|
|
| Line 1: |
Line 1: |
| {{Top|ffa|sprot|mprot}} | | {{Top|ffa|sprot|mprot}} |
| {{Otheruses|more=Ben}}
| |
| {{Youmay|the Jedi Master|the video game ''[[Star Wars: Obi-Wan]]'', the [[Kenobi (novel)|novel]], or [[Obi-Wan (Nebula-class)|the Star Destroyer named for him]]|linebreak=1}}
| |
| {{Multiple issues|updatecontent=[[Kenobi (novel)|Kenobi]], [[The Clone Wars: Season Five]], [[Incognito]]|citation}}
| |
| {{TCWRetcon}}
| |
| {{Character | | {{Character |
| |type=Jedi | | |type=Jedi |
| Line 9: |
Line 5: |
| |name=Obi-Wan Kenobi | | |name=Obi-Wan Kenobi |
| |homeworld=[[Stewjon/Legends|Stewjon]]<ref name="Stewjon">{{Twitter|starwars|status/21159260939|Star Wars|nobackup=1|archiveurl=https://archive.is/uojqy}}</ref> | | |homeworld=[[Stewjon/Legends|Stewjon]]<ref name="Stewjon">{{Twitter|starwars|status/21159260939|Star Wars|nobackup=1|archiveurl=https://archive.is/uojqy}}</ref> |
| |birth=[[57 BBY/Legends|57 BBY]] {{C|22 [[Great ReSynchronization|GrS]]}},<ref name="Holocron">{{Blog|holocron|13/comments|Major Character Birth Years|Keeper of the Holocron's Blog|Leland Chee|archivedate=20090119212402}}, last accessed April 7, 2007</ref> Stewjon<ref name="Stewjon" /> | | |birth= |
| |death=[[0 BBY/Legends|0 BBY]] {{C|35:3 GrS}},<ref name="Atlas">''[[The Essential Atlas]]''</ref> [[DS-1 Orbital Battle Station/Legends|DS-1 Orbital Battle Station]]<ref name="Episode IV">{{Film|IV}}</ref> | | |death=[[0 BBY/Legends|0 BBY]] {{C|35:3 GrS}},<ref name="Atlas">''[[The Essential Atlas]]''</ref> [[DS-1 Orbital Battle Station/Legends|DS-1 Orbital Battle Station]]<ref name="Episode IV">{{Film|IV}}</ref> |
| |species=[[Human/Legends|Human]]<ref name="Character Encyclopedia">''[[Star Wars Character Encyclopedia]]''</ref> | | |species=[[Human/Legends|Human]]<ref name="Character Encyclopedia">''[[Star Wars Character Encyclopedia]]''</ref> |
| Line 26: |
Line 22: |
| *[[Galactic Republic/Legends|Galactic Republic]]<ref name="Episode I">{{Film|I}}</ref> | | *[[Galactic Republic/Legends|Galactic Republic]]<ref name="Episode I">{{Film|I}}</ref> |
| *[[Alliance to Restore the Republic/Legends|Alliance to Restore the Republic]]<ref name="Episode IV" /> | | *[[Alliance to Restore the Republic/Legends|Alliance to Restore the Republic]]<ref name="Episode IV" /> |
| |masters=*[[Yoda/Legends|Yoda]]<ref name="Episode V">{{Film|V}}</ref><ref name="The Rising Force" /> | | |masters=[[Yoda/Legends|Yoda]]<ref name="Episode V">{{Film|V}}</ref><ref name="The Rising Force" /> |
| *[[Qui-Gon Jinn/Legends|Qui-Gon Jinn]]<ref name="Episode I" />
| |
| |apprentices=*[[Anakin Skywalker/Legends|Anakin Skywalker]]<ref name="Episode I" /> | | |apprentices=*[[Anakin Skywalker/Legends|Anakin Skywalker]]<ref name="Episode I" /> |
| *[[Ferus Olin]] {{C|briefly}}<ref name="Last of the Jedi">''[[Star Wars: The Last of the Jedi]]''</ref>
| |
| *[[Luke Skywalker/Legends|Luke Skywalker]]<ref name="Episode IV" /> | | *[[Luke Skywalker/Legends|Luke Skywalker]]<ref name="Episode IV" /> |
| *[[Halagad Ventor]]<ref name="Aliens in the Empire">''[[Aliens in the Empire]]''</ref>}} | | *[[Halagad Ventor]]<ref name="Aliens in the Empire">''[[Aliens in the Empire]]''</ref>}} |
| {{Quote|Obi-Wan is a great mentor; as wise as Master Yoda, and as powerful as Master Windu.|Anakin Skywalker|<ref name="aotc">{{Film|II}}</ref>}}
| | '''Obi-Wan Kenobi''', also known as '''Ben Kenobi''', was a [[Human/Legends|Human]] [[Gender/Legends|male]] [[Jedi Master/Legends|Jedi Master]] who played a significant role in the fate of [[The galaxy/Legends|the galaxy]] during the waning days of the [[Galactic Republic/Legends|Galactic Republic]]. He was the mentor of both [[Anakin Skywalker/Legends|Anakin]] and [[Luke Skywalker/Legends|Luke Skywalker]], training both in the ways of [[The Force/Legends|the Force]]. He had a long and tumultuous career that helped shape the fate of the entire galaxy. |
| '''Obi-Wan Kenobi''', later known as '''Ben Kenobi''' during his [[Exile (punishment)/Legends|exile]], was a [[Force-sensitive/Legends|Force-sensitive]] [[Human/Legends|Human]] [[Gender/Legends|male]] and a legendary [[Jedi Master/Legends|Jedi Master]] who played a significant role in the fate of [[The galaxy/Legends|the galaxy]] during the waning days of the [[Galactic Republic/Legends|Galactic Republic]]. He was the mentor of both [[Anakin Skywalker/Legends|Anakin]] and [[Luke Skywalker/Legends|Luke Skywalker]], training both in the ways of [[The Force/Legends|the Force]]. He had a long and tumultuous career that helped shape the fate of the entire galaxy. | |
| | |
| Born in [[57 BBY/Legends|57 BBY]] on [[Stewjon/Legends|Stewjon]], Kenobi was taken as the [[Padawan/Legends|Jedi apprentice]] of [[Qui-Gon Jinn/Legends|Qui-Gon Jinn]] and traveled on many missions with him. During the [[Invasion of Naboo/Legends|Invasion of Naboo]] in [[32 BBY/Legends|32 BBY]], Kenobi became the first [[Jedi/Legends|Jedi]] in approximately 1,000 [[Standard year/Legends|years]] to defeat a [[Sith Lord/Legends|Sith Lord]] in combat when he defeated [[Darth Maul/Legends|Darth Maul]] during the [[Battle of Naboo/Legends|Battle of Naboo]], yet lost his master in the same duel. He suffered another loss in [[22 BBY/Legends|22 BBY]] in the form of the death of fellow jedi [[Siri Tachi/Legends|Siri Tachi]], whom Kenobi had romantic feelings for. That same year, Kenobi found the [[Grand Army of the Republic/Legends|clone army]] on [[Kamino/Legends|Kamino]], and he was captured and almost executed in the [[Petranaki arena]] on [[Geonosis/Legends|Geonosis]], along with Skywalker and [[Senator/Legends|Senator]] [[Padmé Amidala/Legends|Padmé Amidala]]. The newly arrived [[Clone trooper/Legends|clone troopers]] rescued them, but the following [[First Battle of Geonosis/Legends|battle]] began the galaxy-wide [[Clone Wars/Legends|Clone Wars]].
| |
|
| |
|
| As a [[High Jedi General/Legends|High Jedi General]], Kenobi fought during many battles of the Clone Wars, and was one of the last members of the [[Jedi High Council/Legends|Jedi High Council]]. Even after his apprentice became a [[Jedi Knight/Legends|Jedi Knight]], Kenobi and Skywalker fought together many times, becoming a widely renowned pair. Kenobi earned the sobriquet "the Negotiator" through his charm and calm demeanor as well as the quiet threat of his abilities with a [[Lightsaber/Legends|lightsaber]]. During the war, an old enemy returned to haunt Kenobi: Darth Maul, the murderer of Qui-Gon Jinn. With aid of his brother, [[Savage Opress/Legends|Savage Opress]], the revived Sith Lord went to create a criminal empire, all the while plotting revenge on his most despised adversary. Kenobi clashed blades with Maul on occasion across the galaxy. He was devastated as Maul slew the Jedi's past love interest, [[Duke/Legends|Duchess]] [[Satine Kryze/Legends|Satine Kryze]] of [[Mandalore/Legends|Mandalore]], in cold blood, yet remained strong throughout the conflict. Later in the war, Skywalker saved his life in a [[Battle of Coruscant/Legends|battle]] fought over [[Coruscant/Legends|Coruscant]], after which Kenobi [[Battle of Utapau/Legends|killed]] [[General/Legends|General]] [[Grievous/Legends|Grievous]] on [[Utapau/Legends|Utapau]]. However, he was soon betrayed, as [[Commander/Legends|Commander]] [[CC-2224/Legends|Cody]], following [[Order 66/Legends|Order 66]], opened fire on him. | | As a [[High Jedi General/Legends|High Jedi General]], Kenobi fought during many battles of the Clone Wars, and was one of the last members of the [[Jedi High Council/Legends|Jedi High Council]]. Even after his apprentice became a [[Jedi Knight/Legends|Jedi Knight]], Kenobi and Skywalker fought together many times, becoming a widely renowned pair. Kenobi earned the sobriquet "the Negotiator" through his charm and calm demeanor as well as the quiet threat of his abilities with a [[Lightsaber/Legends|lightsaber]]. During the war, an old enemy returned to haunt Kenobi: Darth Maul, the murderer of Qui-Gon Jinn. With aid of his brother, [[Savage Opress/Legends|Savage Opress]], the revived Sith Lord went to create a criminal empire, all the while plotting revenge on his most despised adversary. Kenobi clashed blades with Maul on occasion across the galaxy. He was devastated as Maul slew the Jedi's past love interest, [[Duke/Legends|Duchess]] [[Satine Kryze/Legends|Satine Kryze]] of [[Mandalore/Legends|Mandalore]], in cold blood, yet remained strong throughout the conflict. Later in the war, Skywalker saved his life in a [[Battle of Coruscant/Legends|battle]] fought over [[Coruscant/Legends|Coruscant]], after which Kenobi [[Battle of Utapau/Legends|killed]] [[General/Legends|General]] [[Grievous/Legends|Grievous]] on [[Utapau/Legends|Utapau]]. However, he was soon betrayed, as [[Commander/Legends|Commander]] [[CC-2224/Legends|Cody]], following [[Order 66/Legends|Order 66]], opened fire on him. |
| Line 44: |
Line 35: |
|
| |
|
| ==Biography== | | ==Biography== |
| ===Early life ([[57 BBY/Legends|57 BBY]]–[[32 BBY/Legends|32 BBY]])===
| |
| {{Quote|Sun suddenly burst through the clouds overhead, dazzling Qui-Gon's sight. The glare caused Obi-Wan's features to blur and dissolve. For a moment, Qui-Gon didn't see the boy. He saw an elder man, alone, living on a desolate planet, his only companions his dark memories.<br />Qui-Gon felt the same shiver he'd experienced in [[O-Vieve]]'s presence ... Then a sudden truth pierced him. ''That isn't me. It is Obi-Wan ... The future is not fixed, but fluid,'' he told himself. Visions did not have to come true...|Qui-Gon Jinn's [[43 BBY/Legends|43 BBY]] [[Force vision/Legends|Force vision]] of an elderly Obi-Wan Kenobi living on Tatooine|<ref name="ja9">''[[Jedi Apprentice: The Fight for Truth]]''</ref>}}
| |
| Obi-Wan Kenobi was born in [[57 BBY/Legends|57 BBY]], the first son of a moderately wealthy family, and was taken to [[Coruscant/Legends|Coruscant]] to begin his [[Jedi/Legends|Jedi]] training while still in his infancy. His [[Homeworld/Legends|homeworld]] was [[Stewjon/Legends|Stewjon]],<ref name="Stewjon" /> which Kenobi believed that he had once visited, possessing vague, pleasant memories of playing with his brother, [[Owen (Kenobi)|Owen]].<ref name="ja3">''[[Jedi Apprentice: The Hidden Past]]''</ref> Kenobi would later conclude that these memories were [[Force vision/Legends|visions from the Force]] of [[Owen Lars/Legends|Owen Lars]]. As Kenobi felt a brotherly bond with his former student, Lars too would be his brother.<ref name="LW">''[[Star Wars: Lone Wolf: A Tale of Obi-Wan and Luke]]''</ref>
| |
|
| |
| ====Youngling====
| |
| {{Quote|Qui-Gon's defiance, I sense in you. Need that, you do not.|Yoda|audio=QuiGon'sDefiance-TPM.ogg|<ref name="Episode I" />}}
| |
| [[File:YoungObiWan-JA01.jpg|thumb|left|Kenobi before becoming a Padawan to [[Qui-Gon Jinn/Legends|Qui-Gon Jinn]]]]
| |
| As a [[Jedi Initiate/Legends|Jedi Initiate]], Kenobi trained under [[Grand Master/Legends|Grand Master]] [[Yoda/Legends|Yoda]] alongside other Jedi hopefuls of his age; later he would be placed into a clan under the tutelage of Master [[Vant]]. [[Bant Eerin/Legends|Bant Eerin]], [[Garen Muln]]<ref name="The Rising Force" /> and [[Quinlan Vos/Legends|Quinlan Vos]]<ref name="shw">''[[Star Wars: Republic: The Stark Hyperspace War]]''</ref> became Kenobi's friends, and he eventually fell in love with fellow [[Padawan/Legends|Padawan]] [[Siri Tachi/Legends|Siri Tachi]].<ref name="sotj">[[Secrets of the Jedi (novel)|''Secrets of the Jedi'']]</ref> Others would become rivals, and even enemies, such as [[Bruck Chun]] and [[Aalto]].<ref name="The Rising Force" /> His lightsaber instructors included [[Anoon Bondara]]<ref name="cod">''[[Cloak of Deception]]''</ref> and [[Cin Drallig/Legends|Cin Drallig]].<ref name="rotsn">[[Star Wars: Episode III Revenge of the Sith (novelization)|''Star Wars'': Episode III ''Revenge of the Sith'' novelization]]</ref>
| |
|
| |
| As a [[Youngling/Legends|youngling]], Kenobi was fascinated by machines, building models of ships and even dreaming of becoming a [[Pilot/Legends|pilot]]. Ironically, as he grew older, Kenobi came to despise flying.<ref name="aotc" /> His ability to repair machinery and reprogram computers would serve him well in the future, but because of his ability to learn quickly, Kenobi became arrogant and was often impatient. Under the careful guidance of Master Yoda, however, Kenobi became more humble and reserved.<ref name="Episode IV" />
| |
|
| |
| ====Becoming Qui-Gon's apprentice====
| |
| {{Quote|You still have much to learn, my young apprentice.|Qui-Gon Jinn|audio=MuchToLearn-TPM.ogg|<ref name="Episode I" />}}
| |
| Despite his rapid growth as a Jedi, by the time Kenobi reached the age of twelve, it seemed that his chances of becoming a [[Jedi Knight/Legends|Jedi Knight]] had all but passed him by; younglings who weren't selected to be Padawans by the age of 13 were shifted into one of the divisions of the [[Jedi Service Corps/Legends|Jedi Service Corps]]. One day, [[Jedi Master/Legends|Jedi Master]] [[Qui-Gon Jinn/Legends|Qui-Gon Jinn]] visited the [[Jedi Temple]] to watch the matches. Kenobi dueled one of his competitors, [[Bruck Chun]], to draw the attention of the maverick Jedi Knight. Kenobi fought valiantly to the point of exhaustion. The final offensive against Chun was carried out so fiercely that Jinn thought Kenobi too dangerous and declined to train the boy. Kenobi was sent to the mining colony of [[Bandomeer/Legends|Bandomeer]] to work as a ploughman for the [[Agricultural Corps/Legends|AgriCorps]]. Coincidentally, Jinn was sent on a mission to the same place. The youngling and the Jedi Knight had to work together if they wanted to survive the mission, which was a trap set for Jinn by his former Padawan, [[Xanatos]]. Kenobi showed Jinn that he was worthy to be taken as a Padawan learner en route, when they were attacked by members of Xanatos' criminal organization, the [[Offworld Mining Corporation]]. After putting an end to the tense situation, the two arrived on Bandomeer, where Jinn received a letter signed by Xanatos. It turned out that Bandomeer was not in need of Jedi assistance; it had all been organized by Xanatos, who was revealed to be the leader of Offworld, a company whose ruthless business practices and mining operations terrorized all of the citizens on the planet.<ref name="The Rising Force" />
| |
|
| |
| Jinn sent Kenobi off to his AgriCorps duties while he planned to meet with Xanatos, not as old adversaries, but as ambassadors, working to find an agreement between Offworld and Bandomeer. Xanatos, however, planned all along to sabotage their meeting and kill Jinn. With the help of Kenobi, Jinn once more attempted to end Xanatos' acts of terror. Jinn dueled with his former apprentice, and though they ended Offworld's business on Bandomeer, Xanatos escaped. During their altercation with Xanatos, Jinn discovered Kenobi's true potential, and took him as his new Padawan learner. Their relationship got off to a bad start, as the pair's personalities were constantly at odds; Jinn was headstrong, while Kenobi was more practical. As time went on, however, their opposing natures blended them into an effective duo.<ref name="ja2">''[[Jedi Apprentice: The Dark Rival]]''</ref>
| |
|
| |
| For his thirteenth birthday, Kenobi received a [[river stone]] from Jinn, something that came from the [[River of Light]] on the [[Qui-Gon Jinn's homeworld|Jedi Master's homeworld]]. The stone was later revealed to be Force-sensitive. It had helped Kenobi save his memories when he was almost [[Memory wipe/Legends|erased]] by the [[Syndicat]], a criminal organization on [[Phindar/Legends|Phindar]].<ref name="ja3" />
| |
|
| |
| Kenobi and his master were later called to monitor the elections on [[Gala]]. The two discovered that the leader of the [[hill people]], [[Elan (Galacian)|Elan]], was the actual heir to the throne. The Jedi also saw through the current [[Prince/Legends|Prince]] [[Beju]]'s plan to secretly cut off the planet's [[Bacta/Legends|bacta]] supply, wait for the people to suffer and then fix it again, making him look like a hero in the eyes of his people. The two Jedi exposed this plan. After Beju withdrew from the elections, Obi-Wan and Qui-Gon attempted to convince Elan to run for queen, but she instead wanted [[Wila Prammi]], who was far more experienced, to become queen. After the elections ended with Wila becoming queen, Elan returned to the hills with her people, now living more peacefully with the people of Gala.<ref name="ja4">''[[Jedi Apprentice: The Mark of the Crown]]''</ref>
| |
|
| |
| [[File:Obi-Wan-Defenders_of_the_Dead_cover.jpg|thumb|Kenobi at the time of his temporary exile from the Jedi Order]]
| |
| During his time with Jinn, Kenobi temporarily left the [[Jedi Order/Legends|Jedi Order]]. Caught up in the [[Melida/Daan Civil War|civil war]] on [[Melida/Daan]], Kenobi elected to stay and help the children, otherwise known as [[the Young]], who were fighting against their tradition-obsessed elders. The planet's residents had been fighting a pointless war for generations, and had forgotten what had started the feud. Kenobi befriended a boy within the Young called [[Nield]], and possibly developed an attraction for another of the Young named [[Cerasi]].<ref name="Defenders of the Dead" /> Soon after Kenobi's decision to stay, Cerasi was mortally wounded and died in Kenobi's arms. For a time, Kenobi remained on the planet to continue helping the war effort, but soon felt that his place was with the Jedi and was taken back by Jinn, though it took a long time for them to fully trust each other again.<ref name="ja6">''[[Jedi Apprentice: The Uncertain Path]]''</ref>
| |
|
| |
| Jinn and Kenobi eventually caught up with Xanatos when the Dark Jedi was planning an attack on Master Yoda. The two found and engaged him before his plans went into effect. While foiling Xanatos, Kenobi was forced to fight his longtime rival, Bruck Chun. Chun had kidnapped Kenobi's friend Bant Eerin while working with Xanatos, and Kenobi engaged the misguided youth in a lightsaber duel. Kenobi won the duel when Chun fell off a ledge and died, though he would carry the guilt for many years.<ref name="ja7">''[[Jedi Apprentice: The Captive Temple]]''</ref> After he escaped, Xanatos returned to his homeworld of [[Telos IV|Telos]]. Kenobi and Jinn went after him. On Telos, however, they were not very welcomed. They were astonished to find out that Xanatos wielded significant financial and political power there. He was considered a hero to his people. What the people of the planet did not know is that while Xanatos and the government had been distracting them with a form of gambling called [[Katharsis]], Offworld had been pillaging the planet's resources. The two Jedi were then framed and wanted for a crime they did not commit. Xanatos captured them, but the two Jedi escaped. Xanatos committed suicide by diving into a pool of acid after Jinn stopped his plans.<ref name="ja8">''[[Jedi Apprentice: The Day of Reckoning]]''</ref>
| |
|
| |
| During this time, Kenobi first spoke to Siri Tachi, whom he had met during lightsaber training at the Temple. They started off on rocky terms, as she was angry at him for leaving the Order,<ref name="ja7" /> but would later forge a friendship that would last the rest of their lives, and even develop into something more.<ref name="sotj" /> Kenobi and Tachi were together sent on a mission with their respective masters, Qui-Gon Jinn and [[Adi Gallia/Legends|Adi Gallia]], to the planet [[Kegan]]. A simple mission to test [[Olana Chion/Legends|a child]] for [[Force-sensitive/Legends|Force-sensitivity]] quickly devolved into a non-violent uprising to overthrow Kegan's [[Benevolent Guide]]s after Kenobi and Tachi were mistakenly captured for truancy and sent to the planet's [[Learning Circle]]. Unable to slip away, the Padawans had to withstand brainwashing at the hands of the [[Teaching Guide]]s, who sought to enforce [[The Learning]] curriculum upon them to teach the two the value of the [[General Good]]. After being reassigned to the [[Re-Learning Circle]] for lack of discipline, Kenobi and Tachi, having learned to work together and with a little help from their Masters, soon escaped with their new friend [[V-Davi|Davi]] and O-Lana, the child they had originally come to the planet for. The [[Keganite]]s, upon discovering what really went on in the Re-Learning Circle, quickly voted out their leaders while Kenobi and his fellow Jedi were still on-planet.<ref name="ja9" />
| |
|
| |
| Soon after, Kenobi traveled with Jinn to [[Ilum/Legends|Ilum]] to make his first lightsaber. While there, Jinn and Kenobi were sent to [[Ord Sigatt]] to investigate the disappearance of a [[Galactic Republic/Legends|Republic]] refinery ship. After noticing the low attitudes and that no one had any weapons (except for guards), Kenobi met the [[Besalisk/Legends|Besalisk]] [[Dexter Jettster/Legends|Dexter Jettster]], who was selling weapons to the people of Ord Sigatt. Jettster was told to wait for Kenobi as a fight had broken out between a boy who threw a rock at a guard. The Jedi jumped in and sliced the guard's weapons before returning to Jettster, who commented on how a lightsaber could stand for danger and for hope. Jettster and Kenobi would soon become friends. Jinm soon came back with information that a [[Senator/Legends|senator]] from [[Denon/Legends|Denon]], [[Denon-Ardru Mutual]], had sent a small army to put a monopoly on the mining business there.<ref name="Life and Legend">''[[The Life and Legend of Obi-Wan Kenobi]]''</ref>
| |
|
| |
| Kenobi fought alongside his master in the [[Stark Hyperspace War/Legends|Stark Hyperspace War]], one of the last of the many small-scale conflicts that plagued the Galactic Republic in its final days. It was during the [[Fourth Battle of Qotile]] when Kenobi's enduring friendship with fellow Padawan Quinlan Vos truly began. Kenobi would later recall fondly a training mission the two Padawans undertook on [[Ragoon VI]] and missions the both of them would undertake with Dexter Jettster on the [[Outer Rim Territories/Legends|Outer Rim]].<ref name="ja10">''[[Jedi Apprentice: The Shattered Peace]]''</ref>
| |
|
| |
| When Kenobi was nearly fourteen years old, he and Jinn traveled to a planet once devastated by turmoil and currently under a temporary truce. The rulers of each planet temporarily exchanged children when they reached the age of seven and raised them in an effort to get the future leaders to appreciate each other. The plan backfired after hundreds of years of success, however, when the heir of [[Rutan/Legends|Rutan]] decided he wanted to remain on [[Senali]], forsaking his royal title and home planet. This infuriated his father, King [[Frane]], who believed his son had been brainwashed by the Senali, and he threatened to declare war on Senali. Kenobi and Jinn arrived to mediate the dispute, and after meeting with King Frane, they went to the ocean world of Senali and attempted to convince [[Leed]] to return to Rutan, thus avoiding war.<ref name="ja10" />
| |
|
| |
| When Qui-Gon and Obi-Wan returned to Coruscant, they were asked for help by a man called [[Didi Oddo]], who was being targeted by a bounty hunter called [[Ona Nobis]]. After a series of brief fights, all ending with Nobis escaping, Nobis kidnapped Qui-Gon. Obi-Wan, with the help of Jedi Adi Gallia and her Padawan, Siri Tachi, found Nobis again on planet [[Belasco/Legends|Belasco]], where the four fought on a rooftop. Nobis had her whip lassoed around a drainpipe, and their duel ended with Gallia cutting the whip in half, resulting in Nobis falling to her death.<ref name="ja11">''[[Jedi Apprentice: The Deadly Hunter]]''</ref> Obi-Wan figured out that a scientist who experimented on Force-sensitives named [[Jenna Zan Arbor]] was responsible for hiring Nobis.<ref name="ja12">''[[Jedi Apprentice: The Evil Experiment]]''</ref> Together with his friend [[Astri Oddo]], Obi-Wan went to [[Jenna Zan Arbor's secret laboratory]] and rescued his master, but Arbor escaped. Obi-Wan joined his master, Adi Gallia and Siri Tachi in their search to find Arbor again, but they were unsuccessful.<ref name="ja13">''[[Jedi Apprentice: The Dangerous Rescue]]''</ref>
| |
| [[File:YoungSatine.jpg|thumb|left|145px|Duchess Satine under the protection of Qui-Gon Jinn and Obi-Wan Kenobi]]
| |
| At some point between 44<ref name="Clan War Start Date">''[[The Bounty Hunter Code: From the Files of Boba Fett]]'' indicates that the Great Clan Wars began around the [[Time/Legends|time]] of the [[Battle of Galidraan]], which [[Jedi vs. Sith: The Essential Guide to the Force (real-life book)|''Jedi vs. Sith: The Essential Guide to the Force'']] dates to [[44 BBY/Legends|44 BBY]].</ref> and [[32 BBY/Legends|32 BBY]],<ref name="Clan War End Date">In "[[Voyage of Temptation]]," Obi-Wan Kenobi states that he spent a [[Standard year/Legends|year]] on [[Mandalore/Legends|Mandalore]] during his apprenticeship as a [[Padawan/Legends|Padawan]], which lasted from [[44 BBY/Legends|44 BBY]] to [[32 BBY/Legends|32 BBY]] per ''[[The New Essential Chronology]]''. As stated in ''[[The Clone Wars: Darth Maul: Shadow Conspiracy]]'', the end of that year roughly coincided with the end of the Great Clan Wars, meaning that the conflict must have ended by 32 [[Galactic Standard Calendar|BBY]].</ref> Kenobi and Jinn were sent on an extended mission to [[Mandalore/Legends|Mandalore]], which was engulfed in the [[Mandalorian/Legends|Mandalorian]] [[Great Clan Wars]]. They were tasked with serving as bodyguards to the [[Duke/Legends|Duchess]] [[Satine Kryze/Legends|Satine]], [[Anti-Mandalore|leader]] of the pacifist [[New Mandalorians/Legends|New Mandalorians]], whom the Senate supported against the belligerent Mandalorian clans. Together, the two Jedi spent a year on Mandalore protecting the Duchess from the hostile insurgents threatening her world. Kenobi fell in love with Satine during his stay on Mandalore, but despite his feelings toward her, he continued with his training and was reassigned. Kenobi regretted leaving her, but ultimately followed the [[Jedi Code/Legends|Jedi Code]] he had sworn to live by.<ref name="VoT">{{TCW|Voyage of Temptation}}</ref><ref name="The Bounty Hunter Code">''[[The Bounty Hunter Code: From the Files of Boba Fett]]''</ref>
| |
|
| |
| In [[41 BBY/Legends|41 BBY]], Obi-Wan [[Second Mission to New Apsolon|followed]] his master to [[New Apsolon/Legends|New Apsolon]], against the [[Jedi High Council/Legends|Jedi Council's]] orders not to, as Qui-Gon had had visions of Jedi Tahl being harmed. When they arrived, Qui-Gon's visions were revealed to be true, as they found out that Tahl had disappeared.<ref name="ja14">''[[Jedi Apprentice: The Ties That Bind]]''</ref> The two Jedi spent days on figuring out that an organization called the [[Absolutes]] had kidnapped her, as they had seen her protect one of their enemies.<ref name="ja15">''[[Jedi Apprentice: The Death of Hope]]''</ref> Qui-Gon soon found Tahl again, however he found that it was too soon, as she had been drugged with paralytic drugs to the point of her death. Obi-Wan later reflected upon Tahl's death, remembering seeing the refusal to accept the fact in his Master's eyes: as a Padawan, he'd thought it impossible that a Jedi Knight could die, but he later came to believe that the first moment of his adulthood had come when he'd seen Qui-Gon's face register the fact that Tahl was dead.<ref name="jq4">''[[Jedi Quest: The Master of Disguise]]''</ref> The death of his partner resulted in Qui-Gon becoming obsessed with finding the drugger, [[Balog (Human)|Balog]], but as he was about to strike him down, he realized what he had become and stopped.<ref name="ja16">''[[Jedi Apprentice: The Call to Vengeance]]''</ref>
| |
|
| |
| One year later, Obi-Wan and his master were sent to [[Frego]], where they had to protect [[Lena Cobral]], a woman who wanted to testify [[Rutin Cobral|her husband's]] death in front of the Galactic Senate, but was too afraid to go alone, as she believed that the murderers of her husband, who were also her family members, were out to kill her. While escorting her, the two Jedi were attacked by [[Zanita Cobral]], the mother of Lena, but Obi-Wan easily stopped her. The three then safely traveled to Coruscant, where Lena testified, leading to the arrest of Lena's family.<ref name="ja17">''[[Jedi Apprentice: The Only Witness]]''</ref>
| |
|
| |
| Two months later, the two Jedi were sent to [[Vorzyd IV]], where they had to find the person responsible for sabotaging the planet's monitoring systems. They discovered that a group called the [[Freelies]], who were angry at the adults of the planet for being so serious and angry all the time, were responsible. Obi-Wan and Qui-Gon helped the adults relax more, resulting in the Freelies stopping their sabotaging.<ref name="ja18">''[[Jedi Apprentice: The Threat Within]]''</ref>
| |
|
| |
| During his training, Kenobi and a Jedi strike team were sent to [[Corellia/Legends|Corellia]] to stop a group of [[Rodian/Legends|Rodian]] terrorists from destroying a [[Spaceport/Legends|Spaceport]] outside of [[Coronet City/Legends|Coronet City]].<ref name="Hasbro Jedi Fact File">''[[Hasbro Inc.|Hasbro]]: Power of the Jedi''</ref>
| |
|
| |
| Sometime between [[39 BBY/Legends|39 BBY]] and [[36 BBY/Legends|36 BBY]]<ref name="AlarisTime">''[[The New Essential Chronology]]'' places the [[Alaris Prime colonial war]], including Obi-Wan Kenobi's involvement as portrayed in ''[[Star Wars: Galactic Battlegrounds]]'', between [[39 BBY/Legends|39 BBY]] and [[36 BBY/Legends|36 BBY]].</ref> Jinn was appointed as an advisor to the [[Wookiee/Legends|Wookiee]] [[Alaris Prime colonists|colonists]] of the [[Moon/Legends|moon]] [[Alaris Prime/Legends|Alaris Prime]]. When a [[Jedi holocron (Alaris Prime)|Jedi holocron]] was found in one of the Wookiee [[Shoran's camp|camps]] Kenobi was sent to a newly built [[Jedi temple (Alaris Prime)|Jedi temple]] in another [[Chewbacca's camp|settlement]] run by the [[Colonist/Legends|colonial]] leader, [[Chewbacca/Legends|Chewbacca]]. Kenobi retrieved the [[Holocron/Legends|holocron]] to keep it out of enemy hands, as only a Force-sensitive individual could handle it, walking between Chewbacca's camp and the settlement containing the holocron.<ref name="GB">''[[Star Wars: Galactic Battlegrounds]]''</ref>
| |
|
| |
| In [[33 BBY/Legends|33 BBY]], Kenobi would assist his master in missions to [[Yinchorr/Legends|Yinchorr]] and [[Dorvalla/Legends|Dorvalla]]. After the [[Dorvalla Incident|Incident at Dorvalla]], Kenobi and Jinn were also involved in the attempt to mediate relations between the [[Trade Federation of Planets|Trade Federation]] and the [[Nebula Front/Legends|Nebula Front]], an attempt that would sadly fail with the disaster at the [[Eriadu Trade Summit]].<ref name="cod" />
| |
|
| |
| Kenobi would later investigate the mysterious disappearance of a fellow Padawan, [[Darsha Assant]]. He found a few tantalizing clues to her fate, but galactic events caught up with Kenobi before he could track down the missing [[Alderaanian/Legends|Alderaanian]]. Shortly after being given the assignment, he and Jinn were dispatched by [[Supreme Chancellor/Legends|Supreme Chancellor]] [[Finis Valorum/Legends|Finis Valorum]] to resolve the [[Battle of Naboo/Legends|Blockade of Naboo]].<ref name="Shadow Hunter">''[[Darth Maul: Shadow Hunter]]''</ref>
| |
|
| |
| ===Capturing Lundi and protecting Fry===
| |
| At one time, Kenobi and Jinn were assigned to search a [[Sith/Legends|Sith]] studying institution. They believed [[Murk Lundi]] to be searching for a [[Sith holocron/Legends|Sith holocron]]. They followed Lundi to various planets, on one of which, Kenobi got shot in the shoulder. Kenobi and Jinn eventually captured Murk Lundi on [[Kodai]].<ref name="jasef">''[[Jedi Apprentice Special Edition: The Followers]]''</ref>
| |
|
| |
| Not long after the capture of Lundi, Kenobi and Jinn, along with Adi Gallia and Siri Tachi, traveled to planet [[Cirrus]], where they had to protect [[Talesan Fry]], a young boy who had revealed a group of bounty hunters' plan to massacre a large group of innocent people, and was now being hunted by them. During the time on Cirrus, Kenobi and Tachi developed romantic feelings for each other, but eventually agreed to end their relationship. After capturing what they believed to be every bounty hunter who was after Fry, the Jedi got ready to depart with Fry, but not before Fry's parents were killed by bounty hunter [[Magus (bounty hunter)|Magus]]. Magus escaped, and Fry ended up living on Coruscant, under indirect protection of the Jedi.<ref name="sotj" />
| |
|
| |
| ===The Aurorient Express===
| |
| {{Quote|Just like the training simulations back on Coruscant...|Obi-Wan Kenobi|<ref name="Q-G & O-W: TAE 1">[[Qui-Gon and Obi-Wan: The Aurorient Express 1|''Qui-Gon and Obi-Wan: The Aurorient Express'' 1]]</ref>}}
| |
| Kenobi and Jinn were sent to investigate the [[Aurorient Express]]'s condition when it failed to respond to signals and was sinking into the atmosphere at a alarming rate. As they boarded, they came under fire from the Express's defense and were then attacked by [[Fastlatch-class defense droid|illegal security droids]]. Kenobi and Jinn got inside the ship and spoke with the [[Unidentified Aurorient Express captain|captain]].
| |
|
| |
| Kenobi and Jinn informed him of the droids on his hull. Kenobi and Jinn went to rescue Chief [[Bouyardy]] from the droids. Kenobi locked and contained the security droids. Kenobi and Jinn then went to question the Chief Pursuer, [[Waverton]] and [[Saul Moegantz]] about the droids. They went to question [[Podlong Foahl]], who tried to run away. Kenobi and Jinn pursued him through the ship and cornered him. Jinn tried to question him, but Foahl refused to answer and told them about a bomb. Foahl was then shot by Waverton.<ref name="Q-G & O-W: TAE 1" />
| |
|
| |
| Kenobi and Jinn questioned [[Buck]] and the rest of passengers and crew. Kenobi went into the vents and caught Waverton talking with a pressure pirate. Kenobi then met with his master and Chief Bouyardy. Kenobi, Jinn and Bouyardy took Waverton prisoner, though he denied planting the bomb. They took him to the captain. But the ship was on a collision course with [[Yorn Skot Mining Station]].<ref name="Q-G & O-W: TAE 2">[[Qui-Gon and Obi-Wan: The Aurorient Express 2|''Qui-Gon and Obi-Wan: The Aurorient Express'' 2]]</ref>
| |
|
| |
| ===The Jin'ha and Black Heth (32 BBY)===
| |
| Jinn sent Kenobi to Coruscant to patrol the mid-city when he first ran into [[Black Heth]]. After saving a woman and fighting his way to the bus, he went back to the [[Jedi Council/Legends|Jedi Council]], where he was directly sent on another mission to rescue an informant. With the information he gathered he went straight to the spaceport to stop Black Heth from escaping. He defeated Black Heth but the people, or [[Jin'ha]], who were getting the shipment sprung from the ship and attacked. Kenobi defeated most of them but was overpowered by their leader, who left him for dead, but before the ship took off Kenobi placed a tracker on it.<ref name="SW:OW">''[[Star Wars: Obi-Wan]]''</ref>
| |
|
| |
| The Jedi tracked the ship to the mining world of [[Obredaan]]. Masters [[Eeth Koth/Legends|Eeth Koth]] and [[Plo Koon/Legends|Plo Koon]] went to investigate, but their ship crashed before they landed. Kenobi and Jinn were sent after them. They both landed and fought the Jin'ha in the swamp and got to the ship. When no one was in the ship, Jinn went on to investigate and Kenobi went on into the mine. Kenobi fought off the Jin'ha and found out their weapons were made of [[Cortosis/Legends|cortosis]]. He then fought his way out to the entrance where Masters Jinn, Koth, and Koon were already fighting. Together they defeated the Jin'ha and returned to the temple. Later Kenobi found out that [[Trade Federation assassin droid]]s armed with [[Cortosis blade|cortosis swords]] were sold to the Trade Federation by the Jin'ha.<ref name="SW:OW" />
| |
|
| |
| ===Blockade of Naboo ([[32 BBY/Legends|32 BBY]])===
| |
| {{Main|Invasion of Naboo/Legends}}
| |
| ====Rising tensions====
| |
| {{Quote|I have a bad feeling about this.''"<br />"''I don't sense anything.''"<br />"''It's not about the mission, Master. It's something elsewhere…elusive.|Obi-Wan Kenobi and Qui-Gon Jinn|audio=BadFeelingAboutThis-TPM.ogg|<ref name="Episode I" />}}
| |
| [[File:Obi-Wan_Kenobi_EP1.png|thumb|right|175px|Kenobi in [[32 BBY/Legends|32 BBY]]]]
| |
| In 32 BBY, twenty-five-year-old Kenobi and his Master Qui-Gon Jinn headed for the planet [[Naboo/Legends|Naboo]] on board the [[Consular-class cruiser|''Consular''-class cruiser]] [[Radiant VII/Legends|''Radiant VII'']], on a mission to resolve a trade dispute. They arrived on the Trade Federation [[Flagship/Legends|flagship]] [[Saak'ak/Legends|''Saak'ak'']] and were greeted by the [[Protocol droid/Legends|protocol droid]] [[TC-14/Legends|TC-14]], who brought the Jedi to a conference room. The Jedi were subsequently betrayed by [[Trade Federation Viceroy]] [[Nute Gunray/Legends|Nute Gunray]]. Secretly acting on the orders of the [[Dark Lord of the Sith/Legends|Dark Lord of the Sith]], [[Palpatine/Legends|Darth Sidious]], Gunray had the ''Radiant VII'' destroyed and attempted to assassinate the two Jedi by venting [[Dioxis/Legends|dioxis]] gas into the conference room, and then dispatched a small group of battle droids to dispose of their bodies.<ref name="Episode I" />
| |
|
| |
| {{Gamemechanics}}
| |
| Before escaping from the conference room, Kenobi asked TC-14 what the gas was. The protocol droid apologized and claimed that it was excess steam from the ventilation system.<ref>This is an optional exchange and the player has several dialogue choices.</ref> When they escaped, they went down the corridor and Kenobi ducked into a service closet to work the controls to open the door at the end of the hallway. Going down the next hallway, Kenobi hit a control panel to open an alcove, this one guarded by a battle droid. Kenobi cut the droid down with his lightsaber and used the control panel to open the next door. Kenobi also met a protocol droid who was carrying out an order to release destroyer droids at "Jedi intruders." Kenobi let it carry on its work.<ref>This is an optional exchange and the player has several dialogue choices. Destroying the droid does not affect game.</ref> The two then tried to break onto the bridge of the battleship, but were disrupted by two destroyer droids. They ran off and went into the ventilation shafts. Kenobi fell through into an air vent and ran through. He saw the ''Radiant VII'' explode.<ref>The game contradicts the movie at this point.</ref> Kenobi continued in the ship's underbelly and defended himself from several [[Trade Federation maintenance droid]]s and used a control panel to open one door, which he went through to use another button to open a door nearby. He continued further into the air vent, and fell through the grating and into a corridor. Kenobi went into a generator room and took out several battle droids. There he met a [[Neimoidian controller (Saak'ak)|Neimoidian]] [[Technician/Legends|technician]] who told him he needed to destroy a [[Power generator/Legends|power generator]] to open the door to the hangar, which the young Jedi did before continuing to the hangar. In the corridor, he faced three [[Variable Geometry Self-Propelled Battle Droid, Mark I/Legends|droid starfighters]]. After that, he met back up with Jinn, who ordered him to stow away on separate landing craft. Kenobi went along the upper catwalks, defending himself from the droids stationed there, and hit switches to maneuver himself over one of the landing craft and enter it. He took the elevator down and entered it.<ref name="SWE1 game">[[Star Wars: Episode I The Phantom Menace (video game)|''Star Wars'': Episode I ''The Phantom Menace'' video game]]</ref>
| |
|
| |
| After escaping from the conference room, the Jedi<ref>''[[Star Wars: Episode I Jedi Power Battles]]'' can be played with one or two characters; these characters are [[Qui-Gon Jinn/Legends|Qui-Gon Jinn]], Obi-Wan Kenobi, [[Plo Koon/Legends|Plo Koon]], [[Mace Windu/Legends|Mace Windu]], and [[Adi Gallia/Legends|Adi Gallia]]. Any character can be selected from the loading screen for any of the game's 10 missions. This article assumes the selection of Jinn and Kenobi, per their appearance in Episode I.</ref> fought through the next corridors and went into a command center, where they traveled along a conveyor and [[Force Jump]]ed over the gaps, ending up in a hangar. There a [[OOM pilot battle droid/Legends|pilot droid]] sent a [[Loader Droid|Cargo Loader Droid]] after them. After taking several lightsaber strikes, the Cargo Loader Droid malfunctioned and crashed into the wall. The two Jedi traveled through the hole and went deeper into the ship near the static discharge chamber. The two Jedi then traveled through a corridor filled with electronodes by jumping on top of them, taking care not to fall onto the floor. They then came out on the upper catwalks in a large void space. They were engaged by a droid starfighter. After deflecting its blasts back at it, the Jedi destroyed the starfighter's [[thrust damper]]s, forcing it to chance to its walker mode. The starfighter continued to strafe them, eventually falling prey to its own deflected blasts, allowing the Jedi to continue their mission.<ref name="SW:JPB">''[[Star Wars: Episode I Jedi Power Battles]]''</ref>
| |
|
| |
| The two Jedi fought their way through the flagship to reach the ship's bridge to discover why the Viceroy wanted them dead. Leaving the conference room, they moved through the hallways and to the [[Hangar/Legends|hangar]], where they came under fire from the hangar turret. Taking cover under the wreckage of the ''Radiant VII,'' Jinn ordered Kenobi to cover him while he disabled the turret. When the turret was disabled, the two Jedi continued to the bridge. Three droid starfighters harassed the Jedi from the side of the hangar. The two Jedi then moved into a cargo bay and went through a battle droid factory. In the factory, they faced two more droid starfighters and [[bomb droid]]s. In the next hallway, they were trapped by force fields. Jinn ordered Kenobi to jump up into the ventilation shafts. The two fought through the shafts, traveling along by riding the updrafts at two points, and came out in a walkway, where they found the invasion fleet in the hangar. They ended up in in an observation deck before going to the bridge. Kenobi covered Jinn while the latter cut through the [[Blast door/Legends|blast doors]]. Kenobi destroyed the battle droids and bomb droid interlocutors.<ref name="SW:OW" />
| |
|
| |
| [[File:Destroyers_attacking_Jedi.png|thumb|left|275px|Obi-Wan Kenobi and Qui-Gon Jinn being attacked by destroyer droids]]
| |
| The two Jedi were interrupted by the arrival of two [[P-series destroyer droid]]s, [[P-59]] and [[P-60]]. The two Jedi used [[Force speed]] to escape into the ventilation shafts and make their way to the hangar, where they discovered the Federation was preparing for invasion. Jinn decided they would stow aboard separate landing crafts.<ref name="Episode I" />
| |
|
| |
| Kenobi boarded [[Unidentified C-9979 landing craft|one of the invasion ships]]; during the voyage down to the planet, he disrupted the ship's communications so as not to reveal his presence. The disruption attracted the attention of the rest of the ship, and [[Battle droid squad 8313]] was sent to investigate, forcing Kenobi to eliminate the squad. Moving through to the [[Armored Assault Tank]] storage bay, he contacted Jinn, who ordered him to either the main control room or the turbine room in order to force the ship to crash-land. Kenobi fought his way through to the turbine room and disabled the turbines. He then went to the main control room and cut down all the present battle droids. He then disabled the [[Holoprojector/Legends|holoprojector]] and went down the hole to the lower level and proceeded to the [[Multi-Troop Transport/Legends|Multi-Troop Transport]] bay, where he fought and destroyed a new type of [[Assassin droid/Legends|assassin droid]] armed with a cortosis blade. After the droid was destroyed, Jinn ordered Kenobi to hide until he landed.<ref name="SW:OW" />
| |
|
| |
| The Jedi had sneaked onto invasion craft and met up on the surface.<ref name="SW:CL">[[Star Wars: Complete Locations (2005)|''Star Wars: Complete Locations'']]</ref> When they landed on the surface, Kenobi and Jinn were separated. Kenobi hid in the swamps and swam to the shore, where he faced a squad of B1 battle droids. After dispatching them, he hid in the water again. He then met a [[Gungan/Legends|Gungan]] named [[Jar Jar Binks/Legends|Jar Jar Binks]]. The two ran away from Federation [[Single Trooper Aerial Platform/Legends|Single Trooper Aerial Platforms]], and Kenobi fell into the swamp water. Once back on land, he used a stump to climb on top of a log where Binks was perched. The Gungan ran off, and Kenobi followed. Kenobi destroyed the droids in his way. He then jumped into the water; when he got back on land, he faced more battle droids in his way around a stuck Multi-Troop Transport. He jumped around a series of small islands in the swamp to avoid the [[Tee/Legends|carnivorous fish]]. Kenobi found Binks again and asked if he had seen his master. Binks replied affirmatively and led the young Jedi away. Kenobi tried to follow the Gungan and got stuck in a pit. He got out by pushing a stump to where he could climb out and grabbed a vine to climb across to the other side. He followed Binks to a droid staging area, and took hold of a [[heavy repeating cannon]] to blast two destroyer droids. After that, Binks led him back to Jinn.<ref name="SWE1 game" />
| |
|
| |
| [[File:Otoh_Gunga_TPM.png|thumb|right|275px|Kenobi, Qui-Gon Jinn and Jar Jar Binks arrive at Otoh Gunga.]]
| |
| Battling Trade Federation forces,<ref>''[[Star Wars: Episode I Jedi Power Battles]]'' can be played with one or two characters; these characters are Qui-Gon Jinn, Obi-Wan Kenobi, [[Plo Koon/Legends|Plo Koon]], [[Mace Windu/Legends|Mace Windu]], and Adi Gallia. Any character can be selected from the loading screen for any of the game's 10 missions. This article assumes the selection of Jinn and Kenobi, per their appearance in Episode I.</ref> they saved Binks, who offered to bring them to safety in [[Otoh Gunga/Legends|Otoh Gunga]]. From there, they could reach the [[City/Legends|city]] of [[Theed/Legends|Theed]] and warn Naboo's queen about the invasion. They fought through 18 B1 battle droids and OOM security droids and avoided a stampede caused by a Multi-Troop Transport.<ref name="SW:JPB" />
| |
|
| |
| The two Jedi escorted Binks past battle droids and a half-built droid camp. Binks panicked and ran off, leaving the Jedi to Force Jump up mushrooms to reach the top of the tree and the nearby plateaus, which they traversed before reaching solid ground again. Following the path, the two Jedi went through another droid command center.<ref name="SW:JPB" />
| |
|
| |
| The Jedi crossed a bridge and [[Telekinesis/Legends#Force Push|Force pushed]] the battle droid guarding it before moving into a cave, where they faced a [[Slaatik hagworm]]. The hagworm tried to slam into the Jedi several times, and when that failed, released a poison gas from its mouth at them. The hagworm also sent [[kreetle]]s to harass the Jedi, although the Jedi succeeded in hurting the hagworm and driving it off. They then rejoined Binks and continued their journey.<ref name="SW:JPB" />
| |
|
| |
| By the time Kenobi reunited with Jinn, his [[Obi-Wan Kenobi's first lightsaber/Legends|lightsaber]] had shorted out. They were attacked by two Single Trooper Aerial Platforms, which Jinn dispatched by reflecting their laser blasts back at them. After traveling through the swamps, Binks led the two Jedi into the water of the swamps and into Otoh Gunga. There they were brought before [[Boss/Legends|Boss]] [[Rugor Nass/Legends|Rugor Nass]] and his advisers. Jinn used a [[Mind trick/Legends|mind trick]] to convince Nass to lend them a [[Tribubble bongo]] and a path to Theed. Nass agreed and told them to travel through the planet's core. Jinn also freed Binks, who was going to be punished for returning from his exile. Binks and the two Jedi navigated through the porous core and ended up near Theed, surfacing on the [[Solleu River/Legends|Solleu River]]. By that time, though, [[Fall of Theed|Theed had fallen to the Trade Federation]].<ref name="Episode I" /> When they tried to gain entry to the secured city, the central bridge across the river was blasted apart by an Armored Assault Tank, cutting the city off from other regions.<ref name="SWE1 game" />
| |
|
| |
| Kenobi later wrote an article about the bongo and their trip entitled "[[Go Aboard the Bongo]]."<ref name="SWKids6">[[Star Wars Kids 6 (1999)|''Star Wars Kids'' 6)]]</ref>
| |
|
| |
| ====Rescuing the queen====
| |
| {{Main|Fall of Theed}}
| |
| Once in Theed, Jinn told his Padawan that he would create a diversion while Kenobi found a way into the [[Theed Royal Palace/Legends|Royal Palace]], and cautioned his Padawan to avoid entanglements. Kenobi went up the stairs near the bongo and engaged several B1 battle droids. That way did not lead to the Palace, so he returned to the Solleu and swam to the other side. He then climbed onto the streets and dispatched the two battle droids in his way, and started toward the Palace. He fought through the battle droids stationed in the streets and rescued three hostages. He also sliced his lightsaber through the alarm systems, disabling them. At one point, he climbed up the balcony and picked up a [[Sniper rifle/Legends|sniper rifle]] to reduce the number of enemies in his way. He then moved forward across a bridge over the river. Down the street, a shield blocked one street, so he went through a door and climbed the stairs to the upper balcony. There he found another hostage; he rescued the man, who led the Jedi to a balcony to spy on more prisoners. Kenobi then moved past the nearby [[Statuary|statue]].<ref name="SW:OW" />
| |
|
| |
| A droid starfighter destroyed the bridge to the Palace. Stuck on the wrong side, Kenobi met two Naboo soldiers and a [[Grenadier/Legends|grenadier]]. They helped him find another way around and told him about a secret entrance to the Palace. Kenobi went up the stairs to the next level and saved another hostage, who warned him about nearby battle droids. Moving along the cliff to the other side, the young Jedi faced more battle droids and one of the new assassin droid, defeating all the droids. He then took over a [[Trade Federation cannon|gun turret]] to destroy a Single Trooper Aerial Platform. He then jumped across the ledges, went up the stairs, and shut off the water flow to the pool. That revealed the secret stairs for him to go down into.<ref name="SW:OW" />
| |
|
| |
| During the Jedi's trek through the city, the central bridge across the river was blasted apart by an Armored Assault Tank, cutting the city off from other regions. Kenobi was separated from Jinn and Binks. The Jedi were forced to cross the city to find the Queen.<ref name="SWE1 game" />
| |
|
| |
| Kenobi jumped into the river and swam away from the tank. He climbed aboard one of the islands a nearby plaza and went onto the walkway. He then Force pushed a lever to extend the walkway. Continuing onward, he then fought a group of battle droids. A force field generator blocked his path, but Kenobi used [[The Force/Legends|the Force]] to flick a switch and lowered the dam, shorting out the generator. Walking along the path and turning left, he found himself among a firefight with more droids and two Naboo guards. After a conversation with them, he told them he was going to enter the garden, and the soldier gave the Jedi a [[Light repeating blaster/Legends|light repeating blaster]]. Two Multi-Troop Transports settled over the garden and disgorged droids. Kenobi met a [[Unidentified wounded Naboo guard 1|wounded guard]], who told Kenobi the passcode to enter the gates near the palace. Kenobi then moved forward, avoiding an Armored Assault Tank in the plaza and sneaking around a battle droids and a disabled Multi-Troop Transport. Kenobi gave the password to another Palace Guard. Once through the gates, the guard charged forward but was gunned down.<ref name="SWE1 game" />
| |
|
| |
| Kenobi then moved through the door and into the plaza. He found the button to open the door out of the gardens, then went through it. Off in a small alley rested a droid starfighter, which self-destructed as Kenobi approached. Returning to the path, the Jedi then drained several water pools to reveal the controls to the bridge to access the plaza near the palace. He also destroyed the droids near the controls.<ref name="SWE1 game" />
| |
|
| |
| Kenobi crossed the bridge and climbed the stairs at the end of the walkway, which had been [[Mine/Legends|mined]], then neared the palace gates, where another Armored Assault Tank was stationed. The Jedi avoided the laser blasts long enough to Force push the lever to open the inner gates, then went back across the tank's path to throw the switch to open the inner gates, which was hidden behind a window. Kenobi then ran through the gates into the area near the palace.<ref name="SWE1 game" />
| |
|
| |
| During the battle, Kenobi rejoined Jinn,<ref>''[[Star Wars: Episode I Jedi Power Battles]]'' can be played with one or two characters; these characters are Qui-Gon Jinn, Obi-Wan Kenobi, Plo Koon, Mace Windu, and Adi Gallia. Any character can be selected from the loading screen for any of the game's 10 missions. This article assumes the selection of Jinn and Kenobi, per their appearance in Episode I.</ref> infiltrated Theed and fought through a city littered with more than twenty battle droids and [[OOM security battle droid]]s to make it to the Royal Palace. They passed the [[Theed Royal Library]], which had been turned into a war room for the Droid Army. Just past the library, they faced a gauntlet of [[Missile launcher/Legends|missile launcher]]-armed droids on the balcony and six destroyer droids on the road. At one point, the Jedi commandeered an Armored Assault Tank after taking out its three [[OOM pilot battle droid/Legends|pilot droids]] and used it to travel through Theed, blasting other [[Tank (vehicle)/Legends|tanks]] and droids. They also rescued seven [[handmaiden]]s who had been captured.<ref>The game requires the rescue of seven handmaidens, although at least nine can be rescued.</ref> They disembarked from the tank near the Palace grounds. As they moved onto the palace grounds, they faced more battle droids. In front of the palace they destroyed a [[T4 turret droid]] along with [[Flame battle droid]]s.<ref name="SW:JPB" />
| |
|
| |
| After entering the palace through the secret entrance, Kenobi found himself inside the palace kitchen, where he met the servant [[Asha (Naboo)|Asha]]. She told him the Palace was on lockdown, but she could crack the codes. Kenobi climbed up the fireplace to reach the next level and fought the droids in the dining room. He then hit the switch to raise the dining table up from the kitchen, which Asha rode up. She then [[Slicer/Legends|sliced]] the doors for the Jedi, but held back as Kenobi fought off the battle and destroyer droids in the next room. Once all the droids were destroyed, Asha sliced the next door for him. In the next room, Kenobi was cut off by force fields. He destroyed the droids, including an assassin droid, and then shut down the force field for Asha. The codes had been changed, but she sliced the doors.<ref name="SW:OW" />
| |
|
| |
| Through the next doors, the Jedi entered a firefight with Panaka<ref>Panaka had been captured with the Queen in the movie. This article assumes his presence during this part of the game is non-canon</ref> and other Naboo soldiers. Asha was locked out by force fields. Together, Kenobi and the Naboo soldiers destroyed the attacking battle droids and the destroyer droid. Kenobi then unlocked the force fields, and went into the next room with a double staircase and fought more droids. Asha then unlocked the throne room. The group entered and fought three assassin droids, which had burst through the windows. A Palace Guard informed them that the Queen had been taken to [[Camp Four/Legends|Camp Four]] to sign a treaty.<ref name="SW:OW" />
| |
|
| |
| Kenobi contacted his Master and informed him of the situation. Jinn ordered Kenobi to meet back up. Traveling back outside of the palace, Kenobi met a [[Unidentified grenadier|Naboo grenadier]], who informed the Jedi about an Armored Assault Tank blocking the resistance. Kenobi jumped on the balcony and destroyed a [[grenade droid]]. He then took over a repeater cannon and destroyed two droids on a lower balcony which were manning more repeater cannons. Moving forward, the young Jedi disabled a force field blocking the street and then assisted several resistance members in fighting battle droids, then dropped an [[Ion grenade/Legends|ion grenade]] on the tank, disabling it. The destruction of the tank cleared his way to the next street. Kenobi then deactivated the shield generator blocking his way, and stepped through.<ref name="SW:OW" />
| |
|
| |
| Alongside two more Naboo soldiers, Kenobi entered a firefight with a squad of battle droids, and an assassin droid. Kenobi dispatched the Federation troops before proceeding. Continuing on, he defeated another assassin droid and rescued another hostage. He then met back up with Jinn, who was fighting two more assassin droids.<ref>At this point ''[[Star Wars: Obi-Wan]]'' diverges from the movie. This article assumes the rest of the mission is non-canon.</ref>
| |
|
| |
| The two Jedi entered the palace and fought through more droids, including [[B1 grapple droid/Legends|B1 grapple droids]], destroyer droids, and OOM command battle droids. At one point they Force jumped on the outside of the walls, using the balconies to proceed to the next story. After that, they infiltrated the throne room with the help of one of the handmaidens they had rescued, who showed them a secret entrance.<ref name="SW:JPB" /><ref>At this point ''[[Star Wars: Episode I Jedi Power Battles]]'' diverges from the movie. This article assumes the rest of the mission is non-canon.</ref>
| |
|
| |
| Theed's officials were liberated by the two Jedi and Binks as OOM security battle droids attempted to bring them to Camp Four. Bibble and several handmaidens decided to stay while the Queen went to Coruscant to plead for help in the [[Galactic Senate/Legends|Galactic Senate]].<ref name="Episode I" />
| |
|
| |
| On their way to enter the passage under the Palace, Kenobi and the decoy [[Sabé/Legends|Sabé]], disguised as the Queen, were separated from Jinn, Panaka and the others. Sabé led Kenobi away from a group of charging battle droids and into a Palace corridor. She informed him about a secret passage through the garden, and they headed that way. In the garden, Kenobi saved Sabé from a battle droid. He then pushed a statue out of the way so they could access the passage. They went up the stairs, with Kenobi dispatching another droid. The door to the passage was locked, so Kenobi Force-jumped across the broken balcony and accessed the door's control from the other side, and the two moved out into the streets.<ref name="SWE1 game" />
| |
|
| |
| Kenobi went into an apartment and met a [[Unidentified Theed woman 1|woman]] who was distraught after being separated from [[Unidentified boy|her son]]. Kenobi promised to rescue the boy. The boy had hid from battle droids in a nearby building and Kenobi brought him back to his mother. The woman gave the Jedi a [[Medkit|medical kit]] in return. Kenobi also found a [[Unidentified wounded Naboo guard 2|wounded Naboo guard]] nearby. In return for Kenobi fetching him water, the guard warned him about a nearby Armored Assault Tank. Kenobi then snuck around the balcony to flank the tank, and destroyed the battle droids in his way. The young Jedi then found a [[Unidentified Naboo merchant|prisoner]]. After a brief dialogue, Kenobi freed the man, who gave the Jedi a [[Thermal detonator/Legends|thermal detonator]].<ref>The player meets these individuals during optional side-quests and have no effect on the outcome of the mission. This article assumes 100% completion and that Kenobi acquired the items they gave him.</ref>
| |
|
| |
| Kenobi destroyed the droids under the archway, prompting the tank to leave its position. He then returned to Sabé and led her past the tank. In the next street, they were ambushed by battle droids, three of which were up on a balcony. Kenobi then met an [[Unidentified R5 unit (Theed)|astromech droid]], but told it he didn't need a droid following him, and the droid remained. Moving along, Sabé and her Jedi protector dueled more battle droids on the way to the hangar. Kenobi then went into the apartment of [[Unidentified Theed woman 2|another woman]] by accident. The woman told him that the gate was locked. Kenobi then leapt onto the balcony, then crossed over the street on an overhanging vine, and opened the gate. During the battle, Kenobi had acquired a blaster, and he used it to destroy three mines on the street to allow Sabé to proceed to the river; he also destroyed more droids. Kenobi then met a [[Unidentified fisherman|fisherman]], and used his boat as a stepping stone to the street. Once there, he Force-pushed a lever to lower the bridge for Sabé to pass over the river. Once across, the two were ambushed by more droids. Further down the street they faced a [[heavy repeating cannon]]. Past that, they joined a firefight with more Palace guards and faced several more groups of battle droids, along with a destroyer droid. Sabé and Kenobi then rejoined Jinn and the others in the Hangar.<ref name="SWE1 game" />
| |
|
| |
| At the time, the Hangar was occupied by droids. Jinn approached an [[OOM command battle droid/Legends|OOM command battle droid]] designated [[2163/Legends|2163]] and tried to talk his way past it. When the droid ordered their arrest, Jinn pulled his [[Lightsaber/Legends|lightsaber]] and disabled it, then turned on other droids, including [[3B3-1204]]; meanwhile, Kenobi rescued several Naboo pilots who were under guard. In the ensuing firefight, one of the Palace Guards was killed. With the droid threat gone, the Queen, Panaka, her handmaidens, and the two Jedi fled aboard the [[J-type 327 Nubian royal starship|Royal Naboo Starship]] and departed Naboo. Governor Bibble stayed behind to watch over the people of Naboo. [[Ric Olié/Legends|Ric Olié]] piloted the ship out of the [[Atmosphere/Legends|atmosphere]] before facing the Federation blockade. One of the [[Lucrehulk-class battleship|blockade battleships]] fired on the Royal Starship, disabling its [[Deflector shield/Legends|shields]]. [[Astromech droid/Legends|Astromech droids]] were sent to repair the damage, but several were destroyed before [[R2-D2/Legends|R2-D2]] fixed the shields as the starship flew past the blockade and entered [[Hyperspace/Legends|hyperspace]]. With the [[Hyperdrive motivator/Legends|hyperdrive motivator]] damaged, Jinn convinced the Queen to divert to [[Tatooine/Legends|Tatooine]] for repairs.<ref name="Episode I" />
| |
|
| |
| Upon landing on the desert planet, the Queen's handmaiden [[Padmé Amidala/Legends|Padmé]] set out for [[Mos Espa/Legends|Mos Espa]], a nearby city, with Jinn, [[Jar Jar Binks/Legends|Jar Jar Binks]], and R2-D2. While they were absent, [[Sabé/Legends|Sabé]] (in the guise of the Queen Amidala) received a message from [[Governor/Legends|Governor]] [[Sio Bibble/Legends|Sio Bibble]], begging her to contact him on Naboo. Kenobi cautioned against this, a warning she heeded.<ref name="Episode I" /> At any rate, she could not act without Padmé Amidala's authority, but she still found the situation she was in highly taxing.<ref name="ff">''[[The Official Star Wars Fact File]]''</ref> While laying in wait, Sabé (still in the guise of Queen Amidala) was captured by [[Tusken Raider/Legends|Tusken Raiders]].<ref name="SW:OW" /> Obi-Wan tracked the Raiders through their extensive canyon dwellings, among old scavenged shipwrecks, and journeyed through a communal Tusken burial site in search of the Queen. He located the Queen being held in a derelict craft that the Tuskens used for shelter and was forced into a confrontation with the [[Tusken war chief]], whom he subsequently defeated. In an odd move for the Tuskens, they solemnly and ceremoniously conceded defeat after Obi-Wan demanded to be allowed to return to safety with the Queen. Obi-Wan, having slain the Tusken war chief and having successfully rescued the Queen, returned to the ship to await his companions.<ref name="SW:OW" />
| |
|
| |
| ====Meeting Anakin Skywalker====
| |
| {{Quote|The boy is dangerous. They all sense it. Why can't you?|Obi-Wan Kenobi to Qui-Gon Jinn, referring to Anakin Skywalker|audio=TheBoyIsDangerous-TPM.ogg|<ref name="Episode I" />}}
| |
| [[File:Kenobi_Skywalker_meet.png|thumb|left|250px|Kenobi meets [[Anakin Skywalker/Legends|Anakin Skywalker]] for the first time.]]
| |
| On Tatooine, Jinn stumbled upon [[Anakin Skywalker/Legends|Anakin Skywalker]], a young [[Slavery/Legends|slave]] boy who showed tremendous Force potential and an unprecedented [[Midi-chlorian/Legends|midi-chlorian]] count of 27,700. Jinn decided that the boy should be trained, and while Kenobi was also amazed by Skywalker's strong Force potential, he initially disagreed with his master's decision; he believed, as the High Council would later concur, that the boy was already too old and had acquired too many emotional attachments, including his mother, [[Shmi Skywalker Lars/Legends|Shmi]], to become a Jedi. Jinn convinced Skywalker to podrace in the [[Boonta Eve Classic/Legends|Boonta Eve Classic]] so they could acquire a replacement hyperdrive motivator. After Skywalker won, Jinn secured the parts and Skywalker's freedom from his master, [[Watto/Legends|Watto]].<ref name="Episode I" />
| |
|
| |
| After securing the parts they needed to return to Coruscant, the Queen and the Jedi left Tatooine with the freed Skywalker, but not before a [[Darth Maul/Legends|cloaked assassin]] with a [[Double-bladed lightsaber/Legends|long-hilted lightsaber]] attacked Jinn. They two Jedi reported to the Jedi Council. Jinn believed that the man who attacked him was a [[Sith Lord/Legends|Sith Lord]], which bewildered the Council. He also requested that Skywalker be brought before the Council to be tested. Kenobi was sure that the boy was too old to be trained and tried to convince his Master of this, but Jinn was adamant.<ref name="Episode I" />
| |
|
| |
| During his stay on Coruscant, Kenobi lightsaber-dueled Master Windu.<ref name="SW:OW" /> In response to the Council's refusal to allow the boy to be trained, as Kenobi predicted, Jinn declared that he himself would take Skywalker as his Padawan learner. The Jedi Code forbade a master to have two apprentices, but according to Jinn, Kenobi was ready to face the trials of a Jedi Knight. Though Kenobi would continue to be an apprentice until after Jinn's death, he showed eagerness to face the trials and expressed thanks to his master for the praise given to him before the Jedi Council. The Council then ordered Jinn and Kenobi to escort Queen Amidala back to Naboo in the hopes of drawing out the mysterious warrior.<ref name="Episode I" />
| |
|
| |
| ====The Battle of Naboo and aftermath====
| |
| {{Main|Battle of Naboo/Legends}}
| |
| {{Quote|I hope you are more challenging than your master. I'm somewhat disappointed in him.|Darth Maul to Kenobi after the former fatally injured Master Jinn|<ref name="SW:OW" />}}
| |
| [[File:Kenobi_Maul_clash.png|thumb|275px|Kenobi's deadly duel with Darth Maul]]
| |
| The Jedi<ref>''[[Star Wars: Episode I Jedi Power Battles]]'' can be played with one or two characters; these characters are [[Qui-Gon Jinn/Legends|Qui-Gon Jinn]], Obi-Wan Kenobi, [[Plo Koon/Legends|Plo Koon]], [[Mace Windu/Legends|Mace Windu]], and [[Adi Gallia/Legends|Adi Gallia]]. Any character can be selected from the loading screen for any of the game's 10 missions. This article assumes the selection of Jinn and Kenobi, per their appearance in Episode I. If only one player is chosen, then the second character does not appear during the game.</ref> were walking along the deserted streets of Theed when they were attacked by an overzealous battle droid on a Single Trooper Aerial Platform. They reflected its laser bolts back at it, destroying the droid and causing the Platform to crash, intact. The two Jedi rode it and another one they found through the streets of Theed, destroying numerous battle droids and destroyer droids before diverting onto an aqueduct and facing more battle droids. They had to destroy several gates blocking their path. The two Jedi eventually dismounted at the cliffs overlooking the waterfall.<ref name="SW:JPB" />
| |
|
| |
| They Force Jumped down the cliffs until reaching a balcony, then jumped back up the other side. At the top, six Naboo [[Pilot/Legends|pilots]] were being held in separate rooms, guarded by three droids each. Each droid trio was a separate type of droid—[[OOM security battle droid]]s, [[B1 grapple droid/Legends|B1 grapple droids]], [[Flame battle droid]]s, [[Grapple droideka]]s, destroyer droids, and B1 battle droids armed with [[Missile launcher/Legends|missile launchers]]. The Jedi rescued five of the pilots before proceeding.<ref name="SW:JPB" />
| |
|
| |
| Around this time,<ref>This mission's placement from ''[[Star Wars: Obi-Wan]]'' is unclear, but it definitely takes place before the entry into the Theed hangar.</ref> Kenobi was contacted by [[Asha (Naboo)|Asha]]. The Resistance pilots were prevented from taking off by a Federation [[Quad turbolaser cannon (Trade Federation)|quad turbolaser cannon]] south of the hangar, and Kenobi was asked to help destroy the cannon. As Kenobi went to comply, he met one of the resistance fighters, who informed the Jedi that the Droid Army was hunting down Resistance members. Kenobi set off through the streets and disabled a force field in his way. He rescued three Naboo hostages from the droids; he also entered a firefight between the Resistance and droids, destroying an [[E4 baron droid]]. Kenobi then entered a tunnel.<ref name="SW:OW" />
| |
|
| |
| When he emerged from the tunnel, he met another Resistance fighter, who informed him that they were pinned down by two [[Trade Federation cannon|repeater cannons]]. Kenobi fought his way through and destroyed the droids manning the cannons. The young Jedi then emerged into a garden outside the palace. He flanked a repeater cannon, destroyed the droid at the controls, and then turned the cannon onto other droids. As he moved to engage other droids, he was ambushed by a squad of OOM security droids and a destroyer droid, which he destroyed by taking another repeater cannon. Kenobi then went up the staircase to where the cannon was placed, facing four more destroyer droids. When the threat was gone, he destroyed the two power conduits on its side, causing the cannon to explode. Kenobi then jumped off the balcony and landed in the pool underneath. Asha contacted him again and told him the cannon had been destroyed. He swam off to rejoin the battle.<ref name="SW:OW" />
| |
|
| |
| The destruction of the AAT surprised Gunray, who had expected the final battle to take place elsewhere.<ref name="Episode I" /> Under cover of the confusion, Amidala led her team into the palace.<ref name="SW:CL" /> The strike force sneaked into the area near the Palace and fought a squad of battle droids. After the droids were eliminated, Kenobi was asked to lead the strike force into the hangar.<ref name="SWE1 game" />
| |
|
| |
| The battle raged on in the streets outside the palace, and eventually into the Theed Hangar, where the team was slowed down down by battle droids.<ref name="Episode I" />
| |
|
| |
| The strike force was discovered, and with battle droid reinforcements on the way, Kenobi was asked to assist the resistance in securing the hangar by destroying the six power cells powering the doors. A Resistance soldier individually lowered the shields on the power cells, and Kenobi sliced through each one when its shield was down. The others provided covering fire, and in Jinn's case, lightsaber cover while Kenobi was disabling the power cells. They faced two E4 baron droids, regular battle droids, and bomb droids. Droid starfighters in walker mode rose up from below the hangar.<ref name="SW:OW" />
| |
|
| |
| The Naboo forces cleared out the hangar in short order, but the droids alerted the Federation's Command Officer.<ref name="SW:CL" /> During the engagement, the pilots took off to attack the [[Vuutun Palaa/Legends|Droid Control Ship]], although one was shot down by an AAT stationed outside the hangar. Panaka ordered Red and Blue Groups to regroup, and the strike force moved toward the Palace. Then the doors opened, revealing the mysterious warrior from Tatooine: Darth Maul, [[Sith apprentice/Legends|Sith apprentice]] to Darth Sidious. The two Jedi moved to engage him in the inevitable clash. Amidala, Panaka, and their security forces left to take the long way through a different door, but were pinned down by droidekas. Maul activated [[Darth Maul's lightsaber|his lightsaber]], revealing a blood-red blade on each end. After the Jedi drew their weapons, the [[Zabrak/Legends|Zabrak]] moved for the attack. Anakin Skywalker, taking refuge in a [[N-1 starfighter/Legends|N-1 starfighter]], accidentally took off, destroyed the droids with the craft's far stronger laser cannon blasts, and joined the battle in space guided by the fighter's auto-pilot.<ref name="Episode I" />
| |
|
| |
| As the duel waged on, Maul spun away and telekinetically threw the piece of a perished droideka to hit the controls for the door leading to the [[Plasma Refinery Complex]]. Kenobi caught up with Maul, followed by Jinn. The Jedi didn't know it, but Maul had scaled this area, making preparations for their duel.<ref name="End Game">{{Shortstory|story=End Game|book=Star Wars: Episode I The Phantom Menace (novelization)|bformatted=''Star Wars: Episode I The Phantom Menace'' novelization|manual=1}} {{C|[[2012]] edition}}</ref> Maul kicked Kenobi off the catwalk they were on, but the Padawan managed to grab the edge of a lower platform.<ref name="Episode I" /> When trying to return to the battle, Kenobi fell through the catwalk down to the next level.<ref name="SWE1 game" />
| |
|
| |
| Kenobi took the elevator back up to the rings, then jumped to the next ring after dispatching a battle droid. Kenobi Force-jumped to the next ring, and took the ramp down to another area. Two droids waited for him in the corridor, but the Jedi dispatched them. Kenobi hit the switch to open the panel to the next chamber. He advanced along the catwalk to turn on the lights. Further down the catwalk, he used the controls to disable the energy barriers in the chamber. He extended the bridge partway from his side, then used the Force to push the opposite bridge control. He Force jumped across the gap to the next catwalk. He continued back to the main chamber while Jinn and Maul continued to fight.<ref name="SWE1 game" />
| |
|
| |
| He then took one of the elevators down to the next level, and Force jumped to the next ring. He went around that ring and Force jumped to the next one, after dispatching the droid guard. He took the elevator back up to the next level and Force-pushed a droid off the ring. He then entered another room. He descended to the lower level of that room and into the next one, which featured a laser maze. Kenobi returned to the first part of the room, where he went back up to the top level. Once there, he jumped across to the other side and hit the control panel there. Jumping back, he moved the box out of the hidden grating and pushed it onto the elevator so he could bring it down a level and push it into the room with the [[laser gate]]s. He jumped onto the box and went into the control area for the laser gates, where he manipulated the controls to form an opening. He jumped down onto the box and went through the laser gates. He rode the elevator back up and re-entered the main chamber.<ref name="SWE1 game" />
| |
|
| |
| Kenobi Force-jumped to an elevator and descended one level and crossed the walkway there. He then boarded another elevator to go up a level, then crossed the walkway to a position where he could jump back to the main catwalk and follow the other two combatants.<ref>At this point in the game the duel diverges slightly from the movie. This article assumes the movie version is the [[canon]]ical sequence.</ref>
| |
| {{Endgame}}
| |
|
| |
| Jinn, then fighting alone, did his best to fend off the Sith until Kenobi could catch up with them, but the older Jedi had been exhausted by the lengthy duel and, deprived of the space necessary to properly utilize his preferred form of lightsaber combat, he was mortally wounded when Maul slammed his lightsaber hilt onto his chin, and in the resulting stun, reversed his lightsaber to stab Jinn in the chest.<ref name="Episode I" /> Maul then taunted Kenobi about defeating his master.<ref name="SW:OW" />
| |
|
| |
| Kenobi was [[Force rage|enraged]] at the murder of his master and, when the laser gates opened, charged at Maul. During an intense duel, Kenobi cut Maul's lightsaber in two. However, Maul continued to fight the Padawan, and Force-pushed Kenobi into an energy pit. Kenobi grabbed onto an input nozzle on the pit wall at the last moment, but Maul kicked the Padawan's lightsaber down the long shaft and then slashed the rim of the pit, showering sparks upon Kenobi in an attempt to make him lose his grip.<ref name="Episode I" /><ref name="Wrath of Darth Maul">''[[The Wrath of Darth Maul]]''</ref> Kenobi calmed himself, reaching into the Force. Then, using the Force, he pulled himself up hard, leaping into the air and flipping above Maul, calling his fallen master's lightsaber to his hand as he did so. Landing in front of Maul, Kenobi slashed him through the waist, causing the Sith Lord to flinch in shock and pain as he was cut in two. Maul fell into the pit, his halves separating, and Kenobi then rushed to his master's side.<ref name="Episode I" />
| |
| [[File:QGJdies-SWE.png|thumb|right|250px|Kenobi mourns his master's death]]
| |
| Jinn's dying request to his apprentice was to train Anakin Skywalker. Kenobi felt that he could not refuse, and took it upon himself to train the boy. Later, in the aftermath of the battle, the Jedi Council arrived to receive Kenobi's report. The Jedi Council was similarly moved by the plea, and fatefully reversed its decision, albeit with misgivings. The Council had been impressed that Kenobi bested a Sith, an enemy that had not surfaced in a millennium. Kenobi was made a full Jedi Knight, with his duel with Darth Maul serving as his [[Jedi Trials/Legends|Jedi Trials]]. Skywalker was formally placed under the tutelage of Kenobi as his Padawan.<ref name="Episode I" />
| |
|
| |
| ===Knighthood ([[32 BBY/Legends|32 BBY]]–[[22 BBY/Legends|22 BBY]])===
| |
| {{Quote|Confer on you the level of Jedi Knight, the Council does. But agree with your taking this boy as your Padawan learner, I do not.''"<br />"''Qui-Gon believed in him.''"<br />"''The Chosen One, the boy may be. Nevertheless, grave danger, I fear, in his training.|Yoda and Obi-Wan Kenobi|audio=ObiWanKnighted-TPM.ogg|<ref name="Episode I" />}}
| |
| [[File:You_will_be_a_Jedi.png|thumb|left|250px|Obi-Wan Kenobi looks on his new apprentice.]]
| |
| During Skywalker's first year at the Temple he met the Tusken Jedi apprentice [[Darth Krayt|A'Sharad Hett]] as the masked Padawan attempted to [[Meditation/Legends|meditate]] on a balcony in the cool night air. The Tusken's Master, the venerable [[Cerean/Legends|Cerean]] [[Ki-Adi-Mundi/Legends|Ki-Adi-Mundi]], came out to scold Hett because of the late hour, for his new Padawan needed his rest for a mission they would begin the next day. But Mundi thought better of it, when he saw that Anakin Skywalker might actually be striking up a friendship, something that both he and the boy's Master, Obi-Wan Kenobi, knew to have been a difficult thing to do, it seemed, for the young Jedi from Tatooine.<ref>[[Star Wars (1998) 13|''Star Wars'' (1998) 13]]</ref>
| |
|
| |
| ====First mission with Skywalker====
| |
| About three years into Skywalker's training, when the boy was 12, the new master-and-apprentice duo were sent on their first mission together. They were sent to investigate the cult leader, [[Kad Chun]], younger brother of Bruck Chun. Kad Chun still blamed Kenobi for his brother's death, and it was only after Kenobi and Skywalker uncovered an insidious plot against Chun by his own [[Vox Chun|father]] (who had allied with the corrupt mining cartel [[UniFy]] against Chun's nomadic ship, the ''[[BioCruiser]]'') that he finally forgave the Jedi Knight.<ref name="jased">''[[Jedi Apprentice Special Edition: Deceptions]]''</ref>
| |
|
| |
| ====Mission to Zonama Sekot====
| |
| {{Quote|Obi-Wan has forgotten ever being a child.|[[Thracia Cho Leem]]|<ref name="Rogue Planet">''[[Rogue Planet]]''</ref>}}
| |
| [[File:ObiWanKenobi-RoguePlanet.jpg|thumb|Kenobi in [[29 BBY/Legends|29 BBY]]]]
| |
| The next mission they were assigned took them to the living planet of [[Zonama Sekot/Legends|Zonama Sekot]] in an attempt to find a Jedi Knight, [[Vergere]], who had recently vanished during a mission there. Unbeknownst to them, [[Wilhuff Tarkin/Legends|Wilhuff Tarkin]] and [[Raith Sienar/Legends|Raith Sienar]] had followed them to exploit Zonama Sekot's [[Zonama Sekot Shipbuilders|ability]] to quickly fuse organic and manufactured technology into [[Zonama Sekotan fighter|starfighters]]. On the planet, the colonists sold "[[seed-partner]]s," which bonded with their hosts and allowed the planet to customize a [[Sekotan Personal Starship|starship]] for the individual. Skywalker attracted many more seed-partners than anyone previously had, and he named his new ship the ''[[Jabitha]]''. When Tarkin and Sienar arrived, the planet revealed its sentient consciousness to the Jedi, explaining that Vergere had left with the mysterious "[[Yuuzhan Vong|Far Outsiders]]" in order to protect Zonama Sekot. Although Kenobi and Skywalker could not rescue her, they could stop Tarkin's attack.<ref name="Rogue Planet" />
| |
|
| |
| During the ensuing battle, Skywalker [[Telekinetic kill|telekinetically]] burned Tarkin's [[Blood Carver]] bodyguard, [[Ke Daiv]], from the inside out in a fit of rage. This display of dark power worried Kenobi greatly. Skywalker was captured and brought before Tarkin, but Kenobi destroyed Tarkin's flagship, and Zonama Sekot activated its planetary hyperdrive, vanishing for the unknown regions. Sienar and Tarkin returned to the Republic, but the ''Jabitha'' died on the abandoned Jedi-outpost planet [[Seline]], due to hull damage and her separation from her home planet. As they returned to the [[Galactic City|galactic capital]] of Coruscant, the Jedi master-apprentice duo discussed Skywalker's actions and his display of dark power.<ref name="Rogue Planet" />
| |
|
| |
| ====Other missions====
| |
| {{Quote|I will not abandon him, Qui-Gon. I see what you see. I see how he struggles. I see his immense capacity for good.|Obi-Wan Kenobi, to the [[Force ghost]] of Qui-Gon Jinn, after Anakin Skywalker killed Krayn|<ref name="Jedi Quest: Path to Truth">''[[Jedi Quest: Path to Truth]]''</ref>}}
| |
| Kenobi next traveled with Skywalker, who was now 13, on a mission to recover from the planet [[Kodai]] the ancient Sith [[Holocron of King Adas|holocron]] of [[Adas|King Adas]],<ref>''[[Evil Never Dies: The Sith Dynasties]]''</ref> which the mad Sith [[Historian/Legends|historian]], [[Murk Lundi]], once tried to claim. With Lundi accompanying them, the three found that Lundi's pupil, [[Norval]], a [[Dark side of the Force/Legends|dark-side]] fanatic, had found and taken the holocron for himself. Kenobi, after facing and killing the deranged student, recovered the holocron, only to learn that their quest to reclaim it had exacted a heavy toll on Lundi's body. Skywalker and Kenobi spent the last moments of Lundi's life at his side, as the old [[Quermian/Legends|Quermian]] [[Professor/Legends|professor]] expressed regret for his fanatical pursuit of the holocron a decade before. With the dangerous artifact at last secured, Kenobi and Skywalker returned the holocron to the Jedi High Council for safekeeping within the vaults of the Jedi Temple at Coruscant.<ref name="jasef" />
| |
|
| |
| On a [[Colicoid/Legends|Colicoid]] escort mission that unexpectedly turned into a joint mission with undercover Jedi Siri Tachi to [[Nar Shaddaa/Legends|Nar Shaddaa]], in [[29 BBY/Legends|29]]–[[28 BBY/Legends|28 BBY]], Kenobi's young apprentice killed the [[T'surr (species)|T'surr]] slave [[Pirate/Legends|raider]] and crime lord [[Krayn]] by impaling him with [[Anakin Skywalker's first lightsaber/Legends|his new lightsaber]]. Before Krayn's death, the notorious slaver had not only kidnapped and enslaved Anakin, but also imprisoned him with Tachi, Obi-Wan's childhood comrade and friend. Kenobi, too, then went undercover as an advisor and slave-operations inspector for the Colicoids in an attempt to rescue Tachi and his Padawan. The death of Krayn by Skywalker effectively freed all the moon's slaves, and brought an end to the undercover mission of Tachi, who was soon thereafter Knighted.<ref>''[[Jedi Quest: Path to Truth]]''</ref><ref name=":6">''[[Jedi vs. Sith: The Essential Guide to the Force]]''</ref>
| |
|
| |
| In [[27 BBY/Legends|27 BBY]], Kenobi and Skywalker, who had turned fourteen, were called upon―along with Tachi (now a Jedi Knight), [[Soara Antana/Legends|Soara Antana]], [[Ry-Gaul]], and their Padawans, [[Ferus Olin]], [[Darra Thel-Tanis]], and [[Tru Veld/Legends|Tru Veld]], respectively―to embark on a [[mission to Radnor]] to help with the evacuation of the planet, known for its development of high-tech weaponry. The evacuation was due to a deadly toxin that had spread because of a bio-weapons leak. The Jedi later discovered that the toxic leak was connected with [[Radnoran]] raiders and their sponsors, the imminent [[Avoni]] invaders from a neighboring [[Avon|world]]. The path of guilt led to [[Galen (Radnoran)|Galen]], a traitorous [[Radnoran]], who was taken into custody for his treachery on behalf of Avon and its [[Ambassador/Legends|ambassador]], [[Dol Heep]]. However, ultimately, the Avoni did not pay for their genocidal crimes, were never thereafter forced by the Galactic Senate to make amends.<ref>''[[Jedi Quest: The Way of the Apprentice]]''</ref>
| |
|
| |
| ====''Outbound Flight''====
| |
| {{Main|Outbound Flight Project}}
| |
| {{Quote|Therein lies the future of the galaxy.|[[Jorus C'baoth]]|<ref name="obf">[[Outbound Flight (novel)|''Outbound Flight'']]</ref>}}
| |
| [[File:Obi-Wanoutboundflight.jpg|thumb|left|180px|Kenobi in [[27 BBY/Legends|27 BBY]]]]
| |
| In [[27 BBY/Legends|27 BBY]], Master [[Mace Windu/Legends|Windu]] sent Kenobi and Skywalker on a secret mission to [[Barlok]] to monitor the overbearing Jedi Master [[Jorus C'baoth]] and his Padawan, [[Lorana Jinzler]]. Unbeknownst to them, [[Kinman Doriana]], on behalf of Darth Sidious, had planned the negotiations to work splendidly in C'baoth's favor, gaining him enough prestige to go ahead with his [[Outbound Flight Project]]. Kenobi and Skywalker did rescue Jinzler after she was captured by malcontents, but their opponents acquired the components they needed to create a missile and attack the negotiations. Kenobi tried to stop the missile, but was unsuccessful. However, C'baoth used the Force to crush the missile, and that gave him the impetus he needed to quickly conclude the negotiations, as well as receive support for Outbound Flight. Unbeknownst to C'baoth, Doriana sabotaged the missile. Following the go-ahead for the project by the Senate, Master Windu tasked Kenobi with accompanying the mission at least part of the way out to keep an eye on the headstrong, arrogant C'baoth.<ref name="obf" />
| |
|
| |
| While they were on the expedition, Kenobi often butted heads with C'baoth over C'baoth's running of the ''[[Outbound Flight]]'', especially when the Jedi Master began taking prospective Jedi children away from their parents in the middle of the night. It was only when Supreme Chancellor Palpatine asked Kenobi and Skywalker to settle a dispute on a world near Outbound Flight's final stop in Republic territory that the two left the expedition.<ref name="obf" />
| |
|
| |
| ====Dangerous games with Omega====
| |
| A Jedi mission to [[Ragoon VI]] saw Kenobi and Skywalker tangled up with a mysterious man—one who had the ability somehow to [[Void in the Force|hide himself]] from detection in the Force by [[Force-sensitive/Legends|Force-sensitives]]—who was believed to be the son of Xanatos. Further research revealed him to be [[Granta Omega]] of [[Nierport VII]], a collector of Sith artifacts, who was extremely wealthy for no apparent reason.<ref name="jq2">''[[Jedi Quest: The Trail of the Jedi]]''</ref> After a [[Galactic Games/Legends|podracing escapade]], further information was uncovered regarding Omega, who was trying to take over the marketing of [[Bacta/Legends|bacta]] through a [[titanite]] mining venture.<ref name="jq3">''[[Jedi Quest: The Dangerous Games]]''</ref> Kenobi and Skywalker further discovered that the man was trying to impress a Sith Lord, and was planning to kill Skywalker. Master and apprentice escaped and, in the process, stopped Omega's mining of titanite.<ref name="jq4" />
| |
|
| |
| ====The School of Fear====
| |
| Not long after, Kenobi and his Padawan, along with Siri Tachi and her apprentice, Ferus Olin, were given another mission to investigate the disappearance of Senator [[Berm Tarturi]]'s son, [[Gillam Tarturi]]. In order to infiltrate a band of renegade students at an Elite Leadership School on [[Andara/Legends|Andara]], Skywalker proposed that he and Ferus Olin penetrate the school by posing as Senators' sons. Kenobi and Tachi's part of the mission involved posing as parents who were enrolling their children in the school.
| |
|
| |
| Skywalker, having infiltrated the renegade squad of students, had agreed to participate in a mission that would logically start a war. Soon after, Anakin told Ferus about this, and he was astonished that he had not contacted Kenobi before making a decision. He agreed to meet Ferus later that day to contact Kenobi. When Olin was captured, Skywalker did not tell Kenobi, instead hoping that he would find him if he continued with the mission. When Kenobi learned of his Padawan's actions, he and the High Council were furious. Soon after they escaped, Kenobi told his apprentice that it was not easy being a Master and said: "If you do that every time we go on a mission we won't last."<ref name="jq5">''[[Jedi Quest: The School of Fear]]''</ref>
| |
|
| |
| ====Yaddle's sacrifice====
| |
| Soon after, Kenobi, Skywalker, and Masters Yoda and [[Yaddle/Legends|Yaddle]] were sent on a negotiation mission to [[Mawan]] to settle a devastating civil war between three crime gangs. These gangs, led by [[Decca Besadii Diori|Decca the Hutt]], [[Feena Shaan]], and a man called Striker (who was actually [[Granta Omega]] in disguise), caused the rest of the population to take refuge underground. Unbeknownst to them, the chaotic planet was a trap set by Omega. He released a fatal chemical weapon that killed Yaddle when she absorbed it through the Force, saving the city of [[Naatan]] in the process. The weapon was intended by its vengeful maker to kill Kenobi and his apprentice, but it failed thanks to Yaddle's sacrifice. Together Kenobi and Skywalker brought peace to Mawan, but Skywalker felt responsible for the death of the High Council member.<ref name="jq6">''[[Jedi Quest: The Shadow Trap]]''</ref>
| |
|
| |
| Skywalker's guilt about Yaddle's death caused friction between him and Kenobi, who felt that he was less than capable of teaching the mischievous boy properly. When sent on a rescue to the [[Uziel system]] to a planet called [[Vanqor/Legends|Vanqor]], the two were forced to try and reconcile their differences, first fighting their way out of a nest of [[Gundark/Legends|gundarks]], then, under the influence of a drug called the [[Zone of Self-Containment]], Skywalker was taken prisoner by the [[Scientist/Legends|scientist]] [[Jenna Zan Arbor]]. Siri Tachi, Ferus Olin, [[Garen Muln]], and [[Clee Rhara]], who were sent on a mission but received the distress signal while en route, picked up Kenobi together with Skywalker on Vanqor. Then all Jedi went to [[Typha-Dor]] to warn them against incoming Vanqor invasion. After successfully thwarting the invasion, they all went back to Vanqor after Jenna Zan Arbor and realized she was gone.<ref name="jq7">''[[Jedi Quest: The Moment of Truth]]''</ref>
| |
|
| |
| ====Trailing Jenna Arbor and Roy Teda====
| |
| {{Quote|The capture of Zan Arbor is the safety of the galaxy.|Obi-Wan Kenobi|<ref name="jq8">''[[Jedi Quest: The Changing of the Guard]]''</ref>}}
| |
| Zan Arbor escaped, however, and did not resurface again until Skywalker was sixteen. From information given to them by [[Tyro Caladian]], they found out that she'd appeared on [[Romin]], a focus of corruption and villainy and a shelter for criminals. In order to infiltrate the planet, he, his apprentice, Siri Tachi, and Ferus Olin disguised themselves as the [[Slams]] looking for refuge on the planet. They found that Zan Arbor had allied herself with [[Roy Teda]], the ruler of Romin, and Granta Omega, who also was at odds with the Jedi. Soon after this discovery, civil war erupted. The underworld was trying to overthrow Teda. In the midst of it, Teda and Zan Arbor attempted to flee offworld, unintentionally contacting the Jedi, thinking they were really criminals. However, Zan Arbor recognized Skywalker from their previous encounter, and Teda ordered his men to seize the Jedi. Before they could do so, Master Mace Windu and a team of Jedi arrived and arrested Teda and Zan Arbor. Since they were trying to get to Omega, and they knew the two would lead them to him, they set the two captives free.<ref name="jq8" />
| |
| [[File:Obi-Wan_The_Changing_of_the_Guard.jpg|thumb|right|250px|Kenobi and Skywalker during their hunt for Jenna Zan Arbor]]
| |
|
| |
| Only a few weeks later, Kenobi and his apprentice trailed Teda and Zan Arbor to [[Falleen (planet)/Legends|Falleen]], where they had set up the [[Blackwater Systems]] facility to mass-produce her drug, the Zone of Self-Containment. When they were found, Zan Arbor was forced to destroy the facility, and Roy Teda fled.<ref name="jq9">''[[Jedi Quest: The False Peace]]''</ref>
| |
|
| |
| Not long after, Senator [[Sano Sauro]], who was a friend of Granta Omega, and [[Bog Divinian]] started to make anti-Jedi accusations in order to convince the Galactic Senate to lessen or completely withdraw its support of the Order. The vote was about whether the Jedi should be involved in the Senate's activities. It was all a part of Sauro and Omega's plan to leak the [[Zone of Self-Containment]] into the Senate's vents and assassinate Chancellor Palpatine. Skywalker and Olin, who were learning to forget their rivalry and understand each other, prevented the assassination attempt on the Supreme Chancellor.<ref name="jq9" />
| |
|
| |
| [[File:Granta_Omega_attacks.jpg|thumb|left|200px|Kenobi and Skywalker fighting Granta Omega on [[Korriban]]]]
| |
| Omega's plan was uncovered, but not in time to save twenty-one Senators and several other Senate employees from being killed by seeker droids programmed by Teda. Unbeknownst to him, since Zan Arbor and Omega had no more use for him, a seeker droid killed him, as well. Kenobi, Tachi, and Skywalker set off to find Omega, leaving Olin to protect the Senators and Palpatine.<ref name="jq9" />
| |
|
| |
| Tracking Omega and Jenna Zan Arbor to [[Korriban]], four Jedi pairs—Kenobi and Skywalker, Tachi and Olin, Ry-Gaul and [[Tru Veld/Legends|Tru Veld]], and [[Soara Antana/Legends|Soara Antana]] and [[Darra Thel-Tanis]]—traveled there to confront and stop them. The apprentices were split up from the Masters to better accomplish the mission. The investigation of [[Dreshdae]] led them to the [[Valley of the Dark Lords/Legends|Valley of the Dark Lords]]. During the confrontation with Omega, Kenobi had no choice but kill him, as he felt Omega was too dangerous to be kept alive.<ref name="jq10">''[[Jedi Quest: The Final Showdown]]''</ref>
| |
|
| |
| ====Keeping the peace====
| |
| [[File:Obi-Wan_The_Moment_of_Truth.jpg|thumb|right|200px|Kenobi in [[24 BBY/Legends|24 BBY]].]]
| |
| Sometime later, Master and apprentice were sent on a diplomatic mission to a planet wishing to join the Galactic Republic. They soon found out, however, that the planet's indigenous population considered thievery an important social asset. During their stay, Skywalker's lightsaber was stolen. He searched for it, ashamed to tell Kenobi that he lost it, and soon had to admit defeat. Asking Kenobi for help, he found that the Jedi Knight knew the lightsaber had been stolen, and, using a trick of the Force, "acquired" it from the thief. Kenobi had merely been waiting for Skywalker to admit that he'd lost it.<ref>{{Tales|12|A Jedi's Weapon}}</ref>
| |
|
| |
| Kenobi and his apprentice were then assigned to the task of protecting Senator [[Simon Greyshade/Legends|Simon Greyshade]] from assassination. Greyshade had recently filled the station of senator of the [[Commonality]] that his assassinated cousin had left. Greyshade's cousin, [[Jheramahd Greyshade]], was thrown off the roof of [[500 Republica/Legends|''500 Republica'']] in an attempt to stall the passage of the [[Financial Reform Act]], which the Senator supported. The Financial Reform Act was a bill that addressed and was meant to reduce the amount of corruption that was causing the Senate, and, through them, the Republic, to disintegrate. Kenobi and Skywalker saved Greyshade from certain death.<ref name="SWR46p1">[[Republic 46|''Republic'' 46]]</ref>
| |
|
| |
| Because it was found that the assassination and assassination attempt was because of the Financial Reform Act, it never got a vote. Some say that this was the cause of a good portion of the seceding planets that would soon make the [[Confederacy of Independent Systems/Legends|Confederacy of Independent Systems]], and could have prevented the [[Clone Wars/Legends|Clone Wars]] had it been passed.{{Fact}}
| |
|
| |
| ====Mission to Ansion====
| |
| {{Main|Mission to Ansion}}
| |
| {{Quote|And that, my young Padawan, was a demonstration of what is known as dynamic diplomacy.|Obi-Wan Kenobi|<ref name="The Approaching Storm">''[[The Approaching Storm]]''</ref>}}
| |
| [[File:Ansion.jpg|thumb|left|250px|Skywalker and Kenobi during their mission to [[Ansion/Legends|Ansion]]]]
| |
| In [[22 BBY/Legends|22 BBY]] Kenobi and Skywalker, along with [[Luminara Unduli/Legends|Luminara Unduli]] and her apprentice, [[Barriss Offee/Legends|Barriss Offee]], were sent to [[Ansion/Legends|Ansion]] to settle a border dispute that could have caused the extremely strategic planet to secede to the Confederacy. If Ansion fell, so would countless other worlds. The Jedi negotiated a settlement with city dwellers to remain in the Republic, provided they also convinced the nomadic [[Alwari]] to allow expansion into the grasslands. Little did they know that [[Presidente]] [[Shu Mai/Legends|Shu Mai]] of the [[Commerce Guild/Legends|Commerce Guild]] was pulling the strings to cause Ansion to secede. Arriving early, Kenobi and Skywalker were just in time to rescue Unduli and Offee from a mob of killers. Thanks again to Presidente Mai and her minion [[Soergg Vosadii Bezhin|Soergg]] the Hutt, the Jedi were in constant danger from attack by hired killers, including a successful kidnapping of Offee by two Ansionians, [[Kyakhta]] and [[Bulgan]]. Offee healed the two killers of injuries though, and they became guides for the Jedi to find the nomadic clans, particularly the [[Borokii]] overclan.<ref name="The Approaching Storm" />
| |
|
| |
| Traveling on [[suubatar]]s, the Jedi braved hazards such as flying [[chawix]], [[kyren]] hordes, capture by the [[Yiwa]] clan and [[shanh]]s. On one occasion, the Jedi were required to entertain their hosts, each in their own way. Kenobi chose to use a story, weaving a masterful tale that thoroughly impressed the Ansionians. The Jedi eventually made contact with the Borokii overclan, who, after requiring the Jedi to retrieve a tuft of rare albino [[surepp]] wool, agreed to the Jedi's settlement—provided they helped wage war against their rivals, the [[Januul]] clan. Kenobi shocked his companions when he agreed, but he had a plan. When the battle lines were drawn, the Jedi marched out into the middle and refused to fight either side, calling on both clans to negotiate a settlement. Kenobi, Unduli, Skywalker, and Offee were subsequently attacked by ''both'' sides, but they deflected the assaults, and amazingly parried only the ''weapons'', defeating both armies with no loss of life.<ref name="The Approaching Storm" />
| |
|
| |
| In the wake of the following peace between the tribes, the Jedi journeyed back to the capital of [[Cuipernam]] to inform the [[Unity Council]] controlling the planet's fate of their success. While they were attacked again by thugs, the two clans sent an honor guard to help the Jedi, and Ansion remained in the Republic thanks to the efforts of Kenobi and his companions. Because of her status as President, Shu Mai was not discovered to be a part of the matter.<ref name="The Approaching Storm" />
| |
|
| |
| ===Beginning of the Clone Wars===
| |
| {{Quote|We're here to protect you, Senator, not to start an investigation.''"<br />"''We will find out who's trying to kill you, Padmé. I promise you.| Kenobi and Anakin Skywalker to Padmé Amidala|<ref name="aotc" />}}
| |
| [[File:Investigate_SWDL.png|thumb|right|250px|Obi-Wan sitting at Dex's Diner]]
| |
| Ten years after the [[Invasion of Naboo/Legends|Invasion of Naboo]], shortly after returning from the border dispute on Ansion, Obi-Wan and Skywalker were tasked with protecting Padmé Amidala after an attempt on her life. Through a ruse organized by Skywalker, the assassin, a [[Clawdite/Legends|Clawdite]] named [[Zam Wesell/Legends|Zam Wesell]], was soon uncovered, and Kenobi pursued her through the streets of Coruscant, finally cornering her inside the [[Outlander Club/Legends|Outlander Club]]. Unfortunately for the Jedi and for Wesell, the Clawdite soon became a victim herself, falling to the poisoned dart of a mysterious hunter garbed in [[Mandalorian/Legends|Mandalorian]] armor. The only clue to his identity was the dart that killed Wesell—a weapon of [[Kaminoan/Legends|Kaminoan]] design.<ref name="aotc" />
| |
|
| |
| Kenobi contacted his old friend Dexter Jettster, who informed him of [[Kamino/Legends|Kamino]], a planet which was strangely absent from the [[Jedi Archives/Legends|Jedi Archives]]. Arriving on Kamino, he was informed that a huge unauthorized clone army was being bred for the Republic, supposedly on the orders of the deceased Jedi Master [[Sifo-Dyas/Legends|Sifo-Dyas]]. Kenobi was introduced to the clones' template, a [[Bounty hunter/Legends|bounty hunter]] named [[Jango Fett/Legends|Jango Fett]]. Kenobi contacted the High Council and was told to apprehend the bounty hunter for questioning. Kenobi attempted to apprehend the bounty hunter, leading to a fierce fight between Kenobi and Fett, in which Fett's son [[Boba Fett/Legends|Boba]] fired on Kenobi from Fett's ship. Despite Kenobi's efforts, Fett escaped to [[Geonosis/Legends|Geonosis]] with his son. Kenobi followed them by attaching a homing beacon to the hull or their ship.<ref name="aotc" />
| |
|
| |
| [[File:Fight_on_Kamino.png|thumb|left|250px|Kenobi fights bounty hunter [[Jango Fett/Legends|Jango Fett]] on [[Kamino/Legends|Kamino]].]]
| |
| Fett noticed Kenobi in pursuit and attempted to finish off the Jedi by leading him through Geonosis' rings. Kenobi's [[Obi-Wan Kenobi's Delta-7 Aethersprite-class light interceptor/Legends|Jedi starfighter]] was damaged and he was forced to hide on the back of an asteroid as Fett descended onto Geonosis. After landing on the planet, Kenobi uncovered a conspiracy of [[Star system/Legends|star systems]] that wanted to secede from the Republic, led by [[Count/Legends|Count]] [[Dooku/Legends|Dooku]]. Kenobi was arrested by Geonosian troops shortly after sending a message to Skywalker and the High Council informing them of the latest development. The Geonosians placed Kenobi in a [[Containment field/Legends|containment field]] to immobilize him and disrupt his access to the Force.<ref name="aotc" />
| |
|
| |
| Dooku attempted to persuade Kenobi to join the [[Confederacy of Independent Systems/Legends|Confederacy of Independent Systems]], invoking Kenobi's memory of Qui-Gon Jinn (Dooku's former Padawan), and telling him that a Sith Lord was now in control of the Galactic Senate. Dooku invited Kenobi to join him to eliminate the Sith menace once and for all. Much to Dooku's disappointment, Kenobi responded that Jinn would never have joined Dooku, and that if the Sith did control the Senate that the Jedi would have sensed it. Dooku left, musing that it would be difficult to secure Kenobi's release.<ref name="aotc" />
| |
|
| |
| ====Battle of Geonosis ([[22 BBY/Legends|22 BBY]])====
| |
| {{Quote|I was beginning to wonder if you'd gotten my message.''"<br />"''I retransmitted it just as you had requested, Master; then we decided to come and rescue you.''"<br />"''Good job.|Obi-Wan Kenobi and Anakin Skywalker in the Arena on Geonosis|<ref name="aotc" />}}
| |
| Having received his message, Skywalker and Senator Amidala traveled to Geonosis in an attempt to rescue Kenobi before the other Jedi could make the journey from Coruscant, but they too were captured, and all three were sentenced to death by the [[Geonosian/Legends|Geonosians]] in the [[Petranaki arena]], where three savage beasts (a [[Nexu/Legends|nexu]], a [[Reek/Legends|reek]] and an [[Acklay/Legends|acklay]]) would be their executioners. In the arena, Kenobi broke free of his chains and eventually ripped a [[Static pike/Legends|static pike]] away from an [[Orray/Legends|orray]]-mounted Geonosian wielder. He used this weapon to fend off the vicious acklay, and eventually threw it at the beast, striking it in the chest. However, to Obi-Wan's surprise, the creature used its jaws to rip out the pike that was protruding from its own chest and snapped it in half, forcing Obi-Wan to make a hasty retreat. Kenobi, Skywalker, and Amidala eventually fought off the wild beasts sent to kill them and turned the field to their advantage. Dooku then sent [[Droideka/Legends|droidekas]] to finish them off.<ref name="aotc" />
| |
|
| |
| [[File:Arenabattle.jpg|thumb|Kenobi fighting alongside Mace Windu in the Petranaki arena]]
| |
| The timely arrival of Master Mace Windu and a [[Geonosis strike team|strike team of 200 Jedi]] prevented their deaths. However, Dooku revealed that he had been expecting the rescue all along, and unveiled a devastating army of Separatist droids (including [[B1-Series battle droid]]s, [[B2 super battle droid/Legends|B2 super battle droids]] and [[Droideka/Legends|droidekas]]). The Jedi fought bravely despite being greatly outnumbered by droids, and suffered many casualties. Master Yoda arrived just in time with a massive clone army from Kamino to save the remaining Jedi. This was the beginning of the [[First Battle of Geonosis/Legends|Battle of Geonosis]], and the Clone Wars.<ref name="aotc" />
| |
|
| |
| Kenobi, Skywalker, and Amidala all jumped onto a [[Low Altitude Assault Transport/infantry/Legends|Republic gunship]] and joined the main battle. The Jedi spotted Count Dooku fleeing from the battle, flanked by two [[Nantex-class territorial defense starfighter/Legends|''Nantex''-class starfighters]]. Kenobi ordered the gunship's pilot to chase him. When Amidala was knocked out of the gunship by a laser blast from one of the starfighters, Kenobi was forced to restrain his Padawan from going back after the senator.<ref name="aotc" />
| |
|
| |
| [[File:KenobivsDooku.png|thumb|left|220px|Kenobi duels the [[Sith Lord/Legends|Sith Lord]] [[Dooku/Legends|Darth Tyranus]] on [[Geonosis/Legends|Geonosis]].]]
| |
| The two Jedi finally caught up to the Sith Lord and engaged him in a duel. Skywalker, ignoring Kenobi's instruction that they should take him together, rushed in quickly and was incapacitated by Dooku's [[Force lightning/Legends|Force lightning]]. Kenobi was then left alone to face the masterful Sith Lord and, for a time, deflected with his lightsaber Dooku's masterful attacks, which included the use of Force lightning. Indeed, never had Kenobi met such power in battle before; never had he come up against something that had completely overpowered him.<ref name="Legacy">''[[Legacy of the Jedi]]''</ref> Kenobi was ultimately brought down when the Sith slashed his leg and shoulder. Skywalker, however, had recovered by this point and, at the last moment, blocked what would have been Dooku's death blow to Kenobi.<ref name="aotc" />
| |
|
| |
| While Skywalker and Dooku briefly parried words, Kenobi summoned his own dropped lightsaber. Tossing the weapon to Skywalker, Kenobi could only watch as his apprentice engaged the Sith Lord. Initially, Skywalker caught Dooku off guard, but since [[Jar'Kai/Legends|Jar'Kai]] was neither his preferred nor strongest form,<ref name="fightsaber">''[[Fightsaber: Jedi Lightsaber Combat]]''</ref> Dooku quickly severed one of the sabers. Forced to switch back to his preferred style of Form V,<ref name="rotsn" /> Skywalker and Dooku engaged in brutal swordplay as Kenobi looked on. Despite Skywalker's efforts, Dooku's experience and economy of movement triumphed over youth and brute force, and Kenobi watched as the Sith severed Skywalker's arm. At this critical juncture, Yoda arrived just in time to prevent Dooku from killing an incapacitated Kenobi and Skywalker. Engaging Dooku in a vicious battle, Yoda gained the upper hand and was on the verge of victory, but Dooku caused a massive column to fall over Kenobi and Skywalker, giving himself time to escape while Yoda devoted his full power to holding up the column, saving his fellow Jedi.<ref name="aotc" />
| |
|
| |
| ====The Halls of Healing====
| |
| {{Quote|Master Yoda, my place is here with Anakin. He is wounded because of me."<br />"He is wounded because of ''Dooku''. And because disobey you he did. A child no longer is Anakin Skywalker. A man he is now, and a man he must be. His own faults must he accept and make amends for."<br />''Anakin is my Padawan. It is my duty to protect him''.<br />"Protect him from himself you cannot, Obi-Wan. Protect you from yourself, could Qui-Gon, when mistakes you made as his apprentice?"<br />"No."<br />"Learn the error of your ways you did. Learn, too, will your apprentice.... The same flaw you share, Obi-Wan. The flaw of attachment. Because of attachment to his mother, to Tatooine did young Skywalker go, defying your direct instructions. To Shmi Skywalker has something happened, I fear."<br />"''What?''"<br />"Sensed young Skywalker in the Force, I did. Great pain. Great anger. A terrible tragedy.... ''Senator Amidala''. Aware of your Padawan's feelings for her, were you?"<br />"I did remind him, Master, that the path he's chosen forbids anything but a warm cordiality between them."<br />"Heed your reminder, Obi-Wan, he did not.... While Anakin sleeps, to Senator Amidala you will go. Ended his relationship with her must be, before more trouble it causes. Know this better than most do you, Obi-Wan."<br />"Master Yoda, I fear the matter is not quite so straightforward. I believe Anakin's feelings are reciprocated. It's likely Senator Amidala will resent my intrusion into her private affairs."<br />"Private affairs? Privacy there is not where a Jedi is involved. Of no importance are her feelings, Obi-Wan. This relationship you will end."<br />"Yes, Master.|Master Kenobi and Grand Master Yoda, in the twilight of Geonosis|<ref name="TCW:WS">''[[The Clone Wars: Wild Space]]''</ref>}}
| |
| Returning to Coruscant, Kenobi was sent to the [[Halls of Healing]] and taken under the care of [[Jedi healer/Legends|Chief Healer]] [[Vokara Che]]. After he was fully recovered, Master Yoda sent him to Senator Amidala's apartment with a stern directive that she end her romantic relationship with the [[Chosen One/Legends|Chosen One]]. After receiving her word of agreement, Kenobi returned to the Temple to prepare for his new assignment.<ref name="TCW:WS" />
| |
|
| |
| ===Clone Wars ([[22 BBY/Legends|22 BBY]]–[[19 BBY/Legends|19 BBY]])===
| |
| {{Quote|You fought in the Clone Wars?''"<br />"''Yes. I was once a Jedi Knight, the same as your father.|[[Luke Skywalker/Legends|Luke Skywalker]] and Obi-Wan Kenobi|<ref name="Episode IV" />}} | | {{Quote|You fought in the Clone Wars?''"<br />"''Yes. I was once a Jedi Knight, the same as your father.|[[Luke Skywalker/Legends|Luke Skywalker]] and Obi-Wan Kenobi|<ref name="Episode IV" />}} |
| [[File:Obi-Wan_Kenobi_SWG4.jpg|thumb|right|180px|Kenobi during the Clone Wars]]
| |
|
| |
| Kenobi became a [[Jedi General/Legends|General]] in the [[Grand Army of the Republic/Legends|Grand Army of the Republic]] during the [[Clone Wars/Legends|Clone Wars]] as he led the Republic to many famous victories, beginning with the countering of the [[Dark Reaper Crisis|Dark Reaper Project]] alongside Skywalker and Mace Windu on planets such as [[Thule/Legends|Thule]], [[Rhen Var/Legends|Rhen Var]], [[Jabiim/Legends|Jabiim]], and [[Raxus Prime/Legends|Raxus Prime]]. In these battles, Kenobi usually participated from the cockpit of his [[fighter tank]], but also led from a [[Low Altitude Assault Transport/infantry/Legends|LAAT/i]] while covering the [[First Battle of Rhen Var|evacuation]] of Rhen Var and scouted from a speeder bike on Raxus Prime before a [[Conquest of Raxus Prime|battle there]]. While Skywalker ultimately countered the threat, Kenobi was disturbed at Skywalker's cockiness over his victory.<ref name="TCWvg">[[Star Wars: The Clone Wars (video game)|''Star Wars: The Clone Wars'' video game]]</ref> This was followed soon after by his brilliant leadership at the [[First Battle of Kamino]], in which he led the Republic to victory.<ref name="SWR50dk">[[Republic 50|''Republic'' 50]]</ref> As his reputation increased, Kenobi earned the moniker "the Negotiator" for his brilliant diplomatic solutions as an alternative to fighting.<ref name="rots" /> Another testimonial to Kenobi's importance in the Clone Wars was that his likeness was used, along with that of his apprentice, in a hologram deployed on Republic shooting ranges to train [[Clone trooper/Legends|clone]] [[Sniper/Legends|sharpshooters]] in distinguishing between friendly and hostile targets.<ref name="Star Wars: The Clone Wars: Sharpshooter">''[[Star Wars: The Clone Wars: Sharpshooter]]''</ref> Kenobi would come to be a part of what many Jedi referred to as the [[Old Guard]], Jedi considered likely to be put on the High Council.<ref name="rotsn" />
| |
|
| |
| ====The swamp gas of Ohma-D'un====
| |
| {{Quote|Our ''only'' concern is retrieving a sample of the antidote, ''regardless'' of the risk. If we fail, the clone army is doomed.|[[Nico Diath|Diath]], regarding his Jedi team's mission to Queyta|<ref name="SWR53br">[[Republic 53|''Republic'' 53]]</ref>}}
| |
| =====Battle of Ohma-D'un=====
| |
| {{Main|Battle of Ohma-D'un}}
| |
| [[File:Defenseofnaboo2.jpg|thumb|left|200px|Kenobi, Skywalker, and others corner [[Asajj Ventress/Legends|Asajj Ventress]].]]
| |
| Kenobi was eventually dispatched with Skywalker, [[Advanced Recon Commando/Legends|ARC Trooper]] [[Alpha-17]] and another Jedi named [[Glaive (Jedi)|Glaive]] and his Padawan [[Zule Xiss]] to investigate the new chemical weapon known as '[[swamp gas]]' used on Ohma-D'un. Kenobi and Glaive would often be at odds with each other during the mission. During the mission the group was attacked by [[Asajj Ventress/Legends|Asajj Ventress]] and the dreaded bounty hunter [[Durge/Legends|Durge]]. The ensuing skirmish saw Kenobi rescue Glaive from Durge, but Glaive was beheaded by Ventress, who also cut off Xiss' arm. Kenobi and Xiss nevertheless resisted Ventress, even while being poisoned by the gas, until the timely arrival of Skywalker and Alpha-17. Kenobi and Skywalker eventually drove off the two assassins, saving Zule Xiss, but were unable to keep them from escaping or retrieve the antidote from them.<ref name="SWRnfr">''[[Star Wars: Republic: The New Face of War]]''</ref>
| |
|
| |
| =====Mission to Queyta=====
| |
| {{Main|Mission to Queyta}}
| |
| After the incident on Ohma-D'un Kenobi, accompanied by four nomadic Jedi Masters, [[Nico Diath]], [[Jon Antilles]], [[Knol Ven'nari]] and Master [[Fay]], were dispatched to recover the antidote to the swamp gas used by the Confederacy on Ohma-D'un. Kenobi often felt he was out of his league with these four legendary Masters, but Fay assured him that his knowledge of the toxin to the mission would be invaluable.<ref name="SWR53br" />
| |
|
| |
| Once they arrived on [[Queyta/Legends|Queyta]], where the antidote was believed to be, the group was ambushed by Durge and Asajj Ventress. Ven'nari was the first to fall when Durge fired upon the native workers, causing their pressure suits to explode. Ven'nari's power kept the explosion from harming the group, but the strain was too much. Antilles went for Ventress but fell when Durge destroyed the bridge he was standing on, but Antilles survived. Diath was killed when Ventress collapsed the ceiling on him and had molten lava rain down onto him. Antilles was finally killed while grappling with Durge when the mercenary thrust him into a lava pit, but not before the [[Gen'Dai]]'s regenerative arms were melted off. Fay and Kenobi survived long enough to confront Ventress, who was in control of the antidote and trying to escape with it to Separatist-friendly space. Using the Force, Master Fay hurled shards of glass and metal at Ventress, catching the Dark Jedi in the throat with a large piece of debris. Believing Ventress to be dead, Kenobi and Fay set off to return to Coruscant. Ventress was far from dead, however, and rose to spear Master Fay in the back with a lightsaber.<ref name="SWR53br" />
| |
|
| |
| Mortally wounded, Fay survived long enough to ensure Kenobi escaped from Queyta with the antidote, then died in his arms. The "swamp gas" would be modified to become a deadly chemical weapon called [[Trihexalophine1138]] that would later decimate the forest of the planet [[Honoghr/Legends|Honoghr]].<ref name="SWR53br" />
| |
|
| |
| ====Battle of Muunilinst and the introduction of Grievous====
| |
| {{Main|Battle of Muunilinst|Battle of Hypori/Legends}}
| |
| {{Quote|I doubt even Master Qui-Gon could've prepared a Jedi Knight for this.|Obi-Wan Kenobi|Star Wars: Clone Wars}}
| |
| [[File:Durge_is_almost_immortal.jpg|thumb|right|200px|Obi-Wan Kenobi during his third encounter with [[Durge/Legends|Durge]]]]
| |
| Kenobi fought courageously against battle droids and crushed the forces of [[San Hill/Legends|San Hill]] and the Confederacy in the [[Battle of Muunilinst/Legends|Battle of Muunilinst]]—an early victory that would do much to build the warrior's reputation. His forces on [[Muunilinst/Legends|Muunilinst]] included [[the Muunilinst 10]] and a [[Lancer Battalion]],<ref name="CW4">[[Clone Wars Chapter 4]]</ref><ref name="CW8">[[Clone Wars Chapter 8]]</ref> the latter of which Kenobi led into battle on [[105-K lancer bike]]s. During the battle, Kenobi also defeated Durge in single combat twice: first after leading his squadron of speeder bikes into battle and then in the command center of the Separatist leaders.<ref name=":0">[[Clone Wars Chapter 9]]</ref>
| |
|
| |
| Soon after the Battle of Muunilinst, Kenobi was contacted by Jedi Master [[Daakman Barrek]], who called for his assistance in the disastrous [[Battle of Hypori/Legends|Battle of Hypori]]. Kenobi sent the Muunilinst 10 led by [[Captain/Legends|Captain]] [[ARC-77|Fordo]] to rescue the remaining Jedi task force from the newly revealed [[General/Legends|General]] [[Grievous/Legends|Grievous]]. In the end, they were only able to rescue three of the six Jedi. Ki-Adi-Mundi, [[Shaak Ti/Legends|Shaak Ti]], and [[Aayla Secura/Legends|Aayla Secura]] survived, but [[Tarr Seirr]] and [[Sha'a Gi]] were killed by Grievous. [[K'Kruhk]] was assumed dead. However, he had simply entered a [[Whiphid healing trance|state of hibernation]] to recuperate from his otherwise fatal wounds.<ref name="CW20">[[Clone Wars Chapter 20]]</ref>
| |
|
| |
|
| ====Battle of Skye==== | | ====Battle of Skye==== |
| {{Main|Battle of Skye}} | | {{Main|Battle of Skye}} |
| In [[21 BBY/Legends|21 BBY]], Kenobi temporarily took [[Halagad Ventor]] as a Padawan in addition to Skywalker, following the demise of Ventor's former master.<ref name="Aliens in the Empire">''[[Aliens in the Empire]]''</ref> They traveled to the planet of [[Skye/Legends|Skye]], where they [[Battle of Skye|fought]] against [[Zeta Magnus]], a genetic terrorist. They foiled the terrorist's plot that threatened the planet with total destruction.<ref name="New Essential Chronology">''[[The New Essential Chronology]]''</ref> Following the battle, Skywalker discovered the 13 year old [[S'kytri]] [[Kharys]], who proved to be strong in the Force. He wished to take her back with them for training, but Kenobi and Ventor believed she was too old to start on the path of a Jedi and refused to take her. However, Skywalker promised Kharys that he would return one day to train her.<ref name="Aliens in the Empire" /> | | In [[21 BBY/Legends|21 BBY]], Kenobi temporarily took [[Halagad Ventor]] as a Padawan in addition to Skywalker, following the demise of Ventor's former master.<ref name="Aliens in the Empire">''[[Aliens in the Empire]]''</ref> They traveled to the planet of [[Skye/Legends|Skye]], where they [[Battle of Skye|fought]] against [[Zeta Magnus]], a genetic terrorist. They foiled the terrorist's plot that threatened the planet with total destruction.<ref name="New Essential Chronology">''[[The New Essential Chronology]]''</ref> Following the battle, Skywalker discovered the 13 year old [[S'kytri]] [[Kharys]], who proved to be strong in the Force. He wished to take her back with them for training, but Kenobi and Ventor believed she was too old to start on the path of a Jedi and refused to take her. However, Skywalker promised Kharys that he would return one day to train her.<ref name="Aliens in the Empire" /> |
|
| |
| ====The bio-droid threat====
| |
| {{Main|Mission to Ord Cestus}}
| |
| {{Quote|I feel ill prepared for this… this maze of commerce and politics.|Obi-Wan Kenobi|<ref name="TCD">''[[The Cestus Deception]]''</ref>}}
| |
| [[File:TheHive_cover_art.jpg|thumb|left|Kenobi on [[Ord Cestus/Legends|Ord Cestus]]]]
| |
| Kenobi was later partnered with fellow Jedi [[Kit Fisto/Legends|Kit Fisto]] on his mission to [[Ord Cestus/Legends|Ord Cestus]] to end the production of [[JK-13 security droid]]s on the planet, in addition to preventing the planet from falling to the Confederacy. Traveling with the barrister [[Doolb Snoil]] while Fisto worked in the desert with four ARCs, Kenobi made contact with both the Five Ruling Families of Ord Cestus and the Desert Wind irregulars, trained and led by Fisto and the [[Cloning/Legends|clones]]. While Kenobi and Snoil tried to find a peaceful resolution to the problem, Fisto and the ARCs were preparing the Desert Wind troops for a guerrilla war, if necessary. In addition to his delicate negotiations with the ruling council, Kenobi helped preserve the position of [[G'Mai Duris]] and worked to pierce the veil of intrigue surrounding the government's workings. Deciding that the time had come for more drastic measures, Kenobi and Fisto staged an attack on members of the Five Ruling Families, with Fisto pretending to be a [[Dark Acolyte/Legends|Dark Acolyte]] from Count Dooku and Kenobi repelling him. While the ruse was successful, their theatrics were secretly revealed to the Five Ruling Families by Asajj Ventress via an emissary. Expelled from the planet, Kenobi and Snoil left, but Kenobi jettisoned in an escape pod to rendezvous with Fisto, though Snoil later rejoined them after the ship was attacked and he took flight in an escape pod also. While working with the clones, Kenobi and Fisto came to understand them more, and even taught them elements of the [[Jedi Flow]] exercise.<ref name="TCD" />
| |
|
| |
| Conducting a hit-and-run campaign against Cestian manufacturing and infrastructure facilities, Kenobi tried to prevent loss of life. However, after an ambush on his troops in which many Desert Wind fighters and Snoil were killed, and with increasing pressure from the Supreme Chancellor to resolve the conflict or bombard Ord Cestus, Kenobi and Fisto planned a mission to knock out Cestian manufacturing. During the mission, Fisto was almost killed by Asajj Ventress but was saved by Kenobi, who defeated the Dark Acolyte. Kenobi also constructed a rare [[Lightwhip/Legends|lightwhip]] which was used by Fisto during the mission. Upon returning from defeating Ventress, Kenobi received a message from one of the ARCs—[[CT-96/298|Jangotat]]—reporting that he had called in the orbital bombardment, which would have targeted the population centers due to Ventress's sabotage, onto his location, which was also the hideaway for the Five Ruling Families. With them dead, and with the Separatist plan revealed to be a fraud by both Jangotat and Ventress, Ord Cestus negotiated a settlement.<ref name="TCD" />
| |
|
| |
| ====Battle of Jabiim and aftermath====
| |
| {{Main|Battle of Jabiim|Escape from Rattatak}}
| |
| {{Quote|I won't fail you.''"<br />"''No, Anakin, don't fail yourself.|Anakin Skywalker and Obi-Wan Kenobi|Star Wars: Clone Wars}}
| |
| Kenobi also led troops during the infamous [[Battle of Jabiim]]. The Republic suffered heavy casualties and weren't prepared for the atrocious conditions on the planet. The Republic forces made great gains in the first weeks of the fighting until the commander, General [[Norcuna]], was killed. Soon after, Kenobi himself was believed dead after being caught inside an exploding walker. In reality, Kenobi and Alpha-17 had been captured by Asajj Ventress and taken to her fortress on [[Rattatak/Legends|Rattatak]]. There Kenobi was [[Torture/Legends|tortured]] using a [[Sith torture mask]] that obscured his connection to the Force in an attempt to break the Jedi and show his uselessness to Count Dooku. Kenobi's ingenuity, however, eventually led to the pair's escape.<ref name="SWRbj">''[[Star Wars: Republic: The Battle of Jabiim]]''</ref>
| |
|
| |
| [[File:Obi_vs_asajj.jpg|thumb|right|Kenobi battles Asajj Ventress.]]
| |
| Throughout their captivity, Kenobi had used what little Force power he had to bend the pipes in the wall of his and Alpha's cell until they eventually burst. In the confusion, they liberated many of the prisoners before running into Ventress.<ref name="SWR60hf">[[Republic 60|''Republic'' 60]]</ref>
| |
|
| |
| After a brief lightsaber fight in which Kenobi made use of [[Ky Narec/Legends|Ky Narec's]] lightsaber, he and Alpha escaped the planet in a stolen [[Ginivex-class starfighter|Fanblade fighter]].<ref name="SWR60hf" /> Flying to [[Riflor/Legends|Riflor]], they were briefly forced to hold off an army of bounty hunters hired by Ventress before being rescued by Anakin Skywalker and Ki-Adi-Mundi. Mundi had been assigned as Skywalker's master after Kenobi's presumed death. After the skirmish, Skywalker was given back over to Kenobi, with Master Mundi relieved to no longer have to train such a headstrong student. Kenobi never forgot his captor, the deadly Asajj Ventress.<ref name="SWR62nml">[[Republic 62|''Republic'' 62]]</ref>
| |
|
| |
|
| ====The Merson pirates==== | | ====The Merson pirates==== |
| Line 395: |
Line 51: |
|
| |
|
| As Tryll fell to his knees and offered his thanks, Kenobi declined his gratitude and retired to his cabin, arguing that he wanted to finish the journey in peace.<ref name="Silent Drifting" /> | | As Tryll fell to his knees and offered his thanks, Kenobi declined his gratitude and retired to his cabin, arguing that he wanted to finish the journey in peace.<ref name="Silent Drifting" /> |
|
| |
| ====Loss of an old friend====
| |
| Later Kenobi was reunited with Siri Tachi when they teamed up with Skywalker and Padmé Amidala to acquire a special codebreaker on the planet [[Genian]]. The Separatists were also after the important codebreaking mechanism invented by Talesan Fry, whom Tachi and Kenobi had met twenty years earlier in a mission to protect him from bounty hunters. Fry was now the founder of a prosperous business on Genian, a world that remained neutral during the war. Reuniting with Fry brought back old memories to Kenobi and Tachi of the feelings that they once had for each other. After convincing Fry to give the device to the Republic, they were attacked by someone else from the past, the bounty hunter Magus, who had killed Fry's parents.<ref name="sotj" />
| |
|
| |
| Fry accompanied the Jedi and Senator Amidala to [[Azure/Legends|Azure]], where the Republic was fighting off more Separatists. While Kenobi, Skywalker, and Fry fought off the attack led by Magus (who was working for the [[Corporate Alliance/Legends|Corporate Alliance]]), Tachi and Amidala took a starfighter of their own to go after Magus himself. Upon reaching Magus' starfighter, Tachi made a desperate leap and landed on it. She broke into his ship and fought him off, which resulted in the ship's crash landing, but in the process she was shot by Magus.<ref name="sotj" />
| |
|
| |
| Kenobi found Tachi and tried to save her, but she stopped him knowing she was dying. Tachi handed him the blue warming crystal she had from that earlier mission together, telling Kenobi that she would always be with him, and then passed on. Her death devastated Kenobi, bringing him close to the dark side as he held his lightsaber blade to Magus' throat. However, he regained control, sparing the merciless bounty hunter. Skywalker thought this indicated that Kenobi did not truly love Tachi, because he couldn't imagine not avenging Amidala's death, had she died. Kenobi later realized he had learned to love with an open heart, a lesson Jinn had long tried to teach him. He could live with losing Tachi.<ref name="sotj" />
| |
|
| |
| ====Promotions====
| |
| {{Quote|Cody might think the sun shines out of [Kenobi's] ear, General, but I think he's a glory seeker who wastes too many men.|[[Ordo Skirata|ARC N-11]] to General [[Arligan Zey]]|<ref name="Order 66: A Republic Commando Novel">''[[Order 66: A Republic Commando Novel]]''</ref>}}
| |
| As a [[High Jedi General/Legends|High General]], Kenobi took command of the [[Open Circle Fleet/Legends|Open Circle Fleet]] and the [[Third Systems Army/Legends|Third Systems Army]], which included [[Clone trooper commander|Clone Commander]] [[CC-2224/Legends|Cody's]] [[7th Sky Corps/Legends|7th Sky Corps]]. Towards the end of the Clone Wars, Kenobi, Skywalker and Commander Cody took part in a number of successful and high profile missions, including the [[Battle of Cato Neimoidia/Legends|Battle of Cato Neimoidia]].
| |
| Kenobi was also known to wear parts of [[Phase I clone trooper armor/Legends|Phase I clone trooper armor]] along with a [[Jetpack/Legends|Jetpack]] and a Clone Trooper Helmet similar to Commander Cody's.{{Fact}}
| |
|
| |
| [[File:Council_RotS.png|thumb|right|250px|Kenobi sitting upon the Jedi High Council with Ki-Adi-Mundi and Yoda]]
| |
| During this time of war, Obi-Wan's reputation and talent on the battlefield and his legendary diplomacy skills had him promoted to Jedi Master, and he was granted a seat on the Jedi High Council to replace [[Depa Billaba/Legends|Depa Billaba]],{{Fact}} who had fallen to the dark side and was in a coma after a mission to [[Haruun Kal/Legends|Haruun Kal]].<ref name="shatterpoint">[[Shatterpoint (novel)|''Shatterpoint'']]</ref> From this exalted position, Kenobi helped develop the tactics of the Grand Army of the Republic and became one of the leading members of the Jedi High Council. Jedi Master Kenobi witnessed the growing strain between the Chancellor's office and the Jedi firsthand. His position on the council also allowed him to advocate the promotion of his Padawan Anakin Skywalker to Jedi Knight. After a tense debate with the rest of the council, Kenobi convinced them to grant Skywalker his knighthood, but with this Kenobi took the responsibility of covering for Skywalker's unorthodox actions that were frowned upon by the rest of the council.<ref name="CW21">[[Clone Wars Chapter 21]]</ref>
| |
|
| |
| During the initial stages of the [[Battle of Rendili]], Kenobi discovered the renegade Quinlan Vos aboard the exploration vessel ''[[Titavian IV]]''. Vos had betrayed Dooku's trust, and the Count had sent Asajj Ventress and [[Tol Skorr]] to eliminate him. Ventress and Kenobi battled yet again, though this time the Dark Acolyte felt assured of victory, riding a ferocious rancor in pursuit of her nemesis. Kenobi and Vos escaped, but Ventress followed Kenobi back to Coruscant. Kenobi helped convince the [[Council of Reconciliation/Legends|Council of Reconciliation]] to re-accept Vos into the Jedi Order.<ref name="SWRdr">''[[Star Wars: Republic: Dreadnaughts of Rendili]]''</ref> Kenobi also questioned the council on why it had to keep [[the Prism]] a secret from Skywalker and the Senate.<ref name="Darth Vader & the Ghost Prison">[[Darth Vader and the Ghost Prison 3|''Darth Vader and the Ghost Prison'' 3]]</ref>
| |
|
| |
| ====Battle of Christophsis====
| |
| {{Main|Battle of Christophsis/Legends}}
| |
| {{Quote|I told you this victory was too easy! We never should have sent the ship back for supplies.''"<br />"''It wasn't ''my'' idea to send the ship back.|Obi-Wan Kenobi and Anakin Skywalker|audio=VictoryWasTooEasy-TCWf.ogg|<ref name="TCWfilm">''[[Star Wars: The Clone Wars (film)]]''</ref>}}
| |
| [[File:Kenobi_Jedi_armor.jpg|thumb|left|180px|Kenobi during the Clone Wars]]
| |
| In [[22 BBY/Legends|22 BBY]],<ref name="SoD">''[[The Clone Wars: Shipyards of Doom]]''</ref> after the Jedi Council received a plea from the planet of [[Christophsis/Legends|Christophsis]] for help against the invading Separatists and to aid [[Bail Prestor Organa/Legends|Senator Organa's]] relief effort, Kenobi and Skywalker were dispatched to [[Battle of Christophsis/Legends|save]] the planet, along with Commander Cody and [[Clone trooper captain|Captain]] [[CT-7567/Legends|Rex]]. After Anakin defeated the separatist blockade commanded by [[Trench/Legends|Admiral Trench]] with a prototype cloaked ship, Obi-Wan and Anakin took command of the situation.<ref name="Cat and Mouse">{{TCW|Cat and Mouse}}</ref> However, when evidence was revealed that a traitor was giving inside information to the Separatists, Kenobi and Skywalker left to secretly scout behind enemy lines, leaving Cody and Rex to find the traitor. Upon arriving at the Separatist [[Christophsis Separatist Headquarters|base]], they met and dueled Asajj Ventress. After she escaped, the two Jedi followed her and discovered an entire army amassing to march on the city. Returning to their base, they discovered that [[Clone trooper sergeant|Sergeant]] [[Slick/Legends|Slick]] was the traitor, and he was taken to lockup. However, he had sabotaged most of their weapons except the [[AV-7 Antivehicle Cannon|heavy cannons]], and forced to defend the planet against an entire Separatist army, the Jedi requested reinforcements.<ref name="The Hidden Enemy">{{TCW|The Hidden Enemy}}</ref>
| |
|
| |
| Kenobi and his former apprentice led [[Torrent Company/Legends|Torrent Company]] and [[Ghost Squadron]] with Rex and Cody. They defeated the first wave of droids, but their opponents soon returned. Skywalker wiped out the [[Octuptarra combat tri-droid|tri-droids]] with Rex, and the [[AV-7 Antivehicle Cannon|cannons]] took charge of the rest of the droid troops. The Separatist army retreated under General [[Whorm Loathsom/Legends|Whorm Loathsom's]] order. Following this, a shuttle arrived, carrying what was assumed to be Kenobi's next apprentice. The Padawan introduced herself as [[Ahsoka Tano/Legends|Ahsoka Tano]], but she revealed that she was assigned to be Skywalker's Padawan, not Kenobi's, much to Skywalker's dismay. Skywalker later commented that he thought that it had been Kenobi's idea for him to train an apprentice.<ref name="TCWfilm" />
| |
| [[File:Obi-Wan_Jabba_negotiations.png|thumb|right|250px|Kenobi negotiates with Jabba.]]
| |
|
| |
| Soon after this, Rex and Tano discovered that the Separatists had activated a [[Deflector shield/Legends|deflector shield]] and the battle was reignited. While Skywalker and Tano set off to deactivate the shield, the clone troopers were outnumbered easily, and their cannons could not get through the shield, even at full power. Within minutes there were only a limited amount of clones left, and Kenobi was surrounded by Whorm and his [[Battle droid/Legends|battle droids]]. He surrendered, but was able to stall Whorm and eventually ring him by the neck.<ref name="TCWfilm" />
| |
|
| |
| Skywalker and Tano deactivated the shield, and the Republic was victorious. Afterward, Master Yoda informed the Jedi that the Republic had been contacted by [[Jabba Desilijic Tiure/Legends|Jabba the Hutt]], as he was willing to ally himself with them, should they locate and rescue his kidnapped son, [[Rotta/Legends|Rotta]].<ref name="TCWfilm" />
| |
|
| |
| ====Helping a Hutt====
| |
| {{Quote|Don't worry. I'm sure Jabba's in a good mood.|Obi-Wan, upon reaching Tatooine|audio=Jabba'sInAGoodMood-TCWf.ogg|<ref name="TCWfilm" />}}
| |
| Yoda ordered Kenobi to Tatooine, to negotiate a treaty with Jabba for safe travel for Republic ships through [[Hutt Space/Legends|Hutt Space]], while Skywalker and Tano sought Jabba's son. Kenobi reluctantly negotiated with the crime lord and was present when Jabba learned that the bounty hunters he had sent to search for his son had returned without their bodies, only their heads; Jabba then promised [[Hyperspace/Legends|hyperspace]] routes in his territories for the Republic in exchange for his retrieved son and the slime that took him.
| |
|
| |
| Kenobi reported this information to Skywalker, who was on his way to [[Teth/Legends|Teth]], where Jabba's son had been located, before informing Yoda and Chancellor Palpatine. It was suspected that the kidnapping was a Separatist plot, which aimed to turn Jabba against the Republic.<ref name="TCWfilm" />
| |
|
| |
| ====Battle of Teth====
| |
| {{Main|Battle of Teth/Legends}}
| |
| [[File:Obi-Wan_vs_Ventress_Teth.jpg|thumb|right|250px|Kenobi duels Asajj Ventress on Teth while searching for Anakin and Ahsoka.]]
| |
| {{Quote|Master Kenobi. Always chasing after Skywalker; how predictable."''<br />''"Anakin leaves quite a mess, which always leads me to you, Ventress.|Asajj Ventress and Obi-Wan Kenobi|audio=QuiteAMess-TCWf.ogg|<ref name="TCWfilm" />}}
| |
| Kenobi arrived on Teth immediately, and found Rex and the [[Army/Legends|army]] heavily outnumbered by [[Battle droid/Legends|battle droids]]. With his reinforcements, the battle was even again while he went to search for Skywalker, R2-D2 and Tano. He ran into Asajj Ventress, whom he battled through the [[B'omarr Monastery (Teth)|B'omarr Monastery]], eventually slicing through her saberstaff, throwing away one half, and offering her the chance to surrender. Ventress gave up the fight and called for a [[Variable Geometry Self-Propelled Battle Droid, Mark I/Legends|Vulture droid]] to rescue her.<ref name="TCWfilm" />
| |
|
| |
| Returning to his troops, he later learned that Skywalker had taken a [[A/SF-01 B-wing starfighter/Legends|B-wing]]-like ship called the [[Twilight/Legends|''Twilight'']] and had flown to Tatooine, where he and Tano had battled Dooku and [[IG-100 MagnaGuard/Legends|IG-100 MagnaGuards]], before giving Jabba's son back to him. After fending off the droids, he and Yoda took gunships to pick up the Jedi team, and Jabba confirmed passage through his routes.<ref name="TCWfilm" />
| |
|
| |
| ====Battle of Gwori====
| |
| {{Main|Battle of Gwori}}
| |
| After Master Windu briefed a gathering of Jedi and highlighted a key issue in the war—that the Separatists vastly outnumbered the Republic in terms of ships—Master Kenobi suggested a surgical strike on the [[InterGalactic Banking Clan/Legends|InterGalactic Banking Clan]] warship building factories. It soon became clear that the [[Gwori]] System was the prime target, yet due to the Republic forces being too splintered, it would be impossible to launch an all-out attack.[[File:SWCW3DV1-FC-FNL.jpg|thumb|left|150px|Kenobi with Skywalker and Tano during the incident on Gwori]] Further complicating a possible strike team's sabotage attempt was a gigantic bio-scan-irradiator-incinerator that would kill any organics on ships that passed through it. Skywalker then concocted a plan to bypass this complication: the strike team would freeze themselves in carbonite, which would resist the radiation produced by the incinerator.<ref name="SoD" />
| |
|
| |
| Skywalker ordered Tano to not participate in the mission. However, after he, Kenobi and the strike team were frozen, she manipulated Admiral Yularen into believing that Skywalker had reversed his order and allowed Tano to be frozen and accompany the team on world. As R2-D2 piloted the frozen team's shuttle on world, a Separatist commander noticed an irregularity and ordered the ship fired upon. Artoo had the carbonite slabs strewn from the ship, and moments before it was destroyed, escaped it himself.<ref name="SoD" />
| |
|
| |
| Artoo freed Tano from her carbonite slab, who in turn freed the rest of the strike team, her Master being less than impressed to discover that she had disobeyed him. While the team located the Separatist shipyards, they were unable to contact Republic bombers, due to the Separatists having jammed all communications. However, Tano noticed a communications tower nearby, and after fighting their way in, the team commed Masters Plo Koon and [[Saesee Tiin/Legends|Saesee Tiin]]. They arranged for the bombers to strike at dawn.<ref name="SoD" />
| |
|
| |
| The overseer of the shipyards, [[Juhm]], noticed the unauthorized transmission and attempted to destroy the comm tower, though the team escaped and split up. B2 super battle droids equipped with jetpacks trailed Tano and her faction of the strike team into a cave, where she was forced to kill a large reptilian carnivore. Kenobi and Skywalker soon learned that the Separatists were using organic slaves to build warships, surprising due to their being far less productive than droids. Later, the remnants of the strike team, Tano, Skywalker, Kenobi and Rex, were captured, though they escaped.<ref name="SoD" />
| |
|
| |
| The Separatist slaves revolted and joined the Jedi strike team. However, upon the arrival of the Republic forces, and the destruction of half of the shipyards, the escape craft of the Jedi and slaves was nearly destroyed by friendly fire, though comming the forces resolved the situation. The freed Separatist slaves were made Republic citizens and then built warships for the Republic.<ref name="SoD" />
| |
|
| |
| ====The ''Malevolence''====
| |
| {{Main|Battle of Abregado/Legends|Battle of the Kaliida Nebula/Legends}}
| |
| {{Quote|Our ship is unstoppable.|General Grievous|<ref name="Shadow of Malevolence">{{TCW|Shadow of Malevolence|Shadow of ''Malevolence''}}</ref>}}
| |
| Later, when information arose regarding a mysterious Separatist superweapon that systematically destroyed several Republic fleets, the Council sent one of its members, Master Plo Koon, to track it down. However, upon Master Koon comming Skywalker with information regarding the unknown weapon, his communications systems became jammed and he was unable to be contacted. As such, Skywalker reported these events to Chancellor Palpatine, and Masters Yoda, Windu and Kenobi.<ref name="Rising Malevolence">{{TCW|Rising Malevolence|Rising ''Malevolence''}}</ref>
| |
|
| |
| [[File:Obi-Wan_reports_to_Nala_Se.png|thumb|left|200px|Kenobi and Admiral Yularen report to [[Nala Se/Legends|Nala Se]].]]
| |
| The Council, in conjunction with the Supreme Chancellor, decided against mounting a task force to ascertain the situation that Master Koon had found himself in, feeling that his forces were most likely entirely wiped out much like previous fleets. However, Skywalker's Padawan, Tano, having a special connection to Master Koon, refused to believe that he had been killed, and as such, she and Skywalker disregarded the Council's orders and journeyed to the [[Abregado system/Legends|Abregado system]].<ref name="Rising Malevolence" />
| |
|
| |
| Master Kenobi soon discovered his former Padawan's actions and reported them to the Council. However, Skywalker's recklessness resulted in the rescue of Plo Koon and a handful of troops. In addition, Master Koon revealed the nature of the Separatist superweapon: it was a giant ship, known as the [[Malevolence/Legends|''Malevolence'']], with ion cannons capable of disabling entire fleets.<ref name="Rising Malevolence" />
| |
|
| |
| With this information, Skywalker formulated a daring plan to engage and destroy the ''Malevolence''{{'s}} ion cannons using [[BTL-B Y-wing starfighter|Y-wing bombers]], to prevent the destruction of an Outer Rim [[Kaliida Shoals Medical Center/Legends|medical center]]. It would then fall to Kenobi to enter the system and destroy the massive warship using the combined firepower of his fleet. Kenobi helped organize the evacuation of the medical center, dispatching [[Pelta-class frigate/Legends|medical frigates]] for the evacuation. While Skywalker's task force succeeded in destroying the ion cannons, the ''Malevolence'' was so large that it could withstand the fire of Kenobi's fleet.<ref name="Shadow of Malevolence" />
| |
|
| |
| [[File:Kenobi_vs_Grievous_Malevolence.png|thumb|right|200px|Kenobi clashes with Grievous aboard the ''Malevolence''.]]
| |
| Indeed, the situation became confounded when an old friend, Senator Padmé Amidala of Naboo, appeared in system during the [[Battle of the Kaliida Nebula/Legends|battle]], having been given false information regarding a diplomatic mission to the system.<ref name="Destroy Malevolence">{{TCW|Destroy Malevolence|Destroy ''Malevolence''}}</ref> Kenobi and Skywalker were horrified as they watched a [[Tractor beam/Legends|tractor beam]] pull Amidala aboard the ''Malevolence''. The pair quickly mounted a mission to rescue her, which ultimately succeeded, though Kenobi was forced to engage in a brief duel with General Grievous while attempting to sabotage the warship's hyperdrive. In addition, Skywalker and Amidala rigged the warship's [[Navigation computer/Legends|navicomputer]] to pilot it into the nearby [[Dead Moon of Antar/Legends|Dead Moon of Antar]], destroying the deadly superweapon, before which the group escaped.<ref name="Destroy Malevolence" />
| |
|
| |
| Some weeks later, while searching for General Grievous and his fleet, Kenobi and Skywalker came to the aid of Commander Cody and Captain Rex, after the pair of clones [[Battle of the Rishi moon|engaged]] Separatist forces on the [[Rishi moon]]. The Jedi's fleet arrived just in time to force Grievous' ships out of the system, foiling the cyborg's plot to launch a surprise attack on Kamino.<ref name="Rookies">{{TCW|Rookies}}</ref>
| |
|
| |
| ====Mission to Zigoola====
| |
| {{Main|Mission to Zigoola}}
| |
| {{Quote|Master Yoda, I will bring Obi-Wan home to you, safe and well. On that you have my solemn word.|Padmé Amidala|<ref name="TCW:WS" />}}
| |
| [[File:Carrieduponhisshoulders.jpg|thumb|Organa carried Kenobi during the mission on Zigoola.]]
| |
| After Kenobi received valuable information from his friend Dexter Jettster on an attack on the planet [[Bothawui/Legends|Bothawui]] by General Grievous, he was injured in a sneak attack by the Separatists on Coruscant. His injuries were not fatal, so he lived, albeit barely.<ref name="TCW:WS" />
| |
|
| |
| As Skywalker took his Padawan Tano and a good-sized portion of the Grand Army of the Republic to counter Grievous's forces at Bothawui, Senator Bail Organa got a message from a [[Friends of the Republic|shadowy ally]] hinting that there was a source of Sith power on a planet in [[Wild Space/Legends|Wild Space]]. Kenobi, who had recovered in the meantime, agreed to go with the Senator in order to find what information laid on it. The Jedi and the Senator rendezvoused with Organa's contact [[Alinta]] in Wild Space, but the three of them were attacked by space pirates. Alinta was killed, but she gave the coordinates to [[Zigoola]], where a [[Zigoola Sith temple|Sith Temple]] was located, and the pair continued their journey. When they arrived on the planet, they crash-landed several miles from the temple and walked there in order to explore it. During the trek, Kenobi suffered from illusions and hysteria due to the planet's dark-side nature. Through pounding rain and lightning storms, Kenobi and Organa clambered through to the temple. Although they reached it in more or less one piece, Kenobi collapsed just outside and Organa was forced to go in on his own, despite having no clue what any of the [[Sith artifact/Legends|artifacts]] did. Realizing this fact, the Senator crawled outside and forced Kenobi to accompany him, tortuously finding a crystal that enhanced long-distance Force communication.<ref name="TCW:WS" />
| |
|
| |
| Kenobi was finally able to contact Grand Master Yoda on Coruscant, who asked Padmé Amidala to rescue Kenobi and Organa on the Sith world. She hurried to Zigoola with some clone troopers including Captain [[Korbel]] and found the injured duo stranded near the temple ruins. Due to Kenobi's tampering with the artifacts and triggering security measures in the Sith temple, the building collapsed in on itself, destroying its dark power and all of the dark-side weapons within. Although Kenobi and Organa were gravely injured and exhausted from the mission, they completed their objective and formed a lasting friendship.<ref name="TCW:WS" />
| |
|
| |
| ====Battle of Bothawui and aftermath====
| |
| {{Main|Battle of Bothawui/Legends}}
| |
| [[File:ReportFromFalleen-DOAD.jpg|thumb|left|200px|Kenobi confers with Skywalker, Tano and Rex.]]
| |
| {{Dialogue|Tano|Suicide is not the Jedi way, Master.|Kenobi|You should listen to your Padawan.|Skywalker|As you listened to yours, my old master? No, we're going to stay and fight.|attr=Ahsoka Tano, Obi-Wan Kenobi and Anakin Skywalker {{Audio|StayAndFight-DoaD.ogg|Listen}}|src=<ref name="Downfall of a Droid">''[[Downfall of a Droid]]''</ref>}}
| |
|
| |
| Since Grievous had been [[Battle of Falleen/Legends|ambushing]] fleets, Kenobi advised Skywalker to retreat, but Skywalker planned on [[Battle of Bothawui/Legends|ambushing]] the cyborg. To his surprise, Skywalker managed to destroy the Confederate [[Flotilla/Legends|flotilla]], but Skywalker's fighter was damaged while he chased the general, and although he was rescued, R2-D2 went missing. Worse, Skywalker hadn't wipe the astromech's memory, which included dangerous tactical files belonging to the Republic.<ref name="Downfall of a Droid" /> Skywalker risked everything to [[Mission to Skytop Station/Legends|retrieve]] the droid, but also took out [[Skytop Station/Legends|Skytop Station]], where Artoo was being held. After Skywalker risked his troopers and even his Padawan Tano to save Artoo, an exasperated Kenobi grudgingly accepted what had happened without severely rebuking Skywalker.<ref name="Duel of Droids">''[[Duel of the Droids]]''</ref>
| |
|
| |
| ====Dealing with pirates====
| |
| {{Main|Skirmish at Vanqor/Legends|Mission to Florrum/Legends}}
| |
| [[File:Kenobi_space_walk.png|thumb|left|200px|Kenobi flies towards [[Count Dooku's frigate/Legends|Count Dooku's frigate]] in a [[Enviro-suit|space suit]].]]
| |
| Kenobi and Skywalker later spearheaded an attempt to capture the head of the Confederacy, Count Dooku himself. While the Jedi's attempts to capture the Count aboard his flagship proved unsuccessful, Tano successfully commanded a Republic force against it, forcing Dooku to crash land on [[Vanqor/Legends|Vanqor]] during his escape from the doomed vessel. While Kenobi and Skywalker searched for the Count in a cave nearby to the wreckage of his personal craft, Dooku used the Force to cause a roof collapse, trapping the Jedi and securing his escape.<ref name="DC">{{TCW|Dooku Captured}}</ref>
| |
|
| |
| [[File:Epguide11.png|Dooku's incarceration is confirmed by Kenobi and Skywalker.|thumb|right|250px]]
| |
| After making contact with a nearby [[Ohnaka Gang/Legends|group]] of [[Pirate/Legends|pirates]], Dooku secured a route offworld, only to find himself captured by the wily gang of pirates who hoped to trade him for a hefty ransom from the Republic. After being rescued by Tano, Kenobi and Skywalker were sent to the [[Hondo Ohnaka's pirate outpost|pirates' stronghold]] to ensure they had indeed captured Dooku, and after he received confirmation from him, Chancellor Palpatine had Representative Binks and Senator [[Kharrus/Legends|Kharrus]] lead a diplomatic mission to trade a ransom for the Count.<ref name="DC" />
| |
|
| |
| [[Hondo Ohnaka/Legends|Hondo Ohnaka]], the leader of the pirates, however, proved treacherous and captured Skywalker and Kenobi, hoping to gain an additional ransom for them. Representative Binks rescued them, though the mission did come at the cost of Senator Kharrus' life, and Dooku again evaded the clutches of the Republic.<ref name="TGG">{{TCW|The Gungan General}}</ref>
| |
|
| |
| ====Battle of Orto Plutonia====
| |
| {{Main|Battle of Orto Plutonia/Legends}}
| |
| {{Quote|Now that you have created peace between your people and the Talz, remember one crucial thing... Make it last, senator. Make it last.|Obi-Wan to Senator [[Riyo Chuchi/Legends|Riyo Chuchi]]|<ref name="Trespass">{{TCW|Trespass}}</ref>}}
| |
| A short time later, Kenobi and Skywalker were called to [[Orto Plutonia/Legends|Orto Plutonia]] to ascertain why the Republic had lost contact with a clone outpost there. The Jedi and clones were accompanied by [[Chairman/Legends|Chairman]] [[Chi Cho/Legends|Chi Cho]] of [[Pantora/Legends|Pantora]] and Senator [[Riyo Chuchi/Legends|Riyo Chuchi]], who had been recalled to the Pantoran system by Cho so that he could use her Senatorial authority to command the Jedi. Orto Plutonia was technically under the control of the [[Pantoran Assembly/Legends|Pantoran Assembly]], and as such, Cho felt that he should be directly involved in the Jedi's investigation.<ref name="Trespass" />
| |
|
| |
| With Rex, Kenobi found the Republic base to be devoid of life, all clones stationed there having been killed. Similarly, they found a nearby Separatist base to be likewise affected and found clues of a third party being involved in the demise of both forces. Skywalker and Kenobi then followed the clues to a nearby canyon, where they spotted light reflections. Shortly afterwards they met primitive, but sentient, inhabitants : the [[Talz/Legends|Talz]]. Despite the language barrier, Kenobi and Skywalker made it clear that their mission was one of peace, and they arranged a diplomatic meeting between the Pantorans and the Talz.<ref name="Trespass" />
| |
|
| |
| [[File:ObiWanHugged-Trespass.png|thumb|left|250px|Kenobi is surprised by a hug given by the Talz chieftain in lieu of a handshake.]]
| |
| When they delivered the news, Chairman Chi Cho arrogantly refused to believe that the Talz could be considered a sentient race and called them trespassers and animals, stating that Pantora hadn't evidence of life on the planet in all their history. Riyo Chuchi tried to mediate, feeling that it was for the Senate to decide the matter, but to no avail.<ref name="Trespass" />
| |
|
| |
| Upon arrival at the meeting place, the Talz leader, [[Thi-Sen/Legends|Thi-Sen]], politely asked that the Republic and Pantora leave them in peace and withdraw their presence from Orto Plutonia. However, Chi Cho still refused to accept the Talz as sentients and arrogantly declared Plutonia as sovereign Pantoran property, deliberately provoking a war. In order to gain sanctity for his actions, he declared this to be an internal affair of Pantora so as to remove the Jedi from the equation. Skywalker and Kenobi appealed to Riyo Chuchi, to find a way to resolve the political matter diplomatically. In response she contacted the Speaker of the Pantoran Assembly, who granted her the authority to negotiate peace and declared the Chairman out of order.<ref name="Trespass" />
| |
|
| |
| However, this solution came too late: while returning to their base, Chi Cho and his escort were ambushed by a Talz war party, forcing them to fight back, and Chairman Cho was felled by a spear in his back. Skywalker, Kenobi and Senator Chuchi arrived in time to save Cho, Rex and the remaining escort from being overrun, but even with his last breath, Cho insisted on killing the Talz for the 'good' of his people as his final command. Chuchi politely declined, informing him of the Assembly's decision. Dumbfounded that he was overruled and that his people preferred peace to war, Chi Cho expired. Senator Chuchi pursued a peaceful approach and managed to cease hostilities, conceding sovereignty of Plutonia to the Talz. As she and the Jedi boarded a gunship offworld, Kenobi congratulated the Senator in creating peace and urged her to make it last and act as an example to others.<ref name="Trespass" />
| |
|
| |
| ====The Blue Shadow Virus====
| |
| =====Stopping Dr. Vindi=====
| |
| {{Main|Raid on Nuvo Vindi's laboratory/Legends}}
| |
| [[File:Obi-Wan_virus_bombs.png|thumb|right|250px|Obi-Wan, shortly after Vindi activates the virus bombs]]
| |
| {{Quote|Where are they?''"<br />"''Patience. They'll be here in a moment. You seem a bit on edge.''"<br />"''There's a good chance we're about to destroy all life on this planet, including the Senator's, so, yes. I'm on edge. Why aren't you?''"<br />"''I'm better at hiding it.|Obi-Wan and Anakin|<ref name="BSV">{{TCW|Blue Shadow Virus (episode)|Blue Shadow Virus}}</ref>}}
| |
| The Jedi Council later sent Kenobi, Skywalker and Tano, to Naboo in response to intelligence that suggested that a Separatist bio-lab had been set up on the planet. Senator Amidala and [[Associate Planetary Representative|Representative]] Jar Jar Binks set off to search for the lab, but contact was lost, and Skywalker sent Tano along with the Gungan native [[Peppi Bow/Legends|Peppi Bow]] to locate them. Meanwhile, Skywalker and Kenobi learned from new information discovered by Captain [[Gregar Typho/Legends|Gregar Typho]] that Separatist scientist [[Nuvo Vindi/Legends|Nuvo Vindi]] was using the lab to perfect the deadly [[Blue Shadow Virus/Legends|Blue Shadow Virus]] so as to release it into key Republic star systems.<ref name="BSV" />
| |
|
| |
| When Tano and Bow searched the swamp where Amidala and Binks disappeared, they accidentally found a spy cam. While hiding from the spy cam, Tano contacted Skywalker and Kenobi, who told her to detonate a bomb in the south bunker to create a distraction. After this, Kenobi entered the lab and aided Tano, before searching for Vindi's [[virus bomb]]s. Though Vindi attempted to release the virus, the Jedi apprehended him and rescued Amidala and Binks.<ref name="BSV" />
| |
|
| |
| [[File:Angel2.png|thumb|left|250px|Kenobi converses with an [[Diathim/Legends|Angel]]]]
| |
|
| |
| =====Finding a cure=====
| |
| {{Main|Mission to Iego/Legends}}
| |
| {{Quote|A great leap forward often requires taking two steps back.|Obi-Wan telling Anakin to slow down|<ref name="MoaTM">{{TCW|Mystery of a Thousand Moons}}</ref>}}
| |
| When Kenobi and Skywalker prepared to transfer Vindi for trial, Tano, Amidala and several clones discovered that a vial of the virus was missing. Though they sounded the alarm, it was not in time, and Vindi's still-at-large servant droid [[LEP-86C8/Legends|LEP-86C8]] detonated a bomb, releasing the virus throughout the lab. The Jedi were forced to make their way to the planet of [[Iego/Legends|Iego]] to search for the antidote to the virus, to save Amidala and Tano.<ref name="MoaTM" />
| |
|
| |
| While on Iego, the Jedi freed the people there from an insidious Separatist [[Drol/Legends|security system]] designed to prevent the inhabitants from leaving the planet, with the help of young [[Jaybo Hood/Legends|Jaybo Hood]]. They also located the [[Reeksa/Legends|antidote]] and returned in time to save Tano, Amidala and most of the clones.<ref name="MoaTM" />
| |
|
| |
| ====Battle of Ryloth====
| |
| {{Main|Battle of Ryloth/Legends}}
| |
| =====Destroying the blockade=====
| |
| {{Quote|Ahsoka, this is Obi-Wan. May we begin our landing?''"<br />"''Yes, master. You're cleared for ground assault.''"<br />"''I won't even ask where the rest of Skywalker's fleet is. Or why he's in an ''escape pod''.''"<br />"''That's…probably for the best.|Kenobi and Ahsoka Tano during the [[Battle of Ryloth/Legends|Battle of Ryloth]]|<ref name="Storm Over Ryloth">{{TCW|Storm Over Ryloth}}</ref>}}
| |
| [[File:Obi-Wan_and_Mace_Storm_Over_Ryloth.png|thumb|right|250px|Kenobi and Mace Windu arrive out of hyperspace near Ryloth.]]
| |
| After [[Techno Union/Legends|Techno Union]] leader [[Wat Tambor/Legends|Wat Tambor]] seized control of [[Ryloth/Legends|Ryloth]] and its [[Twi'lek/Legends|inhabitants]], the Jedi Council devised a plan for Kenobi and Mace Windu to lead a ground assault to invade and liberate the planet. Skywalker and Tano were dispatched to destroy the Separatist blockade surrounding the planet and clear the way for the invasion forces, but their first attack failed horribly. Skywalker reported that they had lost [[Redeemer/Legends|a cruiser]] and an entire squadron of fighters, and that Tano was shaken from losing so many men. Kenobi acknowledged Tano's need for support and time to get over the ordeal, but told Skywalker that he would need her to succeed. Even with only half his forces remaining, Skywalker was given only one planetary rotation to destroy the blockade. He piloted the [[Defender/Legends|''Defender'']] into the lead control ship, forcing its commander, Captain [[Mar Tuuk/Legends|Mar Tuuk]], to flee, leaving only droids in charge of the blockade. With the support of a recovered [[Admiral/Legends|Admiral]] [[Wullf Yularen/Legends|Yularen]], Tano led a successful attack on the blockade. After the invasion forces arrived out of hyperspace, Tano told Kenobi that the way was clear, but Kenobi didn't even want to know how Skywalker had devised a plan to end up in an [[Escape pod/Legends|escape pod]] instead of commanding his fleet.<ref name="Storm Over Ryloth" />
| |
|
| |
| =====Landing on the planet=====
| |
| {{Quote|We need to remember why we're here. We came to aid the Twi'leks, not destroy their home.|Kenobi to [[Ghost Company/Legends|Ghost Company]] aboard the [[Crumb Bomber/Legends|''Crumb Bomber'']]|audio=AidTheTwileks-InnocentsOfRyloth.ogg|<ref name="Innocents of Ryloth">{{TCW|Innocents of Ryloth}}</ref>}}
| |
| [[File:Obi-Wan_distracts_gutkurrs.jpg|thumb|left|250px|Kenobi distracts the [[Gutkurr/Legends|gutkurrs]].]]
| |
| As Kenobi and [[Ghost Company/Legends|Ghost Company]] left the ''Acclamator'' assault ships aboard the [[Crumb Bomber/Legends|''Crumb Bomber'']] and other [[Low Altitude Assault Transport/infantry/Legends|gunships]] to land on [[Nabat/Legends|Nabat]], [[Proton cannon/Legends|proton cannons]] from below attacked the ''Acclamator'' ships. Mace Windu tasked Kenobi with destroying the cannons and allowing the transports to land. To prevent the destruction of the Twi'leks' home, the clone forces utilized only blasters and [[Electromagnetic pulse grenade|EMP grenades]]. After taking out the droids in a bunker on the outskirts of the village, Kenobi and the clones entered the city and set up a temporary camp. Kenobi sent Commander Cody, [[Wooley/Legends|Wooley]], [[Waxer/Legends|Waxer]] and [[Boil/Legends|Boil]] to scout ahead. Cody and Wooley came back and reported that the droids had taken the Twi'leks hostage. During a following conference with Windu, Kenobi stated that the prisoners would make the mission harder but not impossible. However, a [[Separatist probe droid/Legends|recon droid]] sent by [[T-series tactical droid|tactical droid]] [[Commander/Legends|commander]] [[TX-20/Legends|TX-20]] spied on them. After Cody realized that Waxer and Boil still had not returned, Cody sent a transmission out before the Republic forces moved on. Upon entering the village, Kenobi and the clones encountered starved [[Gutkurr/Legends|gutkurrs]], who attacked them. Kenobi lured the creatures into an alley with the Force, and Cody and the clones shot at a bridge above its entrance, trapping the creatures.<ref name="Innocents of Ryloth" />
| |
|
| |
| [[File:TX-20_targets_Obi-Wan_and_Numa.png|thumb|right|250px|TX-20's tank targets Kenobi and Numa.]]
| |
| Waxer and Boil emerged out of an underground tunnel with the young Twi'lek girl [[Numa/Legends|Numa]], and Kenobi understood why they had been "sidetracked." Kenobi conversed with Numa in [[Twi'leki/Legends|Twi'leki]] and learned that she could lead them to the prisoners. He tasked Cody with creating a diversion for the droids, while he went with Waxer, Boil and Numa to the underground passages. As Cody and his men distracted the droids, Kenobi freed the Twi'lek hostages, and they fled into the tunnels. Kenobi took control of a proton cannon, and with the help of Waxer and Boil, he took out the other cannons. However, a shot from TX-20's [[Armored Assault Tank|tank]] blasted the three aside. Numa first ran over to the clones and then to Kenobi, but as TX-20 targeted the two, the former Twi'lek hostages overran the tank and destroyed the droid, and Kenobi attempted to shield Numa's eyes from the violence. After the ''Acclamator'' transports landed, Mace Windu commended Kenobi on his victory, but stated that the next mission was much harder: to retake the capital city of [[Lessu/Legends|Lessu]] and free the planet. As the Republic forces departed for the capital, Numa called "Nerra!" out to Waxer and Boil one last time, and Kenobi translated for them: "Nerra" meant "brother."<ref name="Innocents of Ryloth" />
| |
|
| |
| =====Capturing the southern hemisphere=====
| |
| After Windu and his forces headed for Lessu, Kenobi went with his forces to capture the southern hemisphere of Ryloth. Kenobi successfully took the [[Jixuan desert/Legends|Jixuan desert]]. After Windu enlisted the help of the [[Twi'lek freedom fighters]], he took Lessu and captured Wat Tambor, freeing the planet from Separatist rule.<ref name="Liberty on Ryloth">{{TCW|Liberty on Ryloth}}</ref>
| |
|
| |
| ====Battle of Felucia====
| |
| {{Main|First Battle of Felucia/Legends}}
| |
| [[File:BattleOfFelucia-HH.jpg|thumb|left|230px|Kenobi and Skywalker during the first battle of Felucia]]
| |
| Later, Master Kenobi was sent with Skywalker and Tano to Felucia, which had been invaded by the Separatists. While Obi-Wan, Skywalker, Commander Cody and Captain Rex stayed with the main body of troops to defend their clearing-based emplacement of AT-TE walkers, Tano led two AT-TE walkers and a Juggernaut tank on a patrol of the dense jungle.<ref name="Holocron Heist">{{TCW|Holocron Heist}}</ref>
| |
|
| |
| Kenobi realized that they were losing and ordered the retreat as soon as Master Plo Koon arrived to help them. Kenobi contacted Tano, who refused to retreat. Even when Skywalker and Kenobi arrived to pick her up, she at first refused to pull back before Skywalker convinced her that they would not win this battle. Kenobi later reported to the rest of the Jedi Council about Tano's actions during the battle.<ref name="Holocron Heist" />
| |
|
| |
| ====Stolen holocron====
| |
| {{Main|Mission to the Jedi Temple|Mission to Black Stall Station/Legends}}
| |
| Kenobi was present in the Jedi Temple when [[Cad Bane/Legends|Cad Bane]] and [[Cato Parasitti/Legends|Cato Parasitti]] infiltrated the Temple to steal a Jedi holocron. Kenobi teamed up with Skywalker to find Bane while Tano captured Parasitti. Despite the Jedi's attempts to find him, Bane smuggled the holocron out of the Temple.<ref name="Holocron Heist" />
| |
|
| |
| [[File:KenobiBlackStallStation-CotF.jpg|thumb|right|250px|Kenobi defending against Bane's automated laser defense system on Black Stall Station]]
| |
| Later, Kenobi went to Rodia in an attempt to capture Bane and protect an infant Rodian named [[Wee Dunn/Legends|Wee Dunn]]. His attempt failed and Bane escaped.<ref name="Children of the Force">{{TCW|Children of the Force}}</ref>
| |
|
| |
| After Bane was captured by Skywalker and Tano on Naboo, Kenobi and Mace Windu interrogated the bounty hunter in an attempt to get him to tell them where he'd taken the kidnapped children. When Bane refused to answer, Kenobi, Skywalker and Windu all used a mind trick on him at the same time. Bane resisted, but the Jedi's combined efforts compelled him to agree to take them to the children and the holocron.<ref name="Children of the Force" />
| |
|
| |
| Kenobi and Windu went with the bounty hunter to his [[Black Stall Station/Legends|hideout]] in the [[Rogue Antar system/Legends|Rogue Antar system]]. Bane took them to the holocron, but Windu accidentally triggered the intruder alert system, causing lasers to fire on the two Jedi Masters. While Kenobi and Windu were occupied, Bane fled. However, Kenobi and Windu still retrieved the holocron and escaped the base just before it was destroyed. Meanwhile, Skywalker and Tano rescued the kidnapped children from [[Mustafar/Legends|Mustafar]].<ref name="Children of the Force" />
| |
|
| |
| ====Skirmish on Felucia====
| |
| {{Main|Skirmish on Felucia/Legends}}
| |
| In [[21 BBY/Legends|21 BBY]], the disappearance of the medical station orbiting the fungi world of [[Felucia/Legends|Felucia]] prompted the Jedi Council to send Kenobi, Anakin Skywalker and Ahsoka Tano to investigate. They were immediately attacked and forced to crash-land by [[Variable Geometry Self-Propelled Battle Droid, Mark I/Legends|vulture droids]] from a Separatist deployment station. The Jedi ejected before the complete destruction of their shuttle and set out to find help. They discovered a [[Nysillin/Legends|nysillin]] farm village, but it was apparently deserted, though Kenobi noted that the tools were scattered everywhere and the crops ready to be harvested. Soon after Skywalker and Tano encountered farmers hiding in their house's cellar, the master-apprentice duo was surrounded by four bounty hunters: the gang leader [[Sugi (bounty hunter)/Legends|Sugi]], [[Embo/Legends|Embo]], [[Rumi Paramita/Legends|Rumi Paramita]] and [[Seripas/Legends|Seripas]]. The tension rose when Obi-Wan entered the house, but [[Casiss]], the village elder, persuaded everybody to stand down.<ref name="Bounty Hunters (episode)">{{TCW|Bounty Hunters (episode)|Bounty Hunters}}</ref>
| |
|
| |
| [[File:Embo_hurt.png|thumb|right|250px|Sugi, Kenobi and others come to the aid of Embo as he lay down after being shot]]
| |
| Casiss explained that the villagers hired the bounty hunters to protect themselves against pirates who regularly raided their settlement and demanded a tribute. The elder then asked the Jedi for help in repelling the pirates, but Kenobi refused, saying that it would only attract General Grievous' attention, which would be far worse. Soon after the pirates came to the village to make their tribute demand, Obi-Wan and Anakin were surprised to meet the [[Weequay/Legends|Weequay]] Hondo Ohnaka, whom they previously came across on [[Florrum/Legends|Florrum]].<ref name="TGG" /> Ohnaka then acted friendly with the Jedi and tried to buy off the bounty hunters, who refused, stating they didn't break deals. Kenobi offered to buy transportation to a Republic outpost from the pirate, but Hondo refused, not being interested in [[Galactic Credit Standard|Republic credits]]. The pirates departed after threatening the villagers. The Jedi took on the preparations for the coming battle, training the farmers for combat and organizing the defenses of the village. After the elimination of a pirate scout by Embo, Ohnaka attacked. The bounty hunters and Jedi held back the onslaught until the chief pirate used his [[WLO-5 speeder tank|tank]]. Skywalker jumped onto the bluff from where Ohnaka was firing and defeated the pirate captain, forcing the gang to retreat. The battle being over, Sugi offered Kenobi and the others a ride to a Republic outpost.<ref name="Bounty Hunters (episode)" />
| |
|
| |
| ====The Zillo Beast====
| |
| {{Main|Battle of Malastare/Legends|Zillo Beast/Legends incident}}
| |
| [[File:Zillo_Beast_takes_a_swing.png|thumb|left|250px|Kenobi believed the last Zillo Beast should be protected, not killed and researched]]
| |
| As fuel was vital during the Clone Wars, worlds offering such resources were obvious targets for the opponents. Thus the Confederacy of Independent Systems [[Battle of Malastare/Legends|attacked]] the world [[Malastare/Legends|Malastare]] and its vital [[Dug/Legends|Dug]] fuel resources. The Galactic Republic stopped the invading [[Separatist Droid Army/Legends|Separatist Droid Army]] with a new [[Superweapon/Legends|superweapon]] called the [[Electro-proton bomb/Legends|electro-proton bomb]]. The battle was a Republic victory, but the superweapon unleashed a [[Zillo Beast/Legends|Zillo Beast]] on Malastare. Eventually, the monster was knocked out and taken to Coruscant for study on the order of Supreme Chancellor Palpatine.<ref name="TZB">{{TCW|The Zillo Beast}}</ref> Mace Windu was skeptical, fearing that the creature was too dangerous to be brought to the planet. He shared his concerns with Kenobi, who agreed and suggested letting Anakin Skywalker convince the Chancellor to send back the beast. Kenobi talked to Padmé Amidala, and together they convinced Anakin to reason with Palpatine. But the Chancellor had ordered the [[Sionver Boll/Legends|scientist]] studying the Zillo Beast to kill it in order to extract its scales and make armor out of it. However, when a small amount of poison was applied, the creature became agitated and aggressive, broke free of its bonds, smashed its way out of the laboratory and started rampaging across Coruscant, unhindered by all efforts to stop it. The Zillo Beast targeted specifically Palpatine, capturing his shuttle mid-flight and breaking it in two with its huge hands. Kenobi and Windu saved the Chancellor using [[Telekinesis/Legends|Force-grip]] on the front half of the ship. Then [[Low Altitude Assault Transport/infantry/Legends|gunships]] arrived and killed the creature by firing poison gas bombs into into its mouth. As Kenobi and the others looked on in regret, the Zillo Beast, confused, in pain and dying, finally succumbed to the poison and fell from the roof of the Senate to its death below.<ref name="The Zillo Beast Strikes Back">{{TCW|The Zillo Beast Strikes Back}}</ref>
| |
|
| |
| ====The honorable enemy====
| |
| {{Main|Blockade of Valahari|Duel on Valahari}}
| |
| {{Quote|The noble families of this sector have grown tired of Republic ''meddling'' in our affairs—tired of unfair taxes and regulation. We consider ourselves ''neutral'' in the war, but we will do what we must for the good of our economy.|Harko Vane|<ref name="The Clone Wars 10">[[The Clone Wars 10|''The Clone Wars'' 10]]</ref>}}
| |
| [[File:Duel_on_Valahari.jpg|thumb|right|250px|Kenobi duels Asajj Ventress on Valahari]]
| |
| Around 21 BBY,<ref name="Star Wars Annual 2011">''[[Star Wars Annual 2011]]''</ref> the people of the neutral planet [[Valahari/Legends|Valahari]] began trade relations with the Confederacy of Independent Systems. The Valahari were prolific [[Starship/Legends|starship]] builders, and the Confederate leader, Count Dooku, was an old friend of [[Harko Vane]], the [[Viscount (title)/Legends|Viscount]] of the planet's royal [[House of Vane]]. Hoping to persuade the Valahari to stop selling fighter engines to the Separatists, Kenobi along with Anakin Skywalker went to Valahari on a diplomatic mission. However, the Valahari refused to comply, and the Republic established a [[Blockade of Valahari|blockade]] of the world.<ref name="SWTCWhc">''[[Star Wars: The Clone Wars: Hero of the Confederacy]]''</ref>
| |
|
| |
| Refusing to acknowledge the blockade, Viscount Harko Vane tried to break through with a convoy of [[Freighter/Legends|freighters]]. Kenobi did not want to resort to using the force, but Vane's freighter exploded in what looked like a Republic attack. In reality, his ship had been sabotaged by Dooku's Dark Acolyte Asajj Ventress. Vane's death prompted his escort to open fire on the Republic forces, and after a brief fight, the [[Battle of Valahari|battle]] ended. The Republic retained the blockade, so the Valahari, believing the Republic responsible for their leader's death, joined the Confederacy. Days later, the Valahari forces led by Harko's son, [[Tofen Vane|Tofen]], [[Second battle of Valahari|destroyed]] the Republic blockade of the planet. Tofen then proved highly [[Battle of unidentified planet (Aqualish Jedi)|successful]] and relentless in his pursuit of the Republican forces. He even defeated Skywalker, a renowned Republican ace, in single combat during the [[Battle of the Hexus system]], though his forces were forced to retreat after the timely arrival of reinforcements.<ref name="SWTCWhc" />
| |
|
| |
| Meanwhile on Valahari, Kenobi [[Duel on Valahari|discovered]] that Ventress was responsible for the sabotage of Harko Vane's ship. He informed Vane's widow, [[Elodore Vane]], of that fact. When his mother confronted Tofen with concrete evidence that Dooku was responsible for his father's death, the young pilot refused to give up his determination to fight the Republic. Some time later the Republic found [[Harko Station|Vane's base]] in the [[Veil Nebula]] thanks to a [[Homing beacon/Legends|homing beacon]] attached to his [[Tempest Zero]] starfighter by Skywalker during the previous battle. A large task force was sent to destroy the base, with Jedi Master Plo Koon and Saesee Tiin as well as Jedi Knight Anakin Skywalker. The Republic fleet [[Battle of the Veil Nebula|destroyed]] the station, and Tofen Vane was killed in a dogfight against Skywalker.<ref name="SWTCWhc" />
| |
|
| |
| ====Second Battle of Geonosis====
| |
| {{Main|Second Battle of Geonosis/Legends}}
| |
| {{Quote|As Captain Rex said, this will be a full scale planetary invasion. We're settling the score on Geonosis once and for all.|Obi-Wan Kenobi|<ref name="Prelude to Point Rain">{{SWArchive|url=theclonewars/news20091103fd/index.html|text=Fan Days Script: A Prelude to "Point Rain"|archivedate=20110629021855}}</ref>}}
| |
| =====Recapturing the planet=====
| |
| In [[21 BBY/Legends|21 BBY]], after receiving a report from Clone Captain Rex, the Jedi Council sent Generals Obi-Wan Kenobi, Ki-Adi-Mundi, and Luminara Unduli to lead the Grand [[Army/Legends|Army's]] attack on the droid foundries of Geonosis,<ref name="Prelude to Point Rain" /> as they were considered to be a significant threat to the Republic's safety.<ref name="CWA: Geonosis Saga">[[Star Wars: Clone Wars Adventures (video game)|''Star Wars: Clone Wars Adventures'' video game]], "Geonosis Saga" mini-game</ref> After the Republic fleet arrived in Geonosian [[Realspace/Legends|space]] and entered the planet's orbit, Skywalker, Tano,<ref name="Landing at Point Rain">{{TCW|Landing at Point Rain}}</ref> and Yularen—who had successfully repelled a diversionary attack from Grievous on Dorin<ref name="CWA: Starfighter">[[Star Wars: Clone Wars Adventures (video game)|''Star Wars: Clone Wars Adventures'' video game]], "Starfighter" mini-game</ref>—rendezvoused with the fleet. The Jedi then conferred with Supreme Chancellor Palpatine and Jedi Generals Unduli, Yoda, and Mace Windu. Based on intelligence they had received, Mundi and Kenobi concluded that [[Poggle the Lesser/Legends|Poggle the Lesser]] was holed up within his primary droid factory, which was being protected by a massive [[Ray Shield Fortress|ray shield]].<ref name="CWA: Geonosis Saga" /><ref name="Landing at Point Rain" />
| |
|
| |
| [[File:GeonosisPlanning.png|thumb|left|250px|Kenobi, other Jedi and the Chancellor plan their invasion of Geonosis.]]
| |
| With their primary target being the shield generator at the Ray Shield Fortress, the Jedi mounted a three-pronged attack on the Geonosian defenses. Kenobi and Clone Commander Cody commenced the central push while Mundi and Skywalker led the northern and southern assaults, respectively. The troops finally rendezvoused at<ref name="Landing at Point Rain" /> [[Point Rain/Legends|Point Rain]],<ref name="CWA: Geonosis Saga" /> a site that was a short distance away from the Ray Shield Fortress; there, they established a staging area before destroying the generator and disabling the factories' ray shield, making way for the rest of the clone trooper forces to safely land. All of the Geonosians at the Ray Shield Fortress were forced to surrender, and the injured Kenobi and Mundi returned to the fleet with the rest of the wounded for treatment.<ref name="Landing at Point Rain" /> Left in charge of the Republic forces, Skywalker combined his team with Mundi's remaining troops and set out for Poggle the Lesser's primary droid foundry. Finally, Luminara Unduli's Padawan Barriss Offee and Skywalker's Ahsoka Tano destroyed the foundry reactor, causing the factory to collapse.<ref name="Weapons Factory">{{TCW|Weapons Factory}}</ref>
| |
|
| |
| =====The Geonosian Queen=====
| |
| With several key droid factories destroyed, the Jedi began a cleanup of Geonosis and also mounted an intense campaign to find [[Poggle the Lesser/Legends|Poggle the Lesser]], who had escaped his primary foundry's destruction and was evading the Republic's efforts to locate and apprehend him. Unduli spearheaded the search and followed Poggle to the abandoned [[Progate Temple/Legends|Progate Temple]], where she was captured by the Archduke and taken to the lair of Geonosian Queen [[Karina the Great/Legends|Karina the Great]] in the catacombs below. Tracking Unduli's last known location, Kenobi and Skywalker set out with a clone platoon to rescue her. Battling hordes of "undead" Geonosian warriors who were being reanimated by the Queen's brain worm parasites, the Jedi and their troops finally located Unduli in Karina's throne room. Skywalker was set to mount a full-on attack on the Geonosians, but Kenobi, who was after the reasons behind the Queen's abduction of Unduli, devised a different plan. While Commander Cody stealthily moved the men into place, Kenobi and Skywalker marched straight into the throne room and through the lines of Geonosians zombies to speak with Karina. Kenobi told her that her rule was at an end, but the shrieking Queen refused to recognize the Jedi's authority.<ref name="Legacy of Terror">{{TCW|Legacy of Terror}}</ref>
| |
|
| |
| [[File:CodyLoT.jpg|thumb|right|250px|Cody and his men provide Kenobi, Skywalker and Unduli with blaster cover from the attacking Geonosian zombies.]]
| |
| Karina then revealed her intentions: instead of seeking the Jedi's elimination, she wished to possess them using her brain worms, as the Jedi would make valuable additions to her army of warriors. As Poggle placed one of the parasites on Unduli so that the worms' power could be demonstrated, Kenobi signaled Cody and the clones to attack. The troopers blasted their headlamps on the Geonosians and temporarily blinded them, allowing Kenobi and Skywalker to retrieve their lightsabers from the drones with the Force. While Kenobi himself took Unduli's brain worm as a sample for study, Skywalker freed Unduli and returned her lightsaber to her. The Jedi then confronted Poggle, and Skywalker shackled the Geonosian Archduke in a pair of binders and brought him along with them before knocking Kenobi's worm sample out of his hand and crushing it beneath his boot. The Jedi and their troops destroyed much of the Queen's lair during their escape, burying Karina the Great and her warriors beneath the temple, and the Republic's recapture of Geonosis was secured.<ref name="Legacy of Terror" />
| |
|
| |
| ====Battle of Saleucami====
| |
| {{Main|Battle of Saleucami/Legends}}
| |
| {{Quote|The story of Obi-Wan Kenobi ends here.|General Grievous as he was about to finish Kenobi|<ref name="GI">{{TCW|Grievous Intrigue}}</ref>}}
| |
| Soon after, General Grievous captured Jedi Master and Council member Eeth Koth. He sent a transmission to the remainder of the Council on Coruscant in which he brutally tortured Koth to express his hatred for the Jedi Order. Unbeknownst to the [[Cyborg/Legends|cyborg]] General, Koth used discreet hand signals to inform the Council of his location. Using the information Koth provided, Kenobi, Adi Gallia and Anakin Skywalker organized an assault force to engage the Confederacy at Saleucami, rescue Koth, and capture General Grievous.<ref name="GI" />
| |
|
| |
| [[File:Grievous vs. Kenobi Saleucami.jpg|thumb|left|260px|Kenobi engages Grievous in the docking tube.]]
| |
| Kenobi was the first of the Jedi to arrive at Saleucami and engaged Grievous's forces with a [[Fleet/Legends|fleet]] of [[Venator-class Star Destroyer/Legends|Star Destroyers]] and nimble [[Consular-class cruiser (Charger c70 retrofit)/Legends|''Consular''-class frigates]] under the command of [[Admiral/Legends|Admiral]] [[Wullf Yularen/Legends|Wullf Yularen]]. Early in the battle, Kenobi's [[Arquitens-class light cruiser/Legends|light cruiser]] was caught in a tractor beam from Grievous's Separatist destroyer and was boarded by [[Battle droid/Legends|battle droid]] forces and the cyborg General himself. While Grievous was [[Lightsaber duel/Legends|dueling]] Kenobi aboard the [[Cruiser/Legends|cruiser]], Skywalker and Gallia entered the battle and infiltrated the General's [[Recusant-class light destroyer/Legends|destroyer]] to rescue Eeth Koth. Despite Grievous's preparations for such an occurrence, the two Jedi were successful in freeing the captive Master and getting him off the ship. Meanwhile, Grievous, understanding that Kenobi had the upper hand in their duel, retreated to his destroyer and led his battle droids onto a [[C-9979 landing craft/Legends|landing craft]] bound for Saleucami's surface. During the descent, the craft collided with debris from the battle, forcing Grievous to flee the doomed vessel in an [[Escape pod/Legends|escape pod]].<ref name="GI" />
| |
|
| |
| While Skywalker continued the battle in orbit, Kenobi led a force of clone troopers to the planet's surface to hunt down Grievous. The cyborg General evaded and fled from the Republic forces, hoping to reach an escape pod with a functioning [[Transmitter/Legends|transmitter]] in order to call for an evacuation [[Transport/Legends|transport]]. During the search for Grievous, Clone Captain CT-7567 was seriously injured, necessitating aid from local [[Farm/Legends|farmer]] [[Cut Lawquane/Legends|Cut Lawquane]], a clone who had deserted the Grand Army of the Republic. During the Captain's stay at [[Lawquane farmstead|Lawquane's farm]], [[BX-series droid commando/Legends|droid commandos]] that had previously escaped the doomed [[Landing craft/Legends|landing craft]] attacked the farm homestead and were repelled by CT-7567 and the former [[Trooper/Legends|trooper]]. Meanwhile, Kenobi caught up with and engaged Grievous, who fled the battle once a [[Sheathipede-class transport shuttle/Legends|''Sheathipede''-class shuttle]] arrived to ferry him away.<ref name="TD">{{TCW|The Deserter}}</ref>
| |
|
| |
| ====Battle of Kamino====
| |
| {{Main|Battle of Kamino/Legends}}
| |
| {{Quote|All too easy.''"<br />"''Define 'easy,' General.|Grievous being confronted by Kenobi at Kamino|<ref name="ARC Troopers (episode)">{{TCW|ARC Troopers}}</ref>}}
| |
| After the destruction of the Rishi moon tracking station, Kenobi and Skywalker intercepted a coded message between Ventress and Grievous. Generals Kenobi and Skywalker, Commander Cody, Captain Rex, and troopers of the [[501st Legion/Legends|501st]] went to Kamino to aid in its defense. As Skywalker fought in the space above Kamino, Kenobi took a [[Kamino submarine]] and discovered Ventress's forces readying their assault crafts under water. [[Aqua droid/Legends|Aqua droids]] attacked his submarine, but he escaped thanks to a passing [[Aiwha/Legends|aiwha]]. The Jedi General managed to get back and recalled Skywalker to the city as the Separatists commanders Grievous and Ventress attacked; while Kenobi faced off against Grievous, Skywalker engaged Ventress in combat. The two generals dueled until an [[Trident-class assault ship/Legends|assault craft]] destroyed the platform they were dueling on. Grievous thought he had defeated Kenobi, but an aiwha saved the Jedi again. However, Grievous and Ventress escaped again.<ref name="ARC Troopers (episode)" />
| |
|
| |
| ====The Death Watch threat====
| |
| {{Main|Mandalore Defense Resolution/Legends}}
| |
| {{Quote|We'll have to stand and fight. Or in your case, just stand.|Obi-Wan, to Satine|audio=StandAndFight-TMP.ogg|<ref name="TMP">{{TCW|The Mandalore Plot}}</ref>}}
| |
| [[File:Memorial_Shrine_bombing.jpg|thumb|right|250px|The memorial shrine is bombed as Kenobi and Duchess Satine Kryze look on.]]
| |
| =====Terrorism on Mandalore=====
| |
| {{Quote|Well, Master Kenobi, my shining Jedi Knight to the rescue once again.''"<br />"''After all these years, you're even more beautiful than ever.''"<br />"''Kind words for a man who accuses me of treachery.|Duchess Satine and Kenobi|<ref name="TMP" />}}
| |
| Later in the war, the Jedi Council sent Kenobi to investigate rumors stating that Mandalore was forming an army to help the Separatists. Arriving at [[Sundari/Legends|Sundari]] on Mandalore he was reunited with the [[Duchess of Mandalore|Duchess]] Satine, whom he and Master Qui-Gon Jinn protected many years ago during the [[Mandalorian Civil War (True Mandalorians)|Mandalorian Civil War]].<ref name="VoTEpGuide">{{SWArchive|url=theclonewars/guide/episode213.html|text=''The Clone Wars'' Episode Guide: Voyage of Temptation|archivedate=20110615074612}}</ref> Kenobi showed Duchess Kryze, [[Prime Minister/Legends|Prime Minister]] [[Almec/Legends|Almec]] and Senator [[Tal Merrik/Legends|Merrik]] of [[Kalevala/Legends|Kalevala]] the hologram of a Mandalorian warrior sabotaging a Republic cruiser. Almec and Satine assured the Jedi that Mandalore was not involved in this attack and only wanted to [[Council of Neutral Systems/Legends|stay out]] of the devastating conflict. On a walk through [[Peace Park/Legends|Peace Park]], Kryze told Kenobi of a rogue Mandalorian group known as [[Death Watch/Legends|Death Watch]], which was opposed to her peaceful ways. She claimed she had worked to root out these criminals; at that moment, a terrorist [[Bombing of the Memorial Shrine/Legends|blew up the memorial shrine]] where Satine and Obi-Wan were walking. As they rushed in to rescue the injured, Obi-Wan had the guards round up everyone at the scene. [[Death Watch bomber/Legends|A man]] fled from from the scene, and Kenobi pursued the bomber and cornered him with his lightsaber. After a brief firefight and struggle, the man jumped off a balcony, preferring suicide to interrogation by the Jedi. However, Satine and Obi-Wan reached the dying man on the lower floor, where the Mandalorian whispered his last words to the Duchess in [[Concordian/Legends|Concordian]], the dialect of [[Concordia/Legends|Mandalore's moon]].<ref name="TMP" />
| |
|
| |
| [[File:Kenobi_vs_Vizsla.jpg|thumb|left|250px|Kenobi duels Pre Vizsla, the leader of the Death Watch.]]
| |
| Kenobi and Kryze then traveled to the moon, Concordia, to find more about the terrorists. There they met [[Governor/Legends|Governor]] [[Pre Vizsla/Legends|Vizsla]], who had been trying to hunt down the members of Death Watch; the Jedi then went out to investigate the [[Concordian mines/Legends|Concordian mines]]. He was captured by Death Watch warriors and almost killed as they put him on a conveyor belt that led to a rock-crushing machine. Kenobi contacted Kryze back at the local governmental complex and was saved by her. The two escaped the mine but were confronted by the Death Watch warriors and their [[Commander/Legends|commander]]. The commander removed his helmet and revealed himself to be Pre Vizsla, which shocked the Duchess; Vizsla, using a [[Darksaber/Legends|Darksaber]], dueled Obi-Wan briefly, but as the Jedi gained the upper hand, Vizsla ordered his men to fire [[Missile/Legends|missiles]] on him. However, Kenobi and Kryze escaped and returned to Sundari. When Obi-Wan tried to convince her that Death Watch was being backed by the Separatists, she vehemently disagreed. She also restated her neutral stance in the war, even though Kenobi stated that it may not be possible to stay neutral, which slightly angered her. Satine, along with her Jedi escort, then left for Coruscant.<ref name="TMP" />
| |
|
| |
| =====Protecting Duchess Satine=====
| |
| {{Quote|Obi-Wan… it looks like I may never see you again. I don't know quite how to say this, but I've loved you from the moment you came to my aid, all those years ago.''"<br />"''[rolls his eyes] I don't believe this.''"<br />"''Satine, this is hardly the time or place for…[notices her desperation]''"<br />"''All right. Had you said the word, I would have left the Jedi order.|Satine, Merrik, and Obi-Wan Kenobi|<ref name="VoT" />}}
| |
| Kenobi, along with Anakin Skywalker, Captain Rex, Commander Cody and several clone troopers, protected Duchess Satine from Death Watch and the Separatists on board the [[Coronet/Legends|Coronet]] as she traveled to Coruscant and the Galactic Senate. Obi-Wan and Anakin met up with Satine's entourage: Senators [[Kin Robb/Legends|Kin Robb]], [[Tal Merrik/Legends|Tal Merrik]], [[Orn Free Taa/Legends|Orn Free Taa]] and [[Onaconda Farr/Legends|Onaconda Farr]]. There Kenobi and Kryze argued on the nature of the Clone Wars: while Satine wished to remain neutral and promote diplomacy despite potential Separatist involvement, Obi-Wan warned her that may not be possible. Kenobi later told Skywalker of his mission to Mandalore with Qui-Gon Jinn to protect the Duchess; he explained how they lived hand to mouth, not knowing what to expect the next day, which Anakin found romantic. Obi-Wan expressed regrets for abandoning the Duchess at the end of the mission, but said that he lived by the Jedi Code, which forbade attachments. During the following dinner an [[assassin probe]] burst into the room and attacked the guards. Obi-Wan quickly disabled the droid, but it released smaller assassin droids. Satine pulled out a small [[Deactivator hold-out pistol/Legends|droid deactivator]] and blasted the tiny droids, destroying all but one of them. When Skywalker reported to Kenobi that the container from which the droid emerged was marked with a Senate stamp, they knew that one of the Senators was a traitor.<ref name="VoT" />
| |
|
| |
| Kenobi hatched a plan to expose who activated the assassin probes: he put the remaining droid under a lid and walked around the table. The droid jumped at the Duchess and the Senators in the room but stood still for its master, Senator Tal Merrik. Merrik drew a [[Blaster/Legends|blaster]] and held up Satine as a hostage before going to the bridge of the ''Coronet'' and killing all of the crew. He then contacted Death Watch command, who sent three [[Droch-class boarding ship/Legends|boarding ships]] loaded with [[B2 super battle droid/Legends|super battle droids]]. Anakin took charge with Cody and Rex to repel the boarders, while Obi-Wan went to save the Duchess. As Kenobi tried to rescue Kryze, Merrik countered him by threatening to blow up the ship. The Jedi Master followed the Senator as he made his way to the boarding ships. Just as Satine was about to be taken she confessed her love for Obi-Wan despite what was happening. The Jedi stated that he would have left the Jedi Order had she said so before. Merrik let his guard down at the statements of love, which Satine used to her advantage and slammed her heel into his foot. Merrik warned this turn of events made no difference, as he could destroy the ''Coronet'' once he was away. Satine said she wouldn't allow that, but Merrik retorted that if she killed him, she would be a hypocrite and undermine her pacifist ideals. He said to Obi-Wan that if he killed him, he would be a cold-blooded killer in the eyes of the woman he loves. Merrik then was killed by a stab from behind by Skywalker, who stated that he killed a bomber set to destroy the ship. The ''Coronet'' landed on Coruscant and the Senators, along with the Duchess, met with Supreme Chancellor Palpatine. Satine approached Obi-Wan and casually flirted with him.<ref name="VoT" />
| |
|
| |
| =====Defending a friend's honor=====
| |
| {{Quote|Things are changing. And sometimes the line between friend and foe is blurred. Now more than ever.|Obi-Wan after helping Duchess Satine stop the occupation of Mandalore|<ref name="DoM">{{TCW|Duchess of Mandalore}}</ref>}}
| |
| After Duchess Kryze arrived on Coruscant, she defended the case of Mandalore neutrality against a Senate afraid of the [[Death Watch/Legends|Death Watch]] menace. Chancellor Palpatine himself deemed the Death Watch to be a military threat and that the Republic must intervene. Satine dismissed their fears and insisted to keep the affair internal to Mandalorian interests. Palpatine then surprised her with a holographic message of [[Deputy Prime Minister]] [[Jerec (Inquisitor)|Jerec]] begging of Republic assistance. The Duchess did not believe such untruths from Jerec but she could not protest because he was killed in a terror bombing on [[Kalevala/Legends|Kalevala]] earlier that day. Palpatine found the [[Hologram/Legends|hologram]] to be enough evidence to proceed on a mission to liberate Mandalore. The Duchess was appalled by the occupation, seeing it as the Republic trampling Mandalore's right to self-determination, and making the planet a military target. Satine stormed out of the Senate building onto the landing platforms outside. Obi-Wan was there to meet her, but she was too angry to listen to his advice. She and her guards boarded an airspeeder and set off only to crash shortly after due to explosives rigged to the speeder by a [[Unidentified Death Watch assassin/Legends|Death Watch assassin]]; however, she jumped to safety before the crash. Kenobi met her again after a distressing meeting with Palpatine; he expressed his concern that Satine was an obvious target to the Death Watch. Not caring about her own safety, Satine considered the attempt on her life proof that she was right: someone was pushing Mandalore towards war. As the two walked they met Senator Padmé Amidala, who had more bad news. She informed Satine that the Senate voted for the occupation of Mandalore because of her recent assassination attempt and that the invasion was set to begin the next day.<ref name="DoM" />
| |
|
| |
| [[File:SKASOWKPAPMA-DoM.png|thumb|left|300px|Duchess Satine, Generals Skywalker and Kenobi, and Senator Amidala meet with Chancellor Palpatine and Vice Chair Amedda following the revelation of the authentic testimony.]]
| |
| Wanting to know the truth, the Duchess went to the [[Republic Ministry of Intelligence/Legends|Ministry of Intelligence]] to meet her contact, [[Davu Golec/Legends|Davu Golec]]. After he told her the recording of Deputy Minister Jerec viewed by the Senate was a forgery, he gave her a disc containing the undoctored data. But Davu was shot through the heart by a Death Watch assassin. Satine instinctively pulled out her weapon but that made her suspicious to arriving Republic authorities. She ran from the scene and was chased by [[Police droid/Legends|police droids]] and two clone troopers. She soon lost her pursuers in an alleyway with a departing speeder and contacted Kenobi to meet her at [[Coruscant Park]].<ref name="DoM" /> The Jedi met her in the park, and Kryze gave him the real recording of Jerec. But the [[Unidentified Death Watch assassin/Legends|Death Watch assassin]] was still on her tail; Kenobi fought him, but he escaped. While the Duchess turned herself in, Kenobi gave Padmé the recording. She rushed into the session and showed everyone the real message from Deputy Minister Jerec. With the true light shed, the occupation of Mandalore was abolished. The next morning in his office, Palpatine expressed his gratitude and apologies to Duchess Satine Kryze for uncovering the real truth. Satine expressed her thanks to Obi-Wan Kenobi for his undying friendship in these most uncertain times.<ref name="DoM" />
| |
|
| |
| ====Tracking down a Hutt====
| |
| {{Quote|I never did enjoy hanging out with you.|Kenobi to Voss while hanging off the side of a cliff by their fingertips|<ref name="Hunt for Ziro">{{TCW|Hunt for Ziro}}</ref>}}
| |
| {{Main|Skirmish on Teth}}
| |
| [[File:BaneKenobi-Showdown.jpg|thumb|right|230px|Kenobi duelling Bane on Teth]]
| |
| After the [[Senate hostage crisis/Legends|Senate hostage crisis]], Obi-Wan was assigned to track down [[Ziro Desilijic Tiure/Legends|Ziro the Hutt]] and [[Cad Bane/Legends|Cad Bane]] with his old friend, Jedi Master Quinlan Vos. Though Obi-Wan believed that [[Jabba Desilijic Tiure/Legends|Jabba the Hutt]] wanted to get even with Ziro for what he almost did to his [[Rotta/Legends|son]], Vos' sources told him that Ziro had [[Hutt Council records/Legends|damaging evidence]] against the [[Hutt Ruling Council]].<ref name="Hunt for Ziro" />
| |
|
| |
| The two of them headed to the Hutt home world of [[Nal Hutta/Legends|Nal Hutta]], where they informed [[Gardulla Besadii the Elder/Legends|Gardulla the Hutt]] and the rest of the council of Ziro's escape and of Bane's help in this act. Though the Hutt Council denied involvement in this, Vos [[Psychometry/Legends|psychometrically]] scanned a cup, telling him and Kenobi that Ziro had been there. When they got to the prison level, however, Ziro had already escaped due to help from his lover, [[Sy Snootles/Legends|Sy Snootles]]. Kenobi and Vos tracked Ziro down in the swamp. Kenobi criticized Vos's tracking techniques, saying it would have been easier if they brought a droid. Along the way, Kenobi was attacked by a [[Dragonsnake/Legends|Dragonsnake]], but killed it. When the two saw that Bane and [[Todo 360/Legends|Todo 360]] were following them, the Jedi stayed right behind them. When they got to the swamp shack, Vos cut his way through the door. When Vos and Kenobi confronted [[Mama/Legends|Ziro's Mother]], Kenobi apologized to her about Vos's impulsive behavior. Ziro's mother told them that Bane was going after Ziro, who was en route to Teth.<ref name="Hunt for Ziro" />
| |
|
| |
| Kenobi and Vos proceeded to Teth, where they found Ziro shot and dead at [[Ziro Desilijic Tiure's father|his father's]] grave. The two Jedi were then confronted by Bane, who claimed that he did not kill Ziro. Though Bane tried to leave, Kenobi attempted to arrest Bane for taking the Senate hostage. Kenobi and Vos chased Bane. When Bane knocked out Vos, Bane picked up his lightsaber and fought Kenobi. When Kenobi and Vos ganged up on Bane, Bane used his flame throwers to throw them off the cliff. Bane then left the two Jedi hanging on a cliff.<ref name="Hunt for Ziro" />
| |
|
| |
| ====A special meal====
| |
| {{Quote|Yep! Just as disgusting as I remember!''"<br />"''Disgusting? But you said it was the best thing you ate on Dractu!''"<br />"''Yeah. And have you ever eaten anything on that planet? The worst food in the galaxy!|Obi-Wan Kenobi and Dexter Jettster|<ref name="Appetite for Adventure">''[[Appetite for Adventure]]''</ref>}}
| |
| Sometime during the Clone Wars the Besalisk [[Bartender/Legends|chef]] Dexter Jettster went on a dangerous mission to the planet [[Dractu]] to retrieve [[Dractuvian cave slug]]s. Back in [[Dex's Diner/Legends|his diner]] on the planet Coruscant, Jettster prepared one of the cave slugs for a meal, boiling and chopping up it. Jettster walked out of the kitchen towards his good friend Kenobi, saying he had made a special dinner for him today. Kenobi was surprised to see that Jettster made Dractuvian cave slug, and after taking a bite of the dish, pronounced with a smile that it was still as disgusting as he remembered. Jettster was confused, reminding Kenobi that he previously said that cave slug was the best thing he ate on Dractu. Kenobi only replied that Dractu has the worst food in the galaxy, meaning that Jettster went on a dangerous, foolhardy adventure just to make a meal his friend hates.<ref name="Appetite for Adventure" />
| |
|
| |
| ====Death Canyon====
| |
| Once, chased by a squad of bounty hunters in [[Death Canyon]], Kenobi and Skywalker used a [[VXL speeder]] patched up by the young Jedi Knight. There was only one way out of the canyon, a path that the hunters had closed off. Skywalker zoomed the speeder out of the garage and Kenobi hopped on, skeptical of his former Padawan's modifications but soon hanging on for his life as the VXL blasted off. However, Skywalker informed him that they could not slow down even if they wanted to, and this proved troublesome when a harpoon was stuck into the speeder. Rather than stop it, the harpoon gun itself was pulled out of the ground, forcing Kenobi to jump onto the top of the speeder and dispatch the bounty hunter trailing behind it. The two Jedi next faced two rows of bounty hunters on each side of them, some with rocket launchers and some with blasters. As Kenobi deflected the bolts, Skywalker took both lightsabers and hooked them up to the power core, giving the speeder a moment of sonic speed and allowing it to jet to safety, the Republic headquarters where Grand Master Yoda awaited.<ref name="Thunder Road">''[[Thunder Road]]''</ref>
| |
|
| |
| ====Battle of Sullust====
| |
| {{Main|Battle of Sullust/Legends}}
| |
| [[File:ObiWanS3-CN.jpg|thumb|right|180px|Kenobi, later in the Clone Wars]]
| |
| During this [[Battle of Sullust/Legends|battle]], Kenobi was chased by Asajj Ventress in her [[Ginivex-class starfighter|fanblade fighter]]. Skywalker dispatched the [[Droid tri-fighter/Legends|droid tri-fighter]] that the Dark Acolyte sent for him and came to the aid of his former master. He crippled Ventress's vessel, but not before she shot down the Jedi Master. The two opposing commanders crash-landed in the hangar of the Separatist command ship. Kenobi and Skywalker quickly engaged Ventress in lightsaber combat. Count Dooku, upon orders from his own master, interrupted the duel by ordering the destruction of the Separatist command ship to ensure his Acolyte's death. The two Jedi fled in their interceptors, presuming Ventress to be doomed, but she escaped and Dooku retreated, thinking she was dead.<ref name="Nightsisters">{{TCW|Nightsisters (episode)|Nightsisters}}</ref>
| |
|
| |
| ====Hunt for Savage Opress====
| |
| {{Main|Showdown at Toydaria/Legends}}
| |
| {{Quote|There may be a new threat, perhaps a newly appointed Sith Lord.''"<br />"''This is not the work of a Sith Lord or a Jedi, but a reckless and impulsive animal!|Obi-Wan and Plo Koon on the killer of Master Halsey and his Padawan Knox|<ref name="Witches of the Mist">{{TCW|Witches of the Mist}}</ref>}}
| |
| [[File:ShowdownOnToydaria-WOTM.png|thumb|right|220px|Kenobi faces Savage Opress on Toydaria]]
| |
| After the [[Battle at the Temple of Eedit|massacre on Devaron]] where Master [[Halsey/Legends|Halsey]] and his Padawan [[Knox/Legends|Knox]] were killed,<ref name="Monster">{{TCW|Monster}}</ref> Kenobi, along with fellow Jedi Council members Plo Koon, Saesee Tiin, and Adi Gallia, examined the remains of the Jedi pair that [[Delta Squad/Legends|Delta Squad]] had brought back to the Jedi Temple. The savageness with which the killings had been performed mystified them. Later Kenobi was shown footage of the massacre by Masters Yoda and Windu. At first he thought the [[Savage Opress/Legends|assailant]] was Darth Maul, but Windu stated this one was of a species of [[Zabrak/Legends|Zabrak]] that came from [[Dathomir/Legends|Dathomir]], the place where Maul was raised. They sent Kenobi and Skywalker to hunt down this killer before he could strike again. On Dathomir, they made their way to [[Nightbrother village/Legends|Maul's home village]], where they were ambushed by the [[Nightbrothers/Legends|Nightbrothers]]. Skywalker took [[Viscus/Legends|their leader]] hostage; the Zabrak said that a Nightsister took one of them to [[Nightsister fortress|their village]]. Kenobi and Skywalker went there and questioned [[Mother (title)/Legends|Mother]] [[Talzin/Legends|Talzin]] about this captive. Although Talzin initially avoided giving a direct answer, she told them his name, Savage Opress, and whereabouts. The two Jedi then headed to Toydaria, where they confronted Opress, but failed to stop him from killing King [[Katuunko/Legends|Katuunko]]. After Savage Opress destroyed their ship, they borrowed the king's ship. In space above Toydaria, Skywalker and Kenobi caught up with their target on Dooku's Separatist flagship, but he overpowered them and escaped. Skywalker and Kenobi retreated and left the ship.<ref name="Witches of the Mist" />
| |
|
| |
| ====Strange events on Mortis====
| |
| {{Main|Mission to Mortis/Legends}}
| |
| [[File:ObiWanQuiGon-Overlords.png|thumb|left|250px|Kenobi converses with the Force ghost of his former master]]
| |
| When the Jedi Council received a 2,000-year-old Jedi distress code, Kenobi, with Anakin Skywalker and his Padawan Ahsoka Tano, were sent to the [[Chrelythiumn system/Legends|Chrelythiumn system]], where they were supposed to meet up with Clone Captain Rex and an armed cruiser. Though they both made to the rendezvous point, neither Rex's nor the Jedi's ship could see each other. The Jedi's ship then lost contact with Rex, when a [[Mortis monolith/Legends|crystal-shaped structure]] pulled them toward itself. All three of them lost consciousness and found themselves on a [[Mortis/Legends|strange world]] that was strong with the Force. There they were approached by a [[Daughter/Legends|young woman]], who asked Skywalker if he was the One, and told them that she would take them to [[Father (Mortis)/Legends|Him]]. However, Kenobi and Tano were soon separated from Skywalker and Daughter by a rockslide. Since they couldn't find a way to follow them, Kenobi and Tano headed back to their ship, which they found missing. The [[Son/Legends|Son]] then appeared in front of them, asking about the Chosen One. Kenobi and Tano drew their lightsabers, and asked if he was a Sith. The Son claimed to be himself, and not at the same time, before he transformed into a gargoyle and left. Just after that, Jedi Master and Padawan were forced to seek shelter in cave because of the lethal weather. As the two rested, Kenobi saw a vision (possibly the [[Force ghost]]) of his late master, Qui-Gon Jinn, who asked if he had trained Skywalker, as he had asked many years ago upon his death. Kenobi questioned him about how was he there, to which Jinn replied that the planet was both a conduit and a magnet for the Force, and there were three here who believed, like him, that Skywalker was the Chosen One. He also warned him that if Skywalker wasn't the Chosen One, this place could be dangerous for him. In the morning, Kenobi and Tano were kidnapped by the Daughter and the Son at the orders of their father to test whether Skywalker was the Chosen One. Skywalker proved himself to be, by taming both Children, but refused to stay and replace the Father. They then tried to leave Mortis.<ref name="Overlords">{{TCW|Overlords}}</ref>
| |
|
| |
| [[File:KenobiMortisDagger-AOM.png|thumb|right|250px|Kenobi wields the Dagger of Mortis]]
| |
| However, before their ship could exit the planet's atmosphere, Son abducted Tano, assuming correctly that the Jedi would not leave her behind. After a lengthy pursuit, Skywalker lost track of Son, and almost crashed into a [[Son's cathedral/Legends|giant tower]]. After a not-too-elegant landing, Skywalker went to rescue his Padawan despite Kenobi's concern about disturbing the balance of the Force in their own universe as well. Because he wanted to ask the Father's help against Son, Kenobi remained by the ship. Just when he realized he had no idea where to find the Father, his [[Mortis Monastery/Legends|sanctuary]] appeared in front of the Jedi Master. But by the time he climbed up to the door, Son already had turned against his father and severely injured him with [[Force lightning/Legends|Force lightning]]. After Son left, Kenobi helped Daughter take Father inside, where he could rest. At Kenobi's request to help Skywalker stop Son, Daughter led him to a cave where the [[Altar of Mortis/Legends|Altar of Mortis]] and the [[Dagger of Mortis/Legends|Dagger of Mortis]] were hidden. Kenobi took the dagger, and the two left to confront the Son. When they arrived at his tower, Son informed Kenobi that Skywalker had been "a bit preoccupied" to stop him. Kenobi left the throne room, joining Skywalker in his fight with "Dark Ahsoka," while Daughter and Son started their own combat: a duel way beyond the standards of both the Jedi and the Sith. Father interrupted the battle, but he had grown weak and couldn't fend off Son's Force lightning. Kenobi, in the hopes of defeating Son, threw the dagger to Skywalker, but Tano was quicker: she took it and handed it to Son, who then seemingly killed her with a touch on her forehead. Then he attempted to murder his father with the dagger; to his great dismay, his sister took the blow, which caused him to flee in rage. Skywalker asked Father to help Ahsoka, but he answered without Light, there was no hope for her either. To this Skywalker replied, crying, that there was always hope. Hearing his pain, Daughter required the help of her father to give her remaining life energy to Tano. Since he didn't want to deny the dying wish of his child, Father showed Skywalker how to transfer Daughter's life into his Padawan, who after a few frightening seconds came back to life while the glowing of Daughter's body faded away. After this, Father ordered the Jedi to leave immediately so Son would not be able to leave Mortis with their ship.<ref name="Altar of Mortis">{{TCW|Altar of Mortis (episode)|Altar of Mortis}}</ref>
| |
|
| |
| [[File:ObiWanWell-GOM.png|thumb|left|250px|Kenobi climbing out of the Well of the Dark Side]]
| |
| However, the ship was badly damaged when Skywalker crash-landed it. While Tano did the repairs, Skywalker left to talk with Father, as he wasn't convinced that the old man could contain his son. After his discussion with Skywalker, Father went to Kenobi to inform him that Skywalker had gone to confront the Son at a place [[Well of the Dark Side/Legends|where all that is dark is channeled]]; Kenobi left to search for him. He found the young Jedi too late: the Son had already seduced him to the dark side of the Force by showing him a vision of his future. Skywalker—in order to stop Kenobi from interfering—threw his speeder into the lava and left on his own speeder to let the Son off the planet in his ship. Meanwhile, Kenobi contacted Tano, telling her to disable the ship. Despite her complaints, she obeyed, and left to pick up him. After Skywalker told the Son of this, the Son left to take the Dagger of Mortis from the grave of his deceased sister. The Father took this opportunity to show himself to Skywalker and wiped his memory of his future vision, bringing him back to the [[Light side of the Force/Legends|light side of the Force]]. After Tano returned, the four of them faced off against the Son. The Son quickly threw Skywalker aside and stunned Kenobi and Tano. When he turned to the Father, the Father pulled the dagger into his hands and impaled himself, revealing that by destroying his own powers, he would take away the Son's power as well. The Son went to tend to his father, allowing Skywalker the perfect chance to kill him. After impaling the Son from behind, he died, and after a few short moments, so did the Father, restoring the balance of the Force. Kenobi and the others were then transported back to their miraculously fully functional ship at the coordinates Rex and the Jedi were supposed meet, only this time Rex's cruiser was visible.<ref name="Ghosts of Mortis">{{TCW|Ghosts of Mortis}}</ref>
| |
|
| |
| ====Rescuing Master Piell====
| |
| {{Main|Battle of Lola Sayu/Legends}}
| |
| {{Quote|Obi-Wan, what took you guys so long?|Master Even Piell humorously asking Kenobi of his whereabouts|<ref name="The Citadel">{{TCW|The Citadel}}</ref>}}
| |
| [[File:PiellRescued-TC.jpg|thumb|left|250px|Obi-Wan and Anakin rescuing Master Piell]]
| |
| When Jedi Master Even Piell was [[Capture of Even Piell/Legends|captured]] by Separatist forces after he discovered the coordinates of a [[Nexus Route/Legends|strategically important hyperspace lane]], the Jedi Council organized a rescue mission to the dreadful [[Citadel/Legends|prison]] where he was being held. It was decided that the team that would infiltrate the prison would include Anakin Skywalker, Obi-Wan Kenobi, Commander Cody, Captain Rex, and two ARC Troopers from the [[501st Legion/Legends|501st]], [[CT-5555/Legends|Fives]] and [[CT-21-0408|Echo]]. After the briefing, Master Plo, Kenobi, and Skywalker met up with Ahsoka Tano, who showed enthusiasm about the mission. However, her Master told her that he had decided to leave her behind on Coruscant, as he knew the prison would be fraught with danger and didn't want to put her life at such risk.
| |
|
| |
| The first thing that concerned Kenobi was getting past the droids' [[Lifeform scanner|life-form sensor]]. Skywalker came up with idea of being [[Carbon-freezing/Legends|frozen in carbonite]] to avoid being detected by them. Anakin's part of the plan worked, but when they were thawed, Kenobi was shocked to find that Tano had come along, despite Skywalker's direct orders to stay on Coruscant. When Skywalker was angered by his Padawan's disobedience, Kenobi cooled him down by pointing out Skywalker's humorous new teaching method of "Do as I say, not do as I do." Later, Tano was vital to the infiltration, as the entrance point of the prison had been [[Ray shield/Legends|blocked]] and she was the only one in the group who could squeeze through the ventilation docks, and turn off the ray shields. However, one of the troopers fell onto the one of the mines that were placed on the cliff side, alerting the Citadel's [[Warden/Legends|warden]], [[Osi Sobeck/Legends|Osi Sobeck]], to their presence.
| |
|
| |
| Despite this setback, Obi-Wan and the rest of his team freed Master Piell. Master Piell told Kenobi that the other half of the coordinates of the [[Nexus Route/Legends|Nexus Route]] was with his captain, [[Wilhuff Tarkin/Legends|Wilhuff Tarkin]], and Obi-Wan decided that they must rescue him as well. On their way to the officer's cell, they were attacked by a squad of [[BX-series droid commando/Legends|commando droids]]. Sobeck activated magnets in the ceiling, and Obi-Wan's lightsaber, along with everyone else's weapon and Anakin (due to his cybernetic right hand), were stuck to the ceiling when the second squad of commando droids appeared. Kenobi and his team defeated them, greatly thanks to Skywalker's willpower, as he destroyed the electromagnets despite being electrified. After they rescued Master Piell's captain and the other officers, they split up: Skywalker and Tano escorted Tarkin and most of his officers to the escape spot, while Kenobi's and Piell's group created a diversion, setting off a series of explosives in the prison, as Anakin escaped into one of the old tunnels.<ref name="The Citadel" />
| |
|
| |
| Kenobi and his team then went into the ventilation system, where they encountered a [[Separatist probe droid/Legends|recon droid]]. Piell destroyed it, but security doors in the shaft closed, killing one of their troopers. When Obi-Wan noticed the shuttle seemingly abandoned, he smelled a trap and attempted to approach it via a detour route, but found that Sobeck had anticipated this tactic and prepared a welcoming party of a squad of heavily armed [[LM-432 crab droid/Legends|crab droids]] and battle droids. His team was then brought before Sobeck as prisoners. In an attempt to get the information they had, Sobeck executed one of their clone troopers before ordering the security droids to have them interrogated. R2 learned of this, however, and his [[R2-D2's battle droid squadron/Legends|battle droid squad]] took them as prisoners back to the ship. Unfortunately for Kenobi, the droids learned of this deception and engaged his team at the prison airfield. Anakin's team joined them during the battle to try and get the ship, but despite their attempts, the ship was destroyed and both Kenobi's and Skywalker's team fell back together to caves near the Citadel. With their ship gone, Kenobi contacted the Jedi Temple, requesting a rescue operation.<ref name="Counterattack">{{TCW|Counterattack}}</ref>
| |
|
| |
| After Piell contacted the Jedi Temple and was given a rendezvous point, Kenobi's and Skywalker's team were attacked by [[BX-series droid commando/Legends|commando droids]], forcing their team to move on to the rendezvous point. As they moved on, Obi-Wan, Anakin and Ahsoka discussed Tarkin's attitude on the Jedi's inability to stem the tide of war due to their strict code before they noticed the [[Anooba/Legends|anoobas]] trailing them, along with a squad of [[Single Trooper Aerial Platform/Legends|STAPs]] behind them. Anakin and Obi-Wan lured the creatures into an ambush. When they rejoined the rest of their group, Kenobi and Skywalker wondered where Piell and Ahsoka were. Ahsoka then came, carrying Piell's body after Piell gave her his half of the coordinates to the Nexus route. Kenobi, Skywalker and the team took a moment to consign Piell's body to the lava before moving on. Kenobi's and Skywalker's team reached the rendezvous point, but were attacked by Sobeck. After defeating Sobeck's droids, Master Plo came down in [[Plo's Bros/Legends|his gunship]] and rescued them. Plo Koon took Kenobi, Skywalker and their team back to the Temple to be debriefed.<ref name="Citadel Rescue">{{TCW|Citadel Rescue}}</ref>
| |
|
| |
| ====The Starcrusher trap====
| |
| {{Quote|I've defied the Chancellor's orders. It's that rebellious streak of mine you keep cautioning me about, I'm afraid.''"<br />"'' ''Bless'' that rebellious streak! For once, you're right where I ''want'' you!|Skywalker and Kenobi|<ref name="TCWV6: Starcrusher Trap">''[[The Clone Wars: The Starcrusher Trap]]''</ref>}}
| |
| [[File:Infiltration_of_the_Starcrusher.png|thumb|left|Kenobi, Windu, Ki-Adi-Mundi, Tano and Somtay climb the lift shaft of the Starcrusher]]Shortly thereafter, Kenobi and Skywalker infiltrated a Separatist munitions factory on an [[Asteroid/Legends|asteroid]]. Kenobi used his lightsaber to cut into the factory. Once inside they were surrounded by battle droids, but the two Jedi destroyed them and ventured deeper into the factory. Skywalker threw the explosives into the station's reactor, and the resulting explosion brought down the shields.<ref name="TCWV6: Starcrusher Trap" />
| |
|
| |
| Three Republic ''Venator''-class Star Destroyers led by Captain [[Trask (captain)|Trask]] moved into position to destroy the factory, but the Separatist [[Battleship/Legends|battleship]] ''[[Starcrusher/Legends|Starcrusher]]'' ambushed the destroyers. The two Jedi were unaware of the destruction of the Republic fleet, and Skywalker called for extraction. The Jedi Knight [[Jyl Somtay]], piloting a T-6 shuttle, arrived to pick them up. The three Jedi flew past the ''Starcrusher'' and returned to Coruscant, where the Jedi Council decided to send a team to hunt down the dangerous Separatist vessel, which included Kenobi, Somtay, Master Windu, Master Mundi, and Skywalker's Padawan. Chancellor Palpatine contacted Grand Master Yoda, and asked for the services of Skywalker.<ref name="TCWV6: Starcrusher Trap" />
| |
|
| |
| Skywalker met the Chancellor in his private office, where Palpatine presented a collection of [[Seed/Legends|seeds]] for Skywalker to take to the [[Daltarri (species)|Daltarri inhabitants]] as a gesture of goodwill. Skywalker took R2 and his starfighter to the planet [[Daltarri]] and met the inhabitants, who agreed to aid the Republic. During his mission, Skywalker received a premonition of danger, and cut short his mission to Daltarri by two days.<ref name="TCWV6: Starcrusher Trap" />
| |
|
| |
| The Jedi assault team had gotten trapped on a [[Starcrusher (decoy)|decoy ''Starcrusher'']] and were on the verge of crashing into a star when Skywalker arrived. At that time, the real ''Starcrusher'' arrived. Kenobi came up with a plan, and had Skywalker fly his fighter into the battleship's main hold, where he damaged the inside of the vessel. Skywalker proceeded to the vessel's power generator and destroyed it. Kenobi's plan involved magnetizing the hull of the decoy to cause the real ''Starcrusher'' to crash into it. The team escaped using spacesuits, and Skywalker used a [[Power harpoon|tow cable]] to pick up the team as the Separatist vessels disintegrated in the sun.<ref name="TCWV6: Starcrusher Trap" />
| |
|
| |
| The strike team returned to Coruscant, and Skywalker met with Palpatine, who was not upset that he had cut his mission to Daltarri short. Upon his return to the Jedi Temple, he saw Tano and Somtay, who were going for caf and to discuss Skywalker.<ref name="TCWV6: Starcrusher Trap" />
| |
|
| |
| ====Battle of Umbara====
| |
| {{Main|Battle of Umbara/Legends}}
| |
| [[File:CloneBriefing-Umbara.png|thumb|left|250px|Kenobi during the briefing prior to the invasion of Umbara]]
| |
| Kenobi, along with fellow Jedi Council member Saesee Tiin, Anakin Skywalker, and [[Pong Krell/Legends|Pong Krell]] took Commander Cody's [[212th Attack Battalion/Legends|212th Battalion]] and Captain Rex's [[501st Legion/Legends|501st Battalion]] to [[Battle of Umbara/Legends|retake]] the shadowy world of [[Umbara/Legends|Umbara]], which had allied itself with the Separatists. Kenobi's battalion's mission was to take the [[Umbara capital city|capital]]. Kenobi and his battalion met fierce resistance from the [[Umbaran/Legends|Umbaran]] [[Umbaran militia|militia]].<ref name="Darkness on Umbara">{{TCW|Darkness on Umbara}}</ref> Kenobi then contacted the 501st, which had come under the command of Krell. Kenobi told Krell the capital was too well fortified. Kenobi then told Krell that [[Unidentified Umbaran airbase|Umbaran airbase]] was resupplying the capital, so he told Krell to take his battalion and secure the airbase for their side.<ref name="The General">{{TCW|The General (episode)|The General}}</ref> After Krell took the airbase, Kenobi congratulated Krell on his success. Kenobi then told him how long range missiles had pushed his battalion away from the capital. Kenobi also told Krell that the capital was still receiving supplies, this time from a [[Separatist supply ship|enemy supply ship]] in the atmosphere. Kenobi told Krell that their space forces were trying to destroy it, but the Separatist space force still outnumbered theirs. Kenobi said that reinforcements were coming, but were delayed. Krell told Kenobi that he would take his battalion regardless of the capital's defenses. Kenobi's transmission was then jammed by the Umbarans. Krell continued advancing his forces toward the capital, but three clones in the 501st disobeyed his orders, sneaked onto the supply ship in [[Umbaran starfighter]]s, and destroyed it.<ref name="Plan of Dissent">{{TCW|Plan of Dissent}}</ref> Kenobi's battalion took the capital, despite Krell, who secretly sabotaged the Republic effort by tricking the 501st and Kenobi's forces, the 212th Battalion, into attacking each other. Kenobi's battalion routed the remaining Umbaran forces, and secured all sectors of the planet for the Republic.<ref name="Carnage of Krell">{{TCW|Carnage of Krell}}</ref>
| |
|
| |
| ====Battle of Kiros====
| |
| {{Main|Battle of Kiros/Legends}}
| |
| [[File:DNarPummelsKenobi-Kidnapped.jpg|thumb|right|250px|Kenobi getting pummelled by Zygerrian commander Darts D'Nar]]
| |
| Ten rotations after Master Yoda's last contact with the [[Togruta/Legends|Togruta]] colony of [[Kiros/Legends|Kiros]], Kenobi, along with Anakin Skywalker, his apprentice Ahsoka Tano, Captain Rex, and Commander Cody then landed on the surface. Kenobi, with Rex as his gunner, rode a [[BARC speeder/Legends|BARC speeder]] through the colony. Kenobi found it odd that there were no colonists, but was sure that they were just hiding. As they flew toward the [[Kiros governor's tower|governor's tower]], they were attacked by [[BX-series droid commando/Legends|Commando Droids]] and [[Armored Assault Tank|AATs]]. The Jedi and clones quickly dispatched the attackers, and Kenobi's and Skywalker's forces surrounded the Separatist headquarters at the governor's tower. Cody showed Kenobi a message from the Separatist commander, [[Darts D'Nar/Legends|Darts D'Nar]], asking him to come to the tower to negotiate terms of "surrender." Skywalker became angry when he recognized D'Nar as a [[Zygerrian/Legends|Zygerrian]] slaver, and Kenobi explained Skywalker's history with slavery to Tano and told them to look for the colonists while he negotiated with D'Nar.
| |
|
| |
| Kenobi went into the tower, where he interrupted D'Nar's meeting with Dooku and Zygerrian Prime Minister [[Atai Molec/Legends|Atai Molec]]. After Dooku ended his meeting with D'Nar, Kenobi started to negotiate terms of surrender. D'Nar, however, told him that it was Kenobi who going to surrender to him. Kenobi then turned on his comlink to Skywalker and Ahsoka to alert them to his progress. Kenobi tried to assure D'Nar that he would be given fair treatment, but D'Nar refused to surrender. D'Nar then offered Kenobi a counterproposal: surrender or D'Nar would blow up the buildings with [[Thermal annihilator bomb/Legends|bombs]] that were placed around the [[Artisan colony/Legends|city]]. After D'Nar's [[Unidentified T-series tactical droid (Kiros)/Legends|tactical droid]] sets one the bombs off, Kenobi conceded to his threat. Though D'Nar was ordered by Dooku to bring Kenobi to him on his knee, D'Nar wanted to punish Kenobi for what the Jedi did to the Zygerrians. Kenobi took advantage of this by agreeing to fight D'Nar in the Zygerrian way with no weapon. Kenobi then made a deal with D'Nar. If Kenobi should win, D'Nar would tell him where the bombs and the colonists were, but should D'Nar win, Kenobi would be brought to Dooku in a cage.
| |
|
| |
| Kenobi and D'Nar fought while Skywalker and Ahsoka found and defused bombs. Though D'Nar had the upper hand in the fight, Kenobi distracted him from learning of the bombs. Just as D'Nar was about to beat Kenobi, D'Nar was informed that his bombs had been defused. While D'Nar tried to trigger the bombs, Kenobi subdued D'Nar's commando droids and retrieved his lightsaber. Kenobi then offered D'Nar another chance to surrender. D'Nar set off his last bomb, which was on his tactical droid. He pushed the droid towards Kenobi and then escaped. Kenobi threw the droid out of the window before it exploded. Kenobi then informed Skywalker that D'Nar was escaping, and Skywalker and Tano chased him. After Skywalker captured D'Nar and his ship, Kenobi, Skywalker and Ahsoka contacted the Jedi Council, informing them of the Zygerrians' abduction of the colonists.<ref name="Kidnapped">{{TCW|Kidnapped}}</ref>
| |
|
| |
| ====Mission on Zygerria====
| |
| {{Main|Mission to Zygerria/Legends}}
| |
| [[File:BrezakEscape-SOTR.jpg|thumb|left|250px|Kenobi, Rex and Governor Roshti try to escape]]
| |
| Kenobi, along with Anakin, Ahsoka, Captain Rex and R2-D2 travelled to [[Zygerria/Legends|Zygerria]] using the [[YV-865 Aurore-class freighter/Legends|Zygerrian slave ship]] [[Tecora/Legends|''Tecora'']], obtained from captured Zygerrian Commander, Darts D'Nar. Upon arrival they formed two teams; Skywalker and Tano went to talk to [[Queen/Legends|Queen]] [[Miraj Scintel/Legends|Miraj Scintel]] disguised as master and slave, respectively, while Kenobi and Rex, disguised as Zygerrian traders, tried to locate the kidnapped colonists from [[Kiros/Legends|Kiros]].
| |
|
| |
| While Anakin and Ahsoka met with the Queen, Obi-Wan and Captain Rex proceeded to the [[Zygerrian Royal Palace|Royal palace's]] slave pits, where they found the Togrutan [[Governor/Legends|Governor]] of Kiros, [[Roshti/Legends|Roshti]], weak and broken from his ordeal. Unable to learn from him where the other [[Togruta/Legends|colonists]] had gone, Obi-Wan and Rex sprang him first, and tried to make their getaway on a [[Brezak/Legends|brezak]]. Kenobi was shot in the shoulder by one of the alerted [[Royal Zygerrian guard|guards]], however, and Kenobi and Roshti fell off the brezak and were captured. Rex escaped. Obi-Wan was chained to a wall and tortured for information before Prime Minister Atai Molec recognized the Jedi and prepared to sell him at that night's [[Royal auction house/Legends|auction block]].
| |
|
| |
| At the auction, Roshti was the first slave to be put on offer, followed by Obi-Wan. In order to break him, Queen Scintel ordered Anakin to [[Torture/Legends|torture]] him with a [[shock whip]] before the eyes of the assembled bidders. Once Skywalker entered the arena however, he signaled to R2-D2, who launched Kenobi's, Skywalker's, and Tano's lightsabers to their owners. Skywalker disarmed the nearby guards with his shock whip. Quickly, however, more guards rushed into the arena and captured Kenobi, Skywalker, and Rex. Tano, who had tried to force Scintel's surrender, was disabled with her slave shock collar. Ahsoka and Anakin were kept on Zygerria, but Obi-Wan, along with Captain Rex and Governor Roshti, were brought to the [[Kadavo slave processing facility/Legends|Zygerrian "education center"]] on [[Kadavo/Legends|Kadavo]], where they discovered that the other Togrutans were also being held. Kenobi was forced into submission by the center's warden, [[Agruss/Legends|Agruss]], who emphasized his point by dropping several Togrutan prisoners to their deaths and threatening to do worse to the others, should Obi-Wan ever think of rebellion.<ref name="SOTR">{{TCW|Slaves of the Republic}}</ref>
| |
|
| |
| ====Battle of Kadavo====
| |
| {{Main|Battle of Kadavo/Legends}}
| |
| [[File:RexTogrutasKadavo.png|thumb|right|220px|Obi-Wan and Rex during their enslavement on Kadavo]]
| |
| Soon after, Obi-Wan was forced to slave away in the mines alongside Rex and the Togrutan colonists. Taunted by the facility's cruel warden and his guards, Obi-Wan had a hard time scrounging up any spark of hope for himself or the prisoners, since every time he did so, one of the Togrutans was punished in his place in order to heighten his despair. This caused the Togruta to became distrustful of Kenobi and hesitant to help him.
| |
|
| |
| While Kenobi and Rex were on Kadavo, Count Dooku tried to negotiate with Miraj Scintel for the Togruta slaves but killed her when she would not cooperate with him. Dooku then gave orders to Agruss that Rex and Kenobi be killed, and they were brought to the facility control room. Before they could be executed, however, Skywalker and Tano, who had escaped from Zygerria, arrived at the facility, along with reinforcements led by Plo Koon and Admiral [[Coburn]]. In the confusion of the attack, Kenobi and Rex broke free of their restraints and disabled their guards. Agruss panicked, and initiated the procedure for the execution of the Togruta before he could be stopped. He then taunted Kenobi, because he knew the Jedi would not kill an unarmed man, but Rex, not feeling bound by such moral obligations, threw a spear at the warden. The Republic forces rescued many of the Togruta and then destroyed the labor facility.<ref name="EFK">{{TCW|Escape from Kadavo}}</ref>
| |
|
| |
| ====Plot to kidnap Chancellor Palpatine====
| |
| =====Becoming a bounty hunter=====
| |
| {{Main|Funeral of Obi-Wan Kenobi/Legends|Showdown on Orondia/Legends}}
| |
| [[File:TheGreatEscape-D.jpg|thumb|left|230px|Obi-Wan, disguised as bounty hunter Rako Hardeen, escapes from prison along with Cad Bane and Moralo Eval.]]
| |
| Later in the War, Obi-Wan, along with Anakin and Ahsoka were walking through the nightly streets of Coruscant when a [[Rako Hardeen/Legends|sniper]] opened fire on them. The Jedi dodged the shots, and Obi-Wan, along with Anakin, chased after the [[Sniper/Legends|sniper]]. They lost him, and Obi-Wan moved out onto the open to look for him, when the sniper fired and hit him dead on. Anakin chased after the sniper, who escaped on a speeder, and when he returned to Obi-Wan, he found out that his old master and best friend was dead.<ref name="Deception">{{TCW|Deception}}</ref>
| |
|
| |
| In reality, Obi-Wan, with the help of Masters Yoda and Windu, had faked his death in order to assume the identity of his would-be killer in order to get close to [[Moralo Eval/Legends|Moralo Eval]] and find out his plans to kidnap the Chancellor. After Obi-Wan had his appearance altered, he and Windu then went to [[Trueping's/Legends|Trueping's]] to arrest the real Rako Hardeen. They recorded a sample of his voice, and then Kenobi swallowed a [[Vocal emulator/Legends|vocal emulator]] to perfectly disguise his voice as Hardeen's.<ref name="Deception" />
| |
|
| |
| Kenobi was then sent to the [[Republic Judiciary Central Detention Center/Legends|Republic Judiciary Central Detention Center]], where he formed a partnership with Eval, who trusted Kenobi and thought he could be useful, and Cad Bane, who did not. When a prison riot started, the trio broke out and left Coruscant for Nal Hutta.<ref name="Deception" />
| |
|
| |
| When they arrived at Nal Hutta, Kenobi crashed their ship in order to cover their trail. The trio tried to find supplies and a new ship in [[Bilbousa/Legends|Bilbousa]], and Bane grew more distrustful of Kenobi after Kenobi's kind treatment of [[Pablo/Legends|Pablo]], the owner of the [[Pablo's Pawnshop|pawnshop]] that the trio went to. Kenobi, suspecting betrayal, planted a tracking device on the new ship he bought. As Kenobi had suspected, Bane sprayed Kenobi with [[Knockout gas/Legends|knockout gas]] as they were departing, leaving Kenobi to be arrested by the local authorities. However, Kenobi turned the frequency of the tracking device over to his captors, who shot Bane and Eval's ship down. Kenobi, meanwhile, escaped from captivity and purchased another ship, and when Bane and Eval found him smugly waiting for them, they agreed to make him a partner in their scheme.<ref name="FaE">{{TCW|Friends and Enemies}}</ref>
| |
|
| |
| Anakin Skywalker, meanwhile, had not been informed of the truth of Kenobi's survival, and, at Palpatine's encouragement, Skywalker and Ahsoka Tano went to Nal Hutta after Kenobi's "killer." They followed Kenobi, Bane, and Eval to [[Orondia/Legends|Orondia]], where the trio had stopped to refuel their ship. When Kenobi's ship took off, Skywalker gave chase in his ship, and both ships crashed near a fuel-processing facility. Kenobi tried to find Skywalker to make sure he was all right without blowing his cover, but when Skywalker saw Kenobi, he attacked him in a rage. Kenobi gained the upper hand, and just before knocking Skywalker unconscious, he whispered to Skywalker that he should not keep following him. Kenobi, Bane, and Eval then escaped, leaving Tano at the side of her master.<ref name="FaE" /> Afterward, when Skywalker returned to Coruscant, Yoda and Mace Windu informed him of the ruse so that he would not interfere farther.<ref name="Box">{{TCW|The Box}}</ref>
| |
|
| |
| =====The Box=====
| |
| {{Main|Tournament on Serenno/Legends}}
| |
| Eval, Bane, and Kenobi then traveled to [[Serenno/Legends|Serenno]] to meet with Count Dooku, and Bane and Kenobi accepted an invitation to participate in a test of skill designed by Eval called the [[Box/Legends|Box]] with eleven other notorious bounty hunters. Those who were successful would be rewarded. In the first challenge the twelve participants (Bane shot one before the contest began) faced, they were raised on small platforms above clouds of dioxis. Kenobi discovered that there was a tunnel below the cloud of gas, and the bounty hunters escaped from the room. The second challenge featured panels extending from the walls at seemingly random intervals with energy blades on their ends. Two of the bounty hunters were impaled, but Kenobi observed a pattern in the panels' extensions, and he led the rest of the contestants to another tunnel in the ceiling. When the bounty hunters entered the next room, they were surrounded by energy shields slowly closing in on them. In the center of the room was a serum that would allow the user to pass through the shields and turn them off using a switch on the other side; however, Eval informed them that it was toxic to all but one of the contestants. Kenobi guessed correctly that one of the bounty hunters, [[Derrown/Legends|Derrown]], a [[Parwan/Legends|Parwan]], might be able to to pass through the shields, and the bounty hunters moved on to the next room, while Eval grew angry at "Hardeen" for his continued success.
| |
|
| |
| [[File:Task4Sharpshooting-TB.jpg|thumb|right|250px|Kenobi demonstrates his shooting skills in the fourth task.]]
| |
| In the fourth room, the bounty hunters stood on a platform above a floor of flame emitters. A target moved across the opposite wall that had to be hit three times with a sniper rifle. [[Sixtat/Legends|Sixtat]] stepped up to shoot, but he missed on his third shot and fell into the flames below. Kenobi shot next, hitting all three times. The platform of the four other remaining bounty hunters elevated, while Kenobi's stayed on the same level. Eval told him to hit the target five more times. Kenobi hit four times, but then the rifle ran out of shots, and Kenobi realized he had been set up to fail. The platform dropped beneath him, but Bane, disliking Eval's unfair tactics, shot Kenobi a rope and pulled him up. Dooku decided that Eval should not be exempted from the contest and dropped him to the now extinguished floor to fight with Kenobi. Kenobi gained the upper hand, but when Dooku told him to kill Eval, he declined, saying that he just wanted to do his job. Dooku was disappointed and put Bane in charge of the operation to kidnap the Chancellor instead of Kenobi, as he had planned.<ref name="Box" />
| |
|
| |
| =====Stopping the kidnapping=====
| |
| {{Main|Skirmish in Theed/Legends}}
| |
| The team decided to kidnap Palpatine at the [[Festival of Light/Legends|Festival of Light]] on Naboo. They commandeered a warehouse in Theed, and each member of the team was assigned a role, with Kenobi being given the job of the sniper who would fire stun blasts at the Chancellor. Kenobi contacted Mace Windu from his position above the plaza were the Chancellor would speak and informed him of the group's plan. During Palpatine's speech, Kenobi spotted Derrown, disguised as a [[Senate Commando/Legends|Senate Commando]], going to destroy the generator for the shield around the plaza. He alerted Windu, but Anakin Skywalker could not get to Derrown in time, and the generator exploded, the shield fell, and Palpatine was knocked unconscious. Then, while [[Twazzi/Legends|Twazzi]] posed as Palpatine, and Embo as his kidnapper, Bane and Eval escaped with the true Chancellor. Kenobi followed them, with Windu and Skywalker close behind, and the pair were arrested and the Chancellor recovered when they stopped at the rendezvous point.<ref name="CoN">{{TCW|Crisis on Naboo}}</ref>
| |
|
| |
| Kenobi later returned to the apartment where he had had his position as a sniper, and discovered an activated comlink in his rifle case. He realized that Dooku had bugged him, and had known Kenobi's loyalties the whole time. Kenobi rushed back to the Royal Palace, where he discovered Skywalker dueling with Dooku, while Palpatine was held by a MagnaGuard. Kenobi rescued the Chancellor and Dooku fled, and Palpatine thanked the Jedi for their bravery.<ref name="CoN" />
| |
|
| |
| ====Loss of the ''Negotiator''====
| |
| [[File:YoullRegretThat-BFR.png|thumb|left|250px|Kenobi faces off with Grievous in the ''Negotiator'' hangar.]]
| |
| While Obi-Wan Kenobi was stationed aboard his flagship, the Star Destroyer [[Negotiator/Legends|''Negotiator'']], he was contacted by Jedi initiates aboard the [[Jedi training cruiser]] [[Crucible/Legends|''Crucible'']], who informed him that their guardian, Ahsoka Tano, had been kidnapped by Hondo Ohnaka's pirates. The younglings said they wanted to rescue Tano from the pirates, and Kenobi expressed appreciation for their daring, but told them to stay on the ''Crucible'' for their safety.<ref name="BfR">{{TCW|Bound for Rescue}}</ref>
| |
|
| |
| Kenobi was intending to send Commander Cody to rescue the stranded Jedi, but his plans were interrupted by an unforeseen [[Attack on Obi-Wan Kenobi's fleet/Legends|attack]] by General Grievous on his fleet. Grievous's ships quickly gained the upper hand on Kenobi's, destroying several of his vessels. Upon learning that Grievous had sent a boarding party to the ''Negotiator'', Kenobi and the clone forces on the ship stationed themselves in the hanger in order to repel it. Grievous accompanied the boarding party, and Kenobi dueled him as the clone troopers and battle droids engaged each other. Soon, however, Kenobi realized that this was a battle that he could not win, and as he retreated through the passageways of the Star Destroyer he ordered the crew to abandon ship and initiated the ship's [[Self-destruct mechanism/Legends|self-destruct sequence]]. When Grievous arrived on the bridge, he found a hologram recording of Kenobi. Through it, Kenobi conceded the victory to Grievous but informed him that the ship was about to explode. Kenobi escaped the destruction in an escape pod, as did Grievous, who evacuated the ''Negotiator'' on a shuttle just before it exploded.<ref name="BfR" />
| |
|
| |
| Soon after, Kenobi joined Tano, the younglings, who had gone to [[Rescue on Florrum/Legends|rescue]] Tano despite Kenobi's orders,<ref name="BfR" /> and members of the pirate gang, including Ohnaka himself. After Grievous's defeat of Kenobi, he had [[Second battle of Florrum|attacked]] the pirates' stronghold, and the Jedi and pirates had joined forces against Grievous and barely escaped with their lives.<ref name="A Necessary Bond">{{TCW|A Necessary Bond}}</ref>
| |
|
| |
| ====The return of Darth Maul====
| |
| During Obi-Wan's mission, Savage Opress was continuing his search for his brother, Darth Maul. He eventually went on to find the disfigured Sith Lord<ref name="Brothers">{{TCW|Brothers}}</ref> and brought him to Talzin, where he was mended to and equipped with a new, stronger lower half.<ref name="Revenge">{{TCW|Revenge (episode)|Revenge}}</ref> Kenobi was informed of Maul's return by Master Yoda.<ref name="Brothers" /> Soon, Kenobi, Yoda and Mace Windu received a message from Maul from [[Raydonia/Legends|Raydonia]], saying that he would slaughter everyone if Kenobi did not come. Despite Windu's call of precaution, Kenobi decided to defeat Maul by himself.<ref name="Revenge" />
| |
|
| |
| [[File:MaulVsKenobi-Revenge.jpg|thumb|right|250px|Kenobi faces Darth Maul in a rematch aboard the [[Turtle Tanker]].]]
| |
| =====Skirmish on Raydonia=====
| |
| {{Main|Skirmish above Raydonia/Legends}}
| |
| {{Quote|You know, when I cut you in half, I should have aimed for your neck instead.|Obi-Wan Kenobi to Maul|<ref name="Revenge" />}}
| |
| Obi-Wan went to Raydonia to face Maul at once. He quickly found the Sith Lord, who was full of anger. Obi-Wan realized Maul was not alone: Savage Opress quickly surprised Kenobi and struck him, knocking the Jedi unconscious. Kenobi was taken to [[Turtle Tanker/Legends|the brothers' ship]], where his lightsabers were taken, and he was cruelly tortured by the two. However, Kenobi had an ally in the form of Asajj Ventress, who found out Opress's location on Tatooine, at [[Chalmun's Spaceport Cantina/Legends|Chalmun's Spaceport Cantina]], and followed the Nightbrother to Raydonia. After she got aboard the ship, she revealed herself to the brothers, making them angry enough to leave the Jedi alone, searching for Ventress. After the two left, Ventress roused Kenobi, and gave him one of [[Asajj Ventress' lightsabers|her lightsabers]], to defend himself when the brothers came back. They took up the fight, but they found themselves outmatched. They retreated to the [[Cockpit/Legends|cockpit]] of the ship, and before the two brothers could open the locked door with their lightsabers, they jettisoned the cockpit and fled into space, leaving the angry Maul and Opress behind.<ref name="Revenge" />
| |
|
| |
| =====Chasing Maul=====
| |
| {{Main|Skirmish on Florrum/Legends}}
| |
| {{Quote|Throwing in with pirates now? Oh how the mighty Sith have fallen.|Obi-Wan Kenobi to Darth Maul|<ref name="Revival">{{TCW|Revival (episode)|Revival}}</ref>}}
| |
| After his encounter with Maul, Obi-Wan Kenobi joined with Adi Gallia to find the Sith Lord so that he could be stopped. When the two brothers [[Raid on the Cybloc Transfer Station/Legends|attacked]] [[Cybloc Transfer Station/Legends|Cybloc Transfer Station]], the [[Space station/Legends|space station]] sent out a [[Distress signal/Legends|distress signal]], leading Kenobi and Gallia there to investigate. When they arrived, the pair spoke with the station supervisor, [[Morlimur Snugg/Legends|Morlimur Snugg]], who confirmed that the attackers were indeed the two Zabrak and informed the Jedi that the brothers had taken his ship and were traveling to the [[Sertar sector/Legends|Sertar sector]]. Kenobi correctly guessed that Maul was going to Florrum to find Hondo Ohnaka and his pirates.<ref name="Revival" />
| |
|
| |
| When Kenobi and Gallia's [[Eta-class shuttle/Legends|shuttle]] arrived at Florrum, they contacted Ohnaka. Ohnaka told them that the Sith had convinced his men to betray him, and asked the Jedi to help him. Kenobi agreed to confront the Sith Lords while Ohnaka dealt with the traitorous pirates. When the Jedi landed on the planet, Maul and Opress separated themselves from the battle between the pirates in order to confront and eliminate the Jedi threat. Maul dueled Kenobi, while Opress attacked Gallia. Gallia was overwhelmed by Opress, who killed her by first ramming his head into her and impaling her with his horns and then stabbing her with his lightsaber. Kenobi tried to press his attack against the brothers, but was unable to hold his ground against their combined forces. Ohnaka, whose loyalists were losing the battle against the turncoats, ordered a retreat into his stronghold, and Kenobi followed him, grabbing Gallia's lightsaber as he went.<ref name="Revival" />
| |
|
| |
| [[File:DuelOnFlorrum-Revival.jpg|thumb|left|300px|Kenobi duels Maul while Gallia duels Opress.]]
| |
| As the pirates set up weapons in order to make a stand in their base, Kenobi volunteered to draw the Sith away from the rest of the battle. The pirates used explosives to collapse a tunnel in their base, separating Kenobi, Maul, and Opress from the rest of the battle, and Kenobi again dueled the brothers. Using both his own and Gallia's lightsabers, Kenobi resisted the brothers' attacks until he got inside Opress's defenses and cut off the Sith's left arm. Maul then Force-pushed Kenobi into the wall, and the pair of Sith retreated out of the base and straight into the waiting pirates, including the traitors, who had again given their loyalty to Ohnaka. Maul and Opress got to their ship and lifted off, but they were brought down just as quickly by a rocket launched by one of the pirates. The brothers, however, unbeknownst to the onlookers, left the doomed ship in an escape pod before it crashed. As the pirates looted the wreckage, Ohnaka stated that he thought the absence of bodies meant that they had been vaporized, but Kenobi, who had been mistaken about Maul's fate once before, was hesitant to assume the brothers were dead.<ref name="Revival" />
| |
|
| |
| Once he returned to Coruscant, Kenobi reported the events to Supreme Chancellor Palpatine, along with several Jedi. Kenobi expressed his belief that Maul was still alive, but Palpatine told him that he should focus his efforts on the Separatists, who posed a greater threat, and Yoda agreed, saying that Kenobi was too focused on Maul. However, he said that if he revealed himself, the Jedi would be swift in their response.<ref name="Revival" />
| |
|
| |
| =====Mandalore=====
| |
| {{Main|Battle of Sundari/Legends}}
| |
| {{Quote|Maul must really want you dead.''"<br />"''You have no idea.|Bo-Katan Kryze and Obi-Wan Kenobi in the middle of the battle|<ref name="Lawless">{{TCW|The Lawless}}</ref>}}
| |
| Kenobi was later summoned to meet with Yoda and Ki-Adi-Mundi in the communications room. The two showed him a transmission that had been sent by Duchess Satine from Mandalore. In the message, she stated that her government had been overthrown by [[Shadow Collective/Legends|rogue criminals]]. Before she could say anymore, the transmission abruptly cut.
| |
|
| |
| Kenobi tried to convince the two that they could not make Kryze a martyr, and that they needed to help her. But both Jedi refused as they pointed out that the neutrality of the planet made things difficult. Despite this, Kenobi decided to help his friend. Going to the hangar, he asked Anakin Skywalker for his old freighter, the ''Twilight''. Despite the long list of issues with the ship, he took it to Mandalore.
| |
|
| |
| [[File:BoKatanFreesKenobi-TL.png|thumb|right|250px|Kenobi freed by Bo-Katan]]
| |
| On the planet, he stole armor from a [[Mandalorian super commando/Legends|Mandalorian super commando]] upon his arrival at the docks and proceeded to the prison where Kryze was. Once he rescued her, the two were pursued back to their ship by a squad of commandos. The two were forced to abandon the ship when a rocket destroyed it. In the confusion of leaping off the ship, Kenobi saw Darth Maul and Savage Opress approach.
| |
|
| |
| In the [[Sundari Royal Palace/Legends|palace]], Kenobi was forced to watch as Maul choked Kryze in front of him. He was forced to his knees by two of the commandos and watched in horror as Maul impaled Kryze on the darksaber. Kenobi held her in his arms before she died, and Maul ordered Kenobi taken to a cell to drown in his own misery. But en route to the prison, the commandos were neutralized by [[Bo-Katan Kryze/Legends|Bo-Katan]] and her renegade [[Nite Owls/Legends|Nite Owls]] team.
| |
|
| |
| Kenobi and Bo-Katan allied and fled the scene in battle with more commandos. Bo-Katan ushered him to a ship that had approached to the site and ordered him to get Republic assistance. Kenobi said it would lead to Republic invasion, but she said that they would survive it. As he boarded the ship, he realized that she was Satine's sister, and gave her condolences before he left.<ref name="Lawless" />
| |
|
| |
| ====Onderon====
| |
| Kenobi attended a session of the Jedi Council when [[Onderon rebels/Legends|rebels]] [[Saw Gerrera/Legends|Saw Gerrera]] and [[Lux Bonteri/Legends|Lux Bonteri]] contacted them with a request for assistance in their [[Battle of Onderon|struggle]] against the Separatist forces on [[Onderon/Legends|Onderon]], led by King [[Sanjay Rash/Legends|Sanjay Rash]].
| |
|
| |
| Kenobi pointed out that at the beginning of the war, Onderon made their intentions to join the Separatists, but Gerrera said that their [[Ramsis Dendup/Legends|true king]] was silenced by the fake. The Council refused to help, but did consent to send advisors to train and advise them. Kenobi went there with Anakin Skywalker, Ahsoka Tano and Captain Rex.
| |
|
| |
| On Onderon, Kenobi met the rebels—and their charismatic leader [[Steela Gerrera/Legends|Steela Gerrera]]—alongside his friends and together, they trained the rebels in combat. When the Separatists discovered their outpost and attacked, Kenobi and his fellow Jedi assisted in battle, though cautious not to be in the thick of the battle. When the skirmish concluded, a strategy was devised to get into the capital city of [[Iziz/Legends|Iziz]].<ref name="Two Fronts">{{TCW|A War on Two Fronts}}</ref>
| |
|
| |
| Once in Iziz, Kenobi, Skywalker and Rex left for Coruscant to report to the Council, leaving Tano as a liaison to the rebels. However, they decided that Tano should not reveal her Jedi identity, though allowing her to accompany the rebels on strike.<ref name="Front Runners">{{TCW|Front Runners}}</ref> After that, they kept in frequent communication with her.<ref name="Front Runners" /><ref name="The Soft War">{{TCW|The Soft War}}</ref><ref name="Tipping Points">{{TCW|Tipping Points}}</ref> Kenobi attended the [[Funeral of Steela Gerrera/Legends|funeral service for Steela]] after the final battle after she had perished.<ref name="Tipping Points" />
| |
|
| |
| ====Asajj Ventress====
| |
| The waning months of the Clone Wars saw Kenobi become obsessed with the Dark Jedi whom he and Skywalker had faced numerous times, Asajj Ventress. Through numerous battles with Ventress, Kenobi had found out much about her past and believed that there was still some good in her. For a time he forsook the war to search for this enemy and even brought his former Padawan Skywalker along with him, in what Skywalker considered to be a [[wild bantha chase]] since he believed himself to have killed Ventress when she [[Duel in the Coruscant Underlevels|followed him]] to Coruscant. However, after following several clues that pointed to her survival, once Skywalker had destroyed the deadly bounty hunter Durge once and for all, he became less and less sure of this conviction.<ref name="SWObsession">''[[Star Wars: Obsession]]''</ref>
| |
|
| |
| Eventually the two found Ventress on [[Boz Pity/Legends|Boz Pity]] in a bacta tank. She attacked the two when she came out of her trance but was again defeated, and abandoned by Dooku. Finally, she let go of her anger and rage and put herself in a trance that made her appear dead. She was taken aboard a medical ship (along with Alpha 17), awoke shortly after, and ordered the pilot to take her far away from the war, Dooku, and the Jedi. Kenobi was left believing that she was truly dead.<ref name="SWObsession" />
| |
|
| |
| ====The Outer Rim Sieges====
| |
| Kenobi spent the last few months before the end of the war serving with Skywalker on the Outer Rim Sieges. These took them to some of the most remote worlds in the galaxy, and forced them to stay for long periods of time. While this was a strain on Skywalker being away from his secret wife, Kenobi took these campaigns in his stride, leading the Republic to a long string of victories. One of their missions involved capturing Viceroy Gunray on his homeworld of [[Cato Neimoidia/Legends|Cato Neimoidia]]. In the few weeks before the [[Battle of Coruscant/Legends|Battle of Coruscant]] Kenobi and Skywalker even took up the search for the mysterious Darth Sidious, and uncovered information that almost allowed Mace Windu to find Sidious, but Windu was stopped before he uncovered Sidious' identity when Coruscant was attacked.
| |
|
| |
| Kenobi's legend had grown during the wars, as he and his partner Skywalker became household names from their daring exploits, and were the most famous Jedi in the galaxy. This earned the attention of the Separatist general, Grievous, who wanted to add both Skywalker's and Kenobi's lightsabers to his belt as trophies.{{Fact}}
| |
|
| |
|
| ===Rise of the Empire ([[19 BBY/Legends|19 BBY]])=== | | ===Rise of the Empire ([[19 BBY/Legends|19 BBY]])=== |
| {{Quote|He was deceived by a lie. We all were. It appears that the Chancellor is behind everything, including the war. Palpatine is the Sith Lord we've been looking for. After the death of Count Dooku, Anakin became his new apprentice.|Obi-Wan Kenobi to Padmé Amidala|<ref name="rots" />}}
| |
| ====Battle of Coruscant====
| |
| [[File:Kenobi-EpIII.jpg|thumb|left|200px|Kenobi aboard the [[Invisible Hand/Legends|''Invisible Hand'']]]]
| |
| When Supreme Chancellor Palpatine was kidnapped by General Grievous and taken onto his flagship, the [[Invisible Hand/Legends|''Invisible Hand'']] during the [[Battle of Coruscant/Legends|Battle of Coruscant]] in [[19 BBY/Legends|19 BBY]], Kenobi and Skywalker were quickly called in from the [[Outer Rim Sieges/Legends|Outer Rim Sieges]] to rescue the captive leader of the Republic. Kenobi developed the plan that allowed for Skywalker and himself to rush in and rescue the Chancellor. Once on board, the two fought their way to where the Chancellor was being held captive by Count Dooku.<ref name="rots" />
| |
|
| |
| Kenobi and Skywalker again engaged the aged Sith Lord in battle. Initially, the two Jedi used lesser styles to lull Dooku into a false sense of confidence, before suddenly switching to their more advanced styles. Dooku was caught off guard and soon fought for a more serious duel. The skills Kenobi had developed in Soresu by this point were so incredible that Mace Windu considered his variant the true mastery of the Form. This time it seemed he could even be able to best the Count, however, that was only delusional as the Sith swordsman was still a tad more superior. Still, together the two Jedi would overwhelm him, so Dooku pushed Kenobi off to the side to deal with Skywalker exclusively. While Skywalker drove Dooku up the stairs to the entrance balcony of the General's quarters, Kenobi dealt with the super battle droids that Dooku had brought to distract the two. However, once he did so, Dooku immediately kicked Skywalker aside and grasped Kenobi in a Force choke, hurled him to the side of the room, and brought a section of the balcony down on him, rendering Kenobi unconscious and injured.<ref name="rots" />
| |
|
| |
| Consequently, he was unable to stop Skywalker from murdering Dooku at Palpatine's behest. However, Palpatine was unable to stop Skywalker from rescuing Kenobi.<ref name="rots" />
| |
|
| |
| When Kenobi recovered, he found himself upside-down, in an elevator shaft, staring at Palpatine hanging on Skywalker's leg. He quickly righted himself. After exiting the elevator, Obi-Wan, Anakin and Palpatine were confronted by more droids. Anakin was separated from Obi-Wan and the Chancellor by a magnetic ray shield, but they rendezvoused a little later. Obi-Wan's comlink then received a distress call from another Jedi Knight whose cruiser was being brutally attacked. Anakin and his master then mounted two of the ''Invisible Hand''{{'s}} cannons to attack the Separatist ship that was attacking the cruiser. They shot the vital sections of the ship, and destroyed the Banking Clan battleship. When they got back into the hallways, Kenobi suggested they make their way to the hangar bay to hopefully find something still capable of flight. But before they made it to the hangar, they got caught in a [[Ray shield/Legends|ray shield]].<ref name="rots" />
| |
|
| |
| [[File:MagnaGuard_Unleashed.jpg|thumb|right|200px|Kenobi engaging one of Grievous' MagnaGuards]]
| |
| Brought to the bridge, they were gloated at by Grievous, but Kenobi remained confident. When R2-D2 created a distraction, Kenobi, using the Force, retrieved his lightsaber from Grievous and cut his and Skywalker's bonds. Engaging and defeating Grievous' MagnaGuards, they moved to corner the General. However, Grievous used an electrostaff set on overload<ref name="rotsn" /> to shatter the bridge viewport and exited, climbing along the ship exterior to the escape pods and launching all of them along the way. Having no other escape, Kenobi asked if Skywalker could pilot this cruiser. Skywalker crash-landed the remains of the ship, and they walked away relatively unscathed.<ref name="rots" />
| |
|
| |
| =====Suspicion=====
| |
| {{Quote|The Council wants you to report on all the Chancellor's dealings. They want to know what he's up to.''"<br />"''They want me to spy on the Chancellor?! But that's [[Treason/Legends|treason]]!|Obi-Wan Kenobi and Anakin Skywalker|<ref name="rots" />}}
| |
| As Palpatine gathered more power, Kenobi became concerned. He counseled Skywalker to be wary of the Chancellor. When Skywalker was appointed to the Council and instructed to spy on Palpatine, Kenobi was the only member who was against the Council's decision. Despite this, Skywalker began distrusting him just as much as the rest of the council, and Kenobi felt he was justified in this.<ref name="rotsn" />
| |
|
| |
| ====Battle of Utapau====
| |
| [[File:Obiwanshoots.png|thumb|left|200px|Kenobi shoots Grievous with his own blaster.]]
| |
| {{Quote|Back away! I will deal with this Jedi slime myself.''"<br />"''Your move.''"<br />"''You fool! I've been trained in your Jedi arts by Count Dooku.|General Grievous and Obi-Wan Kenobi|<ref name="rots" />}}
| |
| When Grievous was discovered on Utapau, Kenobi was sent by the Jedi Council to eliminate him. With the death of Count Dooku during the [[Battle of Coruscant/Legends|Battle of Coruscant]], Grievous had become the [[Head of State/Legends|Head of State]] of the Confederacy of Independent Systems, meaning Grievous' death would end the Clone Wars.<ref name="rots" />
| |
|
| |
| Kenobi eventually tracked Grievous down and went down alone to scout out the area. Deceiving the droids into thinking he had left, Kenobi quietly used a [[Varactyl/Legends|varactyl]] named [[Boga/Legends|Boga]] to move around in search of the general. Discovering the cyborg's hiding place, he faced the General alone, after defeating some of his bodyguards.<ref name="rots" />
| |
|
| |
| The General fought the Jedi Master using four of his collected lightsabers in an unpredictable personalized style, using his top two lightsaber as saws, and his bottom two pointing at Obi-Wan. Grievous was a powerful opponent, but Obi-Wan's mastery of Soresu allowed him to quickly slice off two of the cyborg's hands. When the [[212th Attack Battalion/Legends|212th Attack Battalion]], led by Commander Cody, [[Battle of Utapau/Legends|ambushed]] the unsuspecting Separatists, Grievous used the resulting confusion to flee, followed closely by Kenobi. Their chase eventually led them to Grievous' private landing platform, where the two completed the battle. It ended when Kenobi used the General's [[Grievance Striker/Legends|own blaster]] to shoot him through the gutsack, killing him.<ref name="rots" />
| |
| [[File:Dead_General.png|thumb|right|200px|General Kenobi looks down on the deceased General Grievous.]]
| |
|
| |
| ====The beginning of the Purge==== | | ====The beginning of the Purge==== |
| {{Quote|Did you find Kenobi?''"<br />"''Sir, no one could've survived that fall.''"<br />"''Start loading your men onto the ships. Move it!|Clone Commander Cody and a clone trooper|<ref name="rots" />}}
| |
| When Palpatine issued [[Order 66/Legends|Order 66]], commanding all clone troopers to kill their Jedi Generals, Commander Cody, Obi-Wan's friend for the past few months, himself ordered his troops to eliminate Kenobi. Kenobi narrowly escaped murder at the hands of his clones; the blast from an AT-TE's main cannon that was intended to kill him was fired from a long range, and therefore did not score a direct hit. It instead sent Kenobi plummeting into the lake at the bottom of the sinkhole with his mount, the varactyl Boga. After recovering from this attempted murder, Kenobi escaped using General Grievous' [[Belbullab-22 starfighter]].<ref name="rots" />
| |
|
| |
| [[File:Shock.png|thumb|left|200px|Obi-Wan Kenobi watches a [[Hologram/Legends|hologram]] of [[Palpatine/Legends|Darth Sidious]] and Darth Vader in abject shock.]]
| |
| Kenobi used Grievous' starship to escape from Utapau and was contacted by Senator Bail Organa, who had already rescued Master Yoda from [[Kashyyyk/Legends|Kashyyyk]] on his starship, the ''[[Sundered Heart]]''. Kenobi and Yoda [[Infiltration of the Jedi Temple|returned]] to the ruined Jedi Temple on Coruscant. They fought their way to the beacon room and reversed the code to warn all remaining Jedi to stay away instead of returning. They then came across recordings on Temple security camera TR4-121 that showed his former apprentice cutting down [[Cin Drallig/Legends|Cin Drallig]] as well as two of his students, and bowing before Palpatine and being proclaimed his new Sith apprentice. Kenobi and Yoda then decided to split up and kill the two Sith Lords. Kenobi begged to fight the Emperor because he considered Skywalker a brother. Yoda told him that the Emperor was too strong for Kenobi and that Skywalker was not the boy he trained, but consumed by Darth Vader. The two separated.<ref name="rots" />
| |
|
| |
| Kenobi visited Skywalker's secret wife Padmé Amidala, confronting her with the truth that Skywalker had turned to the dark side. Amidala refused to believe him, and would not tell Kenobi that Skywalker had been sent to Mustafar to kill the Separatist Council. Kenobi noted Amidala's heavily pregnant condition, realizing and forcing her to admit that Skywalker was the father, hence her reluctance to help him: apologizing for what he had to do, Kenobi took his leave of her. Kenobi, after sneaking onto Amidala's space cruiser as the Senator prepared to leave to find Skywalker herself, tracked the Sith apprentice to the volcanic world of Mustafar.<ref name="rots" />
| |
|
| |
| =====Duel on Mustafar===== | | =====Duel on Mustafar===== |
| {{Quote|If you're not with me, then you're my enemy!''"<br />"''Only a Sith deals in absolutes. I will do what I must.''"<br />"''You will try!|Darth Vader and Obi-Wan Kenobi before their duel|audio=NotWithMe-Absolutes-Try.ogg|<ref name="rots" />}}
| |
| Arriving on Mustafar stowed away on Amidala's ship, Kenobi witnessed the exchange between her and Vader. When he revealed himself, Vader was consumed by rage and [[Telekinesis/Legends#Choking powers|choked]] Amidala, accusing her of betraying him and bringing Kenobi to murder him. Barely convincing Vader to let her go, but not before Vader choked her into unconsciousness, he attempted to reason with the Sith Lord. Vader retorted with an offer to let Kenobi go, but Kenobi refused, drawing his lightsaber. With a murderous battle cry, Vader drew his and leapt at Kenobi.<ref name="rots" /> | | Arriving on Mustafar stowed away on Amidala's ship, Kenobi witnessed the exchange between her and Vader. When he revealed himself, Vader was consumed by rage and [[Telekinesis/Legends#Choking powers|choked]] Amidala, accusing her of betraying him and bringing Kenobi to murder him. Barely convincing Vader to let her go, but not before Vader choked her into unconsciousness, he attempted to reason with the Sith Lord. Vader retorted with an offer to let Kenobi go, but Kenobi refused, drawing his lightsaber. With a murderous battle cry, Vader drew his and leapt at Kenobi.<ref name="rots" /> |
|
| |
|
| Vader viciously drove Kenobi back through the complex with his mastery of [[Form V/Legends|Djem So]], but he was unable to penetrate Kenobi's mastery of [[Form III/Legends|Soresu]]. Their bout in the control room of the complex deactivated the energy shield protecting the settlement, so when their fight spread to the collection arms of the lava-mining facility, they were forced to dodge a rain of fire. While they were fighting, the weight and heat of the lava caused the collection arms' structure to weaken and eventually collapse and break loose.<ref name="rots" /> | | Vader viciously drove Kenobi back through the complex with his mastery of [[Form V/Legends|Djem So]], but he was unable to penetrate Kenobi's mastery of [[Form III/Legends|Soresu]]. Their bout in the control room of the complex deactivated the energy shield protecting the settlement, so when their fight spread to the collection arms of the lava-mining facility, they were forced to dodge a rain of fire. While they were fighting, the weight and heat of the lava caused the collection arms' structure to weaken and eventually collapse and break loose.<ref name="rots" /> |
|
| |
|
| [[File:Kenobi_Mustafar.jpg|thumb|right|250px|Kenobi on Mustafar during his climactic [[Duel on Mustafar/Legends|duel]] with Darth Vader]]
| |
| Kenobi and Vader continued to fight on the collection arm as it floated down a lava river, but when they came to a lava fall, Kenobi leapt off onto one of the mining platforms floating above the river. Thinking Vader dead, he turned to find the Sith Lord perched on a lava mining droid, having leapt from the structure before it plunged to oblivion. As their fight continued they floated back upriver, continuing to exchange verbal barbs. Kenobi desperately tried to convince Vader of Palpatine's evil, but when Vader retorted the Jedi were evil, Kenobi bellowed that his old student and friend was beyond redemption. As their battle edged close to shore, Kenobi took his chance and leapt onto the shore, gaining the high ground over Vader. Although Kenobi warned Vader off, the Sith snarled, "You underestimate my power!" Obi-Wan, out of a last vestige of friendship, begged Vader not to try the jump, but Vader lunged at his former master, [[Mou kei/Legends|only to have his left arm and both legs cut off]], sending the Sith tumbling down the lava bank.<ref name="rots" /> | | Kenobi and Vader continued to fight on the collection arm as it floated down a lava river, but when they came to a lava fall, Kenobi leapt off onto one of the mining platforms floating above the river. Thinking Vader dead, he turned to find the Sith Lord perched on a lava mining droid, having leapt from the structure before it plunged to oblivion. As their fight continued they floated back upriver, continuing to exchange verbal barbs. Kenobi desperately tried to convince Vader of Palpatine's evil, but when Vader retorted the Jedi were evil, Kenobi bellowed that his old student and friend was beyond redemption. As their battle edged close to shore, Kenobi took his chance and leapt onto the shore, gaining the high ground over Vader. Although Kenobi warned Vader off, the Sith snarled, "You underestimate my power!" Obi-Wan, out of a last vestige of friendship, begged Vader not to try the jump, but Vader lunged at his former master, [[Mou kei/Legends|only to have his left arm and both legs cut off]], sending the Sith tumbling down the lava bank.<ref name="rots" /> |
|
| |
|
| As Vader lay cursing his former master, Kenobi replied: | | As Vader lay cursing his former master, Kenobi replied: |
| {{Quote|You were the Chosen One! It was said that you would destroy the Sith, not join them! Bring balance to the Force, not leave it in darkness!|Obi-Wan Kenobi|audio=ChosenOne-ROTS.ogg|<ref name="rots" />}}
| |
| As Kenobi watched Vader attempt to scramble onto the bank, his old apprentice screamed: "I hate you!" Kenobi stared at his old apprentice, sadness in his eyes, and realized the truth of Yoda's words: the boy he had trained was gone. He replied, "You were my brother, Anakin. I loved you." As he watched Vader's graphic near-immolation from the heat of the lava, the Sith crying out his eternal hatred for Kenobi, he retrieved Skywalker's lightsaber.<ref name="rots" /> He chose not to murder his defenseless enemy in cold blood, and allowed the Force to determine Vader's fate. Believing that Vader was dead, Kenobi left the planet just before Palpatine and his clone escorts landed on the surface. Palpatine and his escorts rescued the Dark Lord from what was almost a horrific fiery demise. | | As Kenobi watched Vader attempt to scramble onto the bank, his old apprentice screamed: "I hate you!" Kenobi stared at his old apprentice, sadness in his eyes, and realized the truth of Yoda's words: the boy he had trained was gone. He replied, "You were my brother, Anakin. I loved you." As he watched Vader's graphic near-immolation from the heat of the lava, the Sith crying out his eternal hatred for Kenobi, he retrieved Skywalker's lightsaber.<ref name="rots" /> He chose not to murder his defenseless enemy in cold blood, and allowed the Force to determine Vader's fate. Believing that Vader was dead, Kenobi left the planet just before Palpatine and his clone escorts landed on the surface. Palpatine and his escorts rescued the Dark Lord from what was almost a horrific fiery demise. |
|
| |
|
| =====Aftermath===== | | =====Aftermath===== |
| [[File:DeliveringLuke-ROTS.png|thumb|left|175px|Kenobi giving [[Luke Skywalker/Legends|Luke]] to [[Beru Whitesun Lars/Legends|Beru Lars]] on Tatooine]]
| |
| {{Quote|I will take the child and watch over him.|Obi-Wan Kenobi to Yoda and Bail Organa, referring to Luke|<ref name="rots" />}}
| |
| After leaving Mustafar, Kenobi took Amidala to [[Polis Massa/Legends|Polis Massa]]. There, with Bail Organa and Master Yoda, the three of them discovered that Amidala was carrying twins and had to be operated on quickly if they were to save the babies, because Amidala was literally dying of a broken heart. Kenobi served as Amidala's coach as the babies were born. Amidala gave her [[Japor snippet/Legends|japor snippet]] to Kenobi to keep for her, but he didn't understand the significance of this gesture so he gave it back to her. It was supposedly buried with her. Amidala also told Kenobi she still believed there was good in her husband before she finally died.<ref name="rotsn" />
| |
|
| |
| As they arrived on Naboo, Kenobi, Organa, and Yoda all agreed that Kenobi would take Anakin Skywalker's son [[Luke Skywalker/Legends|Luke]] to Anakin's step-brother [[Owen Lars/Legends|Owen Lars]] and his wife [[Beru Whitesun Lars/Legends|Beru]] on Tatooine. Organa meanwhile would take Skywalker's daughter [[Leia Organa Solo|Leia]] to Alderaan, and Yoda would hide on the swamp world of [[Dagobah/Legends|Dagobah]]. As the trio prepared to go their separate ways, Yoda asked Kenobi for a moment of his time. He revealed that his old Master, Qui-Gon Jinn, had contacted him from beyond death to teach both of them the true path to immortality.<ref name="rots" /> | | As they arrived on Naboo, Kenobi, Organa, and Yoda all agreed that Kenobi would take Anakin Skywalker's son [[Luke Skywalker/Legends|Luke]] to Anakin's step-brother [[Owen Lars/Legends|Owen Lars]] and his wife [[Beru Whitesun Lars/Legends|Beru]] on Tatooine. Organa meanwhile would take Skywalker's daughter [[Leia Organa Solo|Leia]] to Alderaan, and Yoda would hide on the swamp world of [[Dagobah/Legends|Dagobah]]. As the trio prepared to go their separate ways, Yoda asked Kenobi for a moment of his time. He revealed that his old Master, Qui-Gon Jinn, had contacted him from beyond death to teach both of them the true path to immortality.<ref name="rots" /> |
|
| |
|
| ===Exile ([[19 BBY/Legends|19 BBY]]–[[0 BBY/Legends|0 BBY]])=== | | ===Exile ([[19 BBY/Legends|19 BBY]]–[[0 BBY/Legends|0 BBY]])=== |
| {{Quote|That wizard's just a crazy old man. I don't think he exists anymore. He died about the same time as your father.|Owen Lars to Luke Skywalker|<ref name="Episode IV" />}} | | {{Quote|That wizard's just a crazy old man. I don't think he exists anymore. He died about the same time as your father.|Owen Lars to Luke Skywalker|<ref name="Episode IV" />}} |
| During the [[Galactic Empire/Legends|Imperial]] era, Kenobi was [[Ben Kenobi's hut|forced into hiding]]. Taking Grievous's starfighter to [[Nar Shaddaa/Legends|Nar Shaddaa]], Kenobi sold the ship and booked passage to the desert world, along with his young passenger, the baby Luke.<ref name="The Story of General Grievous: Lord of War">''[[The Story of General Grievous: Lord of War]]''</ref>
| |
|
| |
| Self-exiled on Tatooine, Kenobi spoke with his departed master, Qui-Gon Jinn, through a technique passed down to him by Yoda, who had in turn been taught by Jinn.<ref name="Last One Standing">''[[The Last One Standing]]''</ref> He went by the name of "Ben" to the locals of Tatooine; he had seen that name on the map at the property office of [[Bestine (city)/Legends|Bestine]] and admitted there was "some mesa by that name."<ref name="Kenobi">[[Kenobi (novel)|''Kenobi'']]</ref>
| |
|
| |
| For the first few months of his self-imposed exile, Kenobi had no idea what had become of Vader after he had left him to his fate on Mustafar, but one day at a cantina Kenobi finally heard that he was alive when news reached him of Vader's victory at the [[Battle of Kashyyyk (19 BBY)|Battle of Kashyyyk]]. He was shocked that the remaining Jedi thought they could band together to defeat the Sith Lord. He had hoped that they would go into hiding like he and Yoda did.<ref name="Dark Lord" />
| |
|
| |
| Kenobi visited the [[Lars homestead]] every day, always staying clear of Owen and Beru so that they would not see him and watching Luke from afar. During these visits he would contemplate Skywalker's "death," though he still had inkling that he was in fact alive, as well as wonder why his former Master, Jinn, had not yet contacted him from beyond death. During one of these visits, the Lars discovered that twenty of their vaporators had been stolen by the Sand People. Although Owen decided to gather a group of farmers to combat the Tuskens and win his vaporators back through a bloody war, Kenobi had other ideas.<ref name="Last One Standing" />
| |
|
| |
| Instead, Kenobi set out on his own and tracked the Sand People, contemplating memories of his old apprentice before finally meeting with a group of Tuskens at dusk. At first things went well, as he quickly found out which tent the Sand People were keeping the stolen vaporators in, and silently broke into the tent and loaded them onto a bantha without alerting the nearby Tuskens. As he was about to leave, he was spotted by a lone Tusken Raider male.<ref name="Last One Standing" />
| |
|
| |
| The Raider attacked him immediately. Kenobi quickly sliced through the attacker's weapon with his lightsaber, causing the Raider to howl. This alerted many others in the camp, who all came out to meet with the foe. They all attacked him, and though Kenobi found himself drawing upon his anger, he let go of the dark and destructive feeling. Instead of murdering the entire clan as Anakin Skywalker had done in the past, Kenobi cleverly chose to cut their clothes off to reveal their skin, a taboo to the Sand People, which would usually result in others of the tribe murdering the offenders. This gave him time to escape on the bantha with the vaporators and gained him legendary reputation amongst the Sand People.<ref name="Last One Standing" />
| |
|
| |
| [[File:SWKenobi-coverart.jpg|thumb|left|300px|Kenobi in the early stages of his exile on Tatooine]]
| |
| On returning to the Lars homestead, Kenobi was met with an icy welcome. Owen informed him that they did not need his help, as they were a family and could have handled it on their own. Kenobi left the farm, returning to his solitude and contemplation.<ref name="Last One Standing" />
| |
|
| |
| Unbeknownst to Kenobi, he was being rigorously hunted by Vader, who had tortured several Jedi in order to find Kenobi's whereabouts, and spared no expense to do so. This would work to Vader's disadvantage, however, when Kenobi was said to have been at the infamous [[Conclave on Kessel]].<ref name="SWp">''[[Star Wars: Purge]]''</ref>
| |
|
| |
| ====Adventures with Ferus Olin====
| |
| Over the next few months, Kenobi felt he was ready to train in the way of the [[Ancient Order of the Whills|Whills]], but Jinn's spirit told him that he was not, and that he must realize for himself why in order to begin. Roughly a year into his exile, Kenobi overheard spacers discussing events on [[Bellassa/Legends|Bellassa]], where Ferus Olin, a former Padawan Kenobi had thought dead, was on the run from Imperial forces. Jinn convinced Kenobi to track Olin, promising him that this quest would help Kenobi's mission to protect the baby. With the spirit of Jinn temporarily looking after one-year-old Luke, Kenobi went to Bellassa. On Bellassa he assumed the identity of Ronar Hanare, a businessman charged with working on a pipeline outside the city of [[Ussa]]. This allowed him access to the spaceport of Ussa, which was controlled by [[the Eleven]] while he searched for Olin. He eventually found Olin and helped him escape the ruthless [[Inquisitorius/Legends|Inquisitor]] [[Malorum]]. Kenobi also discovered that Malorum was interested in the events of Polis Massa. Pursued by [[Boba Fett/Legends|Boba Fett]], Kenobi and Olin escaped from Bellassa to [[The Red Twins/Legends|the Red Twins]] system.<ref name="lotj1">''[[The Last of the Jedi: The Desperate Mission]]''</ref>
| |
|
| |
| [[File:Last_of_the_Jedi_by_Chris_Trevas.jpg|thumb|right|200px|Kenobi and Olin are pursued by Boba Fett.]]
| |
| Evading the bounty hunter, Kenobi and Olin eventually found themselves on the planet [[Acherin]], where they met two former Separatists now against the Empire, a man named [[Toma (resistance leader)|Toma]] and a skilled pilot named [[Raina Quill]]. With these new companions, as well as a boy from Bellassa, [[Trever Flume]], Kenobi and Olin escaped the Imperials. Kenobi learned from Toma that [[Garen Muln]], an old Jedi friend of his, survived Order 66 and was hiding on the frozen world of [[Ilum/Legends|Ilum]]. Olin went to rescue Muln, while Kenobi went to Polis Massa to make sure Luke and Leia's birth was still a secret from the Empire. There he encountered the Inquisitor [[Sancor]], a security expert sent by Malorum, and with the help of Polis Massan [[Maneeli Tuun/Legends|Maneeli Tuun]], Kenobi tried to deceive him by pretending to be [[Osh Scal/Legends|Osh Scal]], the supply officer who had witnessed the events. Kenobi also tried to misguide Sancor, offering a more tempting target for his research.
| |
| When Sancor saw an image of Scal in the files, the charade failed, and Kenobi was forced to eliminate him; Sancor was accidentally killed while trying to escape from the Jedi.<ref name="lotj2">''[[The Last of the Jedi: Dark Warning]]''</ref>
| |
|
| |
| Returning to Ilum, Kenobi picked up Ferus, Trever, and Garen and brought them to an asteroid that Ferus planned to make into a haven for Jedi. Olin asked Kenobi to join him, but the Jedi Master turned it down and returned to Tatooine. Kenobi had to leave the asteroid soon afterwards. He met with Olin and asked the former Padawan to take care of Malorum. Kenobi did not tell Olin about the birth of the Skywalker twins, but specifically asked Olin to not allow Malorum to discover whatever had happened in Polis Massa; Kenobi correctly believed that Sancor's death would not deter Malorum from continuing his research. Upon Kenobi's return, Jinn's spirit came to him again, this time to tell him he was ready to train in the way of the Whills.<ref name="lotj2" />
| |
|
| |
| ====Later missions====
| |
| [[File:HettVsKenobi-Legacy2006-16.jpg|thumb|left|220px|Kenobi duels A'Sharad Hett on Tatooine.]]
| |
|
| |
| On Tatooine in [[17 BBY/Legends|17 BBY]], Kenobi met A'Sharad Hett, another Jedi who had survived Order 66. A'Sharad was leading a Tusken Raider group near the Lars's moisture farm. Kenobi had noticed Hett's activities in his exile, and believed Hett was frighteningly close to the dark side, becoming the very thing he was claiming to fight. He begged Hett to stop his crusade there and then, not mentioning to Hett exactly why he had chosen to defend this small farm. However, Hett refused to listen; the settlers and farmers had killed countless Tuskens, and blood called out for blood. With little choice, both Jedi ignited their lightsabers and fought a [[Duel on Tatooine (Imperial Period)|brutal duel]] on the desert flat, with the entire Tusken army watching them.<ref name="SWLegacy 16">[[Legacy (2006) 16|''Legacy'' (2006) 16]]</ref>
| |
|
| |
| The duel ended with the loss of Hett's right arm, and the extra humiliation of having his mask removed. Hett became an outcast, and asked Kenobi to finish him off. However Kenobi would still follow the Jedi Order's tenets, and would never strike down an unarmed opponent. Instead, he made Hett swear on the honor of his late father that he would leave Tatooine and never return, hoping that one day, Hett would see the error of his ways and again take up the Jedi way. Hett never did and he eventually became the Dark Lord of the Sith known as Darth Krayt.<ref name="SWLegacy 16" />
| |
|
| |
|
| Kenobi may have secreted in the [[Lost City of the Jedi]] on [[Yavin 4/Legends|Yavin 4]] the young [[Ken]], just under seven years before the [[Battle of Yavin/Legends|Battle of Yavin]]. Certainly, Kenobi knew of the city's location, as he would later send Luke Skywalker there, and Ken himself seemed to have vague memories of a "brown-robed Jedi Master."<ref name="The Lost City of the Jedi">''[[The Lost City of the Jedi]]''</ref> | | Kenobi may have secreted in the [[Lost City of the Jedi]] on [[Yavin 4/Legends|Yavin 4]] the young [[Ken]], just under seven years before the [[Battle of Yavin/Legends|Battle of Yavin]]. Certainly, Kenobi knew of the city's location, as he would later send Luke Skywalker there, and Ken himself seemed to have vague memories of a "brown-robed Jedi Master."<ref name="The Lost City of the Jedi">''[[The Lost City of the Jedi]]''</ref> |
| Line 922: |
Line 75: |
|
| |
|
| The reason for Owen's anger was that Kenobi had attempted to give Anakin Skywalker's lightsaber to Luke, feeling that Luke was old enough and should be allowed to have it. Owen refused to allow it because he believed the Jedi path was a destructive one. He told Kenobi that he didn't want Luke to make the same mistakes Anakin Skywalker did, saying that he felt Anakin should have never left his mother and gotten involved with the "damn foolish idealistic Jedi crusaders" in the first place. He vehemently told Kenobi to leave and to stay away.<ref name="Adventure in Beggar's Canyon" /> | | The reason for Owen's anger was that Kenobi had attempted to give Anakin Skywalker's lightsaber to Luke, feeling that Luke was old enough and should be allowed to have it. Owen refused to allow it because he believed the Jedi path was a destructive one. He told Kenobi that he didn't want Luke to make the same mistakes Anakin Skywalker did, saying that he felt Anakin should have never left his mother and gotten involved with the "damn foolish idealistic Jedi crusaders" in the first place. He vehemently told Kenobi to leave and to stay away.<ref name="Adventure in Beggar's Canyon" /> |
|
| |
| At some point, Kenobi thought of trying to track down and trace Outbound Flight as there were twenty Jedi amongst its number, possibly the largest group of Jedi in existence. He didn't know that Outbound Flight had been destroyed by [[Commander/Legends|Commander]] [[Mitth'raw'nuruodo/Legends|Mitth'raw'nuruodo]] and all the Jedi aboard had perished. He recorded what information he could gather into an electronic tome which Princess Leia and Han Solo later recovered in [[8 ABY/Legends|8 ABY]]. Although they were not able to immediately unlock the data, C-3PO at least determined what was on the device.<ref name="Tatooine Ghost">''[[Tatooine Ghost]]''</ref>
| |
|
| |
|
| ===Return ([[0 BBY/Legends|0 BBY]])=== | | ===Return ([[0 BBY/Legends|0 BBY]])=== |
| Line 929: |
Line 80: |
| {{Quote|In this struggle, we shall need more than arms and intercepted plans. It's time we summoned the help of one of our wisest warriors and leaders.|Bail Organa, tasking Leia with bringing Obi-Wan Kenobi to Alderaan|<ref name="Star Wars (radio)">[[Star Wars (radio)|''Star Wars'' (radio)]]</ref>}} | | {{Quote|In this struggle, we shall need more than arms and intercepted plans. It's time we summoned the help of one of our wisest warriors and leaders.|Bail Organa, tasking Leia with bringing Obi-Wan Kenobi to Alderaan|<ref name="Star Wars (radio)">[[Star Wars (radio)|''Star Wars'' (radio)]]</ref>}} |
| [[File:Obiwan_old.jpg|thumb|left|200px|Ben recalls once going by the name Obi-Wan.]] | | [[File:Obiwan_old.jpg|thumb|left|200px|Ben recalls once going by the name Obi-Wan.]] |
| In large part because of Kenobi's status as a survivor and fugitive of Order 66, Kenobi was also listed as one of the eight most wanted criminals in the Galactic Empire. Since he hadn't been sighted since the [[Battle of Utapau/Legends|Battle of Utapau]] by the galaxy at large, the image of him was from the Clone Wars, which frequently appeared in [[Be a Stormtrooper!|stormtrooper recruitment videos]] as late as 0 BBY.<ref name="STACjp">''[[Star Tours: The Adventures Continue]]'' (Tokyo Disneyland only)</ref> | | In [0 BBY/Legends|0 BBY]] Kenobi rescued Luke Skywalker from Tusken Raiders while Luke was tracking the errant R2-D2, who insisted he was the property of, and carried a message for, Obi-Wan Kenobi. They returned to Obi-Wan's home, and Kenobi used the opportunity to finally present Luke with Anakin Skywalker's lightsaber. However, when Luke asked Kenobi about his father's death, Kenobi disguised the truth from him.<ref name="Episode IV" /> |
| | |
| Thirty-two years after the [[Battle of Naboo/Legends|Battle of Naboo]], Kenobi rescued Luke Skywalker from Tusken Raiders while Luke was tracking the errant R2-D2, who insisted he was the property of, and carried a message for, Obi-Wan Kenobi. They returned to Obi-Wan's home, and Kenobi used the opportunity to finally present Luke with Anakin Skywalker's lightsaber. However, when Luke asked Kenobi about his father's death, Kenobi disguised the truth from him.<ref name="Episode IV" />
| |
|
| |
|
| In Obi-Wan's way of thinking, this was not completely untrue: Anakin Skywalker died the moment he betrayed the Jedi and chose the path of evil, completely becoming Darth Vader. | | In Obi-Wan's way of thinking, this was not completely untrue: Anakin Skywalker died the moment he betrayed the Jedi and chose the path of evil, completely becoming Darth Vader. |
| Line 956: |
Line 105: |
| Kenobi did not vanish entirely. In accordance with his prediction, he became a Force ghost that could guide and counsel the young Luke from afar. | | Kenobi did not vanish entirely. In accordance with his prediction, he became a Force ghost that could guide and counsel the young Luke from afar. |
|
| |
|
| The spirit of Kenobi played a vital role in the Battle of Yavin, for he guided Skywalker in destroying the Death Star, instructing Luke to "use the Force" when firing his proton torpedoes.<ref name="Episode IV" /> When Luke was shocked into a catatonic state by the dark presence of Darth Vader, Kenobi appeared in a dream to help him fight his fear of the Dark Lord. Later, his spirit temporarily took control of Luke's body, allowing him to survive his first duel with Darth Vader on the mist-shrouded planet of [[Mimban/Legends|Mimban]], and even allowed Luke to knock the Dark Lord into a deep pit.<ref name="Splinter of the Mind's Eye">''[[Splinter of the Mind's Eye]]''</ref> His guidance aided Luke in destroying a rogue moon that threatened the New Academy for space pilots.<ref name="The Maverick Moon">''[[The Maverick Moon]]''</ref> Kenobi's spirit also later [[Mission on Mustafar|appeared]] on Mustafar.<ref name="Star Wars Galaxies: Trials of Obi-Wan">''[[Star Wars Galaxies: Trials of Obi-Wan]]''</ref> | | The spirit of Kenobi played a vital role in the Battle of Yavin, for he guided Skywalker in destroying the Death Star, instructing Luke to "use the Force" when firing his proton torpedoes.<ref name="Episode IV" /> When Luke was shocked into a catatonic state by the dark presence of Darth Vader, Kenobi appeared in a dream to help him fight his fear of the Dark Lord. Later, his spirit temporarily took control of Luke's body, allowing him to survive his first duel with Darth Vader on the mist-shrouded planet of [[Mimban/Legends|Mimban]], and even allowed Luke to knock the Dark Lord into a deep pit.<ref name="Splinter of the Mind's Eye">''[[Splinter of the Mind's Eye]]''</ref> His guidance aided Luke in destroying a rogue moon that threatened the New Academy for space pilots.<ref name="The Maverick Moon">''[[The Maverick Moon]]''</ref> |
| | |
| Obi-Wan contacted Luke again on [[Drunost]]. He told to Luke to stretch out with the Force. Luke did as instructed and sensed danger from an imminent attack. Later, on the ''Millennium Falcon'' when confronting pirates, Obi-Wan again spoke to Luke and told him to stretch out with the Force. Luke did as he was told and sensed another ship behind the ''Falcon''. Luke assumed it was pirate backup, but Obi-Wan told him to focus his thoughts, and Luke realized that the ship was not an enemy. Shortly after that, while held prisoner Obi-Wan again contacted Luke and told him that Leia was in danger. He told Luke where she was and helped him use the Force to uncover a weapons cache. When Luke suggested that Obi-Wan could help him more, he was admonished by Kenobi, who told him that he could not carry him through his journey, only guide him and teach him. Luke apologized and said he understood.<ref name="Allegiance">[[Allegiance (novel)|''Allegiance'']]</ref>
| |
|
| |
|
| [[File:OldBen'sGhost.jpg|thumb|left|200px|Kenobi's Force ghost appearing to Luke on Hoth]] | | [[File:OldBen'sGhost.jpg|thumb|left|200px|Kenobi's Force ghost appearing to Luke on Hoth]] |
| Line 964: |
Line 111: |
| Kenobi's memory was also exploited by the Empire. A few months after the Battle of Yavin, Darth Vader devised a plan to capture Luke using an [[Obi-Wan Kenobi impersonator|actor posing as Kenobi]]. Using this decoy Vader planned to lure Luke to the planet [[Aridus/Legends|Aridus]]. Imperial surgeons and technicians also altered the actor's appearance and hid devices on the actor to simulate the Force. The false Kenobi was delivered to Aridus to help the rebellion being staged there. News of his exploits soon reached Luke. The actor was ordered to lure Luke to the [[Iron Tower]] on the planet where he would meet Vader alone. The actor became so obsessed with this challenging role that he began to respect the dead Kenobi, and in the end sabotaged Vader's plan by destroying the Iron Tower. However, this cost the actor his life.<ref name="The Return of Ben Kenobi">''[[The Return of Ben Kenobi]]''</ref> | | Kenobi's memory was also exploited by the Empire. A few months after the Battle of Yavin, Darth Vader devised a plan to capture Luke using an [[Obi-Wan Kenobi impersonator|actor posing as Kenobi]]. Using this decoy Vader planned to lure Luke to the planet [[Aridus/Legends|Aridus]]. Imperial surgeons and technicians also altered the actor's appearance and hid devices on the actor to simulate the Force. The false Kenobi was delivered to Aridus to help the rebellion being staged there. News of his exploits soon reached Luke. The actor was ordered to lure Luke to the [[Iron Tower]] on the planet where he would meet Vader alone. The actor became so obsessed with this challenging role that he began to respect the dead Kenobi, and in the end sabotaged Vader's plan by destroying the Iron Tower. However, this cost the actor his life.<ref name="The Return of Ben Kenobi">''[[The Return of Ben Kenobi]]''</ref> |
|
| |
|
| Luke was not the only person Kenobi appeared to, having been seen on the planet Mustafar. He assisted an anonymous spacer in the destruction of [[Vartonis|a Dark Jedi]] and a powerful crystal.<ref name="Star Wars Galaxies: Trials of Obi-Wan" />
| |
| {{Quote|You will go to the Dagobah system. There, you will learn from Yoda, the Jedi Master who instructed me.|Obi-Wan Kenobi to Luke Skywalker|<ref name="Episode V" />}} | | {{Quote|You will go to the Dagobah system. There, you will learn from Yoda, the Jedi Master who instructed me.|Obi-Wan Kenobi to Luke Skywalker|<ref name="Episode V" />}} |
| On [[Hoth/Legends|Hoth]], when Luke was almost dead from a [[Wampa/Legends|wampa]] attack and exposure to the harsh climate, Kenobi appeared to him and instructed him to go to the [[Dagobah/Legends|Dagobah]] system for further training with Yoda. He also helped to convince Yoda that Luke was ready to be trained, reminding him that he himself had been much like Luke when Yoda had trained him to be an apprentice. Yoda proceeded to train young Luke, before the latter received a vision of his friends being tortured on [[Bespin/Legends|Bespin]] by Darth Vader. As the young Skywalker prepared to leave, Yoda and Kenobi attempted to dissuade him. Concerned and distraught by the throught of losing another Skywalker to the dark side, Kenobi yearned Luke to be patient, even at the cost of his friends. Kenobi warned Luke that if he chose to face Vader, he must do so alone, for he could not interfere. Finally, Obi-Wan could only plead for Luke to not give into anger and remain strong adn level-headed. As Luke departed Dagobah, Kenobi worried that the Jedi may have lost their last hope. However, Yoda reminded him of the other Skywalker, Leia.<ref name="Episode V" /> | | On [[Hoth/Legends|Hoth]], when Luke was almost dead from a [[Wampa/Legends|wampa]] attack and exposure to the harsh climate, Kenobi appeared to him and instructed him to go to the [[Dagobah/Legends|Dagobah]] system for further training with Yoda. He also helped to convince Yoda that Luke was ready to be trained, reminding him that he himself had been much like Luke when Yoda had trained him to be an apprentice. Yoda proceeded to train young Luke, before the latter received a vision of his friends being tortured on [[Bespin/Legends|Bespin]] by Darth Vader. As the young Skywalker prepared to leave, Yoda and Kenobi attempted to dissuade him. Concerned and distraught by the throught of losing another Skywalker to the dark side, Kenobi yearned Luke to be patient, even at the cost of his friends. Kenobi warned Luke that if he chose to face Vader, he must do so alone, for he could not interfere. Finally, Obi-Wan could only plead for Luke to not give into anger and remain strong adn level-headed. As Luke departed Dagobah, Kenobi worried that the Jedi may have lost their last hope. However, Yoda reminded him of the other Skywalker, Leia.<ref name="Episode V" /> |
|
| |
|
| About a year later, he reappeared after the death of Yoda to explain why he did not tell Luke the truth about his father. Following the passing of the Grand Master of the Jedi Order that had teached and defended the galaxy for centuries, Kenobi comofrted uke that like him, Yoda would always be with him. Though Luke wanted to believe that there was still good in his father, echoing Padmé's belief from twenty-three years ago, Kenobi no longer held that belief. Lamenting over the friendship he once held with Anakin, the Force ghost reminded of his failure to teach Luke's father and that the fallen Jedi was "more machine than man". He told Luke that he must face his destiny by confronting Vader again. Dsolated by Luke's refusal to kill Vader, Kenobi ultimatley admitted the Emreror would have already won. Luke asked what Yoda meant by "another Skywalker." Kenobi confessed that Leia was Luke's sister, though he warned Luke about the powers of the Emperor, the tyrant later being destroyed by Anakin Skywalker, an act his onetime Master, observing the [[Battle of Endor/Legends#Demise of the Sith|duel]] from the [[Netherworld of the Force/Legends|Netherworld of the Force]], could barely believe even after seeing it. Quickly greeting the redeemed spirit of Anakin as he entered the afterlife, Kenobi taught his former Padawan how to revisit corporeal space,<ref name="Life and Legend" /> and was seen shortly after the [[Battle of Endor/Legends|Battle of Endor]], standing next to the spirits of Anakin Skywalker and Yoda, the last Jedi of the Old Republic, as they watched Luke and the other Rebels celebrate their momentous victory, although Luke was the only one able to see them.<ref name="Episode VI">{{Film|VI}}</ref> | | About a year later, he reappeared after the death of Yoda to explain why he did not tell Luke the truth about his father. Following the passing of the Grand Master of the Jedi Order that had teached and defended the galaxy for centuries, Kenobi comofrted uke that like him, Yoda would always be with him. Though Luke wanted to believe that there was still good in his father, Kenobi no longer held that belief. Lamenting over the friendship he once held with Anakin, the Force ghost reminded of his failure to teach Luke's father and that the fallen Jedi was "more machine than man". He told Luke that he must face his destiny by confronting Vader again. Dsolated by Luke's refusal to kill Vader, Kenobi ultimatley admitted the Emreror would have already won. Luke asked what Yoda meant by "another Skywalker." Kenobi confessed that Leia was Luke's sister, though he warned Luke about the powers of the Emperor, the tyrant later being destroyed by Anakin Skywalker, an act his onetime Master, observing the [[Battle of Endor/Legends#Demise of the Sith|duel]] from the [[Netherworld of the Force/Legends|Netherworld of the Force]], could barely believe even after seeing it. Quickly greeting the redeemed spirit of Anakin as he entered the afterlife, and was seen shortly after the [[Battle of Endor/Legends|Battle of Endor]], standing next to the spirits of Anakin Skywalker and Yoda, the last Jedi of the Old Republic, as they watched Luke and the other Rebels celebrate their momentous victory, although Luke was the only one able to see them.<ref name="Episode VI">{{Film|VI}}</ref> |
|
| |
|
| [[File:LukeObiWanDagobah.jpg|thumb|right|200px|Kenobi telling Luke the truth about his father]] | | [[File:LukeObiWanDagobah.jpg|thumb|right|200px|Kenobi telling Luke the truth about his father]] |
| Line 979: |
Line 125: |
|
| |
|
| In [[9 ABY/Legends|9 ABY]], Kenobi, still a spirit, visited Luke for the last time in a dream. Kenobi told Luke that he must move on from his spirit form to another realm. As Kenobi explained it, from the time of his death until then, Kenobi's spirit had been in an intermediate stage between life and the afterlife. Luke was distressed that he would lose Kenobi's guidance, but he comforted Luke with the knowledge that he was not the last of the old Jedi, but rather the first of a new group of Jedi. | | In [[9 ABY/Legends|9 ABY]], Kenobi, still a spirit, visited Luke for the last time in a dream. Kenobi told Luke that he must move on from his spirit form to another realm. As Kenobi explained it, from the time of his death until then, Kenobi's spirit had been in an intermediate stage between life and the afterlife. Luke was distressed that he would lose Kenobi's guidance, but he comforted Luke with the knowledge that he was not the last of the old Jedi, but rather the first of a new group of Jedi. |
|
| |
| Luke would only hear his ghostly mentor's voice again during [[Ben Skywalker|his son's]] birth,<ref name="Edge of Victory II: Rebirth">''[[The New Jedi Order: Edge of Victory II: Rebirth]]''</ref> a son he named Ben to honor Kenobi's memory, and again when watching the living planet Zonama Sekot leave at the end of the [[Yuuzhan Vong War]]. Kenobi said, "She's leaving," to which Luke told Mara, "Ben's words, not mine."<ref name="The Unifying Force">''[[The New Jedi Order: The Unifying Force]]''</ref>
| |
|
| |
|
| ===Legacy=== | | ===Legacy=== |
| Line 986: |
Line 130: |
| [[File:Ben_Vision_Luke.jpg|thumb|left|200px|Obi-Wan Kenobi appears to Luke in a vision over [[Coruscant/Legends|Coruscant]].]] | | [[File:Ben_Vision_Luke.jpg|thumb|left|200px|Obi-Wan Kenobi appears to Luke in a vision over [[Coruscant/Legends|Coruscant]].]] |
| As mentor to the first Jedi of the [[New Jedi Order|new order]] and one of the earliest heroes of the [[Alliance to Restore the Republic/Legends|Rebel Alliance]], Kenobi's legacy would continue long after his death. When Luke lost his lightsaber in the duel with Darth Vader on Bespin, he returned to Kenobi's hut on Tatooine to construct a new one from instructions left in Kenobi's journals.<ref name="Shadows of the Empire (novel)" /> Kenobi's spartan hovel was actually a trove of Jedi information, one of the few repositories left after the [[Great Jedi Purge/Legends|Great Jedi Purge]]. The information contained there would be a great help to Luke in his reconstruction of the Order.<ref name="Shadows of the Empire (novel)" /> | | As mentor to the first Jedi of the [[New Jedi Order|new order]] and one of the earliest heroes of the [[Alliance to Restore the Republic/Legends|Rebel Alliance]], Kenobi's legacy would continue long after his death. When Luke lost his lightsaber in the duel with Darth Vader on Bespin, he returned to Kenobi's hut on Tatooine to construct a new one from instructions left in Kenobi's journals.<ref name="Shadows of the Empire (novel)" /> Kenobi's spartan hovel was actually a trove of Jedi information, one of the few repositories left after the [[Great Jedi Purge/Legends|Great Jedi Purge]]. The information contained there would be a great help to Luke in his reconstruction of the Order.<ref name="Shadows of the Empire (novel)" /> |
|
| |
| His name was commemorated with the [[Obi-Wan (Nebula-class)|''Obi-Wan'']], first of the [[Nebula-class Star Destroyer|''Nebula''-class Star Destroyers]]<ref name="The New Essential Guide to Vehicles and Vessels">''[[The New Essential Guide to Vehicles and Vessels]]''</ref> as well as the [[lightsaber crystal]] [[Kenobi's Legacy]].<ref name="Star Wars Galaxies">''[[Star Wars Galaxies]]''</ref>
| |
|
| |
| Kenobi's Jedi legacy also continued in his namesake [[Ben Skywalker]], the grandson of his first apprentice, Anakin Skywalker, and the son of his second apprentice, Luke Skywalker.<ref name="Edge of Victory II: Rebirth" />
| |
|
| |
|
| Tacticians, both from the Galactic Empire and Rebel Alliance, would pay homage to the General through the study of the [[Kenobi Offensive]], a starship maneuver developed by Kenobi during the Clone Wars.<ref name="The Truce at Bakura" /> Rebel pilots would also strive to be awarded the [[Kenobi Medallion]], named after the Jedi Master.<ref name="The Movie Trilogy Sourcebook">''[[The Movie Trilogy Sourcebook]]''</ref> | | Tacticians, both from the Galactic Empire and Rebel Alliance, would pay homage to the General through the study of the [[Kenobi Offensive]], a starship maneuver developed by Kenobi during the Clone Wars.<ref name="The Truce at Bakura" /> Rebel pilots would also strive to be awarded the [[Kenobi Medallion]], named after the Jedi Master.<ref name="The Movie Trilogy Sourcebook">''[[The Movie Trilogy Sourcebook]]''</ref> |
| [[File:Kenobi's_Blade.jpg|thumb|200px|[[Anakin Solo]] using Obi-Wan's lightsaber to defeat [[Orloc]]]] | | [[File:Kenobi's_Blade.jpg|thumb|200px|[[Anakin Solo]] using Obi-Wan's lightsaber to defeat [[Orloc]]]] |
| Kenobi's lightsaber was inside Vader's [[TIE Advanced x1/Legends|TIE Advanced x1]] during the Battle of Yavin.<ref name="RAFODV">''[[The Rise and Fall of Darth Vader]]''</ref> [[22 ABY/Legends|Twenty-two years later]], a group of Jedi including [[Tionne Solusar]], [[Ikrit]], Anakin Solo, [[Tahiri Veila]], R2-D2, and [[Uldir Lochett]] discovered the blade at Vader's fortress of [[Bast Castle]] on [[Vjun/Legends|Vjun]]. They encountered "Mage" [[Orloc]] and his henchmen during the expedition, though they escaped with the blade and an ancient Jedi holocron.<ref name="JJK:kb">''[[Junior Jedi Knights: Kenobi's Blade]]''</ref>
| | In [[22 BBY/Legends|22 BBY]] a group of Jedi including [[Tionne Solusar]], [[Ikrit]], Anakin Solo, [[Tahiri Veila]], R2-D2, and [[Uldir Lochett]] discovered the blade at Vader's fortress of [[Bast Castle]] on [[Vjun/Legends|Vjun]]. They encountered "Mage" [[Orloc]] and his henchmen during the expedition, though they escaped with the blade and an ancient Jedi holocron.<ref name="JJK:kb">''[[Junior Jedi Knights: Kenobi's Blade]]''</ref> |
|
| |
|
| However, Uldir Lochett, a classmate of Anakin Solo, stole the lightsaber, believing that it would make him a great Jedi. He then went to find Orloc, since he believed that Orloc possessed great powers, and found him at [[Exis Station/Legends|Exis Station]]. However, Uldir later learned that Orloc was a fraud since he possessed no Force powers. Luckily for Uldir, his Jedi companions came to his rescue and defeated Orloc. The weapon and the holocron were recovered and returned to the [[Jedi Praxeum]].<ref name="JJK:kb" /> | | However, Uldir Lochett, a classmate of Anakin Solo, stole the lightsaber, believing that it would make him a great Jedi. He then went to find Orloc, since he believed that Orloc possessed great powers, and found him at [[Exis Station/Legends|Exis Station]]. However, Uldir later learned that Orloc was a fraud since he possessed no Force powers. Luckily for Uldir, his Jedi companions came to his rescue and defeated Orloc. The weapon and the holocron were recovered and returned to the [[Jedi Praxeum]].<ref name="JJK:kb" /> |
|
| |
|
| The Sith cult known as the [[Jensaarai/Legends|Jensaarai]], which taught that the Jedi had fallen to the dark side and that the Sith knew the truth, believed that the roles of Darth Vader and Kenobi were reversed, as they saw Kenobi as the monster. The cult rejected this belief when Luke Skywalker integrated it into the greater Jedi Order.<ref name="i jedi">''[[I, Jedi]]''</ref><ref name="JATM">''[[Jedi Academy Training Manual]]''</ref> | | The Sith cult known as the [[Jensaarai/Legends|Jensaarai]], which taught that the Jedi had fallen to the dark side and that the Sith knew the truth, believed that the roles of Darth Vader and Kenobi were reversed, as they saw Kenobi as the monster. The cult rejected this belief when Luke Skywalker integrated it into the greater Jedi Order.<ref name="i jedi">''[[I, Jedi]]''</ref> |
| | |
| Luke Skywalker finally met with his master, one last time in spirit, after the [[Battle of Yuuzhan'tar|Recapture of Coruscant]] in [[29 ABY/Legends|29 ABY]].<ref name="The Unifying Force" />
| |
|
| |
|
| ==Personality and traits== | | ==Personality and traits== |
| {{Quote|Who's the more foolish, the fool, or the fool who follows him?|Obi-Wan Kenobi|audio=Who's_more_foolish.ogg|<ref name="Episode IV" />}} | | {{Quote|Who's the more foolish, the fool, or the fool who follows him?|Obi-Wan Kenobi|audio=Who's_more_foolish.ogg|<ref name="Episode IV" />}} |
| [[File:Kenobi-BotF.jpg|thumb|left|230px|Master Kenobi]] | | [[File:Kenobi-BotF.jpg|thumb|left|230px|Master Kenobi]] |
| In his youth, the loyal and dedicated Obi-Wan Kenobi possessed a dry sense of humor and sarcastic wit, yet he dealt with a lot of emotional anxiety. Yoda said that he sensed Qui-Gon Jinn's defiance in him,<ref name="Episode I" /> but spoke very highly of him nonetheless.<ref name="aotc" /> Jinn reflected upon Obi-Wan's considerable knowledge and potential; he also considered his Padawan a lot wiser than him.<ref name="Episode I" /> Despite having been apprenticed to the radical Qui-Gon Jinn, Kenobi was relatively orthodox in his views. Kenobi had a strong friendship with Commander Cody, who saved his life aboard an ''Arquitens''-class light cruiser when the corridor was blown off by General Grievous. Cody reached out and grabbed Kenobi's hand before the General was sucked into the vacuum of space.
| | Kenobi was known to be an accomplished storyteller. While hiding in the Jundland Wastes in his later years, he appeared as a kindly and eccentric old hermit (or, in Owen Lars' words, "That wizard is just a crazy old man") to those not familiar with the ways of the Jedi. |
| | |
| As a young Jedi Knight, Kenobi was cynical, though wise beyond his years. His humble and soft-spoken demeanor belied his warrior prowess. Despite his numerous complaints during flight, he was also a skilled pilot. In many ways, he represented the strength of the old Jedi Order: steadfast, selfless, and modest. His later skill at resolving disputes without a single battle would earn him the sobriquet ''The Negotiator''.
| |
| | |
| [[File:Obisign.png|thumb|200px|Kenobi's signature]]
| |
| Over time, Kenobi lost some of his youthful audacity and assumed the role of a more cautious and conservative mentor to Anakin Skywalker, who was in many ways his opposite in personality. Kenobi carefully measured his actions in any situation, garnering him the aforementioned nom de guerre. Kenobi was also known to be an accomplished storyteller. While hiding in the Jundland Wastes in his later years, he appeared as a kindly and eccentric old hermit (or, in Owen Lars' words, "That wizard is just a crazy old man") to those not familiar with the ways of the Jedi. In his final days, Kenobi retained his traits of patience and foresight as well as gaining some of the boldness reminiscent of his youth.<ref name="Episode I" />
| |
| | |
| Obi-Wan often thought out plans and strategies rather than leaping into action. He would usually place his hand on his chin or stroke his beard as he thought. This was a common trait of the Jedi Master, one that his apprentice Anakin Skywalker did not share.<ref name="Rookies" />
| |
| | |
| ===Romantic relationships===
| |
| ====Cerasi====
| |
| {{Quote|She and I had a connection I can't explain.''"<br />"''You loved her.|Obi-Wan Kenobi and Bant Eerin|<ref name="ja7" />}}
| |
| Obi-Wan's first known experience with romance came in the form of Cerasi, a girl he met on Melida/Daan. She was a member of a group called the Young and was fighting to stop [[Melida/Daan Civil War|a civil war]]. Obi-Wan became attracted to her, and chose to leave the Jedi Order to help her.<ref name="Defenders of the Dead" /> Sadly, Cerasi was mortally wounded shortly after he parted ways with Qui-Gon Jinn, and she died in his arms.<ref name="ja6" /> The only Jedi he ever confided his feelings for Cerasi was Bant Eerin.<ref name="ja7" />
| |
| | |
| ====Lena Cobral====
| |
| {{Quote|Lena is a noble woman. She is struggling to do what is right. Your doubts will not help her.''"<br />"''You are infatuated, Obi-Wan. Be careful not to let yourself be guided by your attraction.''"<br />"''I am — It is not infatuation. Lena's motives are good.|Obi-Wan Kenobi and Qui-Gon Jinn|<ref name="ja17" />}}
| |
| The recently widowed [[Lena Cobral]] may have been a few years older than Kenobi, but that did not stop him from developing a brief infatuation for her during his time on [[Frego]]. He admired her for her courage and strength, and could read her intentions through the Force so as to see her honesty. He stood by her side, looking to comfort and protect her as she persisted in her goal of liberating her homeworld from the criminal grasp of her [[Rutin Cobral|late husband's]] [[Cobral family|family]]. Whenever he thought that Jinn was criticizing Lena or turning his back on Lena, he would be ready to defend her. In the end, the two Jedi helped Lena deliver her testimony to the Senate.<ref name="ja17" />
| |
| [[File:JediApprentice_9_art.jpg|thumb|Padawans Obi-Wan Kenobi and Siri Tachi during a training session]]
| |
| | |
| ====Siri Tachi====
| |
| {{Quote|One more day, I hope Qui-Gon and Adi make it back in time.''"<br />"''If they don't, we'll be okay. We can handle anything if we're together.''"<br />"''I know.|Siri Tachi and Obi-Wan Kenobi|<ref name="sotj" />}}
| |
| Siri Tachi was a youngling along with Kenobi. After Kenobi returned from his temporary desertion of the Order from Melida/Daan, Tachi strongly held it against him, since she believed that he didn't take his loyalty to the Jedi seriously,<ref name="ja7" /><ref name="ja9" /> and they bickered often. However, this hostility ended after a mission to Kegan. The two were captured and forced to work together to escape. Siri realized that Kenobi was truly loyal to the Jedi, and they became friends.<ref name="ja9" /> Kenobi later taught Siri patience after he rescued her from the bounty hunter [[Ona Nobis]].<ref name="ja13" />
| |
| | |
| While apprenticed to Qui-Gon Jinn, Kenobi went on other joint missions with Master Adi Gallia and Siri Tachi. While involved in a life-threatening situation, the two Padawans acknowledged that they were in love, but never acted on their feelings for each other. They instead agreed they would focus on their duty as Jedi. When the two were reunited during what would be Siri's last mission, the two admitted that they still loved each other. When Siri died at the hands of a bounty hunter, Kenobi was heartbroken and almost killed the bounty hunter in anger. But he controlled his anger, and later realized that, despite losing his love, he could still go on.<ref name="sotj" />
| |
| | |
| ====Satine Kryze====
| |
| {{Expandsect}}
| |
| {{Quote|I've loved you from the moment you came to my aid all those years ago.''<nowiki>" [</nowiki>'''…'''<nowiki>]</nowiki><br />"''Had you said the word, I would have left the Jedi Order.|Satine and Kenobi|audio=ObiWanInLove-VoT.ogg|<ref name="VoT" />}}
| |
| [[File:Obi-Wan_Sateen.jpg|thumb|right|220px|Kenobi defends Satine, with whom he at one time had an affair]]
| |
| As Qui-Gon Jinn's Padawan, Kenobi went on a mission to protect Duchess [[Satine Kryze/Legends|Satine Kryze]].<ref name="VoT" /> They were always on the run from bounty hunters and they never knew what would happen next. Kenobi saved Kryze in at least one instance when he was a Padawan.
| |
| | |
| During the Clone Wars, their feelings for each other resurfaced. However, Kryze ended up being murdered in cold blood by the Sith Lord Darth Maul in front of Kenobi's eyes. She died in his arms professing her love for the Jedi Master. Their relationship also never developed and they broke off the affair to focus on their mutual responsibilities as peacekeepers.<ref name="VoT" /> During his self-exile, he chose the name Ben for himself due to Satine calling him that in private and admitted he liked it.<ref name="Kenobi" />
| |
|
| |
|
| ==Powers and abilities== | | ==Powers and abilities== |
| {{Quote|Your powers are weak, old man.''"<br />"''You can't win, Darth. If you strike me down, I shall become more powerful than you can possibly imagine.|Darth Vader and Obi-Wan Kenobi|audio=You_can't_win_Darth.ogg|<ref name="Episode IV" />}} | | {{Quote|Your powers are weak, old man.''"<br />"''You can't win, Darth. If you strike me down, I shall become more powerful than you can possibly imagine.|Darth Vader and Obi-Wan Kenobi|audio=You_can't_win_Darth.ogg|<ref name="Episode IV" />}} |
| Despite his preference for diplomacy, Master Kenobi was one of the greatest swordsmen and Force users in Jedi history. | | Despite his preference for diplomacy, Master Kenobi was one of the greatest swordsmen and Force users in Jedi history. |
|
| |
| As a young Jedi Padawan, Kenobi showed much potential, through feats such as resisting a memory wipe (being [[Renewal|renewed]]) at the hands of the Syndicate,<ref name="ja3" /> and defeating a corrupted Bruck Chun in a lightsaber duel.<ref name="ja7" /> He accomplished the prior by placing Force barriers all around his mind,<ref name="ja3" /> something only a Jedi Master should have been able to do.{{Fact}} This displayed not only his strength in the Force but also his strength of character.{{Fact}}
| |
|
| |
| ===Lightsaber training===
| |
| {{Quote|Are you Jedi as good with blasters as you are with lightsabers?''"<br />"''Better. We only use lightsabers to make fights more equitable.|ARC trooper [[CT-96/298|A-98]] and Obi-Wan Kenobi|<ref name="TCD" />}}
| |
| [[File:MaulObiNaboo.png|thumb|left|250px|Kenobi utilizes his skills in Ataru against Darth Maul.]]
| |
| Obi-Wan Kenobi was one of the greatest lightsaber duelists of his time.<ref name="rotsn" /> A natural swordsman, Kenobi's ability was evident even at a young age.<ref name="TPMvd">''[[Star Wars: Episode I The Visual Dictionary]]''</ref> He was so effective that he could be mistaken for an army, based on how much damage he could do.<ref name=":1">''[[Obsession 1]]''</ref> His skills were [[Battlemind|enhanced]] with the Force.<ref>''[[Star Wars Roleplaying Game Core Rulebook]]''</ref> During his training under Qui-Gon Jinn, Kenobi chose to specialize in [[Form IV/Legends|Ataru]],<ref name="fightsaber" /> his relatively advanced skills reinforced by his youth and stamina, which helped compensate for his relative inexperience.<ref name="TMP novel">[[Star Wars: Episode I The Phantom Menace (novelization)|''Star Wars'': Episode I ''The Phantom Menace'' novelization]]</ref> While he relied on the acrobatics to flank his opponents, and to facilitate his strong penchant for physical attacks, Kenobi largely eschewed the more impractical elements of Ataru, such as the open flourishes, favoring more simplistic and direct moves.<ref name="Episode I" /> In addition to Ataru, Kenobi studied [[Form V/Legends|Shien]], as evidenced by his accurate blast-deflections and his occasional use of the reversed grip,<ref name="Fightsaber">{{SWArchive|url=games/videogames/news20080728.html|text=Fightsaber: Mastering the Art of Lightsaber Combat|archivedate=20110629022031}}</ref> and [[Form VI/Legends|Niman]], to develop his ability to incorporate Force abilities into his fighting form.<ref name="TJP">[[The Jedi Path: A Manual for Students of the Force (real-life book)|''The Jedi Path: A Manual for Students of the Force'']]</ref> He also studied the martial art [[Tae-Jitsu]], and was fond of chaining hand-to-hand combat strikes into his lightsaber sequences. His degree of skill with this martial art was such that he was able to break the knee of the hulking Savage Opress with a well-placed kick, though Opress's knee had been weakened from repeated trauma earlier in the duel.<ref name="TAE">''[[Qui-Gon and Obi-Wan: The Aurorient Express]]''</ref> Kenobi also displayed an early interest in studying [[Form VII/Legends|Form VII]], specifically Mace Windu's Vaapad variant, but Qui-Gon refused to let him study it. Ultimately, Qui-Gon Jinn's death due to Ataru's lack of defensive capabilities prompted Kenobi to abandon Form IV as his primary style, but he mastered it nonetheless. Kenobi began studying the defensive [[Form III/Legends|Soresu]], intending to create a hybrid between it and Ataru to compensate for Form IV's aforementioned lack of defense.<ref name="TJP" /> Though Soresu eventually became his primary fighting form, he implemented elements of Ataru into his swordplay from time to time.<ref name="rotsn" /><ref name="RotSvd">''[[Star Wars: Revenge of the Sith: The Visual Dictionary]]''</ref>
| |
|
| |
| Ten years of study of Form III gave Kenobi an extraordinary proficiency in the form. His tight defense and energy-efficient moves stood him in good stead against masterful gunslingers such as Jango Fett, or during the chaotic firefights of the [[First Battle of Geonosis/Legends|First Battle of Geonosis]].<ref name="aotc" /> However, Kenobi's Soresu proved unable to effectively counter Dooku's skills during their first confrontation. On that occasion, Dooku's elegant [[Form II/Legends|Makashi]] strokes and jabs worked away at Kenobi's defense; many of Kenobi's cutting parries missed Dooku's blade entirely, while Dooku's feints confused the Jedi and forced him to retreat, ultimately bringing him down.<ref name="AotCn">[[Star Wars: Episode II Attack of the Clones (novelization)|''Star Wars'': Episode II ''Attack of the Clones'' novelization]]</ref> Over the course of the Clone Wars, Kenobi continued to develop his technique. His blast-deflection skills were further honed to the point where Kenobi could literally walk unscathed through what were described as hornet-swarms of blasterfire, single-handedly deflecting blasts from all directions simultaneously. Thousands of hours of sparring and practice sessions considerably advanced his skills as a duelist as well.<ref name="rotsn" /> Even unarmed, Kenobi was a formidable opponent, evading enemy attacks and working his way inside their defense to physically assault them, as he did against Asajj Ventress and Pre Vizsla.<ref name="TCWfilm" /><ref name="TMP" /> In addition to Soresu, Kenobi would also master and incorporate elements of Shii-Cho and Niman into his fighting style.<ref name="rotsn" /><ref name="RotSvd" /> He also was well versed in the art of [[Jar'Kai/Legends|Jar'Kai]], which was perhaps most prominently displayed during his duel with Darth Maul and Savage Opress, as he proved proficient enough to hold his own against both brothers, and he even broke Opress's left knee and severed his left arm. The duel ended in a stalemate when Maul used his Force powers to briefly incapacitate Kenobi, giving the Sith brothers time to escape.<ref name="Revival" /> Earlier, he momentarily used Jar'Kai against Asajj Ventress,<ref name="SWR60hf" /> General Grievous,<ref name="GI" /> and Cad Bane.<ref name="Hunt for Ziro" /> Without harm, he purged a whole ''Conqueror''-class atmospheric dreadnaught of droids.<ref name=":4">''[[Skywalkers]]''</ref>
| |
| [[File:Obiwan-Soresu.png|thumb|right|250px|Obi-Wan Kenobi, master of [[Form III/Legends|Soresu]]]]
| |
| By the end of the war, Kenobi's study into Soresu had resulted in absolute mastery of the style. He was also capable of using his lightsaber to ground [[Force lightning/Legends|Force lightning]], as he demonstrated against Dooku on Geonosis.<ref name="aotc" /> His skill was such that he was considered by Mace Windu not to simply be ''a'' master of Soresu, but to be ''the'' master of Soresu. In his final duel with Dooku, Kenobi caught the Count off guard with his advanced application, with Kenobi's simplicity and efficiency as well as also his bewildering speed and precision being praised by Dooku, and was able to fight him to a standstill, to the point that Dooku recognized that he couldn't defeat Kenobi in blade-work. Therefore, he relied on his Force abilities to defeat Kenobi, twice using telekinetic attacks to floor the Jedi Master. In his duel with Grievous, Kenobi provided one of his purest applications of Soresu. His blade's intricate pattern of blocks and parries moved just fast enough to subtly interfere with Grievous' multiple strikes, while his slight dodges and shifts of stance allowed him to simply evade the rest. His mastery allowed him to comfortably counter up to eighteen of Grievous's strikes per second. When Grievous intensified his attack, Kenobi stopped stonewalling the general and simply altered the angle of his parries, cutting off two of Grievous' mechanical hands. Kenobi proved to be one of the only Jedi able to engage Darth Vader and survive, as his Soresu mastery perfectly countered Vader's angry Form V. Kenobi simply gave ground before Vader's onslaught, waiting until Vader grew frustrated and overconfident, and then [[Dismemberment/Legends|dismembering]] the proud Sith Lord when his defense lapsed.<ref name="rotsn" />
| |
|
| |
| By the time of his rematch with Vader on the Death Star, however, Kenobi's seventeen years of not duelling, apart from his one fight with and victory over A'Sharad Hett, left him out of practice, degrading his skills to an extent. However, Kenobi retained enough skill in Form III to fight against Vader's newly improved skills well enough that even the Dark Lord had to praise Kenobi's skills and acknowledged them enough that he opted for a cautious, controlled assault instead of an all-out attack despite Kenobi's older age due to having previously learned from his mistake in Mustafar. Although he did not find any openings to exploit, Kenobi could still predict all of Vader's attacks and counter them, even though Vader's new style contained elements of several forms of lightsaber combat,<ref>''[[The Force Unleashed (novel)|The Force Unleashed]]''</ref> and he even briefly forced Vader into the defensive with a flurry of attacks when the Dark Lord was off guard. Ultimately, however, due to his age, lack of practice, and the sheer physical force of Vader's attacks, Kenobi recognized that his defeat was inevitable despite having put up a good fight and rather than continue the fight, he opted to sacrifice his physical self and become one with the Force.<ref name="Fightsaber" /> In this way, he taught both of his Skywalker students one final lesson.
| |
|
| |
|
| ===Force powers=== | | ===Force powers=== |
| {{Quote|The Force is what gives a Jedi his power. It's an energy field created by all living things. It surrounds us and penetrates us. It binds the galaxy together.|Obi-Wan Kenobi to Luke Skywalker|<ref name="Episode IV" />}} | | {{Quote|The Force is what gives a Jedi his power. It's an energy field created by all living things. It surrounds us and penetrates us. It binds the galaxy together.|Obi-Wan Kenobi to Luke Skywalker|<ref name="Episode IV" />}} |
| Though Kenobi focused largely on lightsaber combat he was also very skilled and powerful in the Force, sometimes using the Force to [[Battlemind|improve]] his lightsaber skills.<ref name=":3" /> At one point, Anakin compared Kenobi to Mace Windu in terms of Force power. Kenobi was a master of [[Telekinesis/Legends|moving things and people with the Force.]]<ref name="rotsn" /> He was trained in use of the [[Mind trick/Legends|Mind trick]], Force persuasion and the more advanced Dominate Mind skill.<ref name="Episode IV" /> He was able to mind trick a worker to give him a mount.<ref>[[Star Wars: Episode III — Revenge of the Sith 2|''Star Wars: Episode III — Revenge of the Sith'' 2]]</ref> Apart from these impressive applications of the Force, Kenobi was known to be incredibly adept in the use of [[Animal bond|Animal friendship]], allowing him to exert considerable influence over otherwise untamable beasts. During the [[Battle of Ryloth/Legends|Battle of Ryloth]], the Jedi Master calmed and controlled a large group of starved, vicious and attacking gutkurrs.<ref name="Storm Over Ryloth" />
| | Kenobi was trained in use of the [[Mind trick/Legends|Mind trick]], Force persuasion and the more advanced Dominate Mind skill.<ref name="Episode IV" /> |
|
| |
|
| [[File:Sabercatch.jpg|thumb|left|240px|Kenobi blocks Count Dooku's Force lightning.]]
| | Kenobi could [[Sound mimicry|imitate sounds]] using the Force, like when he imitated a krayt dragon's roar, scaring off the Tusken Raiders who were attacking Luke.<ref name="Episode IV" /> Kenobi was able to use Force Healing on himself and others.<ref name="The Movie Trilogy Sourcebook" /> By 0 BBY, the Jedi Master was known to have learned a variety of [[Battle meditation]], Kenobi knew the [[Force power/Legends|technique]] to [[Injure/Kill|harm or slay]] those he touched by using the dark side of the Force, though there are no known instances of him using these powers.<ref name="The Movie Trilogy Sourcebook" /> |
| Obi-Wan Kenobi was able to telekinetically affect objects without seeing them or using the gestures common to most uses of telekinesis, though, as a padawan who just [[Battle of Naboo/Legends|fought a long duel]], the effort of doing so while jumping exhausted his [[Personal Force reservoir|power]].<ref>''[[Star Wars: Jedi Battles]]''</ref> Kenobi was capable of a powerful Force Push, which he used consistently throughout the Clone Wars, such as against Grievous during their final duel in 19 BBY. He later displayed his mastery of Force Push during his duel with Darth Vader on Mustafar, as neither of them was able to overpower the other while simultaneously using the ability.<ref name="rots" /> The two struggled against each other for a short time, and though Kenobi was clearly giving ground, they both ended up being hurled in opposite directions across the room they were in. The fact that Vader's connection to the Force was, at the time, stronger than any Force user alive save for Yoda and Sidious further exemplifies Kenobi's mastery of the technique.<ref>''[[Star Wars: Episode III Revenge of the Sith]]''</ref> Much like what he did to Grevious, Kenobi manipulated Vader's mechanical hand and compelled it to drop a lightsaber, though Vader could have blocked such an attack had he thought to do so, and the trick only worked since the Sith was not yet aware of this weakness.<ref name="rotsn" /> Obi-Wan was capable of other telekinetic feats such as slamming foes with the Force, striking them down without needing to move them, and moving objects.<ref name=":2" /><ref name=":3">''[[Star Wars Roleplaying Game Revised Core Rulebook]]''</ref> He could break the glass of his Jedi Starfighter with the Force and [[Ballistakinesis|send it outwards towards his opponents]].<ref name=":4" /> Although largely unused on anything other than droids, the Jedi Council member was proficient in the use of the Force crush ability, which he used on one occasion to dispatch pairs of assassin droids,<ref name="Kidnapped" /> much like he previously destroyed Durge's arms,<ref name=":0" /> and crumpled garbage.<ref>''[[The Clone Wars: Wild Space]]''</ref> Obi-Wan was adept at the saber throw,<ref name=":5">''[[Blind Force]]''</ref> as demonstrated during the Clone Wars to destroy a droideka.<ref name="CW9">{{CW|9}}</ref> After [[Cho sun/Legends|cutting off the arm]] of Hett while defending Luke Skywalker, Kenobi ripped through the defenses of Hett, to hurl away the fallen Jedi's lightsabers and severed arm.<ref name="SWLegacy 16" /> In addition, Kenobi was able to use [[Force deflection/Legends|Force deflection]] and Force repulse, both of which he utilized masterfully during his fight with the bounty hunter Durge on Muunilinst. During their initial bout, Kenobi was deprived of his lightsaber and forced to deflect blasts from both a rapid-firing dart launcher using only the Force.<ref name=":0" /> During Kenobi's second bout with Durge, which occurred only a few minutes after their first encounter, Durge absorbed the Jedi Master into his body and attempted to smother him. However, Kenobi used a Force Repulse, to destroy the bounty hunter's body from within, though Durge survived this.<ref name="CW9" />
| |
| | |
| Through the Force, Kenobi could also perform [[Force Jump|extensive acrobatics]]<ref name=":2" /> and [[Enhance Attribute|improve his own physical strength and durability]],<ref name=":3" /> allowing him to leap huge distances,<ref name=":0" /> [[Force speed|cover much more ground in much less time]] such that by the later part of the Clone Wars he was skilled at amplifying his speed to such an extent that he could literally disappear from sight in a blur, either to avoid attacks or to strike first with his own,<ref name=":1" /><ref>[[Star Wars: Episode I The Phantom Menace|''Star Wars'': Episode I ''The Phantom Menace'']]</ref> rip apart General Grevious's armored form, and also [[Force punch|break droids he kicked]].<ref name="rotsn" /> Similarly he could [[Magnify Senses|improve his senses]].<ref name=":3" /> As a Jedi who was trained before the Second Jedi Purge, Kenobi was to know [[Force healing/Legends|Force healing]] to cure his own hurts and tiredness,<ref name="TJP" /> which he was later able to master to the point of being able to heal others.<ref name=":2" /> As instructed by Qui-Gon Jinn's Force ghost, Kenobi eventually learned the ability to become a spirit after death, like his former Master. He would later put this skill to good use, guiding and counseling Luke Skywalker during the Rebellion.<ref name="Episode V" /><ref name="Episode VI" /> Obi-Wan had to make use of his skills with [[Tutaminis]] in his repertoire when Durge tired to [[Fire/Legends|roast]] him. He later demonstrated the ability to deflect blaster bolts from a destroyer droid with the Force.<ref name=":0" />
| |
| | |
| Kenobi could [[Sound mimicry|imitate sounds]] using the Force, like when he imitated a krayt dragon's roar, scaring off the Tusken Raiders who were attacking Luke.<ref name="Episode IV" /> Kenobi was able to use Force Healing on himself and others, such as when he kept his old [[Heart/Legends|heart]] functioning at peak effectiveness.<ref name="The Movie Trilogy Sourcebook" /><ref name=":2">''[[Star Wars Roleplaying Game Saga Edition Core Rulebook]]''</ref><ref name="Life and Legend" /> Kenobi could [[Force stealth|shroud]] himself from the [[Force sense/Legends|Force senses]] of others, even as he could [[Sense Force|detect the Force]] and its uses himself.<ref name=":3" /> Kenobi had a strong [[Precognition/Legends|Danger sense]], able to, for example, detect and thus dodge the [[net]] of the [[Shadowman|Nivek Shadowmen]] threatening him and Anakin while he was unable to see them, then used the Force to [[Force sight|fight without the need of sight]] and encouraged his student to do the same, thus allowing them to sense their foes.<ref name=":5" /> The Jedi Master could peer into the Force, seeking [[Force vision/Legends|visions]] of the present situations of his friends, or of the past and future.<ref name=":2" /><ref name=":3" /> By 0 BBY, the Jedi Master was known to have learned a variety of [[Battle meditation]], Kenobi knew the [[Force power/Legends|technique]] to [[Injure/Kill|harm or slay]] those he touched by using the dark side of the Force, though there are no known instances of him using these powers.<ref name="The Movie Trilogy Sourcebook" /> When his master was struck down by Darth Maul, Obi-Wan briefly [[Force rage|gave into his fury]] during the battle, though he soon abandoned his rage when Maul [[Consume Essence|drew strength from his anger]], returning to how a Jedi should fight and soon cutting down the Sith.<ref name=":6" /> | |
|
| |
|
| ===Other abilities=== | | ===Other abilities=== |
| {{Quote|There is a secret to the warrior arts. One that has nothing to do with training. Nothing to do with fancy movements. It is the willingness to trade lives with your enemy. To never fight for anything you would not die for. Those who fight for glory, or gold, or power, stand on shifting sand, not the bedrock of true courage.|Obi-Wan Kenobi|<ref name="TCD" />}}
| | Kenobi understood [[Shyriiwook/Legends|Shyriiwook]].<ref name="EP4NOVEL">[[Star Wars Episode IV: A New Hope (novel)|''Star Wars Episode IV: A New Hope'' novel]]</ref> |
| [[File:Obi-Wan_TCG_by_Vanderstelt.jpg|thumb|right|200px|Kenobi leverages his expertise in lightsaber combat on the Death Star.]]
| |
| Obi-Wan Kenobi proved to be a great military strategist and a highly studious man, which resulted in his attaining the rank of High General along with Mace Windu during the Clone Wars. He personally led his troops to many famous victories on worlds such as Raxus Prime, Muunilinst, Utapau, and countless others. His persuasive demeanor earned him the moniker of "The Negotiator," and his tactical skills allowed the Republic to minimize clone casualties during many of their battles. His use of Advanced Recon Commandos and [[Clone lancer trooper|Lance Troopers]] on Muunilinst were key elements to the victory of the Republic.<ref name="CW4" />
| |
| | |
| His strategic ability was also shown in his lightsaber combat. Applying the principles of Soresu and Sokan, he often took advantage of his superior defensive capabilities and position on the battlefield to win his battles with as little effort as possible. He used this particular strategy to tire his former Padawan and sever his legs and left arm on Mustafar.<ref name="rots" />
| |
| | |
| Despite his dislike of flying, Kenobi was an excellent pilot. As a Padawan, he was known as one of the greatest pilots in the Jedi Order, expressing great interest in the early Jedi starfighter program. During the Clone Wars, he led many attacks from the cockpit of his [[Delta-7 Aethersprite-class light interceptor/Legends|Jedi starfighter]] or his [[Eta-2 Actis-class interceptor|Jedi interceptor]], often designated as [[Red Leader/Legends|Red Leader]]. He could repair all kinds of craft and machines as well as use computers to enhance his various skills. Constantly monitoring the [[T-14 hyperdrive generator/Legends|hyperdrive generator]] of the [[J-type 327 Nubian royal starship|Naboo Royal Starship]], Obi-Wan readied the core for repairs. Obi-Wan then used his technical expertise to repair the hyperdrive on Queen Amidala's vessel.
| |
| | |
| Kenobi was a skilled hand-to-hand combatant. Trained at the Jedi Temple and having undergone extensive sparring matches with Masters Jinn and Windu, he developed a considerable level of skill in unarmed combat, enough so to outclass [[Pre Vizsla/Legends|Pre Vizsla]], leader of the Death Watch, in both their bouts of the lightsaber as well as their fists.<ref name="TMP" /> During his duel with Jango Fett on Kamino, Kenobi was briefly deprived of his lightsaber, and fought the bounty hunter in unarmed combat.<ref name="aotc" /> Kenobi also possessed great resistance to injury, surviving and standing up from a barrage of the [[Son/Legends|Son's]] Force lightning.<ref name="Ghosts of Mortis" />
| |
| | |
| Though he preferred lightsabers, Obi-Wan was an excellent marksman, as demonstrated during his time as "Rako Hardeen" in the "Box," something he boasted of to Anakin.<ref name="Deception" /> Nevertheless, Kenobi viewed blasters as uncivilized, at least compared to a lightsaber.<ref name="rots" /><ref name="Episode IV" /> He also was skilled in tossing bombs.<ref name=":1" />
| |
| | |
| In his later years, Kenobi learned to understand [[Shyriiwook/Legends|Shyriiwook]]<ref name="EP4NOVEL">[[Star Wars Episode IV: A New Hope (novel)|''Star Wars Episode IV: A New Hope'' novel]]</ref> and other alien languages.<ref name=":3" />
| |
|
| |
|
| ==Equipment== | | ==Equipment== |
| {{Main|Obi-Wan Kenobi's lightsaber}} | | {{Main|Obi-Wan Kenobi's lightsaber}} |
| {{Quote|This weapon is your life.|Obi-Wan Kenobi to Anakin Skywalker|<ref name="aotc" />}}
| |
| When Kenobi was a youngling and Padawan, he was given a lightsaber by an unknown Jedi, probably Yoda, for training. His first Padawan lightsaber accompanied him until an unknown circumstance. Kenobi built a new lightsaber based on the designs of his friend Quinlan Vos and his Master Qui-Gon Jinn.
| |
| [[File:LifeLegendObiWanArt.jpg|thumb|right|170px|Kenobi uses his lightsaber during his [[Rescue of Princess Leia/Legends|duel]] with his former apprentice.]] | | [[File:LifeLegendObiWanArt.jpg|thumb|right|170px|Kenobi uses his lightsaber during his [[Rescue of Princess Leia/Legends|duel]] with his former apprentice.]] |
| The second Padawan lightsaber was with him until the Battle of Naboo, when Darth Maul disarmed Kenobi and kicked his lightsaber down a generator shaft. To defeat the Sith, Kenobi used Force pull to reach for his fallen Master's discarded lightsaber and kill Maul. There were debates over what happened to Kenobi's second Padawan lightsaber. Either he somehow retrieved his saber from the pit or replaced his lost one by making an exact replica. He used Jinn's lightsaber for an unknown amount of time.<ref name="Episode I" />
| |
|
| |
| Ten years after his Master's death and the approval of his training of young Anakin Skywalker, Kenobi still used the same design as his second Padawan lightsaber. This lightsaber was lost when Kenobi was captured by the Separatists on Geonosis. During the Battle of Geonosis, he was given a temporary replacement by one of the Jedi in the task force that had come to rescue him, Skywalker and Senator Amidala. Kenobi later reacquired his own lightsaber and used it during the early part of the Clone Wars.<ref name="aotc" />
| |
|
| |
| After being promoted to the rank of Jedi Master, Kenobi built what was to be his final lightsaber. This last one was based on the design of his first Padawan saber. During his exile, he made some adjustments with its parts, such as changing the belt fastener from a clip to a ring. It was either built, or later customized, to work underwater.<ref name="ARC Troopers (episode)" />
| |
|
| |
|
| Even after his death, he left a journal of how to create a lightsaber. Luke used that journal to build his first lightsaber based on the design of Kenobi's. In the New Jedi Order, that design provided inspiration to the newer generations, like [[Jaina Solo Fel|Jaina]] and Anakin Solo.<ref name="Shadows of the Empire (novel)" /> | | Even after his death, he left a journal of how to create a lightsaber. Luke used that journal to build his first lightsaber based on the design of Kenobi's. In the New Jedi Order, that design provided inspiration to the newer generations, like [[Jaina Solo Fel|Jaina]] and Anakin Solo.<ref name="Shadows of the Empire (novel)" /> |
| Line 1,096: |
Line 166: |
| ===Portrayal=== | | ===Portrayal=== |
| [[File:Ben_Kenobi.jpg|thumb|left|150px|[[Alec Guinness]] as Kenobi in {{Film|IV}}]] | | [[File:Ben_Kenobi.jpg|thumb|left|150px|[[Alec Guinness]] as Kenobi in {{Film|IV}}]] |
| Obi-Wan Kenobi is played by [[Ewan McGregor]] in [[Star Wars: Episode I The Phantom Menace|''The Phantom Menace'']], [[Star Wars: Episode II Attack of the Clones|''Attack of the Clones'']] and [[Star Wars: Episode III Revenge of the Sith|''Revenge of the Sith'']] and Sir [[Alec Guinness]] in [[Star Wars: Episode IV A New Hope|''A New Hope'']], [[Star Wars: Episode V The Empire Strikes Back|''The Empire Strikes Back'']] and [[Star Wars: Episode VI Return of the Jedi|''Return of the Jedi'']]. | | Obi-Wan Kenobi is played by Sir [[Alec Guinness]] in [[Star Wars: Episode IV A New Hope|''A New Hope'']], [[Star Wars: Episode V The Empire Strikes Back|''The Empire Strikes Back'']] and [[Star Wars: Episode VI Return of the Jedi|''Return of the Jedi'']]. |
|
| |
|
| [[File:Obi-Wan_Kenobi_Episode_1_Concept_Art.jpg|thumb|right|200px|Early concept for young Obi-Wan Kenobi in ''The Phantom Menace'']]
| | In the radio dramatizations, he was voiced by [[Bernard Behrens]]. |
| In the [[Star Wars: Clone Wars|''Clone Wars'' micro-series]], its sequel series [[Star Wars: The Clone Wars|''The Clone Wars'']] and the video games ''[[Star Wars: Battlefront II]]'' and [[Star Wars Episode III: Revenge of the Sith (video game)|''Revenge of the Sith'']], Kenobi is voiced by [[James Arnold Taylor]]. [[David Davies]] provided the voice in the game ''[[Star Wars: Rogue Squadron II: Rogue Leader]]'', while [[Timothy Omundson]] provided his voice in ''[[Star Wars: Rogue Squadron III: Rebel Strike]]''. [[Lewis Macleod]] provided the voice of Obi-Wan Kenobi in ''[[Star Wars: Galactic Battlegrounds]]'', ''[[Star Wars: Obi-Wan]]'' and ''[[Star Wars: Super Bombad Racing]]''. In the radio dramatizations, he was voiced by [[Bernard Behrens]].
| |
|
| |
|
| Despite great critical acclaim, Alec Guinness disliked being associated solely with the role of Kenobi. To limit his role in the trilogy, it was reportedly Guinness's own idea that Ben should die on the Death Star.{{Fact}} | | Despite great critical acclaim, Alec Guinness disliked being associated solely with the role of Kenobi. To limit his role in the trilogy, it was reportedly Guinness's own idea that Ben should die on the Death Star.{{Fact}} |
|
| |
|
| However, ''[[The Making of Star Wars: The Definitive Story Behind the Original Film]]'' stated that [[George Lucas]] originally came up with the idea of having Ben die, to which Guinness initially objected. By explaining that Ben would have little to do in the story after the ''Millennium Falcon'' escaped the Death Star, Lucas convinced him to allow it. | | However, ''[[The Making of Star Wars: The Definitive Story Behind the Original Film]]'' stated that [[George Lucas]] originally came up with the idea of having Ben die, to which Guinness initially objected. By explaining that Ben would have little to do in the story after the ''Millennium Falcon'' escaped the Death Star, Lucas convinced him to allow it. |
|
| |
| Ewan McGregor's stunt double in Episodes II and III, [[Nash Edgerton]], is the real-life brother of [[Joel Edgerton]], who played Owen Lars in those two films.
| |
|
| |
|
| ===Character development=== | | ===Character development=== |
| Line 1,115: |
Line 182: |
|
| |
|
| The name "Obi-Wan" curiously resembles a droid name (e.g. ''Emkay'' (MK), ''Threepio'' (3PO), ''Artoo'' (R2) etc.), and theoretically it could also be written as OB1 (KNO-B). | | The name "Obi-Wan" curiously resembles a droid name (e.g. ''Emkay'' (MK), ''Threepio'' (3PO), ''Artoo'' (R2) etc.), and theoretically it could also be written as OB1 (KNO-B). |
|
| |
| Kenobi and Anakin Skywalker/Darth Vader are the only organic characters to appear in all six movies; the inorganic ones are R2-D2 and C-3PO.
| |
|
| |
| In the Wii version of the [[Star Wars: The Force Unleashed (video game)|''Star Wars: The Force Unleashed'' video game]], if you enter BENKENOBI as a cheat code, you can play as Obi-Wan Kenobi.<ref name="TFU">''[[Star Wars: The Force Unleashed (video game)]]''</ref>
| |
|
| |
|
| In the movie [[Wikipedia:Indiana Jones and the Temple of Doom|''Indiana Jones and the Temple of Doom'']] and [[Wikipedia: Indiana Jones and the Temple of Doom (novel)|its novelization]], Obi Wan is the name of a nightclub. | | In the movie [[Wikipedia:Indiana Jones and the Temple of Doom|''Indiana Jones and the Temple of Doom'']] and [[Wikipedia: Indiana Jones and the Temple of Doom (novel)|its novelization]], Obi Wan is the name of a nightclub. |
|
| |
| ===Birth place===
| |
| The [[Star Wars: Episode III Revenge of the Sith (novelization)|novelization of ''Revenge of the Sith'']] indicates that he speaks with a [[Coruscanti/Legends|Coruscanti]] accent, although, as he was trained at the [[Jedi Temple]] on that planet, this could not be considered a clue to his homeworld. ''[[Star Wars: Attack of the Clones: The Visual Dictionary]]'' identifies Kenobi as Coruscanti in the Dexter Jettster section, but again, since he was raised in the Jedi Temple on Coruscant, this doesn't necessarily indicate the planet of his birth. ''[[Star Wars: The Clone Wars Character Encyclopedia]]'' and ''[[Star Wars Character Encyclopedia]]'' also stated that Coruscant is Kenobi's homeworld. Early printings of the ''[[The Rebel Alliance Sourcebook]]'' and ''[[Star Wars Screen Entertainment]]'' both stated that Kenobi was born on Tatooine, and while his homeworld had yet to be revealed, this was highly unlikely, considering the planet's distance from the [[Core Worlds/Legends|Core]] and the fact that Anakin Skywalker resided there and wasn't discovered until he was nine years of age. Furthermore, these two sources were written during a time when it was widely (but ultimately erroneously) accepted that Kenobi was the estranged brother of Owen Lars, who, at the time, was also believed to have been born on Tatooine before it was revealed he was born on [[Ator/Legends|Ator]].
| |
|
| |
| On [[August 14]], [[2010]], Obi-Wan's homeworld was finally named in an interview between George Lucas and Jon Stewart of ''The Daily Show'' at [[Celebration V]]. A fan-submitted question came up regarding the name of the homeworld, and Lucas already had a name for this planet, [[Stewjon/Legends|Stewjon]].<ref name="Stewjon" />
| |
|
| |
| ===Lightsaber debate===
| |
| There have been debates about Kenobi's lightsaber during ''Revenge of the Sith'' due to his appearance in the ''Clone Wars'' animated series. Some say he wields the same lightsaber in Episode III as he wielded in Episodes I and II. Kenobi constructed his final lightsaber during the Clone Wars; however, there are quite a few scenes in the ''Clone Wars'' animated series that clearly show his lightsaber, and the lightsaber is the same one he wielded during ''The Phantom Menace'' and ''Attack of the Clones''. It's possible that Kenobi lost that lightsaber during his imprisonment on [[Rattatak/Legends|Rattatak]]. Although some companies that make replicas, such as Master Replicas, use Kenobi's "final" design for the ''Revenge of the Sith'' model, other lightsaber replica makers claim that he wielded the same lightsaber in Episode III as in I and II. Several scenes in ''Revenge of the Sith'' show his lightsaber clearly, all of them showing his lightsaber resembling his final lightsaber, and no shots show the lightsaber he wielded in Episodes I and II.
| |
|
| |
| ===Non-canon storylines===
| |
| {{Noncanonstart}}
| |
| [[File:Obi-Wan_Visionaries.jpg|thumb|left|125px|Obi-Wan Kenobi during [[16 BBY/Legends|16 BBY]]]]
| |
| Around [[16 BBY/Legends|16 BBY]], Kenobi was finally tracked down by an individual he thought he had defeated many years ago, Darth Maul, rebuilt with [[Cybernetics/Legends|cybernetic]] legs. Maul claimed to have been tracking Kenobi for years and only just missing him on Kamino, Geonosis and Mustafar and indeed having killed witnesses on Polis Massa before he had finally gained crucial information in Mos Espa from Watto, whom he had also killed. Maul proceeded to the Lars homestead, where he threatened to kill a toddler-aged Luke Skywalker if Kenobi did not show himself.<ref name="Old Wounds">{{Shortstory|story=Old Wounds|book=Star Wars: Visionaries}}</ref>
| |
|
| |
| Kenobi, not wanting any harm to come to Luke, revealed himself from his hiding place in the sand and attacked Maul immediately. A ferocious battle ensued in which Maul lost a further arm as well as some of his horns before Kenobi was able to beat him into submission. With his lightsaber hilt to Maul's forehead and his finger on the blade-ignition button, Kenobi hesitated to execute his helpless opponent, but had the decision taken out of his hands when the revived Owen blew the former Sith's head apart with his damaged rifle. Kenobi said he would take the body and burn it in the Dune Sea, to which Owen replied, "I told you I'd keep him safe, and I will. Even if that means from ''you''. You don't come back here. Understand?" Kenobi departed with Maul's corpse, speaking to Luke through the Force, assuring him "Don't worry. I'll be right here... even if you can't see me."<ref name="Old Wounds" />
| |
|
| |
| The [[Star Wars Episode III: Revenge of the Sith (video game)|''Star Wars Episode III: Revenge of the Sith'' video game]] has an option to play as Darth Vader during his duel with Kenobi. The level plays exactly as the canonical level until the ending. As Kenobi is on the hill warning Vader "don't try it," Vader flips over Kenobi and stabs him in the back before kicking his body down towards the lava river.
| |
| [[File:StarkillerVSKenobi-TFUUSE.jpg|thumb|right|250px|Kenobi fights [[Galen Marek]] as Palpatine's servant in the non-canon "Ultimate Sith Edition" of ''The Force Unleashed'']]
| |
| In ''[[Star Wars: The Force Unleashed: Ultimate Sith Edition]]'', [[Galen Marek|Lord Starkiller]] comes to Tatooine searching for R2-D2 and C-3PO, who have the plans to the Death Star. Starkiller tracks them to [[Docking Bay 94/Legends|Docking Bay 94]], and in an attempt to hold off the dark assassin, Kenobi duels Starkiller. The more experienced Kenobi is no match for the more powerful Starkiller, and Starkiller runs Kenobi through with his lightsaber before hurling him into the ''Millennium Falcon'' engines. Kenobi returns instantly as a blue Force ghost and is again defeated by Starkiller through the use of Force powers. In the non-canon Hoth level, the title crawl mentions that Luke has been learning the ways of the Force from Kenobi's spirit.
| |
| {{Noncanonend}}
| |
|
| |
|
| ==Appearances== | | ==Appearances== |
| {{Scroll_box|content= | | {{Scroll_box|content= |
| [[File:Obi-Wan_Kenobi_NEC.jpg|thumb|A portrait of "Ben" Kenobi]]
| |
| *''[[Legacy of the Jedi]]''
| |
| *''[[Jedi Apprentice: The Rising Force]]''
| |
| *''[[Jedi Apprentice: The Dark Rival]]''
| |
| *''[[Jedi Apprentice: The Hidden Past]]''
| |
| *''[[Jedi Apprentice: The Mark of the Crown]]''
| |
| *''[[Jedi Apprentice: The Defenders of the Dead]]''
| |
| *''[[Jedi Apprentice: The Uncertain Path]]''
| |
| *''[[Jedi Apprentice: The Captive Temple]]''
| |
| *''[[Jedi Apprentice: The Day of Reckoning]]''
| |
| *''[[Jedi Apprentice: The Fight for Truth]]''
| |
| *''[[Jedi Apprentice: The Shattered Peace]]''
| |
| *''[[Jedi Apprentice: The Deadly Hunter]]''
| |
| *''[[Jedi Apprentice: The Evil Experiment]]''
| |
| *''[[Jedi Apprentice: The Dangerous Rescue]]''
| |
| *''[[Jedi Apprentice: The Ties That Bind]]''
| |
| *''[[Jedi Apprentice: The Death of Hope]]''
| |
| *''[[Jedi Apprentice: The Call to Vengeance]]''
| |
| *''[[Jedi Apprentice: The Only Witness]]''
| |
| *''[[Jedi Apprentice: The Threat Within]]''
| |
| *''[[Jedi Apprentice Special Edition: Deceptions]]''
| |
| *''[[Jedi Apprentice Special Edition: The Followers]]''
| |
| *''[[Qui-Gon and Obi-Wan: The Aurorient Express]]''
| |
| *''[[Qui-Gon and Obi-Wan: Last Stand on Ord Mantell]]''
| |
| *''[[Jedi Council: Acts of War]]''
| |
| *''[[Cloak of Deception]]''
| |
| *{{Tales|1|Life, Death, and the Living Force}}
| |
| *[[Darth Maul (2000) 1|''Darth Maul'' (2000) 1]]
| |
| *''[[Star Wars: Obi-Wan]]''
| |
| *''[[Darth Maul: Shadow Hunter]]''
| |
| *''[[Episode I Adventures 1: Search for the Lost Jedi]]''
| |
| *''[[Episode I Adventures 2: The Bartokk Assassins]]''
| |
| *''[[Episode I Adventures 3: The Fury of Darth Maul]]''
| |
| *[[Darth Plagueis (novel)|''Darth Plagueis'']]
| |
| *[[Darth Plagueis (audiobook)|''Darth Plagueis'' audiobook]]
| |
| *{{Film|I}}
| |
| *[[Star Wars: Episode I The Phantom Menace (novelization)|''Star Wars'': Episode I ''The Phantom Menace'' novelization]]
| |
| *[[Star Wars: Episode I The Phantom Menace (unabridged audiobook)|''Star Wars: Episode I The Phantom Menace'' unabridged audiobook]]
| |
| *[[Star Wars: Episode I — The Phantom Menace|''Star Wars Episode I: The Phantom Menace''comic]]
| |
| *[[Star Wars Episode I: The Phantom Menace (junior novelization)|''Star Wars Episode I: The Phantom Menace'' junior novelization]]
| |
| *[[Star Wars: Episode I The Phantom Menace (video game)|''Star Wars'': Episode I ''The Phantom Menace'' video game]]
| |
| *[[Star Wars Episode I: The Phantom Menace (script facsimile)|''Star Wars Episode I: The Phantom Menace'' script facsimile]]
| |
| *[[Star Wars Episode I: The Phantom Menace (PhotoComic)|''Star Wars Episode I: The Phantom Menace'' PhotoComic]]
| |
| *''[[Star Wars: Episode I Obi-Wan's Adventures]]''
| |
| *''[[Episode I: Qui-Gon Jinn]]''
| |
| *''[[Episode I: Obi-Wan Kenobi]]''
| |
| *''[[Episode I: The Phantom Menace ½]]''
| |
| *''[[Star Wars: Episode I Jedi Power Battles]]''
| |
| *{{Shortstory|story=End Game|book=Star Wars: Episode I The Phantom Menace (novelization)|bformatted=''Star Wars: Episode I The Phantom Menace'' novelization|manual=1}} {{C|[[2012]] edition}}
| |
| *''[[Kinect Star Wars]]'' {{Hologram}}
| |
| *''[[Star Wars: Republic: Outlander]]'' {{Mo}}
| |
| *''[[Star Wars: Republic: The Stark Hyperspace War]]'' {{Flash}}
| |
| *[[Star Wars (1998) 41|''Star Wars'' (1998) 41]] {{Flash}}
| |
| *{{TCWUKCite|volume=7|9|Temple of Phantoms}}
| |
| *''[[Rogue Planet]]''
| |
| *[[Star Wars: Jedi Quest (comic series)|''Jedi Quest'' comics]]
| |
| *''[[Jedi Quest: Path to Truth]]''
| |
| *''[[Jedi Quest: The Way of the Apprentice]]''
| |
| *''[[Jedi Quest: The Trail of the Jedi]]''
| |
| *''[[Star Wars: Zam Wesell]]''
| |
| *[[Outbound Flight (novel)|''Outbound Flight'']]
| |
| *''[[Jedi Quest: The Dangerous Games]]''
| |
| *''[[Jedi Quest: The Master of Disguise]]''
| |
| *''[[Jedi Quest: The School of Fear]]''
| |
| *''[[Jedi Quest: The Shadow Trap]]''
| |
| *''[[Jedi Quest: The Moment of Truth]]''
| |
| *''[[Jedi Quest: The Changing of the Guard]]''
| |
| *''[[Jedi Quest: The False Peace]]''
| |
| *''[[Jedi Quest: The Final Showdown]]''
| |
| *''[[Star Wars: Republic: Honor and Duty]]''
| |
| *{{Tales|12|A Jedi's Weapon}}
| |
| *''[[Full of Surprises]]''
| |
| *''[[Practice Makes Perfect]]''
| |
| *''[[The Approaching Storm]]''
| |
| *[[The Approaching Storm (audiobook)|''The Approaching Storm'' audiobook]]
| |
| *''[[Star Wars: Jedi Starfighter]]'' {{Mo}}
| |
| *{{Hnn|54|jediwatch/1352_1.html|Jedi Settle Ansion Dispute|https://web.archive.org/web/20130728120337/http://www.holonetnews.com/54/jediwatch/1352_1.html}}
| |
| *{{Film|II}}
| |
| *''[[Star Wars: Episode II — Attack of the Clones]]''
| |
| *[[Star Wars: Episode II Attack of the Clones (novelization)|''Star Wars'': Episode II ''Attack of the Clones'' novelization]]
| |
| *[[Star Wars: Episode II Attack of the Clones (unabridged audiobook)|''Star Wars: Episode II Attack of the Clones'' unabridged audiobook]]
| |
| *[[Star Wars Episode II: Attack of the Clones (junior novelization)|''Star Wars'': Episode II ''Attack of the Clones'' junior novelization]]
| |
| *[[Star Wars Episode II: Attack of the Clones (video game)|''Star Wars'': Episode II ''Attack of the Clones'' video game]]
| |
| *''[[Star Wars: Attack of the Clones Movie Storybook]]''
| |
| *{{Hyperspace|url=hyperspace/member/fiction/f20080423/index.html|text=''Precipice''|int=Precipice|newurl=http://star-wars.suvudu.com/2012/10/star-wars-shorts-precipice.html|newhost=[[Unbound Worlds|Suvudu]]}}
| |
| *''[[Machines of War]]''
| |
| *''[[Most Precious Weapon]]'' {{Flash}}
| |
| *''[[Boba Fett: The Fight to Survive]]''
| |
| *''[[Boba Fett: Crossfire]]'' {{Mo}}
| |
| *[[Star Wars: The Clone Wars (video game)|''Star Wars: The Clone Wars'' video game]]
| |
| *[[Republic 50|''Republic'' 50]]
| |
| *''[[Star Wars: Republic: The New Face of War]]''
| |
| *[[Republic 53|''Republic'' 53]]
| |
| *''[[Storm Fleet Warnings]]''
| |
| *{{CW|1}}
| |
| *{{CW|2}}
| |
| *{{CW|3}} {{Hologram}}
| |
| *{{CW|8}}
| |
| *{{CW|9}}
| |
| *''[[Star Wars: Clone Wars: Planetary Forces]]''
| |
| *[[Star Wars: Clone Wars (PhotoComic)|''Star Wars: Clone Wars'' PhotoComic]]
| |
| *{{CW|11}}
| |
| *{{CW|19}} {{Vision|Anakin Skywalker}}
| |
| *{{CW|20}}
| |
| *{{CW|21}}
| |
| *''[[Star Wars: Galactic Battlegrounds]]''
| |
| *''[[Star Wars: Battle for the Republic]]''
| |
| *{{CWACite|1|Blind Force}}
| |
| *{{CWACite|8|One of a Kind (comic)|One of a Kind}}
| |
| *[[Shatterpoint (novel)|''Shatterpoint'']] {{Mo}}
| |
| *''[[Republic HoloNet News Core Edition 14:2:12]]''
| |
| *''[[Star Wars: The New Droid Army]]''
| |
| *''[[The Cestus Deception]]''
| |
| *''[[The Hive]]''
| |
| *''[[Republic Commando: Triple Zero]]'' {{Mo}}
| |
| *''[[Republic Commando: True Colors]]'' {{Mo}}
| |
| *''[[Star Wars: Republic: The Battle of Jabiim]]''
| |
| *''[[Republic HoloNet News Core Edition 14:9:01]]'' {{Mo}}
| |
| *[[Republic 59|''Republic'' 59]]
| |
| *[[Republic 61|''Republic'' 61]] {{Mo}}
| |
| *[[Republic 62|''Republic'' 62]]
| |
| *[[Republic 63|''Republic'' 63]] {{Mo}}
| |
| *''[[Jedi: Yoda]]''
| |
| *[[Republic 64|''Republic'' 64]] {{Mo}}
| |
| *[[Republic 67|''Republic'' 67]]
| |
| *''[[Changing Seasons]]''
| |
| *{{InsiderCite|72|Republic HoloNet News Core Edition 15:01:03}}
| |
| *{{InsiderCite|73|CIS Shadowfeed Dispatch 15:01:15 Edition}} {{Mo}}
| |
| *''[[The Clone Wars: Shadowed]]''
| |
| *{{TCW|Cat and Mouse}}
| |
| *{{TCW|The Hidden Enemy}}
| |
| *[[Star Wars: The Clone Wars (film)|''Star Wars: The Clone Wars'' film]]
| |
| *[[Star Wars: The Clone Wars (novelization)|''Star Wars: The Clone Wars'' novelization]]
| |
| *[[Star Wars: The Clone Wars (audiobook)|''Star Wars: The Clone Wars'' audiobook]]
| |
| *[[Star Wars: The Clone Wars (junior novelization)|''Star Wars: The Clone Wars'' junior novelization]]
| |
| *''[[The Clone Wars: Decide Your Destiny: Tethan Battle Adventure]]''
| |
| *''[[The Clone Wars: Decide Your Destiny: Crisis on Coruscant]]'' {{Mo}}
| |
| *''[[The Clone Wars: Decide Your Destiny: The Lost Legion]]''
| |
| *''[[The Clone Wars: Shipyards of Doom]]''
| |
| *{{TCW|Supply Lines}}
| |
| *{{TCW|Ambush}} {{Flash}} {{Hologram}}
| |
| *{{TCW|Rising Malevolence|Rising ''Malevolence''}} {{Hologram}}
| |
| *{{TCW|Shadow of Malevolence|Shadow of ''Malevolence''}}
| |
| *{{TCW|Destroy Malevolence|Destroy ''Malevolence''}}
| |
| *''[[The Clone Wars: Destroy Malevolence]]''
| |
| *''[[The Clone Wars: Secret Missions 3: Duel at Shattered Rock]]'' {{Mo}}
| |
| *{{TCW|Rookies}}
| |
| *''[[The Clone Wars: Wild Space]]''
| |
| *[[The Clone Wars: Wild Space (audiobook)|''The Clone Wars: Wild Space'' audiobook]]
| |
| *{{TCW|Downfall of a Droid}} {{Hologram}}
| |
| *''[[The Clone Wars: Downfall of a Droid]]'' {{Hologram}}
| |
| *{{TCW|Duel of the Droids}} {{Hologram}}
| |
| *''[[The Clone Wars: Bait]]''
| |
| *{{TCW|Dooku Captured}}
| |
| *''[[The Clone Wars: Switch]]''
| |
| *{{TCW|The Gungan General}}
| |
| *{{TCW|Trespass}}
| |
| *{{TCW|Blue Shadow Virus (episode)|Blue Shadow Virus}}
| |
| *{{TCW|Mystery of a Thousand Moons}}
| |
| *{{TCW|Storm Over Ryloth}}
| |
| *{{TCW|Innocents of Ryloth}}
| |
| *{{TCW|Liberty on Ryloth}} {{Mo}}
| |
| *''[[Star Wars: The Clone Wars: Republic Heroes]]''
| |
| *''[[The Clone Wars: Decide Your Destiny: Dooku's Secret Army]]''
| |
| *{{TCWA|Republic Defender}}
| |
| *{{TCWUKCite|6.3|In Triplicate}}
| |
| *{{TCWUKCite|6.4|The Droid Deception}}
| |
| *{{TCWUKCite|6.5|Terror on the Twilight|Terror on the ''Twilight''}} {{Mo}}
| |
| *{{TCWUKCite|6.7|Foreclosure}}
| |
| *{{TCWUKCite|6.13|The Guns of Nar Hekka}}
| |
| *{{TCWUKCite|6.14|In the Air}}
| |
| *{{TCWUKCite|6.16|Hunted (comic)|Hunted}}
| |
| *{{TCWUKCite|6.17|Burn the Behemoth!}}
| |
| *{{TCWUKCite|6.18|Repel All Boarders!}}
| |
| *{{TCWUKCite|6.20|Outgunned}}
| |
| *{{TCWUKCite|6.22|Leisure}}
| |
| *{{TCWUKCite|6.23|Fashion}}
| |
| *{{TCWUKCite|6.24|Runaway Starfighter}}
| |
| *{{TCWUKCite|6.26|The Only Good Clanker}}
| |
| *{{TCWUKCite|6.29|Blind Jedi's Bluff}}
| |
| *{{TCWUKCite|6.31|Deadly Droid}}
| |
| *{{TCWUKCite|6.34|Frozen Out!}}
| |
| *{{TCWUKCite|6.35|Bacta Raid}}
| |
| *{{TCWUKCite|6.37|Incident on Kashyyyk}}
| |
| *{{TCWUKCite|6.38|Sabotage (comic)|Sabotage}}
| |
| *{{TCWUKCite|6.39|Dead Shadows}}
| |
| *{{TCWUKCite|6.40|Hypermatters}}
| |
| *{{TCWUKCite|6.43|Downhill}}
| |
| *{{TCWUKCite|6.44|Mask of Iron}}
| |
| *''[[The Clone Wars: The Holocron Heist]]''
| |
| *{{TCW|Holocron Heist}}
| |
| *{{TCW|Children of the Force}}
| |
| *''[[The Clone Wars: Act on Instinct]]'' {{Hologram}}
| |
| *{{TCW|Bounty Hunters (episode)|Bounty Hunters}}
| |
| *{{TCW|The Zillo Beast Strikes Back}}
| |
| *[[The Clone Wars 10|''The Clone Wars'' 10]]
| |
| *[[The Clone Wars 11|''The Clone Wars'' 11]] {{Hologram}}
| |
| *[[The Clone Wars 12|''The Clone Wars'' 12]]
| |
| *{{TCW|Senate Spy}}
| |
| *{{TCW|Landing at Point Rain}}
| |
| *{{TCW|Legacy of Terror}}
| |
| *{{TCW|Brain Invaders}}
| |
| *{{TCW|Grievous Intrigue}}
| |
| *{{TCW|The Deserter}}
| |
| *{{TCW|Death Trap}} {{Mo}}
| |
| *{{TCW|R2 Come Home}} {{Mo}}
| |
| *''[[Clone Wars Gambit: Stealth]]''
| |
| *[[Clone Wars Gambit: Stealth (audiobook)|''Clone Wars Gambit: Stealth'' audiobook]]
| |
| *''[[Clone Wars Gambit: Siege]]''
| |
| *[[Clone Wars Gambit: Siege (audiobook)|''Clone Wars Gambit: Siege'' audiobook]]
| |
| *''[[The Clone Wars: Crash Course]]''
| |
| *''[[The Clone Wars: The Wind Raiders of Taloraan]]''
| |
| *{{TCW|ARC Troopers}}
| |
| *{{TCW|The Mandalore Plot}}
| |
| *{{TCW|Voyage of Temptation}}
| |
| *{{TCW|Duchess of Mandalore}}
| |
| *{{TCW|Corruption (episode)|Corruption}} {{Flash}}
| |
| *{{TCW|Assassin (episode)|Assassin}}
| |
| *{{TCW|Evil Plans}} {{Flash}}
| |
| *{{TCW|Hostage Crisis}} {{Mo}}
| |
| *''[[The Clone Wars: Hunting the Hunters (Part III)]]''
| |
| *[[HoloNet News — A Galaxy Divided (Part 1)|''HoloNet News — A Galaxy Divided'' (Part 1)]] {{Mo}}
| |
| *{{TCW|Hunt for Ziro}}
| |
| *{{TCW|Nightsisters (episode)|Nightsisters}}
| |
| *{{TCW|Witches of the Mist}}
| |
| *{{TCW|Overlords}}
| |
| *{{TCW|Altar of Mortis (episode)|Altar of Mortis}}
| |
| *{{TCW|Ghosts of Mortis}}
| |
| *{{TCW|The Citadel}}
| |
| *{{TCW|Counterattack}}
| |
| *{{TCW|Citadel Rescue}}
| |
| *{{TCW|Gungan Attack}} {{Hologram}}
| |
| *{{TCW|Darkness on Umbara}}
| |
| *{{TCW|The General (episode)|The General}} {{Hologram}}
| |
| *{{TCW|Carnage of Krell}} {{Mo}}
| |
| *''[[Star Wars: The Clone Wars: Slaves of the Republic]]''
| |
| *{{TCW|Kidnapped}}
| |
| *{{TCW|Slaves of the Republic}}
| |
| *{{TCW|Escape from Kadavo}}
| |
| *{{TCW|Deception}}
| |
| *{{TCW|Friends and Enemies}}
| |
| *{{TCW|The Box}}
| |
| *{{TCW|Crisis on Naboo}}
| |
| *[[The Wrath of Darth Maul|''Star Wars: The Wrath of Darth Maul'']] {{Mo}}
| |
| *{{TCW|Brothers}}
| |
| *{{TCW|Revenge (episode)|Revenge}}
| |
| *''[[The Clone Wars: The Sith Hunters]]''
| |
| *''[[Darth Maul—Death Sentence 1]]'' {{Flash}}
| |
| *''[[Darth Maul—Death Sentence 2]]'' {{C|Dream}}
| |
| *''[[Darth Maul—Death Sentence 3]]''
| |
| *''[[Darth Maul—Death Sentence 4]]''
| |
| *{{TCW|A War on Two Fronts}}
| |
| *{{TCW|Front Runners}}
| |
| *{{TCW|The Soft War}} {{Hologram}}
| |
| *{{TCW|Tipping Points}}
| |
| *{{TCW|The Gathering (episode)|The Gathering}} {{Flash}}
| |
| *{{TCW|Bound for Rescue}}
| |
| *{{TCW|A Necessary Bond}}
| |
| *{{TCW|Secret Weapons}}
| |
| *{{TCW|Point of No Return}}
| |
| *''[[The Clone Wars: Darth Maul: Shadow Conspiracy]]''
| |
| *{{TCW|Revival (episode)|Revival}}
| |
| *{{TCW|Eminence (episode)|Eminence}} {{Flash}}
| |
| *{{TCW|Shades of Reason}} {{Mo}}
| |
| *{{TCW|The Lawless}}
| |
| *{{TCW|Sabotage (episode)|Sabotage}}
| |
| *{{TCW|The Jedi Who Knew Too Much}}
| |
| *{{TCW|To Catch a Jedi}} {{Hologram}}
| |
| *{{TCW|The Wrong Jedi}}
| |
| *{{TCW|Conspiracy}}
| |
| *{{TCW|The Rise of Clovis}}
| |
| *{{TCW|The Disappeared, Part I}}
| |
| *{{TCW|The Lost One}}
| |
| *{{TCW|Voices}}
| |
| *{{TCW|Destiny (episode)|Destiny}} {{Vision|[[Yoda/Legends|Yoda]]}}
| |
| *{{TCW|Sacrifice}}
| |
| *{{TCWUKCite|6.47|Lockdown (comic)|Lockdown}}
| |
| *{{TCWUKCite|6.48|Colony Crisis}}
| |
| *{{TCWUKCite|6.50|The Runaway Ride}}
| |
| *{{TCWUKCite|6.51|Deadly Allies}}
| |
| *{{TCWUKCite|volume=7|8|Yoda Uncovered}}
| |
| *''[[MedStar I: Battle Surgeons]]'' {{Mo}}
| |
| *{{InsiderCite|83|MedStar: Intermezzo}} {{Mo}}
| |
| *''[[MedStar II: Jedi Healer]]'' {{Mo}}
| |
| *[[Republic 68|''Republic'' 68]] {{Mo}}
| |
| *[[Secrets of the Jedi (novel)|''Secrets of the Jedi'']]
| |
| *''[[Jedi Trial]]''
| |
| *''[[Yoda: Dark Rendezvous]]''
| |
| *''[[Star Wars: Republic: Dreadnaughts of Rendili]]''
| |
| *''[[Star Wars: Republic: Trackdown]]'' {{Mo}}
| |
| *''[[Routine Valor]]''
| |
| *''[[Boba Fett: Pursuit]]'' {{Mo}}
| |
| *''[[Star Wars: Obsession]]''
| |
| *{{CWACite|4|The Brink}}
| |
| *{{CWACite|9|Appetite for Adventure}}
| |
| *{{CWACite|10|Thunder Road}}
| |
| *''[[Sithisis]]''
| |
| *''[[Star Wars—Free Comic Book Day 2005 Special]]''
| |
| *''[[Labyrinth of Evil]]''
| |
| *''[[Reversal of Fortune]]''
| |
| *''[[Star Wars: Battlefront II]]''
| |
| *{{CW|22}}
| |
| *{{CW|23}}
| |
| *{{CW|24}} {{Voice}}
| |
| *{{CW|25}}
| |
| *{{Film|III}}
| |
| *''[[Star Wars: Episode III — Revenge of the Sith]]''
| |
| *[[Star Wars: Episode III Revenge of the Sith (novelization)|''Star Wars'': Episode III ''Revenge of the Sith'' novelization]]
| |
| *[[Star Wars: Episode III Revenge of the Sith (unabridged audiobook)|''Star Wars: Episode III Revenge of the Sith'' unabridged audiobook]]
| |
| *[[Star Wars Episode III: Revenge of the Sith (junior novelization)|''Star Wars'': Episode III ''Revenge of the Sith'' junior novelization]]
| |
| *[[Star Wars Episode III: Revenge of the Sith (video game)|''Star Wars'': Episode III ''Revenge of the Sith'' video game]]
| |
| *''[[Star Wars: Revenge of the Sith: The Movie Storybook]]''
| |
| *{{TCWUKCite|volume=7|13|Memory Loss}} {{Flash}}
| |
| *[[Lone Wolf: A Tale of Obi-Wan and Luke]]
| |
| *[[Kenobi (novel)|''Kenobi'']]
| |
| *[[Kenobi (audiobook)|''Kenobi'' audiobook]]
| |
| *''[[Order 66: A Republic Commando Novel]]'' {{Mo}}
| |
| *''[[Star Wars: Republic: Hidden Enemy]]'' {{Mo}}
| |
| *''[[Dark Lord: The Rise of Darth Vader]]''
| |
| *''[[Star Wars: Purge: Seconds to Die]]'' {{Vision|[[Sha Koon]]}}
| |
| *''[[Coruscant Nights I: Jedi Twilight]]'' {{Mo}}
| |
| *''[[Coruscant Nights II: Street of Shadows]]'' {{Mo}}
| |
| *''[[Evasive Action: End Game]]'' {{Mo}}
| |
| *''[[Star Wars: Purge]]'' {{Mo}}
| |
| *''[[The Last One Standing]]''
| |
| *''[[The Last of the Jedi: The Desperate Mission]]''
| |
| *''[[The Last of the Jedi: Dark Warning]]''
| |
| *''[[Ghosts of the Sith]]'' {{Mo}}
| |
| *''[[The Last of the Jedi: Underworld]]'' {{Hologram}}
| |
| *''[[The Last of the Jedi: Death on Naboo]]'' {{Mo}}
| |
| *''[[The Last of the Jedi: A Tangled Web]]'' {{Mo}}
| |
| *''[[The Last of the Jedi: Return of the Dark Side]]'' {{Mo}}
| |
| *''[[The Last of the Jedi: Secret Weapon]]'' {{Mo}}
| |
| *''[[The Last of the Jedi: Against the Empire]]'' {{Hologram}}
| |
| *''[[The Last of the Jedi: Master of Deception]]'' {{Hologram}}
| |
| *''[[The Last of the Jedi: Reckoning]]''
| |
| *''[[A Two-Edged Sword]]'' {{Mo}}
| |
| *''[[Domain of Evil]]'' {{C|Appears as a Force illusion}} | | *''[[Domain of Evil]]'' {{C|Appears as a Force illusion}} |
| *{{WEGCite|book=Classic Adventures: Volume Two|story=Domain of Evil}} {{C|Appears as a Force illusion}} | | *{{WEGCite|book=Classic Adventures: Volume Two|story=Domain of Evil}} {{C|Appears as a Force illusion}} |
| *''[[A Hunter's Fate: Greedo's Tale]]'' / [[A Hunter's Fate: Greedo's Tale (webstrip)|webstrip]] | | *''[[A Hunter's Fate: Greedo's Tale]]'' |
| *''[[Luke Skywalker's Walkabout]]'' | | *''[[Luke Skywalker's Walkabout]]'' |
| *''[[Adventure in Beggar's Canyon]]'' | | *''[[Adventure in Beggar's Canyon]]'' |
| *{{Tales|15|Falling Star}}
| |
| *[[Star Wars: The Force Unleashed (video game)|''Star Wars: The Force Unleashed'' game]] {{Hologram}}
| |
| *[[The Force Unleashed (novel)|''The Force Unleashed'' novel]] {{Hologram}}
| |
| *[[Star Wars: The Force Unleashed (comic)|''Star Wars: The Force Unleashed'' comic]] {{Flash}} {{Hologram}}
| |
| *''[[Rebel Dawn]]'' | | *''[[Rebel Dawn]]'' |
| *''[[Star Wars: Empire: Betrayal]]'' {{Flash}}
| |
| *[[Death Star (novel)|''Death Star'']]
| |
| *{{Tales|9|Resurrection}} {{Mo}}
| |
| *''[[Star Wars: Empire at War]]''
| |
| *''[[Star Wars: Empire: Darklighter]]'' {{Flash}}
| |
| *''[[Luke's Fate]]'' | | *''[[Luke's Fate]]'' |
| *''[[Star Wars Journal: The Fight for Justice]]'' | | *''[[Star Wars Journal: The Fight for Justice]]'' |
| Line 1,501: |
Line 198: |
| *{{Film|IV}} | | *{{Film|IV}} |
| *''[[Star Wars: A Storybook]]'' | | *''[[Star Wars: A Storybook]]'' |
| *{{TCWUKCite|volume=7|1|War on the Jundland Wastes}}
| |
| *{{Journal|11|Spare Parts (short story)|Spare Parts}} {{Mo}} | | *{{Journal|11|Spare Parts (short story)|Spare Parts}} {{Mo}} |
| *''[[Escape from the Death Star]]'' | | *''[[Escape from the Death Star]]'' |
| *''[[Star Wars: Trench Run]]'' {{Voice}}
| |
| *[[Star Wars (1977) 1|''Star Wars'' (1977) 1]] {{Mo}} | | *[[Star Wars (1977) 1|''Star Wars'' (1977) 1]] {{Mo}} |
| *''[[Onslaught at Arda I]]'' {{Mo}}
| |
| *''[[R2-D2's Mission: A Little Hero's Journey]]'' | | *''[[R2-D2's Mission: A Little Hero's Journey]]'' |
| *[[Star Wars (1977) 2|''Star Wars'' (1977) 2]] | | *[[Star Wars (1977) 2|''Star Wars'' (1977) 2]] |
| *''[[A More Wretched Hive: The Mos Eisley Cantina]]'' | | *''[[A More Wretched Hive: The Mos Eisley Cantina]]'' |
| *{{CWACite|2|Skywalkers}}
| |
| *''[[Cantina Communications]]'' | | *''[[Cantina Communications]]'' |
| *{{Tales|12|Once Bitten}}
| |
| *[[Star Wars (1977) 3|''Star Wars 3: Death Star'']] | | *[[Star Wars (1977) 3|''Star Wars 3: Death Star'']] |
| *[[Star Wars (1977) 4|''Star Wars'' (1977) 4]] | | *[[Star Wars (1977) 4|''Star Wars'' (1977) 4]] |
| Line 1,518: |
Line 210: |
| *[[Star Wars (1977) 6|''Star Wars'' (1977) 6]] {{Voice}} | | *[[Star Wars (1977) 6|''Star Wars'' (1977) 6]] {{Voice}} |
| *[[Super Star Wars (video game)|''Super Star Wars'']] | | *[[Super Star Wars (video game)|''Super Star Wars'']] |
| *''[[Perfect Evil]]'' {{Ghost}}
| |
| *''[[Hammertong: The Tale of the "Tonnika Sisters"]]'' | | *''[[Hammertong: The Tale of the "Tonnika Sisters"]]'' |
| *{{Shortstory|story=Play It Again, Figrin D'an: The Tale of Muftak and Kabe|book=Tales from the Mos Eisley Cantina}} | | *{{Shortstory|story=Play It Again, Figrin D'an: The Tale of Muftak and Kabe|book=Tales from the Mos Eisley Cantina}} |
| Line 1,563: |
Line 254: |
| *''[[Star Wars 3-D]]'' {{Ghost}} | | *''[[Star Wars 3-D]]'' {{Ghost}} |
| *''[[Blind Fury!]]'' {{Mo}} | | *''[[Blind Fury!]]'' {{Mo}} |
| *[[Allegiance (novel)|''Allegiance'']] {{Voice}}
| |
| *[[Allegiance (audiobook)|''Allegiance'' audiobook]] {{Voice}}
| |
| *''[[The Star Wars Holiday Special]]'' {{Flash}} | | *''[[The Star Wars Holiday Special]]'' {{Flash}} |
| *{{Shortstory|story=The Last One Standing: The Tale of Boba Fett|book=Tales of the Bounty Hunters}} {{Mo}} | | *{{Shortstory|story=The Last One Standing: The Tale of Boba Fett|book=Tales of the Bounty Hunters}} {{Mo}} |
| Line 1,645: |
Line 334: |
| *''[[Ambush at Corellia]]'' {{Mo}} | | *''[[Ambush at Corellia]]'' {{Mo}} |
| *''[[Specter of the Past]]'' {{Mo}} | | *''[[Specter of the Past]]'' {{Mo}} |
| *[[Specter of the Past (unabridged audiobook)|''Specter of the Past'' unabridged audiobook]] {{Mo}}
| |
| *''[[Vision of the Future]]'' {{Mo}} | | *''[[Vision of the Future]]'' {{Mo}} |
| *[[Vision of the Future (unabridged audiobook)|''Vision of the Future'' unabridged audiobook]] {{Mo}}
| |
| *''[[Star Wars: Union]]'' {{C|Dream}}
| |
| *[[Scourge (novel)|''Scourge'']] {{Imo}} {{C|As Mander Zuma's master's master's master}}
| |
| *''[[Junior Jedi Knights: The Golden Globe]]'' {{Mo}} | | *''[[Junior Jedi Knights: The Golden Globe]]'' {{Mo}} |
| *''[[Junior Jedi Knights: Promises]]'' {{Mo}} | | *''[[Junior Jedi Knights: Promises]]'' {{Mo}} |
| Line 1,656: |
Line 341: |
| *''[[Young Jedi Knights: Jedi Under Siege]]'' {{Mo}} | | *''[[Young Jedi Knights: Jedi Under Siege]]'' {{Mo}} |
| *''[[Young Jedi Knights: Crisis at Crystal Reef]]'' {{Mo}} | | *''[[Young Jedi Knights: Crisis at Crystal Reef]]'' {{Mo}} |
| *''[[Survivor's Quest]]'' {{Mo}}
| |
| *''[[The New Jedi Order: Vector Prime]]'' {{Mo}}
| |
| *[[Star Wars: Chewbacca (Dark Horse)|''Star Wars: Chewbacca'']] {{Flash}}
| |
| *''[[The New Jedi Order: Dark Tide I: Onslaught]]'' {{Mo}}
| |
| *''[[The New Jedi Order: Dark Tide II: Ruin]]'' {{Mo}}
| |
| *''[[The New Jedi Order: Agents of Chaos I: Hero's Trial]]'' {{Mo}}
| |
| *''[[The New Jedi Order: Agents of Chaos II: Jedi Eclipse]]'' {{Mo}}
| |
| *''[[The New Jedi Order: Balance Point]]'' {{Mo}}
| |
| *''[[The New Jedi Order: Edge of Victory I: Conquest]]'' {{Mo}}
| |
| *''[[The New Jedi Order: Edge of Victory II: Rebirth]]'' {{Ghost}}
| |
| *''[[The New Jedi Order: Dark Journey]]'' {{Mo}}
| |
| *''[[The New Jedi Order: Traitor]]'' {{Mo}}
| |
| *''[[The New Jedi Order: Force Heretic III: Reunion]]'' {{Mo}}
| |
| *''[[The New Jedi Order: The Unifying Force]]'' {{Ghost}}
| |
| *''[[Dark Nest I: The Joiner King]]'' {{Hologram}}
| |
| *''[[Dark Nest III: The Swarm War]]'' {{Hologram}}
| |
| *''[[Legacy of the Force: Bloodlines]]'' {{Mo}}
| |
| *''[[Legacy of the Force: Tempest]]'' {{Mo}}
| |
| *''[[Legacy of the Force: Sacrifice]]'' {{Mo}}
| |
| *''[[Legacy of the Force: Fury]]'' {{Imo}}
| |
| *''[[Legacy of the Force: Revelation]]'' {{Mo}}
| |
| *[[Riptide (novel)|''Riptide'']] {{Mo}}
| |
| *[[Millennium Falcon (novel)|''Millennium Falcon'']] {{Mo}}
| |
| *[[Millennium Falcon (audiobook)|''Millennium Falcon'' audiobook]] {{Mo}}
| |
| *''[[Fate of the Jedi: Outcast]]'' {{Mo}}
| |
| *[[Fate of the Jedi: Outcast (audiobook)|''Fate of the Jedi: Outcast'' audiobook]] {{Mo}}
| |
| *''[[Fate of the Jedi: Omen]]'' {{Mo}}
| |
| *[[Fate of the Jedi: Omen (audiobook)|''Fate of the Jedi: Omen'' audiobook]] {{Mo}}
| |
| *''[[Fate of the Jedi: Ascension]]'' {{Mo}}
| |
| *[[Fate of the Jedi: Ascension (audiobook)|''Fate of the Jedi: Ascension'' audiobook]] {{Mo}}
| |
| *''[[Fate of the Jedi: Apocalypse]]'' {{Mo}}
| |
| *[[Fate of the Jedi: Apocalypse (audiobook)|''Fate of the Jedi: Apocalypse'' audiobook]] {{Mo}}
| |
| *[[Crucible (novel)|''Crucible'']] {{Mo}}
| |
| *[[Crucible (audiobook)|''Crucible'' audiobook]] {{Mo}}
| |
| *''[[Star Wars: Legacy: Ghosts]]'' {{Mo}}
| |
| *[[Legacy (2006) 16|''Legacy'' (2006) 16]] {{Flash}}
| |
| *[[Legacy (2006) 39|''Legacy'' (2006) 39]] {{Mo}}
| |
| }} | | }} |
|
| |
|
| ===Non-canon appearances=== | | ===Non-canon appearances=== |
| {{Scroll_box|
| |
| [[File:LEGO-Kenobi.jpg|thumb|right|200px|Obi-Wan Kenobi's [[LEGO]] version]]
| |
| *''[[LEGO Star Wars: The Phantom Menace]]''
| |
| *''[[LEGO Star Wars: The Video Game]]''
| |
| *''[[LEGO Star Wars: Darth Maul's Mission]]''
| |
| *''[[Star Wars: The Clone Wars: Sharpshooter]]'' {{Hologram}}
| |
| *[[Path of the Jedi (game)|''Path of the Jedi'']]
| |
| *{{Tales|14|Mythology}}
| |
| *{{Tales|14|The Lesson}}
| |
| *''[[LEGO Star Wars III: The Clone Wars]]''
| |
| *[[LEGO Star Wars: The Yoda Chronicles (video game)|''LEGO Star Wars: The Yoda Chronicles'' video game]]
| |
| *[[Star Wars: Republic Commando: Order 66 (video game)|''Republic Commando: Order 66'' game]]
| |
| *''[[LEGO Star Wars: The Complete Saga]]''
| |
| *''[[Star Wars: Battlefront II]]'' {{C|Non-canon only in certain gameplay modes}}
| |
| *''[[LEGO Star Wars: The Padawan Menace]]''
| |
| *''[[Star Wars Battlefront: Elite Squadron]]''
| |
| *''[[Star Wars: Yoda Stories]]'' {{Ghost}} | | *''[[Star Wars: Yoda Stories]]'' {{Ghost}} |
| *''[[Tag & Bink: Revenge of the Clone Menace]]''
| |
| *"[[Kowakian Monkey-Lizard (comic)|Kowakian Monkey-Lizard]]"
| |
| *''[[LEGO Star Wars: Revenge of the Brick]]''
| |
| *''[[Evil Eyes]]''
| |
| *{{Shortstory|story=Old Wounds|book=Star Wars: Visionaries}}
| |
| *{{Tales|1|Skippy the Jedi Droid}}
| |
| *''[[Tag & Bink Are Dead]]''
| |
| *{{Tales|19|The Rebel Club}}
| |
| *''[[LEGO Star Wars II: The Original Trilogy]]''
| |
| *{{Tales|16|The Long, Bad Day}} {{Ghost}}
| |
| *''[[Star Wars: Empire at War: Forces of Corruption]]'' {{C|Non-storyline mode only}}
| |
| *''[[Star Wars Battlefront: Renegade Squadron]]''
| |
| *{{Tales|20|Luke Skywalker: Detective}}
| |
| *''[[Star Wars: The Force Unleashed: Ultimate Sith Edition]]''
| |
| *''[[Star Wars Mythos]]''
| |
| *''[[Star Wars Infinities: A New Hope]]''
| |
| *''[[Star Wars Infinities: The Empire Strikes Back]]'' {{Ghost}}
| |
| *''[[Star Wars Infinities: Return of the Jedi]]'' {{Ghost}}
| |
| *''[[The Return of Tag & Bink: Special Edition]]'' {{Ghost}}
| |
| *''[[Star Wars Adventures in ABC]]'' | | *''[[Star Wars Adventures in ABC]]'' |
| *{{Tales|8|The Secret Tales of Luke's Hand}} {{Mo}}
| |
| *{{Tales|11|Tall Tales}} {{Mo}}
| |
| *''[[Star Wars -Phantasmagoria-]]'' {{Flash}}
| |
| *''[[Club Penguin Star Wars Takeover]]''
| |
| }}
| |
|
| |
|
| ==Sources== | | ==Sources== |
| Line 1,824: |
Line 432: |
| *{{StarWarsKidsCite|4|Meet Wedge!}} | | *{{StarWarsKidsCite|4|Meet Wedge!}} |
| *{{StarWarsKidsCite|6|Star Wars Kids Answer Quest}} | | *{{StarWarsKidsCite|6|Star Wars Kids Answer Quest}} |
| *''[[Star Wars Roleplaying Game]]''
| |
| *''[[Star Wars Episode I: I Am a Jedi]]''
| |
| *[[Star Wars Episode I: The Phantom Menace (reference book)|''Star Wars Episode I: The Phantom Menace'' reference book]]
| |
| *{{KennerCite|set=Star Wars: The Power of the Force (1995 toy line)|text=''Star Wars: The Power of the Force'' (1995)|pack=Spirit of Obi-Wan|link=potf2spirit.asp|archiveurl=https://archive.is/TERDm}}
| |
| *{{KennerCite|set=Star Wars: The Power of the Force (1995 toy line)|text=''Star Wars: The Power of the Force'' (1995)|pack=Cantina Showdown|link=POTF2cantinashowdown.asp|archiveurl=https://archive.is/USfRs}}
| |
| *{{KennerCite|set=Star Wars: The Power of the Force (1995 toy line)|text=''Star Wars: The Power of the Force'' (1995)|pack=Ben (Obi-Wan) Kenobi with Lightsaber|link=POTF2benkenobiff.asp|archiveurl=https://archive.is/w9wf5}}
| |
| *''[[Star Wars: The Action Figure Archive]]'' | | *''[[Star Wars: The Action Figure Archive]]'' |
| *[[Star Wars: Episode I (toy line)|''Star Wars: Episode I'' toy line]]
| |
| *''[[Star Wars: Episode I The Visual Dictionary]]''
| |
| *''[[Star Wars: Episode I The Phantom Menace The Official Souvenir Magazine]]''
| |
| *''[[Star Wars Episode I: The Data File]]''
| |
| *{{HasbroCite|set=Star Wars: Power of the Jedi|pack=Ben (Obi Wan) Jedi Knight|altlink=https://www.rebelscum.com/potjbenkenobi.asp|archiveurl=https://archive.is/ygV8I}}
| |
| *[[The Essential Chronology (real-world book)|''The Essential Chronology'']]
| |
| *''[[Obi-Wan: Prima's Official Strategy Guide]]''
| |
| *{{GamerCite|1|The Anzati}}
| |
| *{{GamerCite|1|The University of Sanbra Guide to Intelligent Life: The Marvel Series}} {{Imo}}
| |
| *''[[The Dark Side Sourcebook]]''
| |
| *{{WizardsCite|url=starwars/article.asp?x=sw20010920b_ilum&c=rpg|text=Ilum: A Frozen World Hides a Jedi's Secret|int=Ilum: A Frozen World Hides a Jedi's Secret|archivedate=20091015151300}}
| |
| *''[[The New Jedi Order Sourcebook]]''
| |
| *{{FFCite|10|KEN1–4, ''Obi-Wan Kenobi''}}
| |
| *''[[Star Wars: Attack of the Clones: The Visual Dictionary]]''
| |
| *''[[Star Wars: Attack of the Clones: The Illustrated Companion]]''
| |
| *''[[Star Wars: Revenge of the Sith: The Visual Dictionary]]''
| |
| *''[[Star Wars: The Visual Dictionary]]''
| |
| *{{WizardsCite|url=default.asp?x=starwars/article/sw20030116ship|text=Anakin's Living Ship|int=Anakin's Living Ship|archivedate=20091016040922}}
| |
| *''[[Star Wars: The Complete Visual Dictionary]]''
| |
| *''[[Star Wars: The Ultimate Visual Guide]]''
| |
| *''[[The Essential Guide to Characters]]''
| |
| *''[[The New Essential Guide to Characters]]''
| |
| *{{HasbroCite|set=Star Wars Saga|pack=Obi-Wan Kenobi & Bail Organa (Dark Horse Comics' Star Wars: Revenge of the Sith)|altlink=https://www.rebelscum.com/TACcomicpacksWMOWKBA.asp}}
| |
| *''[[The New Essential Chronology]]''
| |
| *{{FFCite|33|LIG1-2, ''Obi-Wan Kenobi's Lightsaber''}}
| |
| *''[[Star Wars: Chronicles]]''
| |
| *''[[Star Wars Chronicles: The Prequels]]''
| |
| *''[[Star Wars Episode I Who's Who: A Pocket Guide to the Characters of The Phantom Menace]]''
| |
| *''[[Hero's Guide]]''
| |
| *''[[Star Wars: Rogue Squadron III: Rebel Strike: The Official Nintendo Player's Guide]]'' {{Po}}
| |
| *{{WizardsCite|url=default.asp?x=starwars/article/sw20040115tank|text=Republic Fighter Tank|int=Republic Fighter Tank|archivedate=20091119015612}}
| |
| *''[[The Story of General Grievous: Lord of War]]''
| |
| *[[Rebel Storm|''Star Wars Miniatures: Rebel Storm #11'']]
| |
| *''[[Star Wars Miniatures: Clone Strike]]''
| |
| *{{WizardsCite|url=default.asp?x=starwars/article/sw20050303a|text=Soldiers of Fortune|int=Soldiers of Fortune|archivedate=20091016032904}} {{Imo}}
| |
| *{{WizardsCite|url=default.asp?x=swminis/article/universepreview10|text=''Universe'' Preview 10|int=Universe Preview 10|archivedate=20081228094650}} {{Imo}}
| |
| *[[Universe (Star Wars Miniatures)|''Star Wars Miniatures: Universe'']]
| |
| *''[[Star Wars Episode III Revenge of the Sith: Illustrated Screenplay]]''
| |
| *{{WizardsCite|url=default.asp?x=starwars/article/sw20050728a|text=Heroes of ''Revenge of the Sith''|int=Heroes of Revenge of the Sith|archivedate=20091016033515}}
| |
| *[[Star Wars Trivial Pursuit]]
| |
| *''[[The Art of Star Wars Episode I: The Phantom Menace]]''
| |
| *''[[Star Wars Episode I: Jedi Power Battles: Prima's Official Strategy Guide]]''
| |
| *{{HasbroCite|set=Star Wars: The Saga Collection|pack=Separation of the Twins - Infant Luke Skywalker (with Obi-Wan Kenobi)|altlink=https://www.rebelscum.com/sw05SotTluke.asp}}
| |
| *{{HasbroCite|set=Star Wars: The Saga Collection|pack=Separation of the Twins - Infant Leia Organa with Bail Organa|altlink=https://www.rebelscum.com/sw05SotTleia.asp|archiveurl=https://archive.is/h6Yd5}}
| |
| *{{InsiderCite|88|Heritage of the Sith}}
| |
| *{{HasbroCite|set=Star Wars Saga|pack=Obi-Wan Kenobi & Bail Organa (Dark Horse Comics' Star Wars: Revenge of the Sith)|altlink=https://www.rebelscum.com/TACcomicpacksWMOWKBA.asp}}
| |
| *[[Jedi vs. Sith: The Essential Guide to the Force (real-life book)|''Jedi vs. Sith: The Essential Guide to the Force'']]
| |
| *{{Hyperspace|url=hyperspace/member/galactic/2005/10/galactic20051031.html|text=Legendary Hero}}
| |
| *{{HasbroCite|set=Star Wars: 30th Anniversary Collection|pack=Star Wars: Episode III - Revenge of the Sith - Commemorative Tin Collection (Clone Commander Cody, Anakin Skywalker, General Grievous. Clone Pilot)|altlink=https://www.rebelscum.com/TACtinepisodeIIIEX.asp}}
| |
| *{{HasbroCite|set=Star Wars: 30th Anniversary Collection|altlink=https://www.rebelscum.com/tacOrder66-1.asp|pack=Obi-Wan Kenobi & ARC Trooper Commander (Order 66)}}
| |
| *{{SideshowCite|set=Order of the Jedi|pack=Aayla Secura (Jedi Master)|altlink=https://www.rebelscum.com/SSC16Aayla.asp|archivedate=20210302050527}}
| |
| *{{InsiderCite|101|Classic Moment}}
| |
| *{{InsiderCite|102|A Long Time Ago....}}
| |
| *{{InsiderCite|103|A Long Time Ago....}}
| |
| *{{InsiderCite|103|Classic Moment}}
| |
| *{{HasbroCite|set=Star Wars: The Clone Wars (toy line)|text=''Star Wars: The Clone Wars''|pack=Obi-Wan Kenobi ((Firing Jet Backpack!)|altlink=https://www.rebelscum.com/TCW02Obi.asp}}
| |
| *{{InsiderCite|104|Classic Moment}}
| |
| *{{InsiderCite|105|A Long Time Ago....}}
| |
| *{{InsiderCite|105|Classic Moment}}
| |
| *{{InsiderCite|106|A Long Time Ago....}}
| |
| *{{InsiderCite|106|Ask Lobot}}
| |
| *{{InsiderCite|106|Han Solo: The Early Years}}
| |
| *{{WizardsCite|url=default.asp?x=starwars/article/BtT1|text=Behind the Threat: The Sith, Part 1: Portrayal|int=Behind the Threat: The Sith, Part 1: Portrayal|archivedate=20100429191304}}
| |
| *{{WizardsCite|url=default.asp?x=starwars/article/PHPhindar|text=Planet Hoppers: Phindar|int=Planet Hoppers: Phindar|archivedate=20090827061341}}
| |
| *{{HasbroCite|set=Star Wars: 30th Anniversary Collection|altlink=https://www.rebelscum.com/tacOrder665.asp|pack=Obi-Wan Kenobi & AT-RT Driver (Order 66)}}
| |
| *''[[Star Wars: The Clone Wars: Heroes and Villains Flip Book]]'' <!--2009-->
| |
| *''[[Star Wars Fandex Deluxe Edition]]''
| |
| *''[[The Complete Star Wars Encyclopedia]]''
| |
| *''[[The Clone Wars Campaign Guide]]''
| |
| *''[[Star Wars Battlefront II: Prima Official Game Guide]]''
| |
| *''[[Star Wars: Empire at War: Prima Official Game Guide]]''
| |
| *''[[Star Wars: Empire at War: Forces of Corruption Expansion: Prima Official Game Guide]]''
| |
| *''[[Rebellion Era Campaign Guide]]''
| |
| *''[[The Art of Star Wars: The Clone Wars]]''
| |
| *''[[Star Wars: The Clone Wars: Visual Guide Ultimate Battles]]''
| |
| *''[[The Essential Atlas]]''
| |
| *''[[Star Wars: The Clone Wars Character Encyclopedia]]''
| |
| *{{SWArchive|url=theclonewars/guide/episode002.html|text=''The Clone Wars'' Episode Guide: Rising ''Malevolence''|archivedate=20110629042530}}
| |
| *{{SWArchive|url=theclonewars/guide/episode003.html|text=''The Clone Wars'' Episode Guide: Shadow of ''Malevolence''|archivedate=20110713005905}}
| |
| *{{SWArchive|url=theclonewars/guide/episode004.html|text=''The Clone Wars'' Episode Guide: Destroy ''Malevolence''|archivedate=20110712015320}}
| |
| *{{SWArchive|url=theclonewars/guide/episode005.html|text=''The Clone Wars'' Episode Guide: Rookies|archivedate=20110903084330}}
| |
| *{{SWArchive|url=theclonewars/guide/episode006.html|text=''The Clone Wars'' Episode Guide: Downfall of a Droid|archivedate=20110711104945}}
| |
| *{{SWArchive|url=theclonewars/guide/episode007.html|text=''The Clone Wars'' Episode Guide: Duel of the Droids|archivedate=20110629042554}}
| |
| *{{SWArchive|url=theclonewars/guide/episode011.html|text=''The Clone Wars'' Episode Guide: Dooku Captured|archivedate=20110615075647}}
| |
| *{{SWArchive|url=theclonewars/guide/episode012.html|text=''The Clone Wars'' Episode Guide: The Gungan General|archivedate=20110815204606}}
| |
| *{{SWArchive|url=theclonewars/guide/episode015.html|text=''The Clone Wars'' Episode Guide: Trespass|archivedate=20110629042347}}
| |
| *{{SWArchive|url=theclonewars/guide/episode016.html|text=''The Clone Wars'' Episode Guide: The Hidden Enemy|archivedate=20110807053657}}
| |
| *{{SWArchive|url=theclonewars/guide/episode017.html|text=''The Clone Wars'' Episode Guide: Blue Shadow Virus|archivedate=20110809030906}}
| |
| *{{SWArchive|url=theclonewars/guide/episode018.html|text=''The Clone Wars'' Episode Guide: Mystery of a Thousand Moons|archivedate=20110808084109}}
| |
| *{{SWArchive|url=theclonewars/guide/episode019.html|text=''The Clone Wars'' Episode Guide: Storm Over Ryloth|archivedate=20110629040524}}
| |
| *{{SWArchive|url=theclonewars/guide/episode020.html|text=''The Clone Wars'' Episode Guide: Innocents of Ryloth|archivedate=20110809030659}}
| |
| *{{SWArchive|url=theclonewars/guide/episode021.html|text=''The Clone Wars'' Episode Guide: Liberty on Ryloth|archivedate=20110717065909}}
| |
| *''[[Fate of the Jedi: Dramatis Personae]]''
| |
| *{{SWArchive|url=theclonewars/guide/episode201.html|text=''The Clone Wars'' Episode Guide: Holocron Heist|archivedate=20110712010046}}
| |
| *{{SWArchive|url=theclonewars/guide/episode203.html|text=''The Clone Wars'' Episode Guide: Children of the Force|archivedate=20110623084355}}
| |
| *{{SWGTCG|set=Champions of the Force (SWGTCG)|cardname=Fate of the Galaxy}} {{Po}}
| |
| *{{SWGTCG|set=Champions of the Force (SWGTCG)|cardname=Obi-Wan Kenobi's Friend}}
| |
| *{{SWGTCG|set=Galactic Hunters|cardname=Obi-Wan Kenobi}}
| |
| *{{SWGTCG|set=Agents of Deception|cardname=Aura of the Force}}
| |
| *{{SWGTCG|set=The Shadow Syndicate|cardname=Single File)}} {{Mo}}
| |
| *''[[Star Wars: Heroes]]''
| |
| *{{Topps|set=2010 Topps Star Wars Galaxy Series 5}}
| |
| *''[[Star Wars ABC]]''
| |
| *''[[Star Wars Art: Visions]]''
| |
| *{{SWArchive|url=theclonewars/guide/episode314.html|text=''The Clone Wars'' Episode Guide: Witches of the Mist|archivedate=20110629021826}}
| |
| *{{InsiderCite|123|Secrets of the Force}}
| |
| *{{SWArchive|url=theclonewars/guide/episode315.html|text=''The Clone Wars'' Episode Guide: Overlords|archivedate=20110701055324}}
| |
| *{{SWArchive|url=theclonewars/guide/episode316.html|text=''The Clone Wars'' Episode Guide: Altar of Mortis|archivedate=20110828134655}}
| |
| *{{SWArchive|url=theclonewars/guide/episode317.html|text=''The Clone Wars'' Episode Guide: Ghosts of Mortis|archivedate=20110902135110}}
| |
| *''[[Star Wars: Head-to-Head Tag Teams]]''
| |
| *{{InsiderCite|125|50 Great Reasons to Rewatch Star Wars: The Clone Wars Season Three|50 Great Reasons to Rewatch ''Star Wars: The Clone Wars'' Season Three}}
| |
| *[[Star Wars: The Clone Wars The Complete Season Three|''Star Wars: The Clone Wars'' The Complete Season Three]]
| |
| *''[[Millennium Falcon Owner's Workshop Manual]]''
| |
| *''[[The Art and Making of Star Wars: The Old Republic]]''
| |
| *{{InsiderCite|130|Family Tradition}}
| |
| *{{DB|technology|aquatabreather|A99 aquata breather|archivedate=20100328111000}}
| |
| *{{DB|location|catoneimoidia|Cato Neimoidia|archivedate=20110817015919}}
| |
| *{{DB|character|obiwankenobi|Kenobi, Obi-Wan (Ben)|archivedate=20110912010452}}
| |
| *{{DB|character|able472|Able-472|archivedate=20100706041247}}
| |
| *{{DB|character|slytherbushforb|Bushforb, Slyther|archivedate=20100731032728}}
| |
| *{{DB|character|benskywalker|Skywalker, Ben|archivedate=20110707055131}}
| |
| *{{InsiderCite|131|Launchpad}}
| |
| *{{InsiderCite|131|Luminous Beings Are We}}
| |
| *{{InsiderCite|131|Mon Mothma's 5 Facts}}
| |
| *{{InsiderCite|131|My Star Wars}}
| |
| *{{InsiderCite|131|The Battle for Theed!}}
| |
| *{{InsiderCite|131|We Need to Talk About Jar Jar}}
| |
| *''[[Battle for Naboo]]''
| |
| *''[[Star Wars: Darth Maul, Sith Apprentice]]''
| |
| *''[[Ultimate Sticker Collection: Star Wars: The Phantom Menace]]''
| |
| *''[[Totally 20: The Phantom Menace]]''
| |
| *{{HasbroCite|set=Movie Heroes|pack=Geonosis Arena Battle|altlink=https://www.rebelscum.com/MH-Battle_Pack_Geonosis_Arena_Battle.asp|archiveurl=https://archive.is/GAaIR}}
| |
| *''[[Book of Sith: Secrets from the Dark Side]]''
| |
| *''[[The Essential Guide to Warfare]]''
| |
| *''[[Star Wars: The Ultimate Visual Guide: Updated and Expanded]]''
| |
| *''[[Star Wars Art: Illustration]]'' {{Po}}
| |
| *''[[Star Wars Character Encyclopedia]]''
| |
| *''[[The Essential Reader's Companion]]''
| |
| *''[[Star Wars: Obi-Wan Kenobi, Jedi Knight]]''
| |
| *''[[Star Wars: The Clone Wars: Masters of the Force]]''
| |
| *{{FFGTCG|set=Star Wars: The Card Game Core Set|cardname=Fall of the Jedi}}
| |
| *{{FFGTCG|set=Star Wars: The Card Game Core Set|cardname=A Disturbance in the Force}}
| |
| *{{FFGTCG|set=Star Wars: The Card Game Core Set|cardname=Stormtrooper Elite}}
| |
| *{{FFGTCG|set=Star Wars: The Card Game Core Set|cardname=A Hero's Journey}}
| |
| *{{FFGTCG|set=Star Wars: The Card Game Core Set|cardname=Double Strike}}
| |
| *{{FFGTCG|set=Star Wars: The Card Game Core Set|cardname=Force Rejuvenation}} {{Po}}
| |
| *{{FFGTCG|set=Star Wars: The Card Game Core Set|cardname=Forgotten Heroes}}
| |
| *{{FFGTCG|set=Star Wars: The Card Game Core Set|cardname=Jedi in Hiding}}
| |
| *{{FFGTCG|set=Star Wars: The Card Game Core Set|cardname=Jedi Mind Trick}}
| |
| *{{FFGTCG|set=Star Wars: The Card Game Core Set|cardname=Obi-Wan Kenobi}}
| |
| *{{FFGTCG|set=Star Wars: The Card Game Core Set|cardname=Shii-Cho Training}}
| |
| *{{FFGTCG|set=Star Wars: The Card Game Core Set|cardname=Trust Your Feelings}} {{Po}}
| |
| *{{FFGTCG|set=Star Wars: The Card Game Core Set|cardname=Twist of Fate}} {{Po}}
| |
| *{{FFGTCG|set=Star Wars: The Card Game Core Set|cardname=You're my Only Hope}}
| |
| *{{FFGTCG|set=The Desolation of Hoth|cardname=A Message from Beyond}}
| |
| *{{FFGTCG|set=The Desolation of Hoth|cardname=Old Ben's Spirit}}
| |
| *''[[Star Wars: The Legendary Yoda]]''
| |
| *[[Star Wars: Complete Vehicles (2013)|''Star Wars: Complete Vehicles'']]
| |
| *{{FFGTCG|set=A Dark Time|cardname=Soresu Training}}
| |
| *{{FFGTCG|set=A Dark Time|cardname=Unwavering Resolve}} {{Po}}
| |
| *''[[The Essential Characters]]''
| |
| *[[Star Wars: Edge of the Empire Core Rulebook|''Star Wars: Edge of the Empire'' Core Rulebook]]
| |
| *{{FFGTCG|set=Edge of Darkness|cardname=Twist of Fate}} {{Po}}
| |
| *{{FFGTCG|set=Edge of Darkness|cardname=Secret Guardian}} {{Po}}
| |
| *{{FFGTCG|set=Edge of Darkness|cardname=Across the Jundland Wastes}}
| |
| *''[[Star Wars: Force Collection]]'' {{C|Card: BoShek}}
| |
| *''[[Star Wars: Force Collection]]'' {{C|Card: Dr. Evazan}} {{Imo}}
| |
| *''[[Star Wars: Force Collection]]'' {{C|Card: Muftak}}
| |
| *''[[Star Wars: Force Collection]]'' {{C|Card: Nicanas Tassu (★)}}
| |
| *''[[Star Wars: Force Collection]]'' {{C|Card: Ponda Baba}} {{Imo}}
| |
| *''[[Star Wars: Force Collection]]'' {{C|Card: Sephjet Josall (★)}}
| |
| *''[[Star Wars: Force Collection]]'' {{C|Card: Ben Kenobi}}
| |
| *''[[Star Wars: Force Collection]]'' {{C|Card: Beru Lars}}
| |
| *''[[Star Wars: Force Collection]]'' {{C|Card: Garindan}} {{Imo}}
| |
| *''[[Star Wars: Force Collection]]'' {{C|Card: Master Yoda (★★)}}
| |
| *''[[Star Wars: Force Collection]]'' {{C|Card: Myo}}
| |
| *''[[Star Wars: Force Collection]]'' {{C|Card: Obi-Wan Kenobi (★★)}}
| |
| *''[[Star Wars: Force Collection]]'' {{C|Card: Qui-Gon Jinn (★★)}}
| |
| *''[[Star Wars: Force Collection]]'' {{C|Card: Anakin Skywalker (★★★, D)}}
| |
| *''[[Star Wars: Force Collection]]'' {{C|Card: Dexter Jettster (★★★)}}
| |
| *''[[Star Wars: Force Collection]]'' {{C|Card: Master Yoda (★★★)}}
| |
| *''[[Star Wars: Force Collection]]'' {{C|Card: Nicanas Tassu (★★★)}}
| |
| *''[[Star Wars: Force Collection]]'' {{C|Card: Obi-Wan Kenobi (★★★, Kamino)}}
| |
| *''[[Star Wars: Force Collection]]'' {{C|Card: Obi-Wan Kenobi (★★★, Utapau)}}
| |
| *''[[Star Wars: Force Collection]]'' {{C|Card: Sephjet Josall (★★★)}}
| |
| *''[[Star Wars: Force Collection]]'' {{C|Card: Stormtrooper (★★★, Death Star)}} {{Imo}}
| |
| *''[[Star Wars: Force Collection]]'' {{C|Card: Ben Kenobi (★★★★)}}
| |
| *''[[Star Wars: Force Collection]]'' {{C|Card: Ben Kenobi (★★★★, Event card)}}
| |
| *''[[Star Wars: Force Collection]]'' {{C|Card: Clone Commander Cody (L)}}
| |
| *''[[Star Wars: Force Collection]]'' {{C|Card: Clone Commander Cody (D)}}
| |
| *''[[Star Wars: Force Collection]]'' {{C|Card: Obi-Wan Kenobi (★★★★)}}
| |
| *''[[Star Wars: Force Collection]]'' {{C|Card: Anakin Skywalker (★★★★★)}}
| |
| *''[[Star Wars: Force Collection]]'' {{C|Card: Han Solo (★★★★★)}}
| |
| *''[[Star Wars: Force Collection]]'' {{C|Card: Padmé Amidala (★★★★★)}}
| |
| *''[[Star Wars: Force Collection]]'' {{C|Card: Qui-Gon Jinn (★★★★★)}}
| |
| *''[[Star Wars: Force Collection]]'' {{C|Card: Luke Skywalker (Special)}}
| |
| *{{FFGTCG|set=Escape from Hoth|cardname=Aggression}}
| |
| *''[[Enter the Unknown]]''
| |
| *''[[Star Wars: Sith Wars]]''
| |
| *{{FFGTCG|set=Balance of the Force|cardname=Obi-Wan Kenobi}}
| |
| *''[[Dangerous Covenants]]''
| |
| *{{FFGTCG|set=Heroes and Legends|cardname=Twist of Fate}} {{Po}}
| |
| *''[[Star Wars: What Makes a Monster?]]''
| |
| *{{SWE|characters|acklay|acklay}}
| |
| *{{SWE|technology|alderaancruiser|Alderaan cruiser}}
| |
| *{{SWE|technology|arc170starfighter|ARC-170 starfighter}}
| |
| *{{SWE|characters|boga|Boga}}
| |
| *{{SWE|characters|boil|Boil}}
| |
| *{{SWE|characters|clonecommandercody|Clone Commander Cody}}
| |
| *{{SWE|groups|jediorder|Jedi Order}} {{Po}}
| |
| *{{SWE|characters|keeperagruss|Keeper Agruss}}
| |
| *{{SWE|technology|sorosuub3000luxuryyacht|Luxury 3000 space yacht}}
| |
| *{{SWE|characters|obiwankenobi|Obi-Wan Kenobi}}
| |
| *{{SWE|characters|quigonjinn|Qui-Gon Jinn}}
| |
| *{{SWE|technology|slavei|''Slave I''}}
| |
| *{{SWE|groups|talz|Talz}}
| |
| *{{SWE|groups|tuskenraiders|Tusken Raiders}}
| |
| *{{SWE|technology|vocalemulator|vocal emulator}}
| |
| *{{FFGTCG|set=Join Us or Die|cardname=May the Force Be With You}}
| |
| *[[Star Wars: Age of Rebellion Core Rulebook|''Star Wars: Age of Rebellion'' Core Rulebook]]
| |
| *''[[LEGO Star Wars: The Dark Side]]'' {{Ncs}}
| |
| *{{FFGTCG|set=Between the Shadows|cardname=Following Fate}}
| |
| *{{FFGTCG|set=Between the Shadows|cardname=Obi-Wan Kenobi}}
| |
| *{{FFGTCG|set=Between the Shadows|cardname=Obi-Wan's Lightsaber}}
| |
| *{{FFGTCG|set=Between the Shadows|cardname=Noble Sacrifice}} {{Po}}
| |
| *''[[Fly Casual]]''
| |
| }} | | }} |
|
| |
|
| ==Notes and references== | | ==Notes and references== |
| {{Scroll_box|content={{Reflist}}}} | | {{Scroll_box|content={{Reflist}}}} |
|
| |
| {{Start_box}}
| |
| {{Succession_box
| |
| |title=Member of the [[Jedi High Council/Legends|Jedi High Council]]
| |
| |years=[[22 BBY/Legends|22 BBY]]–[[19 BBY/Legends|19 BBY]]
| |
| |before=Filled seat vacated by [[Depa Billaba/Legends|Depa Billaba]]
| |
| |before-years=
| |
| |after=
| |
| |after-years=
| |
| }}
| |
| {{End_box}}
| |
|
| |
|
| ==External links== | | ==External links== |
| *{{SWArchive|url=episode-iv/bts/article/f20070228/index.html|text=Time Capsule: Obi-Wan Kenobi 1979|archivedate=20080613234919}}
| |
| *{{SWArchive|url=games/playnow/soundboards/#/?theme=35|text=Official ''Star Wars'' Soundboards: Obi-Wan Kenobi (''The Clone Wars'')|archivedate=20110702164527}}
| |
| *{{SWArchive|url=games/playnow/soundboards/#/?theme=43|text=Official ''Star Wars'' Soundboards: Obi-Wan Kenobi|archivedate=20110702164527}}
| |
| *{{SWArchive|url=games/playnow/soundboards/#/?theme=20|text=Official ''Star Wars'' Soundboards: Ghost of Ben|archivedate=20110702164527}}
| |
| *[http://forums.starwars.com/thread.jspa?threadID=152583&start=735 Leland Chee's comments on Kenobi's role in ''Galaxies'']
| |
| *{{WP|Obi-Wan Kenobi}} | | *{{WP|Obi-Wan Kenobi}} |
| *{{Imdb|url=character/ch0000004|text=Obi-Wan Kenobi|archiveurl=https://web.archive.org/web/20170828022522/https://www.imdb.com/character/ch0000004}} | | *{{Imdb|url=character/ch0000004|text=Obi-Wan Kenobi|archiveurl=https://web.archive.org/web/20170828022522/https://www.imdb.com/character/ch0000004}} |
| *{{Brickipedia}}
| |
|
| |
| {{Council19}}
| |
|
| |
| {{Interlang
| |
| |bg=Оби-Уан Кеноби
| |
| |ca=Obi-Wan Kenobi
| |
| |cs=Obi-Wan Kenobi/Legendy
| |
| |da=Obi-Wan Kenobi
| |
| |de=Obi-Wan Kenobi#legends
| |
| |es=Obi-Wan Kenobi/Leyendas
| |
| |fi=Obi-Wan Kenobi/Legends
| |
| |fr=Obi-Wan Kenobi/Légendes
| |
| |hu=Ben Kenobi
| |
| |it=Obi-Wan Kenobi
| |
| |ja=オビ=ワン・ケノービ/レジェンズ
| |
| |ko=오비완 케노비/레전드
| |
| |nl=Obi-Wan Kenobi
| |
| |no=Obi-Wan Kenobi
| |
| |pl=Obi-Wan Kenobi/Legendy
| |
| |pt=Legends:Obi-Wan Kenobi
| |
| |ro=Obi-Wan Kenobi
| |
| |ru=Оби-Ван Кеноби
| |
| |sv=Obi-Wan Kenobi
| |
| |tr=Obi-Wan Kenobi/Legends
| |
| |ptGA=1
| |
| }}
| |
|
| |
|
| {{DEFAULTSORT:Kenobi, Obi-Wan}} | | {{DEFAULTSORT:Kenobi, Obi-Wan}} |


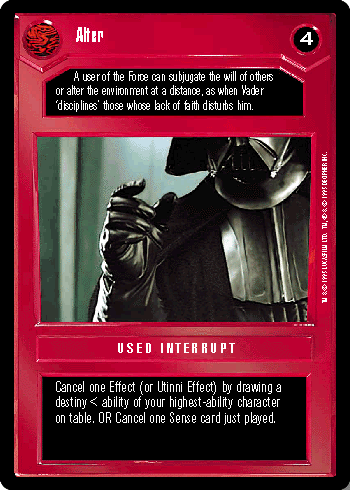