Death Squadron/Legends

- "Deploy the fleet so that nothing gets off the system."
- ―Darth Vader, to Admiral Piett
Death Squadron was the codename applied to Darth Vader's personal fleet of Star Destroyers following the Battle of Yavin, led by the Super Star Destroyer Executor. Because of it being led by the Executor, their fleet insignia also bore an image of the Executor on it. The fleet, designed to instill terror in dissidents of the Empire's New Order, was in fact tasked with locating and destroying the Rebel Alliance headquarters. Moreover, Vader used his fleet in a more personal mission to find and capture his son, Luke Skywalker.
Though Death Squadron initially consisted of only six ships—the Executor and five Star Destroyers—it earned a fearsome reputation as the personal armada of Darth Vader, who also had the authority to assign additional ships from other sectors as he saw fit.[3] By the Battle of Endor, Death Squadron had been reinforced to include the Executor, two battlecruisers, three Tector-class Star Destroyers, and thirty-three Imperial Star Destroyers.[2]
Composition
About half a dozen or so Imperial-class Star Destroyers comprised Death Squadron at any one time, while Vader or the fleet's admiral could reassign ships from other fleets to Death Squadron whenever needed. Likewise, ships assigned to Death Squadron could be sent off from the main fleet on reconnaissance missions when appropriate.[6]
The centerpiece of Death Squadron was Vader's flagship, the Super Star Destroyer Executor, while a number of smaller vessels routinely acted as support ships. Together, Death Squadron was the most powerful assemblage of warships in galactic history.[7][8]
Famed units attached to the fleet included Baron Soontir Fel's 181st Imperial Fighter Wing,[9][10] Major General Maximilian Veers' Blizzard Force,[8] the Scimitar TIE/sa bomber squadron,[10] the Obsidian TIE/LN starfighter squadron,[11] and elements of Stormtrooper Commander Bow's 501st Legion.[12]
Ships

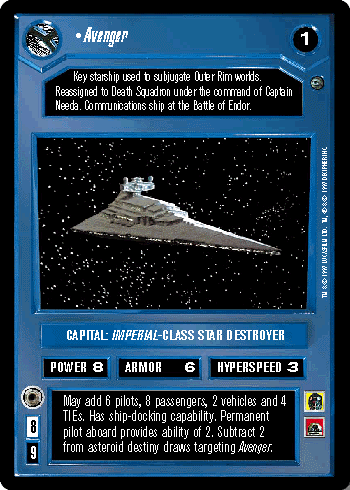
Death Squadron's permanent establishment consisted of the Executor and five Imperial-class Star Destroyers (the Avenger, Stalker, Conquest, Tyrant, and Devastator), though Vader had authority to temporarily attach other fleets' ships when it was necessary.[13][14] During the Blockade of Yavin, the Accuser had been part of Death Squadron's temporary line of ships.[15] During the Battle of Hoth, Death Squadron included the Imperial II-class Star Destroyers Avarice (which was destroyed by X2 of Grey Squadron)[16] and Corrupter,[17] the Victory-class Star Destroyer Firewind[18] as well as at least one Imperial II-class Star Destroyer that ended up obliterated during Death Squadron's pursuit of the Millennium Falcon in the Hoth asteroid field,[1] and at least one Imperial-class Star Destroyer that ended up damaged during the fighting on Hoth.[19]
As of the Battle of Endor, the squadron had swelled to include dozens of capital ships, which included the Battlecruisers Ilthmar's Fist and Pride of Tarlandia (the latter of which acted as the Executor's second in command), as well as the Chimaera, the Thunderflare, the Accuser,[15] Imperial I-class Star Destroyer Adjudicator (which had previously served Death Squadron in the Battle of Poln System),[7] the Death's Head, the Stormhawk, the Nemesis, the Inexorable, the Relentless,[4] and at least 20 other Imperial-class Star Destroyers, as well as 3 Tector-class Star Destroyers.[2]
History
- "General, there's a fleet of Star Destroyers coming out of hyperspace in Sector Four."
- ―Romas Navander, during the Battle of Hoth
Hunting the Alliance

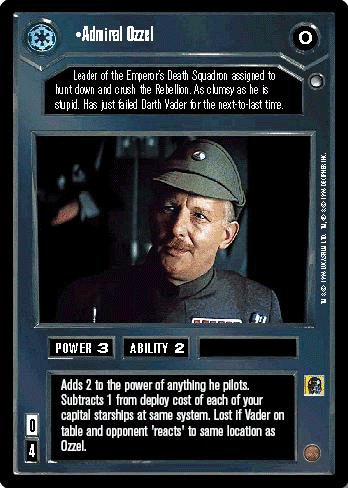
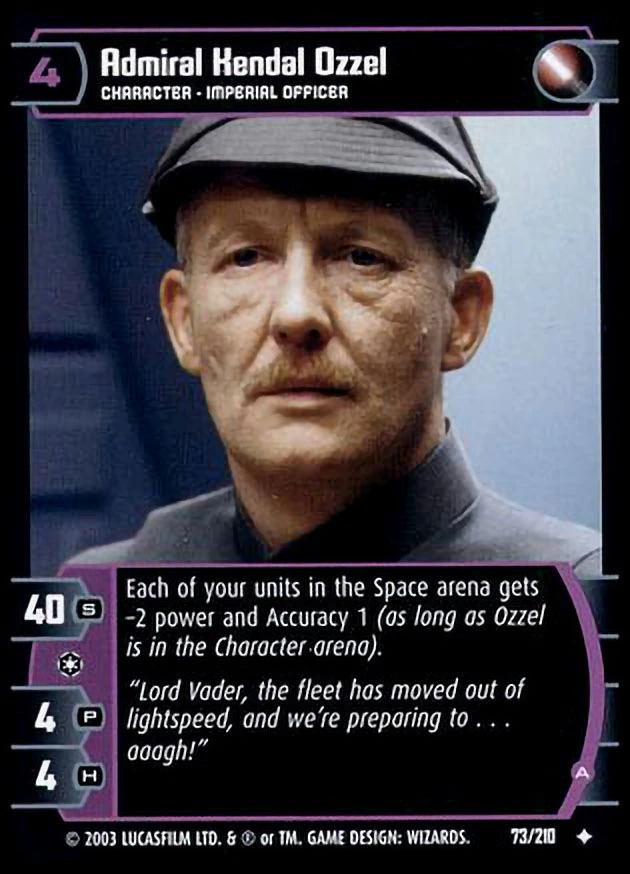
Darth Vader formed Death Squadron after the Imperial defeat at the Battle of Yavin. For three years, Death Squadron hunted the Rebel Alliance from system to system under the command of Admiral Kendal Ozzel, mercilessly crushing any Rebel forces it encountered. At some point during this time, it rendevouzed with a fleet of Allegiance-class battlecruisers, Imperial-class Star Destroyers, Procursator-class Star Destroyers, Bellator-class dreadnoughts, and various squadrons of TIE Advanced x1 starfighters,[14] the x1s being present among the fleet due to the fleet in question being a high-mobility fleet.[20] Eventually, a probe droid launched by the Stalker succeeded in locating the Rebel Alliance base of operations on the ice world of Hoth.[1]
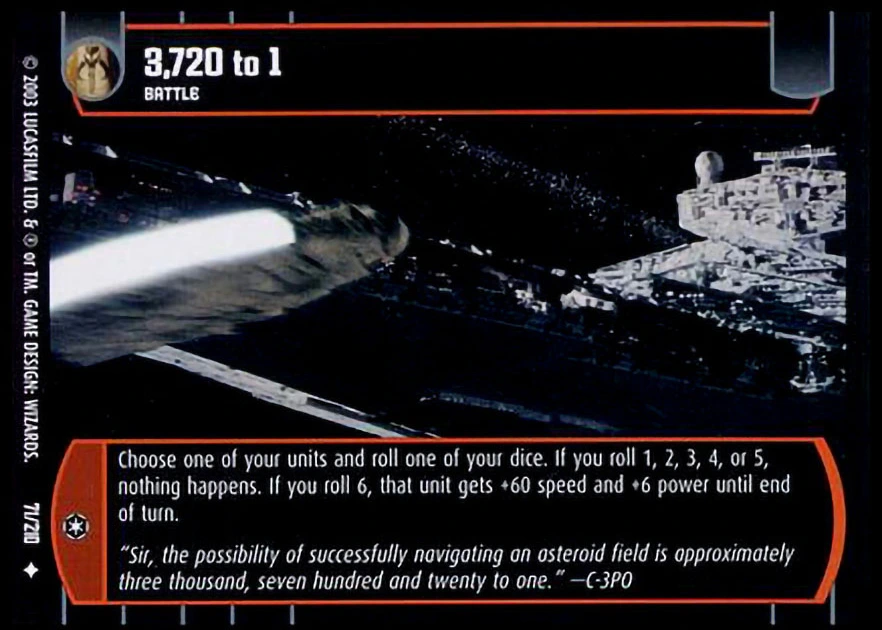
After participating in the space and ground battles at Hoth, Death Squadron pursued the Millennium Falcon, which was lost in the Hoth asteroid belt.[1] The squadron also lost at least two of its Star Destroyers, including one Imperial II-class Star Destroyer, to asteroid collisions during their pursuit of the Millennium Falcon.
Battle of Endor and fragmentation

One year later, Death Squadron, under the command of Admiral Firmus Piett, served as the core of the Imperial fleet at the Battle of Endor, its ranks having swelled to include dozens of Star Destroyers.[21] It also gained a second-in-command flagship in the form of the battlecruiser/support vessel Pride of Tarlandia. During the battle, the flagship Executor was destroyed by a Rebel starfighter crashing into the bridge which left the ship disabled. Being disabled the Executor then descended and exploded on the Death Star. The battlecruiser Pride of Tarlandia and sixteen Star Destroyers were destroyed as well.[2]
With the two lead ships of the squadron destroyed, leadership fell to the commanding officer of the Chimaera, Captain Gilad Pellaeon. When the Death Star was destroyed shortly thereafter, and the assumed deaths of both Emperor Palpatine and Darth Vader were apparent, Pellaeon ordered a retreat to the Moddell sector capital Annaj.[2]
Upon arrival, Pellaeon was relieved of command by superior officer Admiral Adye Prittick and a summit of the surviving Captains and Admirals was convened to determine their next move. Dissension resulted in the fracturing of the unit, with some taking their ships and going their own way, while the Death Squadron title officially remained with Prittick and a mere dozen Star Destroyers. Prittick ordered the remnants of Death Squadron to withdraw once more to Yag'Dhul.[2]
The Thrawn campaign
The twelve Star Destroyers and their support lines remaining in Death Squadron were among the few naval assets that remained truly loyal to the Empire after it fragmented into various warlord fiefdoms after Palpatine's death. Indeed, despite being appointed Supreme Commander by the Imperial Ruling Council-in-exile after his return to the galaxy in 9 ABY, Death Squadron was the only force truly available to Grand Admiral Thrawn at the onset of his final campaign against the New Republic. Despite being nominally unified by Thrawn, the Ruling Council and the Moffs hoarded military assets as much in fear of each other as the New Republic.[4]
Of the twelve Star Destroyers remaining in Death Squadron, Thrawn judged only six - the Chimaera, the Judicator, the Death's Head, the Stormhawk, the Nemesis and the Inexorable - fully reliable. Thrawn split the squadron into two fleets: the fleet of six Loyalist Star Destroyers led by the Chimaera under his personal command, and a second force of six ships led by Captain Dorja aboard the Relentless.[4]
Of the ships remaining in Death Squadron at the start of the Thrawn campaign, only the Chimaera and the Relentless were known to still be active by the signing of the Bastion Accords.
Known officers
- Supreme Commander Darth Vader[1]
- Admiral Amise Griff
- Admiral Kendal Ozzel[1]
- Captain/Admiral Firmus Piett[1]
- Captain Lorth Needa[1]
- Captain Xamuel Lennox[1]
- Captain Venka
- Lieutenant Cabbel[1]
- Major General Maximilian Veers[1]
- Brigadier Nevar
- Colonel Freja Covell
- Colonel Starck
- Colonel Evir Derricote
- Colonel Soontir Fel
- Major Turr Phennir
- Lieutenant Arnet
- Commander Gherant
Appearances
Sources
Notes and references
- ↑ 1.00 1.01 1.02 1.03 1.04 1.05 1.06 1.07 1.08 1.09 1.10 1.11 1.12 1.13 1.14 1.15 1.16 1.17 1.18 1.19 1.20 1.21 Star Wars: Episode V The Empire Strikes Back
- ↑ 2.00 2.01 2.02 2.03 2.04 2.05 2.06 2.07 2.08 2.09 2.10 The Essential Guide to Warfare, pp 185
- ↑ 3.0 3.1 3.2 3.3 3.4 3.5 The Essential Guide to Warfare, pp 164
- ↑ 4.0 4.1 4.2 4.3 4.4 4.5 4.6 4.7 4.8 The Essential Guide to Warfare, p. 201
- ↑ File:StarWarsLCG Logo.png Star Wars: The Card Game – Balance of the Force (Card: Thunderflare)
- ↑ Non-Canon Ref
- ↑ 7.0 7.1 Star Wars: Behind the Magic
- ↑ 8.0 8.1 Galaxy Guide 3: The Empire Strikes Back, Second Edition
- ↑ X-Wing Rogue Squadron 25
- ↑ 10.0 10.1 Death Star II Limited
- ↑ Cloud City Limited
- ↑ Order 66: Destroy All Jedi
- ↑ The Essential Atlas
- ↑ 14.0 14.1 The Essential Guide to Warfare
- ↑ 15.0 15.1 The New Essential Guide to Characters
- ↑ Star Wars Battlefront: Elite Squadron
- ↑ Star Wars: X-Wing Alliance
- ↑
 "A World to Conquer" – Star Wars Adventure Journal 2
- ↑ Star Wars: Rogue Squadron III: Rebel Strike
- ↑ As for the X1s, the reason I used those fighters is I imagined that strategic forces would have high mobility, thus requiring hyperdrive capable fighters. Such units would also have the priority necessary to access limited-production run craft. Limited production for a galaxy-spanning military could end up being quite a lot. A much more prosaic reason is that at the time the image was made, I didn't have any hyperdrive-capable fighter models completed except for the X1. (sic)
Ansel - ↑ Star Wars: Episode VI Return of the Jedi