Endor strike team/Legends
With the discovery that the second Death Star was protected by an energy shield generated from the forest moon of Endor, Alliance High Command realized that they needed a highly skilled strike team to penetrate the Imperial defenses and neutralize the facility. General Crix Madine devised a plan to insert a commando force onto Endor using a stolen Imperial shuttle, Tydirium, and destroy the Imperial base on the surface.[1]
History
Organization and recruitment
- "General, count me in."
"I'm with you too!" - ―Leia Organa and Luke Skywalker agreeing to join the team

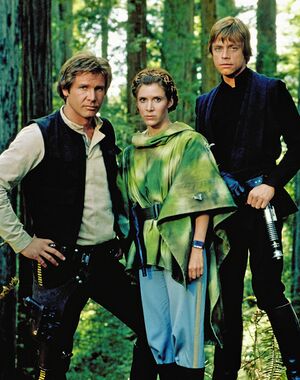
Han Solo, who had recently signed on to the Alliance permanently and been given a commission as a General, volunteered to lead the strike team. Tasked with assembling the team, Solo turned to the survivors of Echo Base. Solo contacted Major Bren Derlin, and, with the help of Lieutenant Nik Sant, who joined as the team's oldest member, the strike team was assembled in virtually no time. Each member of the team was a volunteer, eager and willing to accept the dangerous assignment to strike a blow against the Empire. The team was created with flexibility in mind; each commando brought something unique to the mix, with a diverse array of specialties. With the defeat at Hoth still fresh in their minds, these commandos were ready and eager for revenge.[2]
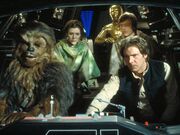
The commandos were to be aided in their mission by Imperial defector General Brenn Tantor, who would be coordinating their mission using a stolen Battlefield Holographic Control Interface on board the Tydirium.[3] Lastly, a command crew was required for the shuttle. During the briefing on Home One, Commander Luke Skywalker, Princess Leia Organa, and Chewbacca all volunteered for the strike team, with Luke volunteering immediately upon his arrival to the briefing.[1]
The Battle of Endor
- "A small Rebel force has penetrated the shield and landed on Endor."
- ―Darth Vader to Palpatine

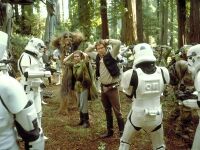
After landing on Endor, the commandos were separated from General Solo when he took the command crew off to search for Princess Leia, who had become separated from the team. Major Derlin, the planet-level unit commander, had instructions to proceed directly to the shield generator and rendezvous with Solo and the others at 0300. The team dodged Imperial patrols, then stopped to make camp as night fell. Shortly after starting their first sleeping shift, the camp sensors picked up an AT-ST moving in on their position. Derlin had Corporal Beezer jam its transmissions so it couldn't call for help, then Lieutenant Greeve took out both of the scout walker's searchlights. Finally, Corporal Delevar used the Caspel launcher to pop a smoke canister through one of the viewports in the head, causing the crew to abandon the vehicle. Forcing the pilot to make check-in calls to explain its absence, the team was able to keep their rendezvous with General Solo without alerting Imperial forces.[2] At one point, one of the commandos left to relieve himself without telling anybody and got lost. He wasn't rescued until thirteen months later, in 5 ABY.[4]
Meanwhile, Solo and the rest of the shuttle crew were captured by the Bright Tree Village Ewok tribe, who agreed to help the Rebels destroy the shield generator. Skywalker allowed himself to be captured and brought before Darth Vader, in an attempt to turn his father back to the light side.[1]
When the strike team moved on the bunker the next day, an Ewok, Paploo, stole an Imperial speeder bike, causing three of the four scout troopers guarding the entrance to chase after him, leaving only one left. The team hid alongside the bunker as Solo grabbed the attention of the trooper, who followed him around to where the team was and found himself held at blasterpoint. Sant took the trooper's armor, disguising himself in it, and stood guard outside the bunker as the rest of the team entered. However, they were quickly captured by Imperial reinforcements in a trap devised by the Emperor himself. Surrounded by Imperial troops, the commandos were saved by the Ewok tribe, who ambushed the Imperials. Alongside their new allies, the commandos fought a savage battle in the forest until General Solo was able to secure the bunker, plant munitions, and destroy the shield generator.[1]
Capturing the Accuser
- "Lieutenant Page, how did you manage to fight your way to the bridge? This is not meant to denigrate the abilities of you and your men…I realize that you and your men are exceptionally capable soldiers, and that ground combat is not my area of expertise…but those kind of odds sound overwhelming."
"Well, actually, we didn't fire a shot." - ―Admiral Ackbar and Lieutenant Page, regarding the capture of the Accuser

Following the destruction of the shield generator, the strike team assisted the Ewoks in mopping up the final pockets of Imperial resistance. Despite the battle continuing to rage overhead, the Alliance managed to send ground reinforcements to Endor to assist the commando team. Major Derlin took direct command of all forces landing on the planet, and command of the strike team was passed to Lieutenant Judder Page.
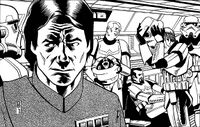
While working on the Tydirium, Chewbacca commented to General Solo that they should get the shuttle back to the fleet. Solo agreed, but it occurred to him that Chewbacca hadn't specified which fleet. Using the Tydirium, General Solo and most of the commando team infiltrated the Imperial II-class Star Destroyer Accuser by posing as survivors of the recently destroyed second Death Star. General Solo was posing as an Imperial general, and promptly relieved the captain of the Accuser. The rest of the commando team secured the bridge crew while Solo rendered the captain unconscious. Then Solo triggered the ship-wide hull-breach alarm, forcing the crew to abandon ship, leaving the ship empty and in the hands of the Alliance. The Alliance was lucky; the Accuser was mostly operational at the time of its capture.[6] Although the Alliance gained a ship, Solo and Page, due to conducting the operation without consulting the Rebel high command beforehand, underwent a mandatory debriefing with Mon Mothma and Admiral Gial Ackbar in the aftermath of the battle. Ackbar was impressed that they managed to apparently fight the ship, before Page corrected him.[5]
Known members
Command crew

- General Han Solo, mission commander
- Commander Luke Skywalker, Jedi Knight
- Princess Leia Organa, diplomat
- Chewbacca, First Mate
- C-3PO
- R2-D2
Strike team
- General Brenn Tantor, mission coordinator based on Tydirium[7]
- Major Bren Derlin, field commander
- Major Morgan Q. Raventhorn, special operations
- Lieutenant Judder Page, intelligence/ special operation
- Lieutenant Greeve, guide/ sharpshooter[2]
- Lieutenant Nik Sant, survival expert[8]
- Sergeant Bruckman, pointman[8]
- Sergeant Junkin, demolitions expert[2]
- Sergeant Brooks Carlson, pathfinder
- Sergeant Squalls, demolitions expert[2]
- Corporal Delevar, medic[2]
- Corporal Kensaric, rearguard[9]
- Corporal Dansra Beezer, slicer/ technician[2]
- Corporal Janse, sharpshooter[10]
- Orrimaarko, commando[8]
- Denev, commando[11]
- Unidentified Rebel trooper, commando[4]
Equipment
The commandos were issued basic commando gear: jungle fatigues and packs, standard comlinks, low-feedback scanners, sensor scramblers, and heavily muffled blasters[2] (BlasTech E-11 blaster rifles with a cooling system to allow for a higher rate of fire[8] and BlasTech A280 Sharpshooter rifles[1][8]). Also carried were two artillery pieces: an E-Web heavy repeating blaster, and a Caspel projectile launcher with dye, smoke, and CryoBan canisters.[2] The commandos also carried a large amount of explosives with which to destroy the shield generator, mostly Merr-Sonn Munitions Class-A thermal detonators, and Merr-Sonn Munitions 7-PrG proton grenades sealed in ray-shielded cases and stored in thermal-resist packs to prevent them from being set off by stray shots during a firefight.[2]
Behind the scenes
In X-Wing Rogue Squadron 1, Elscol Loro notes that her husband, Throm Loro, liberated the Wookiee slave Groznik from Imperial forces on Endor. Loro may have been part of the strike team, or part of the Alliance ground troops sent to the surface after the destruction of the shield generator.
Appearances
- Star Wars: Galactic Battlegrounds
- File:FantasyFlightGamesLogo.png "Takeover at Whisper Base" – Star Wars: Age of Rebellion Beginner Game (Picture only)
- Star Wars: Episode VI Return of the Jedi
- Star Wars Episode VI: Return of the Jedi novel (First appearance)
- Star Wars Episode VI: Return of the Jedi junior novel
- Star Wars Force Commander
- "Marooned" — Star Wars Tales 22
- "Apocalypse Endor" — Star Wars Tales 14 (In flashback(s))
Sources
- Star Wars: Return of the Jedi Coloring Book (Max Rebo) (Picture only)
- Star Wars: Return of the Jedi Coloring Book (Luke Skywalker) (Picture only)
- Star Wars Word Puzzles
- A Guide to the Star Wars Universe
- Star Wars: Return of the Jedi Coloring Book (1984)
- Battle for Endor
- Galaxy Guide 5: Return of the Jedi
- Heir to the Empire Sourcebook
- Dark Force Rising Sourcebook
- The Movie Trilogy Sourcebook
- Galaxy Guide 5: Return of the Jedi, Second Edition
- The Truce at Bakura Sourcebook
- The Thrawn Trilogy Sourcebook
- Star Wars Trilogy Sourcebook, Special Edition
 Star Wars Customizable Card Game – Endor Limited
 Star Wars Customizable Card Game – Death Star II Limited
- C-3PO: Tales of the Golden Droid
- The Official Star Wars Fact File 8 (END5, The Battle of Endor)
- The Official Star Wars Fact File 10 (REB7–8, Rebel Troops)
- Star Wars: The Official Starships & Vehicles Collection 7
- File:StarWarsLCG Logo.png Star Wars: The Card Game – Lure of the Dark Side (Card: Commando Operations) (Picture only)
- File:StarWarsLCG Logo.png Star Wars: The Card Game – Lure of the Dark Side (Card: Rebel Commando) (Picture only)
- File:StarWarsLCG Logo.png Star Wars: The Card Game – Lure of the Dark Side (Card: Adaptive Strategy) (Picture only)
- Star Wars: Age of Rebellion Core Rulebook (Picture only)
- File:StarWarsLCG Logo.png Star Wars: The Card Game – It Binds All Things (Card: Leia's Command) (Picture only)
- File:StarWarsLCG Logo.png Star Wars: The Card Game – Between the Shadows (Card: Commando Raid) (Picture only)
- File:StarWarsLCG Logo.png Star Wars: The Card Game – Between the Shadows (Card: Lieutenant Judder Page) (Picture only)
- File:StarWarsLCG Logo.png Star Wars: The Card Game – Between the Shadows (Card: Page's Commandos) (Indirect mention only)
Notes and references
- ↑ 1.0 1.1 1.2 1.3 1.4 1.5 Star Wars: Episode VI Return of the Jedi
- ↑ 2.00 2.01 2.02 2.03 2.04 2.05 2.06 2.07 2.08 2.09 Galaxy Guide 5: Return of the Jedi
- ↑ Star Wars: Force Commander
- ↑ 4.0 4.1 "Marooned" — Star Wars Tales 22
- ↑ 5.0 5.1 The Deposition of General Solo
- ↑ The Truce at Bakura Sourcebook
- ↑ Star Wars Force Commander
- ↑ 8.0 8.1 8.2 8.3 8.4
 Star Wars Customizable Card Game – Endor Limited
- ↑
 Star Wars Customizable Card Game – Endor Limited (Card: Corporal Kensaric) (backup link)
- ↑
 Star Wars Customizable Card Game – Endor Limited (Card: Corporal Janse) (backup link)
- ↑ The New Jedi Order: The Unifying Force