|
|
| Line 1: |
Line 1: |
| {{Top|ffa}} | | {{Top|sw420}} |
| {{Youmay|the [[Jedi Master/Legends|Jedi Master]]|[[Mount Yoda]]}} | | {{Youmay|the [[Jedi Master/Legends|Jedi Master]]|[[Mount Yoda]]}} |
| {{Citation}}
| |
| {{TCWRetcon}}
| |
| {{Update|[[The Clone Wars: No Prisoners|No Prisoners]], [[Kinect Star Wars]], [[The Clone Wars: Season Five]], [[The Clone Wars: The Lost Missions|The Clone Wars: Season Six]]}}
| |
| {{Expand}}
| |
| {{Character | | {{Character |
| |type=Jedi | | |type=Jedi |
| Line 10: |
Line 6: |
| |name=Yoda | | |name=Yoda |
| |homeworld= | | |homeworld= |
| |birth=[[896 BBY/Legends|896 BBY]] {{C|[[Great ReSynchronization|861BrS]]}}<ref name="Jedi vs. Sith">[[Jedi vs. Sith: The Essential Guide to the Force (real-life book)|''Jedi vs. Sith: The Essential Guide to the Force'']]</ref> | | |birth=[[896 BBY/Legends|896 BBY]] |
| |death=[[4 ABY/Legends|4 ABY]] {{C|39:3}}, [[Dagobah/Legends|Dagobah]]<ref name="Star Wars Episode VI: Return of the Jedi">{{Film|VI}}</ref> | | |death=[[4 ABY/Legends|4 ABY]] {{C|39:3}}, [[Dagobah/Legends|Dagobah]]<ref name="Star Wars Episode VI: Return of the Jedi">{{Film|VI}}</ref> |
| |species=[[Yoda's species/Legends|Unknown]] | | |species=[[Yoda's species/Legends|Unknown]] |
| |gender=[[Gender/Legends|Male]]<ref name="NEGTC">''[[The New Essential Guide to Characters]]''</ref> | | |gender=[[Gender/Legends|Male]]<ref name="NEGTC">''[[The New Essential Guide to Characters]]''</ref> |
| |height=0.66 [[Imperial standard meter|meters]]<ref name="NEGTC" /> | | |height=0.66 [[Imperial standard meter|meters]]<ref name="NEGTC" /> |
| |mass=17 [[Kilogram/Legends|kilograms]]<ref name="H2H">''[[Star Wars: Head-to-Head Tag Teams]]'', pg 63</ref> | | |mass= |
| |hair=*[[Color/Legends|Brown]]<ref name="NEGTC" /> | | |hair=*White<ref name="NEGTC" /> |
| *White<ref name="NEGTC" /> | |
| |eyes=Brown<ref name="NEGTC" /> | | |eyes=Brown<ref name="NEGTC" /> |
| |skin=Green<ref name="Star Wars Episode V: The Empire Strikes Back">{{Film|V}}</ref> | | |skin=Green<ref name="Star Wars Episode V: The Empire Strikes Back">{{Film|V}}</ref> |
| |cyber= | | |cyber= |
| |affiliation=*[[Jedi Order/Legends|Jedi Order]]<ref name="Star Wars Episode VI: Return of the Jedi" /> | | |affiliation=*[[Jedi Order/Legends|Jedi Order]]<ref name="Star Wars Episode VI: Return of the Jedi" /> |
| **[[Jedi High Council/Legends|Jedi High Council]]<ref name="Star Wars Episode III: Revenge of the Sith">{{Film|III}}</ref>
| | |masters= |
| *[[Galactic Republic/Legends|Galactic Republic]]<ref name="Star Wars Episode III: Revenge of the Sith" />
| | |apprentices=*[[Ikrit]] |
| |masters=*[[N'Kata Del Gormo]]<ref name="Nine">{{GalaxyCite|9|Design An Alien}}</ref> {{C|according to legend}}<ref name="Twitter">{{Twitter|HolocronKeeper|status/322954211866333184|[[Leland Chee]]|quote=Galaxy magazine "Design an Alien" N'Kata Del Gormo being Yoda's Master, when mentioned, is treated as in-universe legend.|archivefile=File:N'Kata Del Gormo canon.png}}</ref> | |
| *[[Qui-Gon Jinn/Legends|Qui-Gon Jinn]] {{C|As Force ghost}}<ref name="Star Wars Episode III: Revenge of the Sith" />
| |
| |apprentices=*[[Dooku/Legends|Dooku]] | |
| *[[Mace Windu/Legends|Mace Windu]]
| |
| *[[Cin Drallig/Legends|Cin Drallig]]
| |
| *[[Ikrit]] | |
| *[[Qu Rahn]] | | *[[Qu Rahn]] |
| *[[Rahm Kota]]
| |
| *[[Obi-Wan Kenobi/Legends|Obi-Wan Kenobi]] | | *[[Obi-Wan Kenobi/Legends|Obi-Wan Kenobi]] |
| *[[Kit Fisto/Legends|Kit Fisto]]
| |
| *[[Ki-Adi-Mundi/Legends|Ki-Adi-Mundi]]
| |
| *[[Oppo Rancisis/Legends|Oppo Rancisis]]<ref name="Clone Wars Chapter 21">{{CW|21}}</ref>
| |
| *[[Luke Skywalker/Legends|Luke Skywalker]]<ref name="Star Wars Episode V: The Empire Strikes Back" /> | | *[[Luke Skywalker/Legends|Luke Skywalker]]<ref name="Star Wars Episode V: The Empire Strikes Back" /> |
| *Most [[Jedi/Legends|Jedi]] as [[Jedi Initiate/Legends|younglings]]
| |
| *[[Denin]] {{C|post-mortem}} | | *[[Denin]] {{C|post-mortem}} |
| *[[Vila]] {{C|post-mortem}}}} | | *[[Vila]] {{C|post-mortem}}}} |
| {{Quote|Size matters not. Look at me. Judge me by my size, do you? Hmm? Hmm. And well you should not. For my ally is the Force, and a powerful ally it is. Life creates it, makes it grow. Its energy surrounds us and binds us. Luminous beings are we, not this crude matter. You must feel the Force around you; here, between you, me, the tree, the rock, everywhere, yes. Even between the land and the ship.|Yoda, to [[Luke Skywalker/Legends|Luke Skywalker]]|Star Wars: Episode V The Empire Strikes Back}} | | {{Quote|Size matters not. Look at me. Judge me by my size, do you? Hmm? Hmm. And well you should not. For my ally is the Force, and a powerful ally it is. Life creates it, makes it grow. Its energy surrounds us and binds us. Luminous beings are we, not this crude matter. You must feel the Force around you; here, between you, me, the tree, the rock, everywhere, yes. Even between the land and the ship.|Yoda, to [[Luke Skywalker/Legends|Luke Skywalker]]|Star Wars: Episode V The Empire Strikes Back}} |
| '''Yoda''', considered by some to be the '''Avatar of Light''', was a [[Force-sensitive/Legends|Force-sensitive]] [[Gender/Legends|male]] [[Species/Legends|being]] of a [[Yoda's species/Legends|mysterious species]], one of the most legendary, renowned and powerful [[Jedi Master/Legends|Jedi Masters]] in [[Timeline of galactic history/Legends|galactic history]]. He was known for his legendary wisdom, mastery of [[The Force/Legends|the Force]] and skills in [[Lightsaber combat/Legends|lightsaber combat]]. Yoda served as a member of the [[Jedi High Council/Legends|Jedi High Council]] in the last [[Standard century/Legends|centuries]] of the [[Galactic Republic/Legends|Galactic Republic]] and as [[Grand Master/Legends|Grand Master]] oversaw the [[Jedi Order/Legends|Jedi Order]] before, during, and after the devastating [[Clone Wars/Legends|Clone Wars]]. Following the [[First Battle of Geonosis/Legends|First Battle of Geonosis]], Yoda held the title of [[Master of the Order/Legends|Master of the Order]] in addition to that of Grand Master. In his centuries of service to [[The galaxy/Legends|the galaxy]] and the Force, Grand Master Yoda had a hand in the training of nearly all the [[Jedi/Legends|Jedi]] in the Order, including such luminaries as [[Obi-Wan Kenobi/Legends|Obi-Wan Kenobi]], [[Ki-Adi-Mundi/Legends|Ki-Adi-Mundi]] and [[Oppo Rancisis/Legends|Oppo Rancisis]], all of whom would come to serve on the Jedi Council along with him. | | '''Yoda''' was a [[Force-sensitive/Legends|Force-sensitive]] [[Gender/Legends|male]] [[Jedi Master/Legends|Jedi Master]] of a [[Yoda's species/Legends|mysterious species]], details of which he did not reveal. He was known training [[Obi-Wan Kenobi/Legends|Obi-Wan Kenobi]] and [[Luke Skywalker/Legends|Luke Skywalker]], heroes of the [[Clone Wars/Legends|Clone Wars]] and [[Galactic Civil War/Legends|Galactic Civil War]] respectively. |
|
| |
|
| Standing about 66 cm tall, Yoda was a [[Gender/Legends|male]] member of a [[Yoda's species/Legends|mysterious species]], details of which he did not reveal. Yoda served as a member of the Jedi Order for centuries, eventually gaining a seat on the Jedi High Council, before reigning as the Grand Master of the Jedi. He had exceptional skills in lightsaber combat, having mastered all forms and stances of lightsaber combat, except the Vaapad subset of [[Form VII/Legends|Form VII]] (he had mastered the original Form VII variant known as Juyo), but known for being particularly accomplished in [[Form IV/Legends|Form IV]], often employing the acrobatic techniques of the form. Many considered him a [[swordmaster]] and the greatest duelist in the Jedi Order, even surpassing [[Mace Windu/Legends|Mace Windu]] and [[Count/Legends|Count]] [[Dooku/Legends|Dooku]].
| | Following his death, Master Yoda [[Force ghost|retained his identity]] within the Force and was revered as among the most legendary Jedi Masters of all time by Skywalker's [[New Jedi Order]]. |
| | |
| Though arguably the Order's greatest master of the Force and most skilled warrior, Yoda believed most firmly in the importance of instructing younger generations and never missed an opportunity to ensure his students learn from their experiences. At heart, the diminutive Jedi Master was a teacher; indeed, he instructed nearly all the Jedi in the order, to some extent, during his reign as Grand Master.<ref name="Yoda: Dark Rendezvous">''[[Yoda: Dark Rendezvous]]''</ref>
| |
| | |
| Though Yoda was, arguably, the most highly Force-attuned member of the Order, he was not flawless. It was partially due to his failure to recognize that [[Supreme Chancellor/Legends|Supreme Chancellor]] [[Palpatine/Legends|Palpatine]] was actually responsible for the outbreak of the Clone Wars, and was in fact the [[Sith Lord/Legends|Sith Lord]] Darth Sidious, or to destroy him in battle, that the Republic was overthrown and the Jedi Order decimated. The Grand Master was among the few Jedi to survive [[Galactic Emperor/Legends|Emperor]] Palpatine's [[Great Jedi Purge/Legends|Great Jedi Purge]], after the beginning of which, he went into exile on the swamp planet of [[Dagobah/Legends|Dagobah]].
| |
| | |
| Later, before [[Death/Legends|dying]] and becoming one with the Force in [[4 ABY/Legends|4 ABY]], the exiled Jedi Master was responsible for the instruction of [[Luke Skywalker/Legends|Luke Skywalker]] who would use Yoda's training as a basis for the creation of a [[New Jedi Order]], after defeating the Sith. Following his death, Master Yoda [[Force ghost|retained his identity]] within the Force and was revered as among the most legendary Jedi Masters of all time by Skywalker's reconstituted Order.
| |
|
| |
|
| ==Biography== | | ==Biography== |
| ===Early life=== | | ===Early life=== |
| {{Quote|A trial of being old is this: remembering which thing one has said into which young ears.|Yoda|Yoda: Dark Rendezvous}}
| | The earliest record of Yoda is as one of the Jedi Masters who led the mobile academy aboard the starship ''[[Chu'unthor]]'', which was constructed circa [[500 BBY]]. After crash-landing on the planet of [[Dathomir/Legends|Dathomir]] at around [[230 BBY/Legends|230 BBY]], Yoda and the other Jedi fought with the famed [[Nightsisters/Legends|Witches of Dathomir]]. Coming to a stalemate, he agreed to leave the ship's data tapes. Although he left no means of reading the tapes, they were bestowed to [[Rell (Dathomir)|Rell]] of the [[Singing Mountain Clan]] for safekeeping until such a time, Yoda foresaw, when a Jedi would come to save the planet from darkness and the information could safely be shared with the Witches. This did not happen until around [[8 ABY/Legends|8 ABY]], when Yoda's final student, [[Luke Skywalker/Legends|Luke Skywalker]], found his way to Dathomir, fulfilling his Master's prophecy.<ref name="TheCourtshipOfPrincessLeia">''[[The Courtship of Princess Leia]]''</ref> |
| [[File:GormoTrainingYoda.jpg|thumb|left|A young Yoda being trained by [[Jedi Master/Legends|Master]] [[N'Kata Del Gormo|Gormo]]]]
| |
| Very little is known about Yoda's early life. He was from a remote planet, but which one remains a mystery.<ref name="Legendary">''[[Star Wars: The Legendary Yoda]]''</ref> According to one legend,<ref name="Twitter" /> Yoda originally did not know that he was [[Force-sensitive/Legends|Force-sensitive]] at all.<ref name="Nine" /><ref name="Legendary" /> His path towards the Jedi began when he left his home [[Planet/Legends|planet]]<ref name="Nine" /><ref name="Legendary" /> with a [[Human/Legends|Human]] [[Unidentified Force-sensitive Human|friend]],<ref name="Nine" /> who also did not know he was Force-sensitive,<ref name="Nine" /> on an old, barely space-worthy ship en route to the [[Core Worlds/Legends|Core Worlds]]<ref name="Nine" /> to seek employment.<ref name="Nine" /><ref name="Legendary" /> However, long before they could reach their destination, the ship was struck by a large asteroid, causing it to become severely disabled beyond their abilities to repair. They spent several days drifting dead in space during which time both their life support systems and rations came close to being exhausted, and there was still no response to their distress signal. It seemed like they would soon meet their deaths until their sensors picked up a [[Star system/Legends|star system]] not too far away.<ref name="Nine" /> They had just enough power to make it there,<ref name="Nine" /> and did so before<ref name="Nine" /> crash landing on a strange<ref name="Nine" /><ref name="Legendary" /> [[Unidentified swamp planet|swampy planet]] covered with a dense fog.<ref name="Nine" />
| |
| | |
| They spent a few days there before being found by a strange being: [[Hysalrian]] Jedi Master [[N'Kata Del Gormo]], who revealed to them both that they were very much Force-sensitive.<ref name="Nine" /> The Jedi Master invited Yoda to become his apprentice, also known as a [[Padawan/Legends|Padawan]].<ref name="Legendary" /> Master Gormo took them to his home, where he trained them in the ways of [[The Force/Legends|the Force]] and, not long after their training was complete, a [[Galactic Republic/Legends|Galactic Republic]] [[Starship/Legends|starship]] picked up their distress signal and rescued the two friends, who were now [[Jedi/Legends|Jedi]] themselves.<ref name="Nine" /> Departing the world, Yoda went to [[Coruscant/Legends|Coruscant]], where he continued his training at the [[Jedi Temple]] as a [[Jedi Initiate/Legends|Jedi Initiate]].<ref name="Nine" /> As time passed, he proved to be a skilled Jedi,<ref name="Legendary" /> and he studied under the Jedi Master [[Fae Coven]].<ref name="The Jedi Path">[[The Jedi Path: A Manual for Students of the Force (real-life book)|''The Jedi Path'']]</ref> Eventually, Yoda passed [[The Gathering/Legends|The Gathering]] and was assisted by the [[Architect droid/Legends|architect droid]] [[Huyang/Legends|Huyang]] in the construction of his first lightsaber.<ref name="A Necessary Bond">{{TCW|A Necessary Bond}}</ref><ref name="Nine" />
| |
| | |
| ===Jedi Master===
| |
| {{Quote|Secret, shall I tell you? Grand Master of Jedi Order am I. Won this job in a raffle I did, think you? 'How did you know, how did you know, Master Yoda?' Master Yoda knows these things. His job it is.|Yoda|Yoda: Dark Rendezvous}}
| |
| When Yoda had completed his Padawan training, he became a [[Jedi Knight/Legends|Jedi Knight]], meaning he could go on important missions. By the age of 96, he had become a Jedi Master. Later, he was elected to join the [[Jedi High Council/Legends|Jedi High Council]].<ref name="Legendary" /> By [[800 BBY/Legends|800 BBY]], Yoda had begun the training of his first student, who would be one of the many Padawans Yoda would train over the long centuries of his life.
| |
| | |
| [[File:Once_Allies_SWG4.jpg|thumb|right|200px|Yoda with Jedi Knight Dooku]]
| |
| | |
| Later, Yoda became one of the Jedi Masters who led the mobile academy aboard the starship ''[[Chu'unthor]]'', which was constructed circa [[500 BBY]]. After crash-landing on the planet of [[Dathomir/Legends|Dathomir]] at around [[230 BBY/Legends|230 BBY]], Yoda and the other Jedi fought with the famed [[Nightsisters/Legends|Witches of Dathomir]]. Coming to a stalemate, he agreed to leave the ship's data tapes. Although he left no means of reading the tapes, they were bestowed to [[Rell (Dathomir)|Rell]] of the [[Singing Mountain Clan]] for safekeeping until such a time, Yoda foresaw, when a Jedi would come to save the planet from darkness and the information could safely be shared with the Witches. This did not happen until around [[8 ABY/Legends|8 ABY]], when Yoda's final student, [[Luke Skywalker/Legends|Luke Skywalker]], found his way to Dathomir, fulfilling his Master's prophecy.<ref name="TheCourtshipOfPrincessLeia">''[[The Courtship of Princess Leia]]''</ref>
| |
|
| |
|
| Yoda once traveled to [[Kushibah]] in search of a new Padawan. There among the diminutive [[Kushiban]], the Jedi Master discovered young [[Ikrit]], who proved strong in the Force, and took him to be trained as a Jedi. As a Jedi Knight, Ikrit once lost control during a petty disagreement and almost murdered a friend with his lightsaber, with Yoda risking his own life to stop him. As a result, Ikrit forsook the use of lightsabers for years afterward.<ref name="Vader's Fortress">''[[Junior Jedi Knights: Vader's Fortress]]''</ref> | | Yoda once traveled to [[Kushibah]] in search of a new Padawan. There among the diminutive [[Kushiban]], the Jedi Master discovered young [[Ikrit]], who proved strong in the Force, and took him to be trained as a Jedi. As a Jedi Knight, Ikrit once lost control during a petty disagreement and almost murdered a friend with his lightsaber, with Yoda risking his own life to stop him. As a result, Ikrit forsook the use of lightsabers for years afterward.<ref name="Vader's Fortress">''[[Junior Jedi Knights: Vader's Fortress]]''</ref> |
| Line 71: |
Line 37: |
| By around [[400 BBY]], when [[Beldorion]] left the Jedi Order, Yoda could be considered one of the greatest Masters in Jedi history, comparable with [[Nomi Sunrider]] or [[Thon]], both of whom had lived more than 3,500 years earlier.<ref name="Planet of Twilight">''[[Planet of Twilight]]'', p. 187.</ref> | | By around [[400 BBY]], when [[Beldorion]] left the Jedi Order, Yoda could be considered one of the greatest Masters in Jedi history, comparable with [[Nomi Sunrider]] or [[Thon]], both of whom had lived more than 3,500 years earlier.<ref name="Planet of Twilight">''[[Planet of Twilight]]'', p. 187.</ref> |
|
| |
|
| By [[200 BBY/Legends|200 BBY]], Yoda, along with other Jedi Masters of that time, discovered that the shape of the Force had begun to flux, becoming murky and uncertain. Studying the perplexing mystery in silent meditation, the Jedi High Council, of which Yoda was now a senior member, was unanimous: the power of the [[Dark side of the Force/Legends|dark side]] was growing. While the Council and the other Jedi believed this indicated the growing power of the [[Sith/Legends|Sith]] or other dark-siders, Yoda put forth the possibility that the darkening of the Force might suggest the imminent approach of the [[Chosen One/Legends|Chosen One]], which prophecy said would bring balance to the Force. In opposition to this theory, several of the younger Jedi disputed Yoda's findings, and formed a breakaway sect—the [[Potentium]]. Their heresy was not welcomed by the Council, and Yoda led the campaign to expel them from the order in [[130 BBY]].<ref name="Yoda: Dark Rendezvous" />
| | ===Bpfasshi Dark Jedi=== |
| | |
| Around one hundred and fifty [[Standard year/Legends|years]] before the [[Clone Wars/Legends|Clone Wars]], Yoda traveled to [[Ord Cestus/Legends|Ord Cestus]] and saved the native [[X'Ting]] from disaster. They honored Yoda by building a giant statue of him, at least 70 meters tall, inside the [[X'Ting Hall of Heroes]].<ref name="The Hive">''[[The Hive]]''</ref> At some point between [[133 BBY]] and [[69 BBY/Legends|69 BBY]], Master Yoda attempted to see the future of [[Byrch Dyshkava]], a Padawan who had mysteriously gone missing after a mission. Yoda failed to provide the Order with any useful information.<ref name="BL">{{GamerCite|7|Bartyn's Landing (article)|Bartyn's Landing}}</ref>
| |
| | |
| In [[102 BBY/Legends|102 BBY]] an infant by the name of [[Dooku/Legends|Dooku]], heir to the title of [[Count/Legends|Count]] on the planet of [[Serenno/Legends|Serenno]], was discovered by the Jedi and willingly given to the Order by his parents. When Dooku reached the appropriate age, he was taken as a Padawan by Council member [[Thame Cerulian]]. However, even though he studied under Cerulian, Yoda took a particular interest in the young Dooku and was frequently his adviser and confidant. The Jedi Master, however, was equally quick to point out Dooku's flaws when necessary. Yoda assisted quite closely in Dooku's lightsaber training as a Padawan, and building from this foundation, Dooku became an accomplished duelist with the weapon. In Dooku's later years, only Yoda and senior Council member [[Mace Windu/Legends|Mace Windu]] were considered equal to his skill with a lightsaber. Later, Yoda also served as the lightsaber instructor of [[Cin Drallig/Legends|Cin Drallig]], who would become the [[Jedi Battlemaster|Battlemaster]] of the Jedi Temple.
| |
| | |
| ===Yinchorri uprising ([[33 BBY/Legends|33 BBY]])===
| |
| ====Early engagements====
| |
| [[File:Mayvitch_soldier_contacting_Jedi.jpg|thumb|left|250px|Yoda and the Council learn of the Yinchorri uprising.]]
| |
| In [[33 BBY/Legends|33 BBY]], the Jedi Council received a transmission sent four standard days earlier informing them of an [[Battle of Mayvitch 7|attack on Mayvitch 7]] instigated by the [[Yinchorri]]. After news of this reached [[Supreme Chancellor/Legends|Supreme Chancellor]] [[Finis Valorum/Legends|Finis Valorum]], he asked Mace Windu to send Jedi to negotiate with the Yinchorri. However, the aggressive Yinchorri murdered the two Jedi sent to negotiate and sent their mutilated bodies to Valorum's [[Coruscant/Legends|Coruscant]] doorstep as a warning.<ref name="ActsOfWar">''[[Jedi Council: Acts of War]]''</ref>
| |
| | |
| Following this, the Council created a Jedi strike team of twelve, including senior Councilor Mace Windu, to the [[Yinchorri system]]. Reports of the Jedi's engagement with Yinchorri forces that reached Yoda and the Council proved confusing and contradictory, while the diminutive Jedi Master sensed danger coming toward him in the Force. Yoda's danger sense proved accurate when the Yinchorri launched a raid on the Jedi Temple.<ref name="ActsOfWar" />
| |
| | |
| ====Raid on the Temple====
| |
| The Yinchorri task force found that all the Jedi sleeping quarters were empty. The troops then entered a chamber where they were met by several armed Jedi, including Yoda. In the end, almost all the Yinchorri were killed, and two Jedi died: [[Jude Rozess]] and [[Tieren Nie-Tan]].<ref name="ActsOfWar" />
| |
| | |
| [[File:Yoda_Yinchorri.jpg|thumb|right|300px|Yoda kills a Yinchorri warrior.]]
| |
| | |
| Yoda interrogated the last remaining Yinchorri and asked him the location of the Yinchorri high command. The soldier responded to the Jedi Master by telling him that he did not know since he was only an ordinary soldier. Yoda then turned to converse with [[Soon Bayts]], a Jedi Knight who brought word from [[Adi Gallia/Legends|Adi Gallia]] and [[Eeth Koth/Legends|Eeth Koth]] that the high command was not on Yitheeth and that they were heading to Yibikkoror to help [[Plo Koon/Legends|Plo Koon]] and [[Micah Giiett]].<ref name="ActsOfWar" />
| |
| | |
| These distractions gave the Yinchorri in the Temple enough time to grab his weapon and attempt to shoot the Jedi Master. Yoda, however, used the Force to throw him against a wall, presumably killing him. The Jedi then came to the conclusion that the Yinchorri were misguided rather than bloodthirsty and that the attack may have been the work of an unknown party, rather than the Yinchorri themselves.<ref name="ActsOfWar" />
| |
| | |
| ====Endgame====
| |
| Following the unsuccessful raid on the Jedi Temple, the Jedi strike team continued to engage the Yinchorri, while Yoda remained on Coruscant. Master Windu eventually reported to Yoda, informing him that the strike team had discovered the location of the Yinchorri's high command, thanks to Master [[Yaddle/Legends|Yaddle's]] knowledge of the [[Holocron/Legends|Jedi holocrons]]. The Jedi led an attack on the world, while four navy attack groups authorized by the Senate arrived to help them, concluding the uprising.<ref name="ActsOfWar" />
| |
| | |
| ===Invasion of Naboo ([[32 BBY/Legends|32 BBY]])===
| |
| {{Quote|There's no doubt. The mysterious warrior was a Sith.''"<br />"''Always two there are. No more, no less. A Master and an apprentice.''"<br />"''But which one was destroyed, the Master, or the Apprentice?|Mace Windu and Yoda, about Darth Maul|audio=AlwaysTwoThereAre-TPM.ogg|Star Wars: Episode I The Phantom Menace}}
| |
| In [[32 BBY/Legends|32 BBY]], the [[Galactic Senate/Legends|Galactic Senate]] passed legislation that called for the taxation of trade routes to outlying systems, in an attempt to weaken the ever-expanding [[Trade Federation of Planets|Trade Federation]], which had grown increasingly powerful—to the point that it had its own Senate delegation and easily "persuaded" Republic weapons inspectors to overlook the arming of the Federation's shipment vessels into lethal battleships.<ref name="Star Wars Episode I: The Phantom Menace">{{Film|I}}</ref>
| |
| [[File:Yoda_Episode_I_Canon.png|thumb|left|250px|Yoda during the Naboo crisis ([[32 BBY/Legends|32 BBY]])]]
| |
| As such, the Federation created an invasion force of battle droids, in addition to their growing fleet of warships, and in protest of the Senate's legislation, blockaded the small world of [[Naboo/Legends|Naboo]]. [[Queen/Legends|Queen]] [[Padmé Amidala/Legends|Amidala]] of Naboo implored the help of the Republic, and as such, Supreme Chancellor [[Finis Valorum/Legends|Finis Valorum]] asked Yoda and the Council to send Jedi to negotiate with the Trade Federation, as ambassadors of the Republic.<ref name="Star Wars Episode I: The Phantom Menace" />
| |
| | |
| The Council sent Jedi Master [[Qui-Gon Jinn/Legends|Qui-Gon Jinn]], and his apprentice [[Obi-Wan Kenobi/Legends|Obi-Wan Kenobi]], to negotiate with the leadership of the Trade Federation. However, upon the arrival of the Jedi, the Federation attempted to assassinate them and began invading Naboo; the Jedi were able to escape their would-be killers and rescue the Queen of Naboo, Amidala.<ref name="Star Wars Episode I: The Phantom Menace" />
| |
| | |
| Upon returning to Coruscant, Qui-Gon Jinn brought a young [[Anakin Skywalker/Legends|Anakin Skywalker]] to the Jedi Council, requesting to train him once Obi-Wan Kenobi had completed the [[Jedi Trials/Legends|trials]] necessary to become a Jedi Knight, as Jedi could only have one apprentice at a time. Yoda, as the teacher of many of those on the Council, and its most venerable and respected member, played a key role in that body's initial decision to deny the request. Yoda believed that the boy was clearly affected by his years as a slave and that he still clung too tightly to the memory of [[Shmi Skywalker Lars/Legends|his mother]] to be trained safely. The boy's future, Yoda thought, was clouded. Qui-Gon, however, continued to insist that Skywalker was the Chosen One, who would bring balance to the Force.<ref name="Star Wars Episode I: The Phantom Menace" />
| |
| | |
| ====Return of the Sith====
| |
| {{Dialogue|Obi-Wan|The Sith were before Master Yoda's time, were they not, Master?|Qui-Gon|Nothing was before Yoda's time, Padawan.|attr=Obi-Wan Kenobi and Qui-Gon Jinn|src=Cloak of Deception}}
| |
| In addition to this supposed Chosen One, Qui-Gon brought news of the return of the Sith; while he and the Queen's entourage had been preparing to depart the planet of [[Tatooine/Legends|Tatooine]] after having their damaged ship repaired, [[Darth Maul/Legends|what appeared to be a Sith Lord]] confronted the Jedi Master in a lightsaber duel.<ref name="Star Wars Episode I: The Phantom Menace" />
| |
| [[File:Obi-Wan_Knighted_Episode_I_Canon.png|thumb|right|250px|Yoda makes Kenobi a Jedi Knight.]]
| |
| After finding the Senate unresponsive to her pleas for aid, Queen Amidala demanded a vote of no confidence in Supreme Chancellor Valorum's leadership, before returning to Naboo, where she successfully led a revolt against the occupation of the Trade Federation. During this battle, Qui-Gon's mysterious attacker reappeared, and successfully murdered him, though the attacker in turn was defeated by Obi-Wan Kenobi. It became obvious to Yoda and others on the Council that the Sith had indeed returned; however, it was not clear whether the attacker Kenobi "killed" was the Sith Master or apprentice.<ref name="Star Wars Episode I: The Phantom Menace" />
| |
| [[File:Anakin_The_Shadow_Trap2.jpg|thumb|left|200px|Yoda with Kenobi and Skywalker during the mission to Mawan]]
| |
| Following Amidala's call for a vote of no confidence in Valorum's leadership of the Senate, Naboo's own [[Senator/Legends|senator]], [[Palpatine/Legends|Palpatine]], was elected the new Supreme Chancellor of the Galactic Republic. In addition, the Council against Yoda's wishes, granted Obi-Wan, now a Jedi Knight, permission to train Anakin Skywalker as a Jedi. He vocally expressed his disapproval of the Council's decision, but reluctantly relented when he learned that Obi-Wan was willing to even go against the decision of the Council if it meant fulfilling Qui-Gon's final wish.<ref name="Star Wars Episode I: The Phantom Menace" />
| |
| | |
| In circa [[31 BBY/Legends|31 BBY]], the Human [[Len Markus]] seized the [[Darkstaff]], an ancient [[dark side artifact]], from the [[Cularin system asteroid belt]], causing the [[Cularin system]] to [[Cularin's disappearance|disappear]] from [[The galaxy/Legends|the galaxy]] for ten years. The event caused a surge of dark-side energy, which was so strong that it almost hospitalized Yoda. However, despite the physical absence of the system, Yoda could sense that the star system's inhabitants were still alive.<ref name="Philology">''[[Philology]]''</ref>
| |
| | |
| ===Mission to Mawan ([[26 BBY/Legends|25 BBY]])===
| |
| Seven years after the events at Naboo, Yoda went on a negotiation mission to [[Mawan]] with Obi-Wan, Anakin and Yaddle. Their goal was to settle a devastating civil war between three crime gangs. These gangs, led by [[Decca Besadii Diori|Decca the Hutt]], [[Feeana Tala]], and [[Granta Omega|Striker]], caused the remainder of the population to take refuge underground. Unbeknownst to them, the chaotic planet was a trap set for the Jedi by Striker, whose true identity was [[Granta Omega]], son of [[Xanatos]]. After kidnapping Anakin, he released a deadly chemical weapon that Yaddle intercepted, killing her when she absorbed it through the Force. However, through her sacrifice, she saved the city of Naatan. The weapon was intended by its vengeful maker to kill thousands if he was betrayed by any opposition, and as his insurance to escape offworld, but it failed because of what Yaddle had done. Anakin and Obi-Wan managed to bring peace to Mawan, but Anakin still felt responsible for the death of the [[Jedi High Council/Legends|Jedi High Council]] member. Yoda, despite the loss of Yaddle, still managed to convince Decca to evacuate with her illegal operations by "suggesting" that the Jedi Council might build a Temple on the planet, which was more than enough to make the criminal flee.<ref name="Jedi Quest: The Shadow Trap">''[[Jedi Quest: The Shadow Trap]]''</ref>
| |
| | |
| ===Separatist Crisis ([[24 BBY/Legends|24 BBY]]–[[22 BBY/Legends|22 BBY]])===
| |
| {{Quote|Master Yoda, do you think it will really come to war?" <br /> "Hmmm. The dark side clouds everything. Impossible to see, the future is.| Palpatine and Yoda|Star Wars: Episode II Attack of the Clones}}
| |
| Spurred by the failure of the Senate to even vote on the [[Financial Reform Act]], many planets, systems and corporations began to withdraw from the Republic. In addition, and particularly troubling for the Jedi, especially Yoda, the disillusioned former Jedi Count Dooku, who had once studied under Yoda, was the leading voice among these Separatists.<ref name="Star Wars Episode II: Attack of the Clones">{{Film|II}}</ref>
| |
| | |
| ====Attempts on Senator Amidala====
| |
| [[File:Chancellors_Office.png|thumb|200px|Yoda and other members of the Council advise the Chancellor during the Separatist Crisis.]]
| |
| The growing threat prompted members of the Senate to call for a [[Military Creation Act/Legends|Military Creation Act]], which would allow Supreme Chancellor Palpatine to create an army for the Republic. The leader of the opposition against this act was Senator Padmé Amidala, the former Queen of Naboo. When the time to vote on the act arrived, and Amidala arrived on Coruscant, an attempt was made upon her life, though she survived.<ref name="Star Wars Episode II: Attack of the Clones" />
| |
| | |
| The Jedi Council, disturbed by this, had Jedi Knight Obi-Wan Kenobi and his apprentice, Anakin Skywalker, placed in charge of the Senator's safety. Following a second attempt on the life of Amidala, Kenobi and Skywalker captured the bounty hunter responsible, only to have her killed by a second bounty hunter, through the use of a toxic dart, during her interrogation.<ref name="Star Wars Episode II: Attack of the Clones" />
| |
| | |
| The Council had Kenobi trace the second bounty hunter, while Skywalker was to accompany Amidala to the safety of her homeworld. Yoda helped Kenobi solve the mystery behind the missing planet [[Kamino/Legends|Kamino]], where the Jedi Knight had traced the origins of the toxic dart; it was Yoda's belief that certain files had been deleted from the [[Jedi Archives/Legends|Jedi Archives]] for an unknown purpose. Even more disturbing, only a Jedi would have been capable of erasing the files.<ref name="Star Wars Episode II: Attack of the Clones" />
| |
| | |
| ====Clone army====
| |
| {{Quote|Blind we are, if creation of this clone army, we could not see.''"<br />"''I think it is time we informed the Senate that our ability to use the Force has diminished.''"<br />"''Only the Dark Lords of the Sith know of our weakness. If informed, the Senate is, multiply, our adversaries will.|Yoda and Mace Windu|Star Wars: Episode II Attack of the Clones}}
| |
| Upon making his way to Kamino, Obi-Wan Kenobi discovered that a massive [[Grand Army of the Republic/Legends|army of clones]] was being created, apparently on the orders of the late Jedi Master [[Sifo-Dyas/Legends|Sifo-Dyas]]. Kenobi reported this to Masters Mace Windu and Yoda, the senior members of the Council, who had had no knowledge of a clone army. Obi-Wan felt certain that the template of the clone army, a bounty hunter named [[Jango Fett/Legends|Jango Fett]], was the same bounty hunter who had been involved in the attempts on Senator Amidala's life.<ref name="Star Wars Episode II: Attack of the Clones" />
| |
| | |
| While waiting for Kenobi's report, Yoda meditated. He heard the voice of the spirit of Qui-Gon Jinn and sensed that [[Mission to Tatooine (Separatist Crisis)|something]] had happened to Anakin Skywalker. He conferred with Windu that the young Padawan was in "pain. ''Terrible'' pain."<ref name="Star Wars Episode II: Attack of the Clones" />
| |
| | |
| Kenobi traced Fett to [[Geonosis/Legends|Geonosis]], only to be captured during his report, which detailed his discovery that Count Dooku had formed an alliance of powerful corporations into a [[Confederacy of Independent Systems/Legends|Confederacy of Independent Systems]]. This caused the Senate to grant the Chancellor emergency powers, with which he authorized the Grand Army of the Republic while Senator Amidala and Anakin Skywalker attempted to rescue Kenobi, only to be captured themselves. In response, Master Windu formed a strike team to extract the captured trio, while Yoda went to Kamino in an attempt to discover the truth of the clone army, and also to bring some of those troops to Geonosis.<ref name="Star Wars Episode II: Attack of the Clones" />
| |
| | |
| ===Clone Wars ([[22 BBY/Legends|22 BBY]]–[[19 BBY/Legends|19 BBY]])===
| |
| ====Battle of Geonosis====
| |
| {{Quote|The shroud of the dark side has fallen. Begun, the Clone War has.|Master Yoda|Star Wars: Episode II Attack of the Clones}}
| |
| [[File:Yoda1280.jpg|thumb|left|220px|Yoda battles his former [[Padawan/Legends|student]], [[Count/Legends|Count]] [[Dooku/Legends|Dooku]], on [[Geonosis/Legends|Geonosis]].]]
| |
| Windu and the Jedi were confronted by a huge droid army under the command of Count Dooku, with only a handful surviving, when, with the rank of General, Yoda arrived with a contingent of the new clone army. Yoda commanded the forces of the Republic, before feeling a disturbance in the Force.<ref name="Star Wars Episode II: Attack of the Clones" />
| |
| | |
| Master Yoda arrived in a hangar to confront Dooku, after he had grievously wounded Skywalker and Kenobi. After deflecting Dooku's Force powers, among which was [[Force lightning/Legends|Force lightning]], Yoda realized that Dooku had turned to the dark side of the Force, becoming a [[Sith Lord/Legends|Sith Lord]]. A lightsaber duel began between the two, with Dooku faring well against his old master. Yet, as the duel progressed the Grand Master of the Jedi showed speed and agility so incredible that it began to overwhelm Dooku, plus he was the only one save for one other being in the galaxy that held skill enough with a blade equal or even greater than the Makashi master. Yoda almost defeated Dooku, but the Sith Lord used the Force to drop a pillar over Obi-Wan and Anakin. While Yoda concentrated on stopping the massive construction from crushing the two Jedi, Dooku made his escape.<ref name="Star Wars Episode II: Attack of the Clones" />
| |
| | |
| Though the Republic won the [[First Battle of Geonosis/Legends|First Battle of Geonosis]] under the direction of Yoda, many Jedi were killed. More importantly, the thousand-year peace that had existed since the [[Seventh Battle of Ruusan]] had ended. Yoda sensed that the Clone Wars would be a long and tumultuous period for both the Republic and the Jedi Order, and indeed they were, shaking the galaxy to its very core. During the Clone Wars, Yoda, along with many other Jedi Masters, was forced to become a general fighting in various battles for the Republic on worlds across the galaxy.<ref name="Star Wars: Clone Wars">''[[Star Wars: Clone Wars]]''</ref>
| |
| | |
| ====Frontline warrior====
| |
| {{Quote|Darker, the coming storm grows. I fear the dark cloud of the Sith shrouds us all.|Yoda|audio=DarkerTheComingStormGrows-CW20.ogg|Clone Wars Chapter 20}}
| |
| Shortly after the beginning of the war, Yoda took the title of [[Master of the Order/Legends|Master of the Order]] from Mace Windu. Early in the conflict, Yoda saw front-line action at the [[Battle of Axion]], leading [[Clone trooper/Legends|clone troopers]] into battle atop [[Yoda's kybuck|his]] [[Kybuck/Legends|kybuck]] steed. On that contested world, he saved the life of [[Commander/Legends|Commander]] [[Brolis]], and in the process defeated a [[IG-227 Hailfire-class droid tank/Legends|Hailfire droid]] in single combat.<ref name="duel">''[[Duel]]''</ref> Around the time of the [[Battle of Muunilinst/Legends|Battle of Muunilinst]], Yoda came to the rescue of Jedi, [[Luminara Unduli/Legends|Luminara Unduli]] and [[Barriss Offee/Legends|Barriss Offee]], with the help of Senator Padmé Amidala of Naboo after the [[Crystal Caves]] on [[Ilum/Legends|Ilum]] were destroyed by [[Spelunker probe droid/Legends|chameleon droids]]. Yoda sensed Unduli and Offee's peril through the Force, and during his rescue mission destroyed dozens of chameleon droids, before rescuing the pair. On Ilum, Yoda learned that Dooku's treachery ran deeper than he had believed, for the former Jedi Master had ordered the attack on the crystal temple.<ref name="Star Wars: Clone Wars" />
| |
| [[File:Kybuckcharge_cw1.jpg|thumb|right|230px|Yoda during the [[Clone Wars/Legends|Clone Wars]]]]
| |
| | |
| Yoda had lost his former Padawan to the dark side before the war began, but during the conflict, Yoda lost another good friend. [[King/Legends|King]] [[Alaric (Sephi)|Alaric]] of [[Thustra/Legends|Thustra]] was planning to secede his homeworld to the Confederacy of Independent Systems, although he intended to rejoin the Republic when the corruption he had witnessed was gone. Yoda traveled to Thustra to speak with Alaric, but his old friend was resolute, and eventually, his world became embroiled in battle. Unwilling to face the state of his world, Alaric drew a [[Blaster/Legends|blaster]] on Yoda, knowing his friend would be forced to defend himself. Left with no choice, Yoda deflected the bolt into the body of the King. Yoda lamented the fall of his friend, but more worrying was how even he had been forced to draw his blade in battle, and feared he would have to draw it again in many battles to come.<ref name="JediYoda">''[[Jedi: Yoda]]''</ref>
| |
| | |
| The Jedi Grand Master oversaw many missions from the Jedi Temple as well, sifting through several intelligence reports and working with the Council to determine which to act upon. He learned through Obi-Wan Kenobi that [[Dexter Jettster/Legends|Dexter Jettster]] was a reliable informant, and soon learned to place his trust in [[Bail Prestor Organa/Legends|Bail Organa]] as well after the senator revealed information of a hitherto unknown Sith planet designated [[Zigoola]]. Kenobi and Organa soon departed to bring an end to the planet, and Yoda and Mace Windu meditated and lent their support from afar, sensing the completion of their mission upon its closure and calling upon Padmé Amidala once more to go and retrieve them.<ref name="Wild Space">''[[The Clone Wars: Wild Space]]''</ref>
| |
| | |
| When the Republic was contacted by crime lord [[Jabba Desilijic Tiure/Legends|Jabba]] the [[Hutt/Legends|Hutt]], in regards to his missing son, [[Rotta/Legends|Rotta]], and offered the Republic use of Hutt hyperspace lanes, should the Republic rescue the missing Huttlet, it became apparent that the only Jedi the Order could spare for the mission were Obi-Wan Kenobi and Anakin Skywalker. However, the two were embroiled in an ongoing [[Battle of Christophsis/Legends|conflict]] on [[Christophsis/Legends|Christophsis]], and communications were impossible. As such, Yoda sent a youngling, [[Ahsoka Tano/Legends|Ahsoka Tano]], to inform the pair of their new mission, and in addition, assigned her as Skywalker's Padawan. The trio eventually succeeded in rescuing Jabba's son, allowing the Republic to use unknown Hutt hyperspace lanes, an advantage the Confederacy did not have.<ref name="CloneWarsMovie">[[Star Wars: The Clone Wars (film)|''Star Wars: The Clone Wars'' film]]</ref>
| |
| | |
| ====Rugosa====
| |
| {{Dialogue|Ventress|If Yoda is indeed the Jedi warrior you believe he is, let him prove it. Allow me to send my best troops to capture him. If he escapes, join the Republic. But should my droids defeat Yoda, consider an alliance with the Separatists.|Katuunko|I did not request Yoda's presence here to test him in battle.|Yoda|Accept the challenge I do, Your Highness. Arrive by nightfall, I ''will''.|attr=Asajj Ventress places the terms of the competition; Yoda accepts|audio=YodaAcceptsChallenge.ogg|src=Ambush}}
| |
| [[File:Yoda_Ambush.jpg|thumb|left|200px|Yoda during the mission to Rugosa]]
| |
| | |
| Shortly after, Yoda was selected to lead diplomatic relations with the [[Toydarian/Legends|Toydarian]] King [[Katuunko/Legends|Katuunko]], as the Republic wished to build a base in his system to further combat the Confederacy in the [[Outer Rim Territories/Legends|Outer Rim Territories]]. However, the Confederacy intercepted communications between the king and the Republic with the newly built [[Skytop Station/Legends|Skytop Station]], and, hoping to derail the negotiations, Separatist leader Count Dooku sent his apprentice [[Asajj Ventress/Legends|Asajj Ventress]] to the neutral moon of [[Rugosa/Legends|Rugosa]], where the negotiations were scheduled to take place. When Master Yoda's warship arrived at Rugosa, it was immediately set upon by several Separatist cruisers; however, Yoda refused to be deterred, and escaped the frenzy via [[Escape pod/Legends|escape pod]] along with three clone troopers, and landed safely on the moon's surface.<ref name="Ambush">''[[Ambush]]''</ref>
| |
| | |
| Once on the moon, the Jedi Grand Master contacted Katuunko, and after becoming aware of Ventress's presence, agreed to a wager: should Yoda defeat Ventress' best troops, Toydaria would join the Republic; however, should Ventress's forces overwhelm Yoda, then the king would ally his system with the Confederacy. Katuunko insisted that the Dark Jedi ensure Yoda be given a fair fight, to which she agreed. After returning to her base, Ventress contacted Dooku and stated that her forces were being deployed. She did not intend for Yoda to get his fair fight<ref name="Ambush" /> and dispatched the recently promoted [[224/Legends|224]]<ref name="Ambush" /> with the task of leading the droid forces, and the battle droids prepared to ambush the Republic's diplomatic squad. Led by 224 in his [[Armored Assault Tank]], the main column of Confederate forces advanced into the jungle. Yoda and his men made their way to the rendezvous position on a different path, as the Jedi Master was certain that their enemies were already heading toward them. The droids began to go through the [[Rugosa land coral|coral]] of the jungle, but the dense foliage prevented the [[Tank (vehicle)/Legends|tanks]] from advancing.<ref name="Ambush" />
| |
| | |
| [[File:Yoda_the_great_warrior.png|thumb|right|220px|Yoda eliminates a Confederate tank.]]
| |
| Yoda and the clones split up, seeking to use their surroundings to their advantage.<ref name="Ambush Decoded">{{TCW|Ambush|d=y}}</ref> The clones engaged a squad of B1 battle droids from the south and managed to defeat them, but [[B2 super battle droid/Legends|B2 super battle droids]] then came to attack the clones, and the three were forced to flee. Yoda, meanwhile, was able to defeat an entire squad of droids on his own without even using his [[Lightsaber/Legends|lightsaber]]. [[CC-4477/Legends|CC-4477]] was hit by a [[Missile/Legends|rocket]] fired by a [[B2-HA series super battle droid]] and was wounded in the leg. Yoda appeared and aided the clones, using the Force to [[Telekinesis/Legends|turn around]] a battle droid and destroy the rest of the squad. [[Droideka/Legends|Droidekas]] soon appeared, and the Republic forces fled. Yoda, clinging onto CC-4477's back, deflected the [[Laser/Legends|lasers]] at a nearby tall formation of land coral, causing the droids to be squashed and the four escaped to a cave to rest. The clones learned that they were low on ammunition, but the Jedi Master imparted his wisdom on the clone troopers to further inspire their efforts.<ref name="Ambush" />
| |
| | |
| After hearing the sounds of the droids approaching in the distance, Yoda and the clones exited the cave. The Jedi and his men arrived on a ridge to observe the advancing droids below, which were passing through a narrow pathway. Yoda left the clones on the ridge and faced three tanks and a large number of droids alone. The Jedi Master destroyed all of them, along with 224, leaving Katuunko amused and Ventress angry. However, Ventress did not give up easily; the Dark Acolyte broke the terms of the competition and secretly sent several droidekas to deal with the Jedi Master. As Yoda destroyed the last Confederate tank, the droidekas arrived, and the Jedi Master began blocking their laser attacks. CC-4477 launched the last of the rockets at an overhanging rock above the canyon, causing an avalanche to crush the droids. Yoda then led the clones to the rendezvous point, remarking that it was not polite to be late.<ref name="Ambush" />
| |
| | |
| Katuunko was greatly amused by the droids' defeat. Through a holotransmission, the king informed Dooku that one Jedi was not worth a hundred battle droids, but rather a thousand, and stated that he would be joining the Republic. The count urged him to reconsider, but the Toydarian king refused to deal with those who went back on their promises, as Ventress had broken the terms of the competition. Seeing that his plan had failed, Dooku ordered Ventress to kill the king, believing that negotiations might go smoother with his successor. Katuunko's guards tried to stop the Dark Acolyte, but Ventress merely Force-pushed them aside, knocking them unconscious. As Ventress attacked the king with her [[Interlocking hilt|paired lightsabers]], she was confronted by Yoda, having arrived in time to save the king.<ref name="Ambush" />
| |
| | |
| [[File:Ventress_strikes.png|thumb|left|230px|Ventress' assassination attempt is thwarted by Master Yoda.]]
| |
| Yoda used the Force to stop the Dark Acolyte's [[Death/Legends|death]] blow from being struck. As Ventress' droid escorts were dispatched by the clones, Yoda [[Telekinesis/Legends#Force Disarm|disarmed]] Ventress herself, and after examining her lightsabers, the Jedi returned them to her,<ref name="Ambush" /> having proven they were useless against his telekinesis,<ref name="Ambush Decoded" /> while commenting that she still had much to learn. Ventress was outnumbered, and Yoda suggested that she surrender. In order to escape, Ventress detonated pre-planted explosives and caused the hillside adjacent to the Republic forces to collapse. Yoda was forced to telekinetically stop the rocks from crushing all of them, and as he did so, Ventress seized the opportunity and fled to [[Punworcca 116-class interstellar sloop/Legends|her ship]]. Dooku, watching the events unfold through the holoprojector, commented before taking his leave that it was a pity that he had not been there himself.<ref name="Ambush" />
| |
| | |
| With the Confederate threat over, Yoda was able to enter into negotiations with Katuunko. The king stated that discussions were unnecessary, however, as the Jedi had already proven his worth.<ref name="Ambush" /> Katuunko presented his [[Toydarian ceremonial sword|ceremonial sword]] to Yoda and entrusted him with his planet's protection<ref name="Ambush Decoded" /> while pledging Toydaria's support to the Republic, declaring that it would be an honor to fight on their side.<ref name="Ambush" />
| |
| | |
| ====The ''Malevolence''====
| |
| After the appearance of a [[Malevolence/Legends|mysterious Separatist super weapon]] that had ambushed several Republic fleets and left no survivors, Yoda and the Council sent one among its number, Jedi Master Plo Koon, to track down the unknown threat. After Master Koon discovered the weapon, he contacted the Jedi general in the closest system to him, Anakin Skywalker. However, during the transmission, Koon's communication systems were jammed, and the Republic lost contact with his fleet. Masters Yoda, Windu and Kenobi, in conjunction with Supreme Chancellor Palpatine, agreed that sending a task force to search for survivors of the latest attack would prove risky; however, Skywalker disobeyed their orders, and through his Padawan Ahsoka Tano's unique connection through the Force to Master Koon, rescued the stranded Jedi Master and his few remaining troops. With Master Koon alive to report on the nature of the Separatist weapon, the Republic learned that the Separatists had acquired giant [[Ion cannon/Legends|ion cannons]] capable of disabling any fleet.<ref name="Rising Malevolence">{{TCW|Rising Malevolence|Rising ''Malevolence''}}</ref>
| |
| | |
| [[File:Yoda_CN.jpg|thumb|right|180px|Yoda]]
| |
| A plan devised and instigated by Skywalker proved able to destroy the ''Malevolence''{{'s}} primary weapon, and later, during a mission to rescue the captive Senator Amidala of Naboo, the giant warship was rigged to pilot itself into a nearby moon, destroying it, and freeing the Republic from the danger it represented.<ref name="DM">{{TCW|Destroy Malevolence|Destroy ''Malevolence''}}</ref>
| |
| | |
| ====Gunray's capture====
| |
| A short time later, Senator Amidala captured important Separatist leader [[Nute Gunray/Legends|Nute Gunray]] on [[Rodia/Legends|Rodia]]. As such, the Council sent Jedi Master Luminara Unduli and Padawan Ahsoka Tano to escort the viceroy to Coruscant, where he would face trial for war crimes. While guarding the viceroy, Master Unduli was to interrogate him, in the hopes of learning important Separatist secrets.<ref name="CoD">{{TCW|Cloak of Darkness}}</ref>
| |
| | |
| However, Unduli's starship came under Separatist assault and was boarded by large numbers of droids. Though Unduli defeated the droids, she was unprepared for the far greater adversary that had infiltrated the ship: Asajj Ventress. Ventress dueled both Unduli and Tano, holding them off while her secret ally, the Senate Commando [[Faro Argyus/Legends|Faro Argyus]], betrayed his fellows and rescued Gunray. After receiving word of this, Ventress escaped the Jedi, who were left to explain the catastrophe to Master Yoda.<ref name="CoD" />
| |
| [[File:Council_report.png|thumb|left|200px|Fisto reports to Windu and Yoda.]]
| |
| Yoda was particularly disturbed by the betrayal of Argyus, as he felt it revealed that the Republic's enemies were everywhere. However, he supported Master Unduli's proposal that Master [[Kit Fisto/Legends|Kit Fisto]] move to recapture Gunray, his escape ship having been tracked, as the [[Nautolan/Legends|Nautolan's]] fleet was nearer the viceroy's last known position.<ref name="CoD" />
| |
| | |
| Fisto was largely led on a wild bantha chase, however. Rather than recapturing Gunray, the Nautolan was forced to duel General Grievous and to watch his former Padawan, [[Nahdar Vebb/Legends|Nahdar Vebb]], die at the cyborg's hands. After he escaped, Fisto reported to the Council in the persons of Mace Windu and Yoda. Yoda lamented that Vebb's death was largely the result of his own hubris and feared that in the war there was a danger of the Jedi losing the very essence of who they were.<ref name="LoG">{{TCW|Lair of Grievous}}</ref>
| |
| | |
| ====Dealing with pirates====
| |
| Skywalker and Kenobi later launched a mission to capture the heart of the Confederacy, Count Dooku, though they were unsuccessful. However, where Skywalker and Kenobi failed, lowly pirates succeeded and contacted the Chancellor's office demanding a reward in return for the Sith Lord. Yoda confirmed that the lightsaber handled by the head of the pirate organization, [[Hondo Ohnaka/Legends|Hondo Ohnaka]], was indeed his former apprentice's.<ref name="DC">{{TCW|Dooku Captured}}</ref>
| |
| | |
| Under the advice of Senator Amidala, the Council sent Kenobi and Skywalker to confirm Dooku's capture, which they ultimately did. However, Ohnaka had them captured in addition to Dooku, in the hopes of garnering a further reward from the Republic. Though Skywalker and Kenobi ultimately escaped with the help of the Republic dignitaries sent to deliver the reward, it came at the expense of the respected Senator [[Kharrus/Legends|Kharrus]]' life, while Dooku managed to escape capture.<ref name="TGG">{{TCW|The Gungan General}}</ref>
| |
| | |
| ====Blue Shadow Virus====
| |
| [[File:Naboo_holo_conference.png|thumb|right|200px|Yoda and Windu conferring with the Naboo]]
| |
| Later, the Naboo contacted the Council and asked Masters Windu and Yoda to send two Jedi, specifically Kenobi and Skywalker due to their relations with the native Gungans, to help uncover a Separatist bio-lab believed to have been established on world. While the Jedi did discover the lab and prepare its resident scientist Dr. [[Nuvo Vindi/Legends|Nuvo Vindi]] for trial, a deadly virus he had prepared, the [[Blue Shadow Virus/Legends|Blue Shadow Virus]], was released, infecting Senator Amidala and Ahsoka Tano. They were administered the rare antidote before the virus could claim them.<ref name="BSV">{{TCW|Blue Shadow Virus (episode)|Blue Shadow Virus}}</ref><ref name="MoaTM">{{TCW|Mystery of a Thousand Moons}}</ref>
| |
| | |
| ====Ryloth====
| |
| Later, when Master Windu led an assault on the planet Ryloth aimed at freeing the Twi'leki population from Separatist occupation, Yoda remained on Coruscant. However, the diminutive Jedi Master acted as advisor to Windu and was involved in tactical discussions regarding how to capture the capital city of [[Lessu/Legends|Lessu]]. Yoda counseled Windu that it was important that the Separatist leader [[Wat Tambor/Legends|Wat Tambor]], who was responsible for the occupation of Ryloth, be captured to answer for his many war crimes. Ultimately, Windu agreed with Master Yoda and was able to capture the Separatist Council member at the conclusion of the [[Battle of Ryloth/Legends|Battle of Ryloth]].<ref name="LoR">{{TCW|Liberty on Ryloth}}</ref>
| |
| | |
| ====Stolen holocron====
| |
| {{Quote|Master Yoda, what is it?''"<br />"''A disturbance in the Force. Intruders there will be, in this Temple.|[[Jedi Knight/Legends|Jedi Knight]] [[Anakin Skywalker/Legends|Anakin Skywalker]] and [[Grand Master/Legends|Grand Master]] Yoda|Holocron Heist}}
| |
| Following the [[First Battle of Felucia/Legends|First Battle of Felucia]], Master Yoda presided over a meeting of the Jedi Council which heard that Padawan Ahsoka Tano had refused to comply with orders given to her by her superior Jedi Master Obi-Wan Kenobi. In punishment for her actions, Ahsoka was appointed as a guard of the Jedi Archives in order to spend time away from the battlefield.<ref name="HH">{{TCW|Holocron Heist}}</ref>
| |
| | |
| Later, while discussing the impact the defeat at Felucia would have on Republic war efforts in the region with Master Kenobi and Jedi Knight Anakin Skywalker, Yoda was overcome by a disturbance in the Force which revealed to him that intruders planned to infiltrate the Jedi Temple. Kenobi and Skywalker incorrectly deduced that the culprits would attempt to steal the Jedi Order's transmission codes, and as such, focused their efforts on securing the codes. Yoda later sensed the arrival of the intruders and suggested to Kenobi and Skywalker that their enemies may head to the [[Jedi Temple communication center/Legends|Jedi Temple communication center]]. The Grand Master then met there with Masters Mace Windu, Kit Fisto and [[Aayla Secura/Legends|Aayla Secura]] after having placed the Temple on high alert.<ref name="HH" />
| |
| [[File:YodaHolocronChamber-HH.png|thumb|left|200px|Master Yoda stands at the entrance to the Holocron Chamber.]]
| |
| As Kenobi and Skywalker tracked the intruders through the Temple's ventilation system, Master Yoda deduced that it was likely that the intruders were receiving assistance from within the Temple considering their ability to avoid the two Jedi trailing them. As such, the diminutive Master contacted Ahsoka Tano and cautioned her that he sensed deception and that there was somebody in the Archives impersonating a Jedi. Fortunately, Tano was able to subdue the impostor, a [[Clawdite/Legends|Clawdite]] [[Changeling/Legends|changeling]] named [[Cato Parasitti/Legends|Cato Parasitti]], who had been impersonating Master [[Jocasta Nu/Legends|Jocasta Nu]] and feeding her employer [[Cad Bane/Legends|Cad Bane]] information from the Jedi Archives.<ref name="HH" />
| |
| | |
| Nonetheless, Bane's scheme worked, as he was able to keep the Jedi off his tail long enough to break into the [[Holocron Chamber]] and steal a Jedi holocron as ordered by the Sith Lord Darth Sidious. However, Parasitti revealed to the Jedi that Bane's next target was Jedi Master [[Bolla Ropal/Legends|Bolla Ropal]]. This allowed the Jedi to deduce that Bane was after the [[Kyber memory crystal/Legends|Kyber memory crystal]] in Ropal's keeping, which when combined with a holocron would reveal a list of all known Force-sensitive children in the galaxy.<ref name="HH" />
| |
| | |
| While Skywalker and Tano were dispatched to protect Master Ropal, they were ultimately too late; Ropal was captured and died under torture, refusing to use the Force to help Bane unite the holocron and Kyber crystal. However, the Jedi believed that Bane himself was killed during the [[Battle of Devaron/Legends|Battle of Devaron]], though he later proved to have survived. Prior to faking his death, Bane was able to coerce Skywalker into uniting the holocron and memory crystal, and as such, the bounty hunter began collecting the Force-sensitive children on behalf of Sidious.<ref name="CargoofDoom">{{TCW|Cargo of Doom}}</ref>
| |
| | |
| Later, Yoda led Windu, Kenobi and Skywalker in using the Force to pinpoint which children would be targeted by Bane. Yoda sensed that a child on Rodia was in danger, as well as one on Naboo. However, when Master Windu asserted that a child from [[Glee Anselm/Legends|Glee Anselm]] was being targeted by Bane, Yoda revealed that the infant had already been claimed by the bounty hunter and that the dark side hid his fate. Kenobi proved unable to prevent Bane from capturing the Rodian, but Skywalker and his Padawan captured Bane when he ventured to Naboo.<ref name="CargoofDoom" />
| |
| | |
| Masters Kenobi and Windu then used Bane to relocate the stolen holocron, though the bounty hunter escaped in the process. However, even without Bane, Skywalker and his Padawan discovered a secret facility on [[Mustafar/Legends|Mustafar]] where the captured children were hidden, and ultimately rescued them.<ref name="CargoofDoom" />
| |
| | |
| ====The Zillo Beast====
| |
| [[File:ForceBarrier-ZBSB.png|thumb|right|200px|Yoda, Aayla Secura, and Anakin Skywalker fend off the toxin-bombs.]]
| |
| When Supreme Chancellor Palpatine discovered the [[Zillo Beast/Legends|Zillo Beast]] on [[Malastare/Legends|Malastare]] and ordered it brought to Coruscant for research, it promptly escaped and made a beeline for the Senate building, necessitating the interference of Yoda and the Jedi Order. Dismissing Mace Windu's suggestion to shoot the beast down with stun rays, Yoda and Aayla Secura clambered atop the beast's back, distracting it with their lightsabers to buy Republic forces time to rescue the shuttle in the creature's grasp with Palpatine, Anakin Skywalker, and Padmé Amidala inside. When all the shuttle's occupants were brought to safety, Yoda aided Secura and Skywalker in protecting the group from the toxin-bombs detonated to kill the beast.<ref name="The Zillo Beast Strikes Back">{{TCW|The Zillo Beast Strikes Back}}</ref>
| |
| | |
| ====Savage Opress====
| |
| {{Quote|A creature from the same species he is. From Dathomir.|Yoda assures Obi-Wan Kenobi that Savage Opress is not Darth Maul.|Witches of the Mist}}
| |
| Yoda and Mace Windu later showed Obi-Wan Kenobi footage of a recent [[Battle at the Temple of Eedit|massacre]] on [[Devaron/Legends|Devaron]], in which Jedi Master [[Halsey/Legends|Halsey]] and his Padawan [[Knox/Legends|Knox]] were brutally murdered by an [[Savage Opress/Legends|unknown assassin]]. The footage baffled Kenobi, for he believed he had killed the Sith Lord Darth Maul, but Yoda pointed out that it was a creature of the same species from Dathomir. Yoda tasked Kenobi with going to Dathomir to find this threat and defeat it.
| |
| | |
| ====Mortis communication====
| |
| The Jedi Council later received a mysterious transmission which was over two thousand years old. After the Council reviewed the ancient transmission, they dispatched Obi-Wan Kenobi, Anakin Skywalker and Ahsoka Tano to uncover if it was a Separatist trap. As a precaution, they sent a heavily armed fleet to accompany them.
| |
| | |
| When the trio returned, Yoda learned from Kenobi that they encountered three beings: the [[Father (Mortis)/Legends|Father]], [[Son/Legends|Son]] and [[Daughter/Legends|Daughter]], who resembled the [[Light side of the Force/Legends|light]] and dark sides of the Force.
| |
| | |
| ====Rescue of Even Piell====
| |
| Jedi Master and councilor [[Even Piell/Legends|Even Piell]] was taken [[Capture of Even Piell/Legends|prisoner]] by Separatist forces after he recovered the [[Nexus Route/Legends|Nexus Route]] coordinates, which were crucial to the war effort. As a result, the Jedi Council set up a [[Battle of Lola Sayu/Legends|rescue attempt]], with Obi-Wan Kenobi and Anakin Skywalker in charge. Ahsoka Tano also went along, disobeying orders to stay.
| |
| | |
| But the rescue attempt failed, and the team split up and later rejoined after their ship was destroyed. Yoda, Mace Windu, [[Saesee Tiin/Legends|Saesee Tiin]] and Plo Koon then set up a rescue mission for the team, with Koon, Tiin, Adi Gallia and Kit Fisto successfully extracting them; however, Piell lost his life.
| |
| | |
| With the coordinates in the hands of both Ahsoka Tano and Piell's Captain [[Wilhuff Tarkin/Legends|Wilhuff Tarkin]], Yoda decided to meet with Supreme Chancellor Palpatine, as Tano vowed to Piell to give it to the Council, while Tarkin vowed to give it to the Chancellor.
| |
| | |
| ====Padawan lost====
| |
| Ahsoka Tano vanished in a battle on the world of [[Felucia/Legends|Felucia]]. After some time, a ship piloted by bounty hunters [[Sugi (bounty hunter)/Legends|Sugi]] and [[Seripas/Legends|Seripas]] came to the Jedi Temple with a band of [[Wookiee/Legends|Wookiees]], and two Jedi younglings. Among them was Tano. Yoda and Mace Windu watched as Tano and Anakin Skywalker paid their mutual respects to each other in satisfaction.
| |
| | |
| ====Mon Calamari====
| |
| {{Quote|To the Gungans we must look.|Yoda finds reinforcements for their stranded allies.|Gungan Attack}}
| |
| Yoda and Mace Windu then made contact with Anakin Skywalker, [[Gial Ackbar/Legends|Gial Ackbar]] and Senator Amidala, who were on [[Dac]] to cool down tensions between the [[Mon Calamari/Legends|Mon Calamari]] and the Separatist-aligned [[Quarren/Legends|Quarren]]. When Kit Fisto and Ahsoka Tano went to aid their forces on the planet, they soon lost contact after the Republic was almost decimated by Separatist commander [[Riff Tamson/Legends|Riff Tamson]].
| |
| | |
| As a result of this, the Jedi held a special session to discuss how to proceed. Saesee Tiin suggested that they find a nearby underwater race with an army to aid their allies, and Obi-Wan Kenobi pointed out Naboo. Yoda then contacted the Gungan boss, [[Lyonie/Legends|Lyonie]], who dispatched [[Jar Jar Binks/Legends|Jar Jar Binks]] to lead the army to Mon Cala.
| |
| | |
| ====Aleen relief mission====
| |
| When several earthquakes struck the [[Aleena/Legends|Aleena]] world of [[Aleen/Legends|Aleen]], Commander [[CC-3636|Wolffe]] and his [[Wolfpack/Legends|team]] were sent to the planet with relief supplies as well as Senator Amidala's droids, [[C-3PO/Legends|C-3PO]] and [[R2-D2/Legends|R2-D2]]. Yoda also appeared in the transmission sent to Wolffe.
| |
| | |
| ====Rise of the Zygerrian Empire====
| |
| {{Dialogue|Plo Koon|What is it, Master?|Yoda|Slavery, a great tool it is for the rise of the Sith.|attr=Yoda ponders on the rise of the slavers|src=Kidnapped}}
| |
| Yoda then made contact with Governor [[Roshti/Legends|Roshti]] of planet [[Kiros/Legends|Kiros]] to warn him that he could not trust Dooku and the Separatist cause. Roshti said it was out of his hands, as the Separatists had already arrived. Yoda promised to send assistance, in the form of Anakin Skywalker, Obi-Wan Kenobi and Ahsoka Tano along with their forces.
| |
| | |
| Shortly after they won a [[Battle of Kiros/Legends|battle]] there, the three appeared in holographic form alongside Admiral [[Wullf Yularen/Legends|Wullf Yularen]], who reported that he ran a scan but found none of the [[Togruta/Legends|Togruta]] colonists—who were not even on the planet.
| |
| | |
| ====Kenobi's "demise"====
| |
| Criminal mastermind [[Moralo Eval/Legends|Moralo Eval]] hatched a scheme to abduct Supreme Chancellor Palpatine at the [[Festival of Light/Legends|Festival of Light]] on Naboo with the aid of Dooku and a cadre of bounty hunters. The Jedi tried to make a deal with Eval for information, to no avail, so devised their own plan to thwart the attack. Obi-Wan Kenobi would fake his death via assassination and pose as the killer to infiltrate Dooku's team and send them information about the attack.
| |
| | |
| When the deed was done, Yoda attended the [[Funeral of Obi-Wan Kenobi/Legends|mock funeral]] for Kenobi and later visited with Mace Windu as Kenobi underwent his facial transformation. Yoda and Windu received various communications from Kenobi, and later, he told Anakin Skywalker the truth about Kenobi's "demise." With the aid of Kenobi, Dooku fled, the Chancellor was rescued, and Eval, Cad Bane, [[Twazzi/Legends|Twazzi]] and [[Embo/Legends|Embo]] were apprehended in [[Theed/Legends|Theed]].
| |
| | |
| ====Return of Darth Maul====
| |
| {{Dialogue|Mace Windu|Master Yoda, if this is indeed Darth Maul, then his capture is far too important for Obi-Wan to handle alone.|Yoda|Not alone will Kenobi be; an unexpected ally he may have. Trust the Force we must.|attr=Mace Windu and Yoda discuss Kenobi's ability to defeat Darth Maul|src=Revenge (episode)}}
| |
| The Jedi later received a transmission that came from the Outer Rim world of [[Raydonia/Legends|Raydonia]]. To the horror of the Jedi, the person that sent the communication was the presumed dead Sith Lord Darth Maul, the one who murdered Qui-Gon Jinn eleven years before.
| |
| | |
| Maul said that if Kenobi did not face him, he would destroy the planet, after he [[Massacre on Raydonia/Legends|killed]] a group of people in the communication. Kenobi said that he could [[Skirmish above Raydonia/Legends|defeat]] Maul as he once did, and left for Raydonia. Mace Windu expressed his doubts about Kenobi's skill, but Yoda said he may gain an unexpected ally in his quest.
| |
| | |
| Kenobi returned, and the Jedi learned that Maul had teamed with his brother Savage Opress, the one that massacred the forces at Devaron. Many teams were sent to capture the two [[Nightbrothers/Legends|Nightbrothers]] on many worlds from [[Pleem's Nexus]], [[Yellowblade's Landing]], [[Paklan]] and [[Moorjhone]]. Each Jedi met their end to the two Sith's blades, [[Bruu Jun-Fan]], [[Ko Solok]], [[Grohto]], [[Judd]] and [[Salmara]] all lost their lives.
| |
| | |
| Kenobi and Adi Gallia soon tracked the two Sith from their last known location to [[Florrum/Legends|Florrum]]—where Master Gallia was killed. Yoda, Windu, Kenobi and Anakin Skywalker met with Supreme Chancellor Palpatine to inform him of Maul's return and his plans for the future, but the Chancellor dismissed it, believing that Kenobi took it too personally. Yoda reaffirmed this, but said that when they resurfaced, the Jedi would be swift.
| |
| | |
| ====Onderon====
| |
| Yoda attended a session of the Jedi Council when [[Onderon rebels/Legends|rebels]] [[Saw Gerrera/Legends|Saw Gerrera]] and [[Lux Bonteri/Legends|Lux Bonteri]] sent a transmission with a plea for assistance in the [[Battle of Onderon|rebellion]] against the Separatist droid army led by the corrupt ruler King [[Sanjay Rash/Legends|Sanjay Rash]], who ousted the [[Ramsis Dendup/Legends|previous monarch]].
| |
| | |
| The Council said that they would not intervene in their affairs as the planet made their intentions at the start of the war, but promised to send some of their own to train and advise them. Anakin Skywalker, Obi-Wan Kenobi, Ahsoka Tano and Captain [[CT-7567/Legends|Rex]] were sent.
| |
| | |
| ====The Gathering on Ilum====
| |
| [[File:The_Gathering.png|thumb|left|250px|Yoda, the initiates and Padawan Tano on Ilum]]
| |
| Yoda then traveled to Ilum, where he awaited Ahsoka Tano and a clan of initiates who were [[The Gathering (20 BBY)|deemed ready]] to construct their own lightsabers in the ancient ritual known as the Gathering. When Tano arrived with the younglings in the [[Ilum Temple|temple]] there, Yoda showed his own lightsaber and explained to them what they needed to do.
| |
| | |
| When the younglings went inside to find their own crystal, [[Petro/Legends|Petro]] was the first to come out, but Yoda was quick to point out his flaw for certainty and said that he found a crystal, but brought water to them—that is, a ''water'' crystal. He directed Petro back inside. The other younglings, [[Gungi/Legends|Gungi]], [[Byph/Legends|Byph]], [[Ganodi/Legends|Ganodi]], [[Katooni/Legends|Katooni]] and [[Zatt/Legends|Zatt]], each came out later. The students then went on to make their personal lightsabers.
| |
| | |
| ====Attack on the Jedi Temple====
| |
| [[File:Epguide520.png|thumb|right|250px|Yoda presided over the trial of Ahsoka Tano.]]
| |
| During the peak of the war, [[Barriss Offee/Legends|Barriss Offee]] with the help of [[Letta Turmond/Legends|Letta Turmond]] [[Bombing of the Jedi Temple Hangar|bombed the Jedi Temple]] on Coruscant. Yoda then ordered Anakin Skywalker and his Padawan Ahsoka Tano to return from [[Cato Neimoidia/Legends|Cato Neimoidia]] to help investigate, refusing to trust anyone who was in the temple during the bombing. Yoda's judgement was clouded, but he still guided the Jedi as the leader of the Council.<ref name="TCW:Sabotage">{{TCW|Sabotage (episode)|Sabotage}}</ref>
| |
| | |
| Turmond was captured by Skywalker and Tano. In prison, she requested Tano speak with her, saying Tano was the only one she could trust. When Turmond was strangled to death via the Force, and several clones were murdered by a lightsaber, Republic Admiral [[Wilhuff Tarkin/Legends|Wilhuff Tarkin]] accused Tano of being the mastermind responsible for the attack. When Tano escaped the prison, desperate to prove her innocence, Tarkin ordered her captured. This resulted in a manhunt led by Anakin Skywalker and Captain Rex, during which Tano lost her [[Lightsaber shoto|shoto]]-style lightsaber and escaped.<ref name="TCW:TJWKTM">{{TCW|The Jedi Who Knew Too Much}}</ref>
| |
| | |
| After Tano eluded her master and fled to the Underworld, Yoda ordered Skywalker and Plo Koon to track her down and bring her to the temple. Tano was quickly captured by Asajj Ventress, now a bounty hunter after having been betrayed by Dooku, who agreed to help the young Padawan in exchange for a pardon for Ventress' crimes as a Sith. Tano contacted Barriss Offee at the Jedi temple. Offee led Tano into a trap by telling her she could find evidence to prove her innocence by going to a warehouse on Level 1315. There, Offee jumped Ventress, stealing her lightsabers and mask. She attacked Tano, knocking her out in front of crates of [[Nano-droid/Legends|nano-droids]] and effectively framing her for the bombing.<ref name="TCW:TCAJ">{{TCW|To Catch a Jedi}}</ref>
| |
| | |
| Tano was eventually brought back to the temple, where Yoda reluctantly agreed to expel her from the Jedi Order and have her face a Republic military tribunal before the Senate. Yoda, Obi-Wan Kenobi, Plo Koon, and several other members of the Jedi Council were in the Senate Chambers when Skywalker brought Barriss Offee before the Chancellor, where she confessed to being responsible for the bombings and for framing Tano. In light of this revelation, Yoda and the rest of the Council personally invited Tano to rejoin the Order, but she refused and left. Yoda would regret the Council's decision and began to question the doctrine of the war.<ref name="TCW:The Wrong Jedi">{{TCW|The Wrong Jedi}}</ref>
| |
| | |
| ====Clone crisis====
| |
| [[File:Yoda_Speaking_To_The_Council.jpg|thumb|left|250px|Yoda speaks with the Council about Tup]]
| |
| Prior to the war, Darth Sidious and his apprentice, Darth Tyranus, secretly created the Clone Army with the assistance of an unsuspecting [[Sifo-Dyas/Legends|Sifo-Dyas]], who had seen visions of a conflict beforehand. When this was done, they had organic [[inhibitor chip]]s implanted in their brains. which caused the clones to do anything Palpatine told them to, in this case execute the Jedi. With one simple command, the clones would enter a trance-like state and perform whatever orders they were given.<ref name="TCW:Conspiracy">{{TCW|Conspiracy}}</ref>
| |
| | |
| During the [[Battle of Ringo Vinda/Legends|Battle of Ringo Vinda]], Clone Trooper [[CT-5385/Legends|Tup]] murdered Jedi Master [[Tiplar/Legends|Tiplar]] when his inhibitor chip was activated prematurely. Sidious ordered Tyranus to apprehend Tup to prevent the Jedi from discovering the truth. Tup was eventually sent to Kamino after Anakin Skywalker, Captain Rex, and [[Advanced Recon Commando/Legends|ARC trooper]] [[CT-5555/Legends|Fives]] were able to recover Tup from a Separatist Transport.<ref name="TCW:The Unknown">{{TCW|The Unknown}}</ref>
| |
| | |
| After escorting Tup to Kamino, Fives and Rex were greeted by Jedi Master [[Shaak Ti/Legends|Shaak Ti]], alongside the main developer of the clones, Kaminoan scientist [[Nala Se/Legends|Nala Se]]. Rex returned to Ringo Vinda while Fives remained on Kamino to undergo examination in case Fives had a similar situation. Disputes over the tests led to a debate. While Shaak Ti advised a brain scan, Nala Se suggested terminating the clone and performing an autopsy to isolate the case. Shaak Ti contacted the Jedi Temple where Yoda, alongside Obi-Wan Kenobi, decided Tup should be brought to the temple to be examined through the Force.<ref name="TCW:Conspiracy" />
| |
| | |
| What the Jedi were unaware of was that the Kaminoans knew of the inhibitor chips and were working with Count Dooku, who used his Sith name, Tyranus, to prevent the Jedi from making the connection. Dooku ordered that Tup be terminated and that the chip be sent to him to be looked at.<ref name="TCW:Conspiracy" />
| |
| | |
| Angry at Nala Se and Master Ti for their treatment of Tup, Fives escaped the medical center and embarked on his own plan. Fives faked leaving the planet, but stayed to try and save Tup and discover the truth. He and the [[Medical droid/Legends|medical droid]] [[AZI-345211896246498721347/Legends|AZI-3]] were able to perform a brain scan on Tup, where they learned of the inhibitor chips. Fives had the droid take the chip out of his and Tup's brains. Unfortunately, the already-weakened Tup died soon after the operation, whispering his last words to Fives.<ref name="TCW:Conspiracy" /> Fives blamed Nala Se for what happened to Tup. Suspecting the Kaminoans of treachery, and with the support of Master Ti, Fives insisted on presenting his evidence and the removed chips directly to Palpatine. Fives was eventually brought to Coruscant, at the request of Shaak Ti, where he was brought before the Chancellor. As the ship landed, Nala Se drugged Fives, causing him to act strange.<ref name="TCW:Fugitive">{{TCW|Fugitive}}</ref>
| |
| | |
| When Fives attempted to assassinate Palpatine, Yoda and the rest of the Jedi Council ordered Anakin Skywalker to investigate. Fives was killed in the end, and Yoda was ultimately told that the doctors had found another cause, and that a vaccination had been prepared, in case of a future incident.<ref name="TCW:Orders">{{TCW|Orders}}</ref>
| |
| | |
| ====Uncovering the truth====
| |
| {{Quote|Know now we do that guide the creation of the clones from the beginning, Dooku did. Hm, our enemy created an army for us."<br />"If this was known, public confidence in the war effort, the Jedi, and the Republic would vanish. There would be mass chaos."<br />"Cover up this discovery we must. No one, not even the Chancellor, may know. Valiant men the clones have proven to be. Saved my life and yours they have many times. Believe in them we must. Win the war swiftly we must, before our enemy's designs reach completion, whatever they may be.|Yoda and Mace Windu|The Lost One}}
| |
| Sometime later, the Jedi received a distress signal from a [[Desert moon of Oba Diah|moon]] near [[Oba Diah/Legends|Oba Diah]]. Plo Koon and Commander Wolffe, sent to investigate, found the remains of a shuttle and the lightsaber of Jedi Master Sifo-Dyas, who was killed sometime around the Battle of Naboo while dealing with a conflict on Felucia. Upon reviewing the temple archives, [[Jocasta Nu/Legends|Jocasta Nu]] and the Jedi found that the information had been sealed by order of the Supreme Chancellor. While sending Anakin Skywalker and Obi-Wan Kenobi to Felucia, Yoda went to speak with Chancellor Palpatine. The latter directed Yoda to Finis Valorum, who had been Supreme Chancellor when these events took place. Anakin and Obi-Wan attempted to communicate with the native tribe on Felucia, but were unable to understand them. They did learn, however, that a second Jedi had shown up with Sifo-Dyas.<ref name="TCW:TLO">{{TCW|The Lost One}}</ref>
| |
| | |
| [[File:Valorum_Yoda_The_Lost_One.png|thumb|250px|Yoda meets with former Supreme Chancellor Finis Valorum on Coruscant.]]
| |
| Valorum told Yoda that he sent Sifo-Dyas to negotiate with the [[Pyke Syndicate/Legends|Pyke Syndicate]] to stop a booming drug trade underneath Coruscant. Valorum also revealed that he kept this secret, fearing his opponents in the bureaucracy. The talks were postponed after the Council sent Sifo-Dyas to intervene on Felucia. Valorum was unable to identify the second Jedi, but did say that his assistant, [[Silman/Legends|Silman]], was with Sifo-Dyas when he was shot down.<ref name="TCW:TLO" />
| |
| | |
| Eventually, Yoda dispatched Anakin and Obi-Wan to Oba Diah, where they learned the Pykes were paid to shoot down the ship carrying Sifo-Dyas, but had kept Silman captive as leverage and that Dooku was in fact the individual known as Tyranus, leading them to realize Dooku impersonated Sifo-Dyas to help push forward the Clone Wars. Yoda, not knowing how to stop the plot, suggested the Jedi keep the discovery a secret, and that they should keep playing the Sith Lord's game.<ref name="TCW:TLO" />
| |
| | |
| ====Discovering immortality====
| |
| [[File:YodaHearsQui-Gon.png|thumb|left|250px|Yoda hears the voice of Qui-Gon Jinn.]]
| |
| While meditating during the end of the war, Yoda heard the voice of Qui-Gon Jinn, who demonstrated his presence by levitating Yoda. The encounter left Yoda distracted during the subsequent Council gathering, leaving them worried about whether the stresses of the war were finally taking its toll on him. While strolling through the Temple gardens, Yoda was greeted by Anakin. Yoda asked him about his encounter with Qui-Gon's spirit on [[Mortis/Legends|Mortis]], which Anakin had dismissed as a trick, noting the Jedi belief that one could not retain their identity after becoming one with the Force. Yoda responded that he now questioned this dogma.<ref name="TCW:Voices">{{TCW|Voices}}</ref>
| |
| | |
| Yoda confessed what happened to the Council, much to their disbelief. They agreed though to meditate with him, to verify his experience. Despite meditating together for an entire day, they were unable to hear anything. [[Ki-Adi-Mundi/Legends|Ki-Adi Mundi]] expressed worry that Yoda had become susceptible to Sith manipulation, so Yoda underwent medical tests that revealed that he was still in good health. Jedi Doctor [[Rig Nema/Legends|Rig Nema]] suggested Yoda undergo a [[Deprivation ritual/Legends|deprivation ritual]] that would allow him to meditate more strongly and find the source of the voice.<ref name="TCW:Voices" />
| |
| | |
| Agreeing, Yoda was suspended in a liquid tank with an [[Breath mask/Legends|oxygen mask]] to bring him as close as possible to death without actually becoming one with the Force. While unconscious, Qui-Gon's voice requested Yoda go to [[Dagobah/Legends|Dagobah]], and to tell no one about it. After, Obi-Wan broke open the tank due to his concern over Yoda's failing life signs.<ref name="TCW:Voices" />
| |
| | |
| Put on bedrest and under guard, Yoda convinced Anakin to help him escape by posing as simply accompanying each other for a walk. Guided to the Jedi Temple Hangar, Anakin lent Yoda his [[Astromech droid/Legends]] R2-D2 to accompany him to his [[Eta-2 Actis-class interceptor|personal interceptor]]. Yoda and R2-D2 flew to Dagobah, where Yoda asked the droid to stay with their ship while he found a clearing to meditate.<ref name="TCW:Voices" />
| |
| | |
| [[File:YodaDagobahLight.png|thumb|250px|Yoda communes with Qui-Gon on Dagobah.]]
| |
| Qui-Gon's voice greeted him. Yoda asked why he could not see him. Qui-Gon explained he had not been fully trained enough to do so. The Living Force appeared to Yoda in the form of [[Firefly/Legends|fireflies]], guiding Yoda to a [[Dark Side Cave|cave]] strong with the dark side, it showed the Jedi Master a vision of the future, where a hooded Sith Lord slaughtered the Jedi. Qui-Gon explained to a distraught Yoda that he would help him bring hope for the future, and directed him to the planet that spawned the midi-chlorians.<ref name="TCW:Voices" /><ref name="TCW:Destiny">{{TCW|Destiny (episode)|Destiny}}</ref>
| |
| | |
| Arriving there, Yoda gave his lightsaber to R2-D2 for safekeeping, and descended into the world to meet the [[Force Priestesses/Legends|Force Priestesses]], who agreed to teach him how to achieve life after death. First, Yoda confronted a manifestation of his own dark side, conquering his hubris. Next, he witnessed a vision of the Jedi massacred in the Temple, where an apparition of Katooni invited him to enter a peaceful courtyard to escape these painful events. Seeing Qui-Gon, Kenobi, Ahsoka and Dooku together, alive and full Jedi, Yoda recognized the vision's falsehood, overcoming its temptation and his attachment to those that have fallen.<ref name="TCW:Destiny" />
| |
| | |
| [[File:EpGuide613.png|thumb|left|250px|Yoda sees the specter of Darth Bane.]]
| |
| Instructed to complete his tests on the Sith homeworld of [[Korriban|Moraband]], Yoda and R2-D2 [[Mission to Korriban (Clone Wars)|flew]] to the [[Valley of the Dark Lords/Legends|valley]] where the ancient Sith Lords were buried. Recognizing the danger, Yoda instructed R2-D2 to return to the Jedi Temple and inform the Council of what happened, if he did not come back after three nights. Spectres of a serpent, [[Zombie/Legends|undead]] Sith warriors and even [[Darth Bane/Legends|Darth Bane]] himself confronted him, but Yoda brushed them off. As he entered a temple execution chamber, the Force Priestesses warned Yoda that whatever he encountered there would be beyond their control.<ref name="TCW:Sacrifice">{{TCW|Sacrifice}}</ref>
| |
| | |
| Unknown to Yoda, Darth Sidious and Dooku sensed his presence on Moraband, and met in an abandoned tower in the industrial sector of Coruscant. Using Dooku and Yoda's [[Force bond]], Sidious planned to reach out to Yoda and crush his spirit. Appearing to Yoda in the form of Sifo-Dyas, Sidious had Yoda wake up in a [[Low Altitude Assault Transport/infantry/Legends|Republic attack gunship]] with Anakin and members of the [[501st Legion/Legends|501st Legion]], en route to terminate the Sith on Coruscant. As they arrived, the clones, led by Captain Rex, rushed at Dooku only to be hit with Sith lightning. Anakin immediately attacked Dooku while Sidious fled. Walking sadly past the fallen clones, a dismayed Yoda witnessed Anakin decapitate Dooku. However, he left Anakin and pursued Sidious.<ref name="TCW:Sacrifice" />
| |
| | |
| Emerging on a catwalk, Yoda and Sidious ignited their lightsabers and engaged in a fierce duel that took them further away from the industrial tower. Anakin eventually caught up with the pair, engaging Sidious in lightsaber combat alongside the Grand Master. Yoda was able to throw Sidious away from them with a Force push, but Anakin foolishly took the chance to attack Sidious while he was still on the ground. The Dark Lord rose to his feet and immediately proceeded to Force-choke Anakin before rendering him unconscious with Force lightning. Sidious then turned his lightning upon Yoda, who immediately began to deflect it with his bare hands by using tutaminis, advancing upon Sidious and closing the gap between them. Although both struggled with the effort of overcoming the other, Yoda was able to cause Sidious to begin to slowly reel backwards with the strength of his counterattack before the combination of their powers caused an explosion that blasted them apart. Sidious was sent toppling over the catwalk's banisters while Yoda was able to maintain his ground. Yoda immediately looked for a seemingly vanished Sidious only to witness the latter damaging the catwalk with his lightsaber from below. Yoda leapt after him, but Yoda's attention soon became divided between Force-lifting Anakin to save him from falling to his death and blocking Sidious' Sith lightning with his lightsaber. After Sidious taunted him by suggesting he sacrifice Anakin to concentrate on defeating him, Yoda put down his lightsaber to ensure Anakin's safety only to be hit with lightning. As the catwalk collapsed, Yoda maneuvered Anakin to safety and prevented Sidious escaping by severing the collapsing catwalk with his lightsaber, dragging Sidious down too. The incident proved Yoda's selflessness and demonstrated his resolve to Sidious, who concluded the illusion as he realized it would take more to defeat the Jedi Master.<ref name="TCW:Sacrifice" />
| |
| | |
| Yoda awoke and was greeted by a Priestess, who explained he would continue his training with Qui-Gon's spirit. As she disappeared in a glow of light, Yoda had a vision of the future, including his own death.<ref>{{SW|url=series/clone-wars/sacrifice-episode-gallery|text=Sacrifice Episode Gallery}}</ref> Yoda returned to the Jedi Temple, where Windu and Kenobi greeted him in the garden. Yoda claimed his journey had been uneventful, but felt it had demonstrated the Jedi had been wrong to wage the war on the Republic's behalf.<ref name="TCW:Sacrifice" />
| |
| | |
| ====Vjun====
| |
| [[File:MissionToVjun.jpg|thumb|200px|Yoda during the [[Mission to Vjun (Clone Wars)|mission to Vjun]]]]
| |
| Near the end of the war, Yoda journeyed to the planet [[Vjun/Legends|Vjun]] after receiving a communication from Count Dooku, stating his intention to defect. Although Yoda was well aware of Dooku's treachery, he could not help but hope the count's plea was sincere, and that his former student was, at last, trying to find his way home.
| |
| | |
| Taking Jedi Masters [[Maks Leem]], [[Jai Maruk]], and their Padawans [[Whie Malreaux/Legends|Whie Malreaux]] and [[Tallisibeth Enwandung-Esterhazy]], Yoda traveled secretly to Vjun. However, along the way, Asajj Ventress tracked and captured the foursome, and unleashed new assassin droids. Killing Leem and Maruk, Ventress tried to destroy the [[Phindar Spaceport|space station]] to kill Yoda. The little green creature, using the help of his [[Palleus Chuff|media doppelgänger]], destroyed Ventress' [[Last Call (Ginivex-class)|ship]], allowing them to escape. Yoda rendezvoused with Dooku in [[Château Malreaux]] and confronted the Sith Lord over his choice to join the dark side. Dooku attempted to convert Yoda, but the Jedi Master easily pushed aside Dooku's hollow promises. Instead, Yoda tried to persuade Dooku to rejoin the Jedi Order, and it appeared his words had a profound effect on Dooku. The unexpected intervention of Obi-Wan Kenobi and Anakin Skywalker hardened Dooku's resolve, however, and Yoda was forced into a second duel with the count. Both Yoda and Dooku survived, but each left the confrontation with much on their minds.<ref name="Yoda: Dark Rendezvous" />
| |
| | |
| ====Argul====
| |
| When fierce [[Battle of Argul|fighting]] broke out on the planet [[Argul]], Yoda traveled to the world with a number of other Jedi, to help evacuate refugees from Argul's cities. However, there were not enough transports for the Jedi to evacuate all of the [[Argullian]]s, so Yoda left the planet, promising to return with more ships.<ref name="OtF">''[[Only the Force]]''</ref>
| |
| | |
| {{RPG}}
| |
| Yoda commandeered the [[Sullustan task force]] and returned to Argul with the fleet, using it to reinforce Republic forces on the planet. The task force quickly turned the tide of the battle in the favor of the Republic, and Yoda landed with the reinforcements, via a gunship. He then congratulated the surviving Jedi on the world, for their efforts during the battle.<ref name="OtF" />
| |
| {{Endgame}}
| |
| | |
| ====Bpfasshi Dark Jedi crisis====
| |
| Early in [[19 BBY/Legends|19 BBY]], Yoda led a Jedi task force to confront the [[Dark Jedi/Legends|Dark Jedi]] crisis on the planet [[Bpfassh]]. A group of [[Bpfasshi]] Dark Jedi were responsible for a rampage of terror and destruction throughout the [[Bpfassh system]] and, indeed, the entire [[Sluis sector/Legends|Sluis sector]]. The task force was able to stop the insurrection and quell the uprising.<ref name="Star Wars: Rebellion (video game)">[[Star Wars: Rebellion (video game)|''Star Wars: Rebellion'' video game]]</ref> Yoda then personally engaged the last of the Bpfasshi Dark Jedi, who survived the Jedi intervention and managed to escape, commandeering [[Jorj Car'das]]'s smuggling ship, in a duel that lasted a day and a half, before finally defeating him<ref name="VotF">''[[Vision of the Future]]''</ref>—or so it seemed. Mortally wounded, the fallen Bpfasshi Jedi made it to the swamp planet [[Dagobah/Legends|Dagobah]], where he died.<ref name="holocron">{{SWBoards|url=thread.jspa?messageID=14866609|thread=Holocron continuity database questions|user=[[Leland Chee|Tasty Taste]]|date=2006-05-25|time=01:27 PM|archiveurl=https://web.archive.org/web/20070104184209/ttp://forums.starwars.com/thread.jspa?messageID=14866609}}</ref> At the site of the Dark Jedi's death, a dark-side nexus was formed, becoming the Dark Side Cave.<ref name="HeirtotheEmpire">''[[Heir to the Empire]]''</ref> | | Early in [[19 BBY/Legends|19 BBY]], Yoda led a Jedi task force to confront the [[Dark Jedi/Legends|Dark Jedi]] crisis on the planet [[Bpfassh]]. A group of [[Bpfasshi]] Dark Jedi were responsible for a rampage of terror and destruction throughout the [[Bpfassh system]] and, indeed, the entire [[Sluis sector/Legends|Sluis sector]]. The task force was able to stop the insurrection and quell the uprising.<ref name="Star Wars: Rebellion (video game)">[[Star Wars: Rebellion (video game)|''Star Wars: Rebellion'' video game]]</ref> Yoda then personally engaged the last of the Bpfasshi Dark Jedi, who survived the Jedi intervention and managed to escape, commandeering [[Jorj Car'das]]'s smuggling ship, in a duel that lasted a day and a half, before finally defeating him<ref name="VotF">''[[Vision of the Future]]''</ref>—or so it seemed. Mortally wounded, the fallen Bpfasshi Jedi made it to the swamp planet [[Dagobah/Legends|Dagobah]], where he died.<ref name="holocron">{{SWBoards|url=thread.jspa?messageID=14866609|thread=Holocron continuity database questions|user=[[Leland Chee|Tasty Taste]]|date=2006-05-25|time=01:27 PM|archiveurl=https://web.archive.org/web/20070104184209/ttp://forums.starwars.com/thread.jspa?messageID=14866609}}</ref> At the site of the Dark Jedi's death, a dark-side nexus was formed, becoming the Dark Side Cave.<ref name="HeirtotheEmpire">''[[Heir to the Empire]]''</ref> |
|
| |
|
| ===Rise of the Sith Lords===
| |
| ====Battle of Coruscant====
| |
| {{Quote|Strange is the enemy's strategy.''"<br />"''A massive invasion but no attempt to take the temple or senate.''"<br />"''Unless an elaborate distraction.''"<br />"''To hide their primary objective.''"<br />"''Palpatine!|Yoda and [[Mace Windu/Legends|Mace Windu]]|Clone Wars Chapter 25}}
| |
| Despite these dark sojourns, Yoda largely remained on Coruscant and coordinated the war effort on behalf of the Jedi. He did, however, journey to [[Cato Neimoidia/Legends|Cato Neimoidia]] shortly before the [[Battle of Coruscant/Legends|Battle of Coruscant]] to investigate the discovery of Nute Gunray's [[Mechno-chair/Legends|mechno-chair]].<ref name="Labyrinth of Evil">''[[Labyrinth of Evil]]''</ref>
| |
|
| |
| During the Battle of Coruscant, Yoda again rode his kybuck into battle, to support the forces of [[ARC-77|Captain Fordo]] with a dazzling display of [[mounted lightsaber combat]]. He eventually sent the creature back to the Temple, and continued to fight, side by side with Mace Windu, on foot.<ref name="Star Wars: Clone Wars" />
| |
| [[File:YodaMaceCoruscant.jpg|thumb|left|200px|Yoda and Mace Windu realize [[Palpatine/Legends|who the Separatists are after]] during the attack on Coruscant.]]
| |
| Despite their efforts, the Jedi were unable to prevent the capture of Supreme Chancellor Palpatine by [[General/Legends|General]] [[Grievous/Legends|Grievous]], though Anakin Skywalker and Obi-Wan Kenobi later rescued him and killed Dooku in the process. With his hopes of converting his pupil back to the light dashed, Yoda set his focus on tracking down the last Sith Lord, though tensions between the Jedi High Council and the [[Office of the Supreme Chancellor]] were high.<ref name="Star Wars Episode III: Revenge of the Sith novelization">[[Star Wars: Episode III Revenge of the Sith (novelization)|''Star Wars'': Episode III ''Revenge of the Sith'' novelization]]</ref>
| |
|
| |
| In 19 BBY, Supreme Chancellor Palpatine appointed Anakin to the Jedi Council as his own representative. Again, the Council was hesitant about Skywalker's temperament but, in turn, acquiesced to the request. Yoda once more played a significant role in the young Jedi's ascension in the order, as they denied Anakin the rank of Jedi Master. During that discussion, the clones reported that the Wookiees were under attack, and Yoda, having once been the planet's [[Jedi Watchman/Legends|watchman]], decided to venture to Kashyyyk to assist them.<ref name="Star Wars Episode III: Revenge of the Sith" />
| |
|
| |
| ====Invasion of Kashyyyk====
| |
| {{Quote|I fear the dark cloud of the Sith shrouds us all.|Yoda|Clone Wars Chapter 20}}
| |
| [[File:Overlooking_the_Chaos.png|thumb|250px|Yoda observing the [[Battle of Kashyyyk/Legends|Battle of Kashyyyk]]]]
| |
| Yoda was quite skilled in the technique of [[battle meditation]] and would use this to some effect during the [[Battle of Kashyyyk/Legends|Battle of Kashyyyk]], assisting the Wookiees and clones as they fought the Separatist army.<ref name="The Hidden Enemy">''[[Star Wars: Republic: Hidden Enemy]]''</ref>
| |
|
| |
| While Yoda was on Kashyyyk, Palpatine, now revealed as Darth Sidious, ordered the clones to execute [[Order 66/Legends|Order 66]], which meant the extermination of all Jedi. Yoda sensed his Jedi brethren being killed all over the galaxy and, coming to the only logical conclusion for so many concurrent deaths of his fellow Jedi, he suddenly realized, in one horrible instant, that the clone troopers were responsible. Worst of all, before the attack began, he felt Anakin Skywalker's ascension into Sidious's new apprentice, Darth Vader. Despite being filled with grief, he was still able to defend himself, [[Sai cha/Legends|decapitating]] [[Clone trooper commander|Commander]] [[CC-1004/Legends|Gree]] and [[Unidentified clone scout trooper|his assistant]] with a single strike and stop the rest of [[9th Assault Corps/Legends|his former troops]] from assassinating him. With help from the Wookiees [[Chewbacca/Legends|Chewbacca]] and [[Tarfful/Legends|Tarfful]], Yoda, like fellow Jedi [[Quinlan Vos/Legends|Quinlan Vos]], survived and was able to escape to meet with another surviving Jedi Master, Obi-Wan Kenobi, and Senator Bail Organa of [[Alderaan/Legends|Alderaan]].
| |
|
| |
| ====Dark revelations====
| |
| {{Quote|In a dark place we find ourselves… and a little more knowledge might light our way.|Yoda|Star Wars: Episode III Revenge of the Sith}}
| |
| Yoda and Kenobi then [[Infiltration of the Jedi Temple|went]] to the conquered Jedi Temple so they could reconfigure the emanating signal that was drawing Jedi survivors back to Coruscant into a trap. They disabled the deadly beacon after cutting through several clone troopers, and saw the Temple littered with the bodies of fallen Jedi, including younglings, who had been slaughtered with a lightsaber.<ref name="Star Wars Episode III: Revenge of the Sith" />
| |
| [[File:Pg3_saber_bg.jpg|thumb|left|200px|Yoda fights his way into the [[Jedi Temple]], now in the hands of the [[Galactic Empire/Legends|Empire]].]]
| |
|
| |
| As Kenobi finished recalibrating the coded signal, he felt he must know who was responsible for the attack. Yoda, knowing that the revelation of Anakin's turn to the dark side would cause Kenobi pain, cautioned him before his fellow Master activated the security recordings. As they watched, they learned of Palpatine's Sith identity and that the Republic was now a [[Galactic Empire/Legends|Galactic Empire]]. They agreed that the two Sith Lords needed to be destroyed. Yoda would remain on Coruscant to confront the newly crowned Emperor Palpatine in the [[Senate Building]], while a deeply reluctant Kenobi would battle his former apprentice.<ref name="Star Wars Episode III: Revenge of the Sith" />
| |
|
| |
| ====Duel in the Senate====
| |
| {{Quote|I have waited a long time for this moment, my little green friend… at last, the Jedi are no more.''"<br />"''Not if anything to say about it, I have! […] At an end your rule is, and not short enough it was.|Darth Sidious and Yoda|Star Wars: Episode III Revenge of the Sith}}
| |
| As Sidious waited for word from his apprentice, Yoda entered the office. Quickly dispatching Sidious' guards by Force-pushing them into the wall, Yoda confronted the Sith Lord, who seemed surprised at his survival and attacked Yoda with Force lightning. Yoda quickly fought back with a [[Telekinesis/Legends|Force push]] that sent the Sith Lord across the room and into his chair, where he fell onto the ground in a crumpled heap. As Sidious tried to flee, Yoda jumped in front of him and pulled out his lightsaber. Sidious then drew his own lightsaber, and the duel began.<ref name="Star Wars Episode III: Revenge of the Sith" />
| |
|
| |
| [[File:YodaDuel.jpg|thumb|200px|Yoda and Darth Sidious [[Skirmish in the Senate|duel]] in the [[Grand Convocation Chamber]].]]
| |
| The [[Skirmish in the Senate|duel moved into the Senate]], where the two Force users engaged in a saber duel in the Chancellor's podium. The two at first stalemated each other, but Yoda ultimately started to gain the upper hand, pressuring Sidious by using his small size to easily avoid the latter's strikes and to nimbly navigate through the podium,<ref name="Star Wars Episode III: Revenge of the Sith" /> whereas Sidious was hampered by the podium's tight space. Not allowing a moment's rest for Sidious, Yoda flurried around the Sith with his centuries worth of lightsaber knowledge, hitting with pristine determination to end this here and now. Eventually, Yoda [[Sun djem/Legends|dislodged]] the Dark Lord's lightsaber from his grip.<ref name="ROTS junior novel">[[Star Wars Episode III: Revenge of the Sith (junior novelization)|''Star Wars Episode III: Revenge of the Sith'' junior novel]]</ref> After retreating to the surrounding Senate pods, Sidious changed tactics and began using the Force to hurl several Senate Hoverpods at him from above, forcing Yoda to concentrate on dodging the improvised projectiles instead of getting to Sidious's level. The [[Grand Master/Legends|Grand Master of the Jedi Order]] and the [[Dark Lord of the Sith/Legends|Dark Lord of the Sith]] were counterpoised.<ref name="Star Wars Episode III: Revenge of the Sith" />
| |
|
| |
| As the duel progressed, during a match between the embodiments of the light and the dark, that Yoda realized the Jedi had lost the war before it even started. In the last millennium, the Sith had changed and adapted, becoming a new entity; while the Jedi Order, under his leadership, spent the same time merely training to re-fight the ''last'' war. Moreso, he sensed that while he was weakening, Sidious was only growing stronger. Hence, Yoda realized that the longer the duel continued, the greater the gap between his power and Sidious' would become. For while both of them were elderly avatars of the dark and light side, Yoda was ancient at nearly 900 years while Sidious, still old, stood at the beginning of his 60s. If he was to win at all, he had to end the duel, and quickly.<ref name="Star Wars Episode III: Revenge of the Sith novelization" /> As Sidious continued his telekinetic assault, Yoda caught one of the Senate podiums and flung it back at Sidious, who leapt out of its path to a lower Senate pod. Yoda took the opportunity to engage the distracted Dark Lord at close quarters once again, but Sidious fired a torrent of Force lightning at Yoda. The attack tore Yoda's lightsaber from his hand, and the diminutive Jedi was forced to use tutaminis to withstand the Dark Lord's lightning.<ref name="Star Wars Episode III: Revenge of the Sith" /> As Sidious increased the power of his lightning and aimed his attack above Yoda's defense by elevating his body, Yoda began to falter. As Sidious intensified his attack further, the Jedi Master's vision pierced the veil of the dark side, and he was able to see a glimpse of the future. What he might have seen was unclear, but Yoda's vision certainly did reveal to him that, if the galaxy were ever to be free of the Sith, he had to remain alive.<ref name="Star Wars Episode III: Revenge of the Sith novelization" />
| |
|
| |
| Yoda's newfound hope gave him the strength to resist Sidious's might, and he quickly managed to [[Force deflection|coalesce]] the energy of Palpatine's lightning into a blue orb, slowly redirecting it back to an astounded Sidious, who was slowly being pushed back by the strength of Yoda's counterattack. But just as Yoda appeared to be on the brink of succeeding, the combination of both of their powers caused the orb to explode, and the blast blew them both apart, ending the battle. Both Masters were able to grasp the edge of nearby Senate pods, with Sidious barely managing to right himself and achieve the high ground. Yoda, however, was unable to maintain his grasp, and fell to the floor of the Senate Chamber. Realizing that any chance he had to defeat Sidious was gone with his stamina exhausted and his body battered, Yoda decided to flee and escaped through several service pipes, with his small size proving advantageous in this moment, and met up with Bail Organa, who hurried him away in [[XJ-2 airspeeder|his speeder]] as Yoda mused about his failure. The two left for the [[Asteroid/Legends|asteroid]] colony of [[Polis Massa/Legends|Polis Massa]].<ref name="Star Wars Episode III: Revenge of the Sith" />
| |
|
| |
| ===Exile ([[19 BBY/Legends|19 BBY]]–[[4 ABY/Legends|4 ABY]])===
| |
| {{Quote|Into exile I must go. Failed, I have.|Yoda to [[Bail Prestor Organa/Legends|Bail Prestor Organa]]|Star Wars: Episode III Revenge of the Sith}}
| |
| [[File:YodaLandsonDagobah.jpg|thumb|left|200px|Yoda surveys [[Dagobah/Legends|Dagobah]], his new home.]]
| |
| On Polis Massa, Yoda communed with the spirit of Qui-Gon Jinn, who agreed to train Yoda in secret [[Ancient Order of the Whills|Whill]] techniques he had learned after his death. He also regrouped with Kenobi, who had defeated but not killed Vader. Kenobi brought with him a badly injured Amidala, who was treated in Polis Massa. Although Amidala bore twins, Luke and [[Leia Organa Solo|Leia]], she died soon afterward. Yoda decided that the babies were strong in the Force.<ref name="Star Wars Episode III: Revenge of the Sith" />
| |
| When returning to the ''[[Sundered Heart]]'' with Bail Organa and reuniting with Obi-Wan Kenobi, he decided that Luke and Leia—the Skywalker children—should be hidden from Darth Vader and the Emperor in secret locations. Other than the ancient Jedi Master, only the Organas, the Lars, and Kenobi would know of their placement. He also told Obi-Wan that an old friend, Master Qui-Gon Jinn, had found the way to retain one's identity after death, a skill he would teach both of them. Yoda would play a role he had not taken on in centuries: that of an apprentice.<ref name="Star Wars Episode III: Revenge of the Sith novelization" />
| |
|
| |
| During the [[Great Jedi Purge/Legends|Great Jedi Purge]], Yoda stowed away aboard an automated Polis Massan–registered barge that was transporting grain to starving inhabitants of the ex-Separatist world of [[Sluis Van/Legends|Sluis Van]]. The ship briefly dropped out of hyperspace near the planet Dagobah. Undetected and unrecorded, Yoda launched [[E3-standard starship lifeboat/Legends|his escape pod]] and landed on the swamp planet. He would spend his entire exile hiding on Dagobah, from the onset of the [[Imperial Period|Dark Times]] to the early period of the [[Galactic Civil War/Legends|Galactic Civil War]].<ref name="e3lifeboatdatabank">{{DB|starship|yodaescapepod|Yoda's escape pod|archivedate=20100306102647}}</ref>
| |
| [[File:TheCave-SWGs7.jpg|thumb|180px|Yoda experiences a vision of Darth Sidious in the Dark Side Cave]] | | [[File:TheCave-SWGs7.jpg|thumb|180px|Yoda experiences a vision of Darth Sidious in the Dark Side Cave]] |
| Yoda soon found and healed the badly wounded smuggler Jorj Car'das, who had been wounded by a survivor of the Bpfasshi Dark Jedi insurrection.<ref name="VotF" /> After a revived Car'das left Dagobah, Yoda made [[Yoda's hut|his home]] near the Dark Side Cave, which, in addition to the massive number of lifeforms (which masked his presence in the Living Force), counteracted his presence in the light side. Yoda's imprint on the Force was hidden, as was his sanctuary from the Emperor's sinister agents.<ref name="HeirtotheEmpire" /> Moreover, Dagobah was one of the thirty-seven planets erased from the Jedi Archives, further ensuring his anonymity. | | Yoda soon found and healed the badly wounded smuggler Jorj Car'das, who had been wounded by a survivor of the Bpfasshi Dark Jedi insurrection.<ref name="VotF" /> After a revived Car'das left Dagobah, Yoda made [[Yoda's hut|his home]] near the Dark Side Cave, which, in addition to the massive number of lifeforms (which masked his presence in the Living Force), counteracted his presence in the light side. Yoda's imprint on the Force was hidden, as was his sanctuary from the Emperor's sinister agents.<ref name="HeirtotheEmpire" /> Moreover, Dagobah was one of the thirty-seven planets erased from the Jedi Archives, further ensuring his anonymity. |
| Line 408: |
Line 45: |
| At some point, he encountered [[the Children]], a group of cannibals whose parents had been part of a Republic survey team that became stranded on the planet decades earlier. For some reason, the Children became extremely afraid of him and called him the "Imp."<ref name="Galaxy of Fear: The Hunger">''[[Galaxy of Fear: The Hunger]]''</ref> | | At some point, he encountered [[the Children]], a group of cannibals whose parents had been part of a Republic survey team that became stranded on the planet decades earlier. For some reason, the Children became extremely afraid of him and called him the "Imp."<ref name="Galaxy of Fear: The Hunger">''[[Galaxy of Fear: The Hunger]]''</ref> |
|
| |
|
| Shortly afterward, [[Qu Rahn]], another Jedi who survived both Order 66 and its aftermath, went to Dagobah and was taught many skills by the old master. Before the [[Battle of Hoth/Legends|Battle of Hoth]], [[Tash Arranda/Legends|Tash]] and [[Zak Arranda/Legends|Zak Arranda]] also encountered Yoda.<ref name="Galaxy of Fear: The Hunger" /> It was during these years that the diminutive being developed a taste for [[Rootleaf stew/Legends|rootleaf stew]]. | | Shortly afterward, [[Qu Rahn]], another Jedi who survived the [[Great Jedi Purge/Legends|Jedi Purge]], went to Dagobah and was taught many skills by the old master. Before the [[Battle of Hoth/Legends|Battle of Hoth]], [[Tash Arranda/Legends|Tash]] and [[Zak Arranda/Legends|Zak Arranda]] also encountered Yoda.<ref name="Galaxy of Fear: The Hunger" /> It was during these years that the diminutive being developed a taste for [[Rootleaf stew/Legends|rootleaf stew]]. |
| | |
| When [[Subject 1138|Starkiller]], a clone of Darth Vader's deceased [[Galen Marek|secret apprentice]], traveled to Dagobah to meditate, he discovered the entrance to a cave. Before entering, Starkiller met Yoda, although he was oblivious to the diminutive creature's identity. Despite his vague comments, Yoda assured the clone that his path clearly brought him to the cave and venturing inside would yield some answers for him. After Starkiller exited the cave, Yoda told him that he had to follow his destiny, to which the clone said he would follow it to the ends of the galaxy.
| |
| [[File:Yoda_2014_NationalChampionship_PrizeCard.png|thumb|left|200px|Yoda practices his lightsaber skills in exile on Dagobah.]]
| |
| By this time, Emperor Palpatine increased the bounty on Yoda by a further 30,000 [[Galactic Credit Standard|credits]].<ref>[[Star Wars: The Force Unleashed II]], [[PlayStation 3|PS3]]/[[Xbox 360]] Yoda Databank entry</ref> Due to multiple attempts at collecting the reward through fraud, the Empire had to modify the conditions so that no one else would be tempted to cheat the Empire. First, the reward was only good for a living subject. Second, a non-negotiable death penalty was attached to the bounty and would be enforced on anyone who tried to collect the reward by handing over a "false Yoda." The Empire also used the fate of [[Bounty hunter/Legends|bounty hunter]] [[Rurrk Ca'rivv]] to remind others that Imperial authorities were quite capable of telling the difference between a Jedi Master of advanced age and a dead [[Jawa/Legends|Jawa]] stripped of his clothing and surgically altered, noting the smell as the first and most obvious sign of deception. Shortly thereafter, Yoda was listed one of eight of the Empire's most wanted criminals, alongside Alderaanian [[Prince/Legends|Princess]] Leia Organa, former Mon Calamari senator [[Meena Tills/Legends|Meena Tills]], and Obi-Wan Kenobi, of which they were often issued in recruitment videos for stormtroopers and the Imperial Army.<ref name="Be a Stormtrooper: part 1">{{Youtube|8GuG6YOcDNU|TDL : New STAR TOURS【BE A STORMTROOPER】. 新・スター・ツアーズ【さあ、ストームトルーパーになろう!】|channel/UCzKgCU4TYHyfdOkwBFxtkuQ|couperin9||archivedate=20210419074436}}
| |
| </ref>
| |
|
| |
|
| One day around [[0 BBY/Legends|0 BBY]], Jorj Car'das suddenly showed up once more on Dagobah, violently demanding that Yoda put his failing health right. Yoda simply took his blaster and the [[Beckon call/Legends|beckon call]] from his ship and flung them into the swamp, then berated Car'das for wasting the second chance he had been given. He also told Car'das that he couldn't help him any further, since he was busy preparing for the most important training he would ever lead. Car'das became so embarrassed by his own actions that he couldn't return to his group, so he fled to [[Exocron]], where Yoda had indicated he might receive help from the [[Aing-Tii/Legends|Aing-Tii]] monks.<ref name="VotF" /> | | One day around [[0 BBY/Legends|0 BBY]], Jorj Car'das suddenly showed up once more on Dagobah, violently demanding that Yoda put his failing health right. Yoda simply took his blaster and the [[Beckon call/Legends|beckon call]] from his ship and flung them into the swamp, then berated Car'das for wasting the second chance he had been given. He also told Car'das that he couldn't help him any further, since he was busy preparing for the most important training he would ever lead. Car'das became so embarrassed by his own actions that he couldn't return to his group, so he fled to [[Exocron]], where Yoda had indicated he might receive help from the [[Aing-Tii/Legends|Aing-Tii]] monks.<ref name="VotF" /> |
| At some point during his exile, Alliance historian Major [[Arhul Hextrophon/Legends|Arhul Hextrophon]] discovered Yoda's whereabouts and traveled to Dagobah to find him. Yoda originally intended to wipe his mind but in the end decided against it, since it was not the Jedi way to cause pain and suffering—in this case, through the loss of memory. Hextrophon was instead made to swear not to reveal his existence. He erased the records which led him to Yoda in the first place, and apart from keeping logs in his private journal, it is believed he kept his word.<ref name="The Movie Trilogy Sourcebook">''[[The Movie Trilogy Sourcebook]]''</ref> | | At some point during his exile, Alliance historian Major [[Arhul Hextrophon/Legends|Arhul Hextrophon]] discovered Yoda's whereabouts and traveled to Dagobah to find him. Yoda originally intended to wipe his mind but in the end decided against it, since it was not the Jedi way to cause pain and suffering—in this case, through the loss of memory. Hextrophon was instead made to swear not to reveal his existence. He erased the records which led him to Yoda in the first place, and apart from keeping logs in his private journal, it is believed he kept his word.<ref name="The Movie Trilogy Sourcebook">''[[The Movie Trilogy Sourcebook]]''</ref> |
|
| |
|
| ====The next Skywalker====
| | ===The next Skywalker=== |
| {{Quote|Try not. Do, or do not. There is no try.|Yoda to Luke Skywalker|audio=ThereIsNoTry-ESB.ogg|Star Wars: Episode V The Empire Strikes Back}} | | {{Quote|Try not. Do, or do not. There is no try.|Yoda to Luke Skywalker|audio=ThereIsNoTry-ESB.ogg|Star Wars: Episode V The Empire Strikes Back}} |
| [[File:Yodalukedagobah.png|thumb|right|250px|Yoda passes down his knowledge to Luke Skywalker.]] | | [[File:Yodalukedagobah.png|thumb|right|250px|Yoda passes down his knowledge to Luke Skywalker.]] |
| Line 424: |
Line 56: |
|
| |
|
| [[File:YodaTrainingLuke-TESB40.png|thumb|left|200px|Yoda training Skywalker in concentration.]] | | [[File:YodaTrainingLuke-TESB40.png|thumb|left|200px|Yoda training Skywalker in concentration.]] |
| The experienced Jedi Master expedited Luke Skywalker's Jedi training to fit in the limited time they could afford. At one point Yoda sent Luke Skywalker to fight the Dragonsnake King in order to humble the beast and casually reminisced with R2-D2 during the battle, before [[Telekinesis/Legends|using the Force]] to help the droid avoid harm and strike the beast with electricity--this was later shown to be a ploy by the old Grandmaster to ensure the beast would be dethroned as it was too large and powerful and had unbalanced the ecosystem.<ref name=":0">''[[Star Wars Adventures: Luke Skywalker and the Treasure of the Dragonsnakes|Star Wars Adventures: Luke Skywalker and the Dragonsnake Treasure]]''</ref> However, prior to finishing his instruction, Luke chose to leave Dagobah without completing his training in order to confront Darth Vader at [[Cloud City/Legends|Cloud City]] above [[Bespin/Legends|Bespin]] and save his friends. Yoda and the spirit of Obi-Wan Kenobi attempted to convince him to stay, thinking Luke ready to face neither Vader nor the revelation to come. Skywalker promised to come back in order to complete his training. Obi-Wan was concerned about this decision, telling Yoda that Luke was their last hope. Yoda quickly reminded Kenobi that hope still remained in the person of "another,"<ref name="Star Wars Episode V: The Empire Strikes Back" /> namely Leia Organa, Luke's sister.<ref name="Star Wars Episode VI: Return of the Jedi" />
| | Luke chose to leave Dagobah without completing his training in order to confront Darth Vader at [[Cloud City/Legends|Cloud City]] above [[Bespin/Legends|Bespin]] and save his friends. Yoda and the spirit of Obi-Wan Kenobi attempted to convince him to stay, thinking Luke ready to face neither Vader nor the revelation to come. Skywalker promised to come back in order to complete his training. Obi-Wan was concerned about this decision, telling Yoda that Luke was their last hope. Yoda quickly reminded Kenobi that hope still remained in the person of "another,"<ref name="Star Wars Episode V: The Empire Strikes Back" /> namely Leia Organa, Luke's sister.<ref name="Star Wars Episode VI: Return of the Jedi" /> |
| | |
| Afterwards, Yoda reflected on the events that led to that point. Although he knew that the Jedi Council was all but gone, and that his own age meant he would soon die, he nonetheless was still a Jedi Master, and even during the Dark Times, he believed the struggle would continue, with droids and aliens such as R2-D2 and Chewbacca, respectively, fighting the Empire. He also noted that Leia Organa, one of the leaders of the Rebel Alliance, resembled her mother, Padmé Amidala, and noted that an imprint on the parent was always strong. However, he grew concerned regarding Luke and Vader, noting that the imprint was not always a good path, and that Luke could become an agent of evil should he follow the same path as his father. But he also noted that Luke was both strong and good-hearted, which might mean that not only would he not turn to the dark side, but also that Anakin Skywalker might be redeemed. He then proclaimed his faith in the light side and the return of the Jedi Knights.<ref name="Power of the Force">[[Star Wars: The Power of the Force (comic)|''Star Wars: The Power of the Force'' comic]]</ref>
| |
|
| |
|
| ====Death==== | | ====Death==== |
| Line 436: |
Line 66: |
|
| |
|
| ===Legacy=== | | ===Legacy=== |
| {{Quote|When you look at the dark side, careful you must be; For the dark side looks back.|Yoda to [[Whie Malreaux/Legends|Whie Malreaux]] and [[Tallisibeth Enwandung-Esterhazy]]|Yoda: Dark Rendezvous}}
| |
| [[File:JediGhosts-ROTJ.png|thumb|left|250px|Yoda as a Force ghost]] | | [[File:JediGhosts-ROTJ.png|thumb|left|250px|Yoda as a Force ghost]] |
| Doubtlessly, Yoda was one of the most gifted Force users in the history of the Jedi Order. Aside from his mastery of the Force, his most noticeable attributes were leadership and a very long lifespan. With almost a millennium of life, Yoda was able to establish himself as the most venerated Jedi Master throughout the entire Order—a status that would remain solely his for centuries until the fall of the Republic. As the reigning Grand Master for many centuries, Yoda had essentially become the "face" of the Jedi. As [[Etain Tur-Mukan]] mused, "Yoda was the Jedi Order," making it impossible to criticize him without sounding blasphemous. | | Doubtlessly, Yoda was one of the most gifted Force users in the history of the Jedi Order. Aside from his mastery of the Force, his most noticeable attributes were leadership and a very long lifespan. With almost a millennium of life, Yoda was able to establish himself as the most venerated Jedi Master throughout the entire Order—a status that would remain solely his for centuries until the fall of the Republic. |
| | |
| Ironically, in this regard, Yoda had more in common with his Sith counterpart, Palpatine (Darth Sidious), than he realized. As Chancellor Palpatine was regarded as the vital and infallible leader of the Galactic Republic, so too was Master Yoda the vital and infallible leader of the Jedi Order. Thus, neither Yoda or Palpatine could be criticized without their critics being automatically discredited and regarded with suspicion.
| |
|
| |
|
| After his death at the age of 900, Yoda retained his individuality in the Force. As a so-called Force ghost, he would look down on Leia and the Solo twins when they were born. His teachings would become the basis for what Luke taught his [[New Jedi Order]]. Since Yoda's teachings to Luke were rushed, most teachings of the Jedi Order were lost until the New Jedi Order began to find ancient holocrons, or, in some cases, libraries like the one on [[Ossus/Legends|Ossus]]. | | After his death at the age of 900, Yoda retained his individuality in the Force. As a so-called Force ghost, he would look down on Leia and the Solo twins when they were born. His teachings would become the basis for what Luke taught his [[New Jedi Order]]. Since Yoda's teachings to Luke were rushed, most teachings of the Jedi Order were lost until the New Jedi Order began to find ancient holocrons, or, in some cases, libraries like the one on [[Ossus/Legends|Ossus]]. |
|
| |
| Yoda later informed Luke of the history of The Ones and their encounter with Obi-Wan and Anakin Skywalker during the Clone Wars, at some point during their pursuit of Abeloth.<ref name="Apocalypse">[[Fate of the Jedi: Apocalypse]]</ref>
| |
|
| |
|
| ==Personality and traits== | | ==Personality and traits== |
| {{Quote|To be Jedi is to face the truth, and choose. Give off light, or darkness, Padawan. Be a candle, or the night, Padawan: but choose!|Yoda, to Whie Malreaux|Yoda: Dark Rendezvous}}
| |
| [[File:Yoda_naturist.jpg|thumb|right|250px|Yoda, respecter of all life, holds a [[Neebray/Legends|neebray]] on his hand.]] | | [[File:Yoda_naturist.jpg|thumb|right|250px|Yoda, respecter of all life, holds a [[Neebray/Legends|neebray]] on his hand.]] |
| Yoda was the personification of what it meant to be a Jedi and a servant of the Jedi ideals. Yoda was the best equipped to guide the Jedi order. To his students, the elfin luminary Yoda could appear as either very strict or like a grandfatherly figure, testing them to mental and physical extremes one moment and showing warmth the next. Students often strongly disagreed with him at first, but gradually came to understand his attitudes. He believed strongly in the need to heed the insights of the Unifying Force,<ref>''[[Star Wars Roleplaying Game Core Rulebook]]''</ref> though he rejected the theory<ref>''[[The New Jedi Order: Traitor]]''</ref> the Force was essentially "grey."<ref name="Star Wars Episode III: Revenge of the Sith novelization" />
| |
|
| |
|
| Among his colleagues on the Jedi High Council, he was known to have a penchant for mischief and practical jokes. To all of the young Jedi, he was the humble Yoda, who offered enlightened leadership and epitomized the ideals of the Jedi Order; a grand master of that august body, he was widely known as a sage instructor.
| | Although Yoda was a strict and firm leader, he deeply cared for the Jedi Order and the light side. The Jedi Master had the deepest commitment to the Force and the teachings thereof.<ref name=":1">''[[The Star Wars Sourcebook]]'' </ref> |
| | |
| Although Yoda was a strict and firm leader, he deeply cared for the Jedi Order and the light side. The Jedi Master had the deepest commitment to the Force and the teachings thereof.<ref name=":1">''[[The Star Wars Sourcebook]]'' </ref> Yoda respected Wookiees.<ref name=":2">[[Star Wars: Episode III — Revenge of the Sith 3|''Star Wars: Episode III — Revenge of the Sith'' 3]]</ref> He was willing to sacrifice a chance to win and neutralize Dooku by saving Anakin and Kenobi when Dooku unleashed an attack that would have killed them. Yoda also greatly grieved Anakin Skywalker's fall and Order 66 killing almost all Jedi, to the point of falling to his knees. He was also willing to acknowledge whenever he was proven wrong, as shown by how he humbly apologized to Jinn—when the latter proved his unique wisdom was beneficial, as he had acquired the ability to retain identity—for having doubted him and acknowledged that he was a great Jedi.<ref>[[Star Wars: Episode III — Revenge of the Sith 4|''Star Wars: Episode III — Revenge of the Sith'' 4]]</ref> | |
|
| |
|
| Despite a body of evidence to the contrary, which included famous names such as [[Ulic Qel-Droma/Legends|Ulic Qel-Droma]], [[Oss Wilum]], and [[Revan/Legends|Revan]], Yoda was largely a traditionalist in his belief that a Jedi who was seduced by the dark side of the Force would be forever condemned to walk in darkness. During the Clone Wars, however, he originally believed that no Jedi was beyond redemption and forgiveness. Even after Count Dooku betrayed the Republic and the Jedi by committing numerous atrocities as the Sith Lord Darth Tyranus, Yoda once tried to persuade his former student to let go of the dark side and return to the ways of the Jedi, and very nearly succeeded in redeeming Dooku. Even as Quinlan Vos slipped further into the dark side's embrace, Yoda had faith that the disturbed young Jedi Master would find his way back to the light side of the Force; unlike Dooku, Vos vindicated Yoda's belief in redemption. | | Despite a body of evidence to the contrary, which included famous names such as [[Ulic Qel-Droma/Legends|Ulic Qel-Droma]], [[Oss Wilum]], and [[Revan/Legends|Revan]], Yoda was largely a traditionalist in his belief that a Jedi who was seduced by the dark side of the Force would be forever condemned to walk in darkness. During the Clone Wars, however, he originally believed that no Jedi was beyond redemption and forgiveness. Even after Count Dooku betrayed the Republic and the Jedi by committing numerous atrocities as the Sith Lord Darth Tyranus, Yoda once tried to persuade his former student to let go of the dark side and return to the ways of the Jedi, and very nearly succeeded in redeeming Dooku. Even as Quinlan Vos slipped further into the dark side's embrace, Yoda had faith that the disturbed young Jedi Master would find his way back to the light side of the Force; unlike Dooku, Vos vindicated Yoda's belief in redemption. |
| Line 461: |
Line 82: |
| Throughout his exile on Dagobah, the tyranny of the Empire and the Sith hunt for the Jedi during the [[Great Jedi Purge/Legends|Great Jedi Purge]] embittered Yoda to the point where he lost all faith in the idea of redemption. In his exile, Yoda held no interest in being involved with the rest of the galaxy, seeing himself as more of a watcher of the events which unfolded during the Empire's rule. Before his death, he warned Vader's son, Luke Skywalker, that "when a person falls to the dark side, their destiny would forever be dominated by darkness." | | Throughout his exile on Dagobah, the tyranny of the Empire and the Sith hunt for the Jedi during the [[Great Jedi Purge/Legends|Great Jedi Purge]] embittered Yoda to the point where he lost all faith in the idea of redemption. In his exile, Yoda held no interest in being involved with the rest of the galaxy, seeing himself as more of a watcher of the events which unfolded during the Empire's rule. Before his death, he warned Vader's son, Luke Skywalker, that "when a person falls to the dark side, their destiny would forever be dominated by darkness." |
|
| |
|
| Yoda spoke an unusual version of [[Galactic Basic Standard/Legends|Basic]]. He tended to place verbs (especially auxiliaries) after the object and subject (an object-subject-verb format). An example of Yoda's speech pattern: "When nine hundred years old you reach, look as good you will not."({{Audio|900YearsOld-ROTJ.ogg|Listen}}) Most agreed that this pattern of speech was convoluted, and while it seems as though others of his species (e.g. Yaddle) had the same penchant for rearranging sentences, not all of them did (e.g. [[Vandar Tokare]]). As suggested by [[Ben Skywalker]], he purposefully chose to speak like this so that people would have to listen attentively to what he said.<ref name="Backlash">''[[Fate of the Jedi: Backlash]]''</ref> | | Yoda spoke an unusual version of [[Galactic Basic Standard/Legends|Basic]]. He tended to place verbs (especially auxiliaries) after the object and subject (an object-subject-verb format). An example of Yoda's speech pattern: "When nine hundred years old you reach, look as good you will not."({{Audio|900YearsOld-ROTJ.ogg|Listen}}) |
| [[File:Yodascrest.svg|thumb|left|100px|[[Yoda's crest]]]] | | [[File:Yodascrest.svg|thumb|left|100px|[[Yoda's crest]]]] |
| Yoda walked with the aid of a cane later in life, although he was capable of throwing it aside and moving nimbly while using the Force.<ref name="Star Wars Episode II: Attack of the Clones" /> One of his canes was a gift from the Wookiees. His rare [[Gimer bush|gimer]] cane contained nutrients that could sustain him were he to chew on it. He also used a [[Power chair|hoverchair]] for moving around the Temple quickly and more efficiently.<ref name="Star Wars Episode II: Attack of the Clones" /> | | Yoda walked with the aid of a cane later in life. His rare [[Gimer bush|gimer]] cane contained nutrients that could sustain him were he to chew on it.{{Fact}} |
|
| |
|
| Another item unique to Master Yoda was a [[blissl]], an instrument similar to a pan flute, which he wore around his neck while on Dagobah. During the Clone Wars, he would often make use of a kybuck given to him by a [[Woolwarricca]] princess from Kashyyyk as a gift.<ref name="kybuckdatabank">{{DB|creature|kybuck|kybuck|archivedate=20110908154025}}</ref>
| |
| Yoda also had a unique [[Yoda's crest|crest]] that adorned his [[Yoda's quarters/Legends|quarters]]. | | Yoda also had a unique [[Yoda's crest|crest]] that adorned his [[Yoda's quarters/Legends|quarters]]. |
|
| |
| Yoda's origins were secretive and he never revealed his homeworld to anyone.<ref name="ultimateillustrated">''[[Star Wars: Attack of the Clones: The Ultimate Illustrated Guide]]''</ref>
| |
|
| |
| Yoda appeared to break with the then current Jedi tradition regarding feelings of love near the end of his life, as shown by how he told Luke that he should be glad his friends loved him.<ref name=":0" />
| |
|
| |
|
| ==Powers and abilities== | | ==Powers and abilities== |
| {{Quote|Help you I can. Yes, mmm.''"<br />"''I don't think so. I'm looking for a great warrior.''"<br />"''Oh! Great warrior. Wars not make one great.|Yoda and Luke Skywalker, meeting on Dagobah|Star Wars: Episode V The Empire Strikes Back}} | | {{Quote|Help you I can. Yes, mmm.''"<br />"''I don't think so. I'm looking for a great warrior.''"<br />"''Oh! Great warrior. Wars not make one great.|Yoda and Luke Skywalker, meeting on Dagobah|Star Wars: Episode V The Empire Strikes Back}} |
| Considered by many to be the greatest Jedi Master of the era, Yoda was one of the most skilled lightsaber duelists and users of the Force in the history of the galaxy. Yoda's powers awestruck even the Dark Jedi Beldorion, who grouped him among three elite Jedi Masters, along with Thon and Nomi Sunrider, who had lived several millennia earlier than him. Beldorion considered the trio to be truly great as they were prodigiously talented in the Force, specifically in the directing of pure light-side energies.<ref name="Planet of Twilight" /> Of all the Force users in the galaxy, only Darth Sidious, perhaps the most powerful Sith Lord of all time, rivaled Yoda's mastery of the Force and strength with a lightsaber.
| | Yoda's powers awestruck even the Dark Jedi Beldorion, who grouped him among three elite Jedi Masters, along with Thon and Nomi Sunrider, who had lived several millennia earlier than him. Beldorion considered the trio to be truly great as they were prodigiously talented in the Force, specifically in the directing of pure light-side energies.<ref name="Planet of Twilight" /> |
| | |
| ===Lightsaber training===
| |
| [[File:Air_yoda.jpg|thumb|200px|Yoda was extremely skilled with the [[Lightsaber/Legends|lightsaber]].]]
| |
| In addition to his immense connection to the Force, Yoda was amazingly skilled in [[Lightsaber combat/Legends|lightsaber combat]], one of the greatest duelists in history, and was widely acknowledged as being perhaps the greatest Jedi duelist and [[Swordmaster]] of his time despite being trained as a [[Jedi Consular]]. He was known to be the only Jedi who could best Mace Windu and [[Count of Serenno/Legends|Count]] Dooku. Although he did not often participate in direct combat, Yoda's impeccable swordsmanship remained as sharp as ever. In his duel with Dooku, who had became Darth Tyranus and improved his skill even further, Yoda held the upper hand throughout the majority of the fight and would have defeated him had Tyranus not fled. Another testament to Yoda's immense dueling skill was that not only was he able to fight on equal footing with Darth Sidious, but he was also even able to defeat and disarm the Dark Lord, a feat that only Luke Skywalker (while empowered by the might and meditation of his family) and Mace Windu were ever able to replicate.<ref name="ROTS junior novel" /> In fact, Sidious was confused and confounded by Yoda's speed and skill.<ref>''[[Star Wars: Jedi Battles]]''</ref> Overall, Yoda's mastery of lightsaber combat marks him as perhaps the greatest duelist of his time. Sidious himself, after having dueled Yoda, stated his belief that the Grandmaster would have "destroyed" Darth Vader if the young Sith had faced Yoda rather than Kenobi on Mustafar.<ref>''[[Dark Lord: The Rise of Darth Vader]]''</ref>
| |
| | |
| Yoda received intensive training in the use of all the seven forms of lightsaber combat and had achieved full mastery and knowledge of them all and all of their stances and techniques. Known to be the best lightsaber instructor in the Temple, he presumably was good enough with each form to decide which one fitted his student the most and instruct them how to use their specialized form effectively. His most preferred style was [[Form IV/Legends|Form IV]], which he particularly specialized at, as it allowed him to compensate for his limited reach and stature. Known to be the Order's greatest master of Ataru, his technique was said to consist of the pure basics of Ataru taken to their highest possible levels.<ref name="Fightsaber: Jedi Lightsaber Combat">''[[Fightsaber: Jedi Lightsaber Combat]]''</ref> Despite his advanced age and short stature, Yoda was still an exceptionally formidable duelist, displaying amazing speed and dexterity, leaping through the air and twirling as he battered at an opponent's defenses.<ref name="Labyrinth of Evil" /> Much of his lightsaber combat style relied on jumps and acrobatics, augmented by his mastery of [[Force valor]]. Despite the fact that Yoda's primary combat specialization was Ataru, his skill in the form was such that he was capable of effectively overcoming it's weaknesses with ease and demonstrated an extreme level of skill with regard to deflecting blaster bolts and could easily handle many opponents at once, evidenced by his easy victory over many clone troopers when he returned to the Jedi Temple during Order 66.<ref name="Star Wars: Clone Wars" /> In addition, Yoda at times applied his mastery of the other forms into his dueling style. He was known for having proficiently applied elements of Shii-Cho bladework and his outstanding deflection ability implied a superb level of skill in either Shien or Soresu.
| |
| | |
| However, in his later years, Yoda lost a great deal of his mobility, demonstrating a pronounced limp and depending on a cane to aid him in his everyday movements. This loss of mobility was due to the fact that, in his old age, Yoda suffered from debilitating arthritis.<ref name="Fightsaber: Jedi Lightsaber Combat" /> When possible, Yoda preferred to use a hoverchair rather than walk at all.<ref name="Star Wars Episode II: Attack of the Clones" /> His mastery of Force valor allowed him to overcome these physical infirmities, but due to the extremely taxing nature of the ability, he was only able to utilize it for a short time before tiring.<ref name="Star Wars Episode III: Revenge of the Sith novelization" /> Even when he trained Luke Skywalker, however, Yoda retained enough skill to effortlessly defeating his pupil with only a stick, in spite of Skywalker being armed with a lightsaber and employing a [[Telekinesis/Legends|saber throw]] against him--and only lost when he allowed Skywalker to seize his stick.<ref name=":0" />
| |
| | |
| Master Yoda carried a green-bladed [[Lightsaber shoto|shoto]], which, unlike most other lightsabers, possessed an ignition button that also acted as a clip. Yoda was one of the few Force-users, Jedi and Sith alike, who kept his trademark homespun<ref name="SWCE">''[[Star Wars Character Encyclopedia]]''</ref> robe on during combat, possibly because it was small enough not to hinder his movements.
| |
| | |
| Yoda was able to cave his way through a host of Spelunker probe droids, often moving faster than they could react or fire.<ref>''[[Clone Wars Chapter 15]]''</ref>
| |
| | |
| Yoda fought his way to safety through a squad of clones during [[Order 66/Legends|Order 66]].<ref name=":2" />
| |
|
| |
|
| ===Force powers=== | | ===Force powers=== |
| [[File:Yodaholdup.jpg|thumb|left|200px|Yoda demonstrates his ability to telekinetically move objects.]] | | [[File:Yodaholdup.jpg|thumb|left|200px|Yoda demonstrates his ability to telekinetically move objects.]] |
| Yoda, as befitting a centuries-old Jedi Grand Master, was extraordinarily powerful and skilled in the Force, one of the most powerful Force users in history—rivaling Darth Sidious—and was the greatest and strongest master of the Force among the Jedi of his time, surpassing even the potentially more powerful Anakin Skywalker, due to having far more experience in using it. Luke Skywalker considered Yoda's powers to be far beyond what Darth Vader was capable of, and felt Yoda was likewise much more powerful than he was in 9 ABY.<ref name="HeirtotheEmpire" /> His power in the Force was described as being "as light as the stars." His midi-chlorian count was also known to be the second highest in the history of the Jedi, surpassed only by the Chosen One Anakin Skywalker. His strength and mastery of the Force was great enough that he could easily defend himself against and dominate other powerful masters of the Force, as shown when he casually repelled all of Dooku's Force assaults despite the increase in power and skill Dooku had acquired from turning to the dark side. Yoda was so powerful and skilled in Force combat that he could effortlessly overpower highly skilled and armed adversaries using nothing but the Force, as evidenced with Asaji Ventress. Indeed, Yoda was the only one to have ever managed to single-handedly go up against Darth Sidious in Force combat and matched the Dark Lord to a draw, although he proved incapable of defeating him as they were evenly matched. His power and skill in the Force remained tremendous even as he continued to age and lost his former great mobility. Even the Dark Lords of the Sith Darth Tyranus and Darth Sidious acknowledged his Force power and mastery, with Darth Tyranus holding his former master's strength in the Force in high enough regard that he believed that should Yoda fall to the dark side, he would be so powerful that not even Sidious would be able to stand against him.<ref name="Yoda: Dark Rendezvous" /> | | Yoda, as befitting a centuries-old Jedi Master, was extraordinarily powerful and skilled in the Force. Luke Skywalker considered Yoda's powers to be far beyond what Darth Vader was capable of, and felt Yoda was likewise much more powerful than he was in 9 ABY.<ref name="HeirtotheEmpire" /> |
| | |
| Master Yoda was extremely skilled in the use of mind-related powers. He could cast [[Mind trick/Legends|mind tricks]] that were easily strong enough to effectively manipulate strong-willed individuals, such as [[Captain/Legends|Captain]] [[Gregar Typho/Legends|Typho]],<ref name="Star Wars: Clone Wars" /> and could easily delve deep into the minds of others to decipher their thoughts with great precision. Yoda's [[Telepathy/Legends|telepathic]] capabilities also allowed him to manipulate the memories of his targets.
| |
|
| |
|
| Yoda was also extraordinarily skilled in [[Telekinesis/Legends|telekinesis]]. He demonstrated on one occasion the ability to easily telekinetically lift and carry an [[T-65 X-wing starfighter/Legends|X-wing]], and during the Battle of Coruscant, he caused a pair of [[C-9979 landing craft/Legends|C-9979 landing craft]] to collide with each other on two occasions.<ref name="Star Wars: Clone Wars" /> In their duel on Geonosis, Yoda easily deflected every telekinetic assault from Darth Tyranus, who was a former Temple instructor of telekinesis. Yoda was able to catch Darth Sidious off guard with a Force-push that blasted Sidious away from him and later managed to stop a Senate Hoverpod that Sidious hurled at him from above, which he then proceeded to use the Force to throw back at him, an all the more impressive feat due to the fact that the pod was thrown upwards against gravity. He even could effortlessly toy with the very powerful Asajj Ventress, who was known to have defeated Kit Fisto and could hold her own against the likes of Mace Windu and Anakin Skywalker, using only telekinesis: he was able to easily send her flying, stop her strike in midair, and even go as far as to casually disarm her of her lightsabers with a simple gesture.<ref name="Ambush" /> A master practitioner of the Force Push and [[Telekinesis/Legends#Force Wave|Force Wave]] powers, Yoda used these abilities in conjunction with Mace Windu to blast away dozens of battle droids simultaneously during the Battle of Coruscant and also to raise an expansive force of Separatist battle droids into the air, ensuring that they would collide into the incoming airborne Separatist attack ships, which eliminated the two attack forces in one seamless stroke.<ref name="Star Wars: Clone Wars" /> Master Yoda was also adept at the saber throw, as demonstrated in his return to the Jedi Temple during the Great Jedi Purge.<ref name="Star Wars Episode III: Revenge of the Sith" /> | | Yoda was also extraordinarily skilled in [[Telekinesis/Legends|telekinesis]]. He demonstrated on one occasion the ability to easily telekinetically lift and carry an [[T-65 X-wing starfighter/Legends|X-wing]].<ref name="Star Wars Episode V: The Empire Strikes Back" /> |
|
| |
|
| Yoda also displayed considerable proficiency in the use of the defensive power of [[Tutaminis]], using it during his duel with Darth Tyranus to effortlessly absorb and redirect the Sith Lord's Force lightning with no effort. Despite being nearly overwhelmed by its power, Yoda was ultimately able to absorb Sidious's lightning, eventually managing to coalesce the energy of the Dark Lord's Force lightning into a blue orb between the two of them, which slowly redirected the lightning back onto an astounded Sidious and caused him to slowly reel backwards with the strength of Yoda's counterattack before the combination of both of their Force powers blasted the two of them apart. Yoda also was able to use [[Force valor|Force Valor]] to improve his physical attributes with the Force, and even after his exile was so strong in the Force that he was able to resist old age long enough to train Luke.<ref name="Star Wars Episode II: Attack of the Clones" /><ref name="The Movie Trilogy Sourcebook" /> However, despite his great power and skill as a warrior, Yoda was known to strongly dislike combat in general, and was even a bit disdainful of the idea that "greatness" could be achieved through martial prowess.<ref name="Star Wars Episode V: The Empire Strikes Back" />
| | After his exile was so strong in the Force that he was able to resist old age long enough to train Luke.<ref name="The Movie Trilogy Sourcebook" /> However, despite his great power and skill as a warrior, Yoda was known to strongly dislike combat in general, and was even a bit disdainful of the idea that "greatness" could be achieved through martial prowess.<ref name="Star Wars Episode V: The Empire Strikes Back" /> |
| [[File:Yodasforcedeflection.png|thumb|right|250px|Yoda could [[Tutaminis|absorb]] overpowering [[Force lightning/Legends|Force lightning]] with his bare hands.]]
| |
| Master Yoda was able to [[Force vision/Legends|foresee]] events with a great clarity, rivaling even that of Darth Sidious. In addition, Yoda had extremely strong [[Force sense/Legends|Force senses]], as he was able to quickly sense the deaths of almost all members of the Jedi Order and identify each one, while also sensing that Anakin Skywalker had turned to the dark side even all the way from Kashyyyk. Due to his training with Qui-Gon Jinn, Yoda acquired the power to retain his identity after becoming one with the Force.<ref name="Star Wars Episode III: Revenge of the Sith" /> He was also able to ponder matters of the dark and light sides of the Force with unparalleled clarity that surpassed all other Jedi of his time, even Mace Windu. He was the most skilled user of Force Empathy among the Jedi, exceeding even the renowned empathic abilities of Depa Billaba.<ref name="Power of the Jedi Sourcebook">''[[Power of the Jedi Sourcebook]]''</ref> He could sense intense feelings coming from others even from other planets, as he was able to sense the immense pain Anakin felt from the death of his mother while the latter was on Tatooine even though Yoda was on Coruscant and meditating. He also easily sensed the tension between Kenobi and Anakin when they pursued Dooku and was able to identify the cause as Padmé's fall from an LAAT gunship.
| |
|
| |
|
| Yoda was also quite proficient in the valued Force technique Battle Meditation, having even been able to determine the outcome of battles by lifting the morale of thousands of companions while simultaneously dampening the spirits of thousands of his opponents.<ref name="The Hidden Enemy" /> Yoda could enter a [[Serenity (trance)|trance state]], then when he emerged his ability to use the Force briefly was more focused.<ref name="Ambush" /> Moreover was able to summon the force power of [[Electric Judgment|Emerald Lightning]], such as when he fought Darth Sidious.<ref>''[[Star Wars: The Clone Wars: Who Are the Jedi?|Star Wars The Clone Wars: Who are the Jedi?]]''</ref><ref name="VotF" /><ref name="Star Wars Episode III: Revenge of the Sith novelization" /> In addition, Yoda could use [[Force harmony|Force Harmony]] to defend himself from Dark powers and even shatter powers already in effect—this ability became more effective if Yoda was able to join his power with that of other Jedi.<ref name="The Movie Trilogy Sourcebook" /> Yoda was believed by Luke to have, in 3 ABY, [[Ionize|used the Force to disable the sensors]] of the young Jedi's ship, then used the Force to guide the craft to where it needed to be.<ref name="HeirtotheEmpire" /> He was also capable of using it to inspire great amounts of hope while simultaneously eliminating feelings of doubt and despair from the spirit of others with a single touch, as he did to [[Inspire|saturate]] Palleus Chuff with feelings of hope and potential mission success while also completely dispersing his feelings of doubt and despair. Yoda was very proficient in the use of the Force to preserve life, having learned the use of many powers to heal himself and others,<ref name="The Movie Trilogy Sourcebook" /> and even keeping himself alive though sheer willpower until he trained Luke Skywalker, though just before he allowed himself to pass into the Force he admitted he was at the end of his strength due to the great power required for such a feat.<ref name="ROTJn" /> Upon his death, Yoda's body vanished as he became a [[Force ghost]].<ref name="ROTJn" />
| | In addition, Yoda could use [[Force harmony|Force Harmony]] to defend himself from Dark powers and even shatter powers already in effect—this ability became more effective if Yoda was able to join his power with that of other Jedi.<ref name="The Movie Trilogy Sourcebook" /> Yoda was believed by Luke to have, in 3 ABY, [[Ionize|used the Force to disable the sensors]] of the young Jedi's ship, then used the Force to guide the craft to where it needed to be.<ref name="HeirtotheEmpire" /> Yoda was very proficient in the use of the Force to preserve life, having learned the use of many powers to heal himself and others,<ref name="The Movie Trilogy Sourcebook" /> and even keeping himself alive though sheer willpower until he trained Luke Skywalker, though just before he allowed himself to pass into the Force he admitted he was at the end of his strength due to the great power required for such a feat.<ref name="ROTJn" /> Upon his death, Yoda's body vanished as he became a [[Force ghost]].<ref name="ROTJn" /> |
|
| |
|
| However, despite his advanced skill and power in the Force, he was only able to lift five of the seven [[Muntuur stones]] while in meditation once he passed his seven hundredth year.<ref name="The Jedi Path" /> Moreover, Yoda was aware of several [[Sith magic|Sith spells]]—though he did not use them, and understood the Dark Side powers to [[Telekinesis/Legends#Force Wound|kill with a touch]] or take [[Mind trick/Legends#Mind control|total control over a victim]], though again he is not known to actually used these Dark Side powers.<ref>[[Star Wars: The Clone Wars: Who Are the Jedi?|Star Wars: The Clone Wars: Who Are The Jedi?]]</ref><ref name="The Movie Trilogy Sourcebook" /> Yoda contemplated [[Memory rub|using the dark side to remove all memory of himself]] from a man, but ultimately decided that to do so would be wrong, and instead did what he felt the Force was guiding him to do and spared the historian.<ref name=":1" />
| | Yoda was aware of several [[Sith magic|Sith spells]]—though he did not use them, and understood the Dark Side powers to [[Telekinesis/Legends#Force Wound|kill with a touch]] or take [[Mind trick/Legends#Mind control|total control over a victim]], though again he is not known to actually used these Dark Side powers.<ref>[[Star Wars: The Clone Wars: Who Are the Jedi?|Star Wars: The Clone Wars: Who Are The Jedi?]]</ref><ref name="The Movie Trilogy Sourcebook" /> Yoda contemplated [[Memory rub|using the dark side to remove all memory of himself]] from a man, but ultimately decided that to do so would be wrong, and instead did what he felt the Force was guiding him to do and spared the historian.<ref name=":1" /> |
|
| |
|
| <br /> | | <br /> |
| Line 510: |
Line 108: |
| ===Other abilities=== | | ===Other abilities=== |
| [[File:Yoda_TCGBtS.png|thumb|left|220px|Yoda in his hut on Dagobah]] | | [[File:Yoda_TCGBtS.png|thumb|left|220px|Yoda in his hut on Dagobah]] |
| Unlike most other Jedi of his era, Master Yoda knew how to create Jedi holocrons. The diminutive Jedi Master created [[Yoda's holocron|at least one holocron]], through which he discussed various aspects of the [[Jedi Code/Legends|Jedi Code]]. This particular holocron was rescued by [[Jax Pavan]] during Vader's attack on the Jedi Temple.
| |
|
| |
|
| Yoda was known for being the wisest and smartest Jedi of his time. He was an exceptional strategist, being a great contributor to the highest level of Jedi strategy, and was also an exceptional diplomat comparable with the likes of Obi-Wan Kenobi and Mace Windu. As such, many of the sage's missions during the Clone Wars were diplomatic in nature, and he prevented many battles from occurring, though some, as in the case of his missions to Vjun and Rugosa, ultimately descended into battle.<ref name="Yoda: Dark Rendezvous" /><ref name="Ambush" /> Yoda later demonstrated his strategical aptitude by choosing Dagobah as his place of exile, using the strong dark-side presence around the cave representing the dark side to block the senses of Sidious and Vader.<ref name="HeirtotheEmpire" /> Yoda also came up with a plan to evade CIS fire when his ship was ambushed, ordering all escape pods to be launched so the droids would not know which one he was in.<ref name="Ambush" /> Despite at times offering help to others, he was able to avoid any confrontation with the Empire during his exile. | | Yoda demonstrated his strategical aptitude by choosing Dagobah as his place of exile, using the strong dark-side presence around the cave representing the dark side to block the senses of Sidious and Vader.<ref name="HeirtotheEmpire" /> |
|
| |
|
| Yoda was a very capable leader, as Mace Windu passed on the mantle of the Master of the Order to him, and he also at times led many attacks during the Clone Wars to victory. He also had enough strength to carry a box with a gigantic [[chaingun]], this weapon he used to destroy a droid army in order to save a [[Unidentified planet (Yoda's charge)|planet]].<ref>''[[A Stranger in Town]]''</ref> He was confidant that he could destroy the droid attack on the Wookiees.<ref>[[Star Wars: Episode III — Revenge of the Sith 2|''Star Wars: Episode III — Revenge of the Sith'' 2]]</ref> Sometime during his exile, he was able to craft a new lightsaber.<ref>''[[Star Wars: The Card Game]]''</ref>
| | Luke Skywalker felt the old master's stews tasted good.<ref name="HeirtotheEmpire" /> |
| | |
| Although Yoda usually had his soldiers handle the piloting, when required to personally pilot a ship, he proved surprisingly capable, as evidenced when he was forced to travel alone to Dagobah: he single-handedly flew a starfighter without fail, avoiding any damage while piloting it. He could even enhance his piloting skills using the Force, allowing him to safely reach the planet where the Force Priestesses were when Artoo and the instruments on the ship malfunctioned while in a small, glowing, golden nebula.<ref name="TCW:Voices" /><ref name="TCW:Destiny" /><ref name="TCW:Sacrifice" />
| |
| | |
| Yoda was perceptive with his physical senses as well as the Force, as shown when he was able to catch Luke Skywalker cheating during exercises.<ref name=":0" /> By his own admission, food Yoda prepared often tasted foul.<ref name=":0" /> However, Skywalker felt the old master's stews tasted good.<ref name="HeirtotheEmpire" />
| |
|
| |
|
| ==Behind the scenes== | | ==Behind the scenes== |
| [[File:Yodaold2.jpg|thumb|right|250px|The original Yoda puppet from [[Star Wars: Episode I The Phantom Menace|Episode I]]]]
| | Yoda was voiced by Muppeteer [[Frank Oz]] in the ''[[Star Wars]]'' films. In the [[original trilogy]], he was realized as a [[Wikipedia:Puppet|puppet]] (controlled by Oz). Yoda's appearance was originally designed by British makeup artist [[Stuart Freeborn]], who based Yoda's face partly on his own and partly on [[Wikipedia:Albert Einstein|Albert Einstein's]]. |
| [[File:TPMCGYoda.jpg|thumb|left|250px|A CG version of Yoda from Episode I was created as a test during the animation process for [[Star Wars: Episode III Revenge of the Sith|Episode III]].]]
| |
| Yoda was voiced by Muppeteer [[Frank Oz]] in the ''[[Star Wars]]'' films. In the [[original trilogy]] and [[Star Wars: Episode I The Phantom Menace|''The Phantom Menace'']], he was realized as a [[Wikipedia:Puppet|puppet]] (controlled by Oz). Yoda's appearance was originally designed by British makeup artist [[Stuart Freeborn]], who based Yoda's face partly on his own and partly on [[Wikipedia:Albert Einstein|Albert Einstein's]]. In ''The Phantom Menace'' the actor [[Warwick Davis]] played Yoda for scenes where the character was required to walk. Rendered with computer animation in [[Star Wars: Episode II Attack of the Clones|''Attack of the Clones'']] and [[Star Wars: Episode III Revenge of the Sith|''Revenge of the Sith'']], Yoda appeared in ways not previously possible, including his participation in elaborate fight scenes. However, Yoda's first appearance as a completely CG-rendered image was in ''The Phantom Menace'', at the close of the film where he talks with Obi-Wan about his and Anakin's futures. | |
|
| |
|
| For the radio dramatizations of ''The Empire Strikes Back'' and ''Return of the Jedi'', he was voiced by veteran character actor [[John Lithgow]]. [[Tom Kane]] provided Yoda's voice for both the [[Star Wars: Clone Wars|''Clone Wars'']] animated series and [[Star Wars: The Clone Wars|''The Clone Wars'']] 3D series, as well as many video-game incarnations: ''[[Star Wars: Episode I Jedi Power Battles]]'', ''[[Star Wars: Galactic Battlegrounds]]'', ''[[Star Wars: Super Bombad Racing]]'', ''[[Star Wars: Jedi Starfighter]]'', [[Star Wars: The Clone Wars (video game)|''Star Wars: The Clone Wars'']], ''[[Star Wars: Rogue Squadron III: Rebel Strike]]'', ''[[Star Wars: Battlefront]]'', ''[[Star Wars: Battlefront II]]'', ''[[Star Wars: Republic Commando]]'' and [[Star Wars Episode III: Revenge of the Sith (video game)|''Star Wars Episode III: Revenge of the Sith'']]. | | For the radio dramatizations of ''The Empire Strikes Back'' and ''Return of the Jedi'', he was voiced by veteran character actor [[John Lithgow]]. |
|
| |
|
| Along with a few substitute voice actors in the original trilogy, but from the second one onwards, Yoda is dubbed in Japanese by the late [[Wikipedia:Ichirō Nagai|Ichirō Nagai]]. By this proxy along with his and Darth Vader's appearance in [[Soulcalibur IV]], Nagai also provided Yoda's voice in the Japanese version of the game. | | Along with a few substitute voice actors in the original trilogy, but from the second one onwards, Yoda is dubbed in Japanese by the late [[Wikipedia:Ichirō Nagai|Ichirō Nagai]]. |
|
| |
|
| The depiction of the number of Yoda's toes is inconsistent between different films, alternately numbering three, four and five toes. [[Leland Chee]], keeper of the [[Holocron continuity database]], has stated that Yoda canonically has four toes—three in the front and one in the back.<ref name="Insider122AskLobot">{{InsiderCite|122|Ask Lobot}}</ref> For more, see the article on [[Yoda's species/Legends#Number of toes|Yoda's species]]. | | The depiction of the number of Yoda's toes is inconsistent between different films, alternately numbering three, four and five toes. [[Leland Chee]], keeper of the [[Holocron continuity database]], has stated that Yoda canonically has four toes—three in the front and one in the back.<ref name="Insider122AskLobot">{{InsiderCite|122|Ask Lobot}}</ref> For more, see the article on [[Yoda's species/Legends#Number of toes|Yoda's species]]. |
| Line 535: |
Line 126: |
| Producer/director [[Wikipedia:Mel Brooks|Mel Brooks]] lampooned Yoda in his 1987 movie ''[[w:c:spaceballs:Spaceballs|Spaceballs]]''. Brooks portrayed a diminutive character named [[w:c:spaceballs:Yogurt|Yogurt]], who specialized in manipulating a magical energy known as the [[w:c:spaceballs:The Schwartz|Schwartz]]. | | Producer/director [[Wikipedia:Mel Brooks|Mel Brooks]] lampooned Yoda in his 1987 movie ''[[w:c:spaceballs:Spaceballs|Spaceballs]]''. Brooks portrayed a diminutive character named [[w:c:spaceballs:Yogurt|Yogurt]], who specialized in manipulating a magical energy known as the [[w:c:spaceballs:The Schwartz|Schwartz]]. |
| [[w:c:muppet:Yoda Muppet|Yoda]] also made a cameo in ''[[Wikipedia:It's a Very Merry Muppet Christmas Movie|It's a Very Merry Muppet Christmas Movie]]'', voiced by [[W:c:Muppet:Eric Jacobson|Eric Jacobson]]. Jacobson took over many of Frank Oz's Muppet roles. | | [[w:c:muppet:Yoda Muppet|Yoda]] also made a cameo in ''[[Wikipedia:It's a Very Merry Muppet Christmas Movie|It's a Very Merry Muppet Christmas Movie]]'', voiced by [[W:c:Muppet:Eric Jacobson|Eric Jacobson]]. Jacobson took over many of Frank Oz's Muppet roles. |
|
| |
| Yoda also appears in a [[Wikipedia:Hip hop|hip-hop]] Yoda music video that can be accessed via the ''Revenge of the Sith'' DVD when you go to the Options menu, highlight the [[THX]] logo, press 11, wait for the pause, press 3, wait for the pause, and finally press 8.
| |
|
| |
| To get the animation team back in shape for their work on Episode III, Rob Coleman and his team replaced the footage of the Episode I Yoda puppet with their Episode III digital model as a test to see how far they could push his usual performance boundaries. This footage was released on the DVD, where it can be seen as part of "The Chosen One" featurette on Disc 2 of ''Revenge of the Sith''. The footage has since appeared in the Blu-ray release of ''The Phantom Menace'', replacing the puppet Yoda.
| |
|
| |
|
| Original concept art showed Yoda as blue instead of the green that he ended up being, and he is depicted as blue in ''The Empire Strikes Back'' novelization (published before the film of ''The Empire Strikes Back'') . In Marvel's [[Star Wars (1977) 42|''Star Wars'' (1977) 42]], Yoda also seems to be tinier than in his normal appearance. | | Original concept art showed Yoda as blue instead of the green that he ended up being, and he is depicted as blue in ''The Empire Strikes Back'' novelization (published before the film of ''The Empire Strikes Back'') . In Marvel's [[Star Wars (1977) 42|''Star Wars'' (1977) 42]], Yoda also seems to be tinier than in his normal appearance. |
| Line 548: |
Line 135: |
|
| |
|
| ''[[Heir to the Empire]]'' and ''[[Vision of the Future]]'' describes how Yoda followed a Dark Jedi from [[Bpfassh]] to Dagobah and killed him on the planet. After the [[Star Wars: Episode III Revenge of the Sith (novelization)|''Revenge of the Sith'' novelization]] (which hints that Yoda had never been on Dagobah before his exile) was published, it has been suggested the battle occurred shortly after the exile.<ref name="holocron" /> In [[Star Wars Insider 98|''Star Wars Insider'' 98]] [[Leland Chee]] wrote that the location of the battle is no longer considered part of continuity, but that it is possible that a mortally wounded Dark Jedi died on the planet after having fought Yoda elsewhere. However, this has not been confirmed. | | ''[[Heir to the Empire]]'' and ''[[Vision of the Future]]'' describes how Yoda followed a Dark Jedi from [[Bpfassh]] to Dagobah and killed him on the planet. After the [[Star Wars: Episode III Revenge of the Sith (novelization)|''Revenge of the Sith'' novelization]] (which hints that Yoda had never been on Dagobah before his exile) was published, it has been suggested the battle occurred shortly after the exile.<ref name="holocron" /> In [[Star Wars Insider 98|''Star Wars Insider'' 98]] [[Leland Chee]] wrote that the location of the battle is no longer considered part of continuity, but that it is possible that a mortally wounded Dark Jedi died on the planet after having fought Yoda elsewhere. However, this has not been confirmed. |
|
| |
| Yoda received an updated character model to look more accurate to his ''Revenge of the Sith'' appearance for [[The Clone Wars: Season Five]].
| |
|
| |
| In the ride ''[[Star Tours: The Adventures Continue]]'', Yoda was one of the characters helping the [[StarSpeeder 1000]] pilot safely deliver a Rebel spy to the [[Alliance to Restore the Republic/Legends|Rebel Alliance]]. However, as he was not known to have interacted with the Rebel Alliance during this time, it is unknown whether this is canon.
| |
|
| |
|
| In November 2013, a deleted scene for ''Return of the Jedi'' was found on the laserdisc edition of the film. The scene, taking place on Yoda's deathbed and presumably occurring when Luke learns Vader was indeed his father, had him revealing that Obi-Wan Kenobi would have told Luke about his paternal relation to Vader had Yoda let him, making clear that Yoda was largely the reason Kenobi hid the truth from Luke.<ref name="Kenobi redeemed">{{Cite_web|url=https://www.hollywoodreporter.com/heat-vision/deleted-jedi-line-redeemed-obi-653550|title=The Deleted 'Jedi' Line That Redeemed Obi-Wan Kenobi|author=McMillan, Graeme|date=2013-11-05|work=[[Wikipedia:The Hollywood Reporter|The Hollywood Reporter]]|archivedate=20210213232210}}</ref> | | In November 2013, a deleted scene for ''Return of the Jedi'' was found on the laserdisc edition of the film. The scene, taking place on Yoda's deathbed and presumably occurring when Luke learns Vader was indeed his father, had him revealing that Obi-Wan Kenobi would have told Luke about his paternal relation to Vader had Yoda let him, making clear that Yoda was largely the reason Kenobi hid the truth from Luke.<ref name="Kenobi redeemed">{{Cite_web|url=https://www.hollywoodreporter.com/heat-vision/deleted-jedi-line-redeemed-obi-653550|title=The Deleted 'Jedi' Line That Redeemed Obi-Wan Kenobi|author=McMillan, Graeme|date=2013-11-05|work=[[Wikipedia:The Hollywood Reporter|The Hollywood Reporter]]|archivedate=20210213232210}}</ref> |
|
| |
| [[File:Yodasign.png|thumb|150px|Yoda's signature in ''The Jedi Path'']]
| |
| Yoda's signature in [[The Jedi Path: A Manual for Students of the Force (real-life book)|''The Jedi Path'']] differs<ref name="The Jedi Path" /> from that of the 1980 Yoda postcard made by Frank Oz.<ref name="Yoda postcard">{{Lucasfilm|url=news/history-in-objects-a-postcard-from-yoda|text=History in Objects: A Postcard from Yoda|archivedate=20200811233216}}</ref>
| |
|
| |
| ===Non-canon appearances===
| |
| {{Quote|Sick and weak I have become, Elderly and tir'd, And yet, I ask thee: When nine hundred years thou hast, Shalt thou look better?|Yoda to Luke Skywalker|William Shakespeare's The Jedi Doth Return: Star Wars Part the Sixth}}
| |
|
| |
| [[File:Roan's_Imagined_Yoda.jpg|thumb|250px|A drawing by Roan Novachez of how he imagined Yoda would look]]
| |
| Official non-canon ''Star Wars'' works generally still portrayed Yoda as a wise and skilled Jedi Master, but often played up his more humorous traits.
| |
|
| |
| In [[Jeffrey Brown]]'s [[Jedi Academy (novel)|''Jedi Academy'']] books, Yoda is a top instructor at the [[Jedi academy]] on [[Coruscant/Legends|Coruscant]], but not the academy's principal. Approximately 700 years old, he provides students with important training on the deeper aspects of the Force, but sometimes says things that are humorous or downright strange. He almost always talks backwards and laughs a lot. [[Roan Novachez]], a student recruited to the academy at a relatively late age, was surprised by Yoda's appearance and nature and initially suspected that Yoda was teaching instead of being a full-time Jedi Knight because he was going kind of senile. Later in the series, Yoda became the personal Jedi Master to the [[Zabrak/Legends|Zabrak]] [[Padawan/Legends|Padawan]] [[Cyrus (Jedi Academy)|Cyrus]].
| |
|
| |
| In ''[[William Shakespeare's The Empire Striketh Back: Star Wars Part the Fifth]]'' and ''[[William Shakespeare's The Jedi Doth Return: Star Wars Part the Sixth]]'', Yoda is the only character to speak entirely in haiku.
| |
|
| |
| ''[[LEGO Star Wars: The Yoda Chronicles]]'' features Yoda and focuses on events seen in the prequel era.
| |
|
| |
| ===Clone Wars: Infinities: What if the Father never rescued Anakin from the dark side?===
| |
| After Anakin fell under the influence of the [[Son/Legends|Son]] from [[Mortis]], they both returned to the regular plane of the universe. Both Yoda and Palpatine sensed their arrival upon Coruscant. Because of this both Yoda and Palpatine called a temporary truce to stop Anakin, but Anakin proved too powerful for either of them and defeated them with relative ease. He then became even more powerful in the process, and proceeded to create a Force hurricane in the Senate building.<ref name="Star Wars: The Clone Wars Magazine 7">''[[Star Wars: The Clone Wars Magazine 7]]''</ref>
| |
|
| |
|
| ==Appearances== | | ==Appearances== |
| {{Scroll_box|content= | | {{Scroll_box|content= |
| [[File:Yoda_NEC.jpg|thumb|A portrait of Yoda]] | | [[File:Yoda_NEC.jpg|thumb|A portrait of Yoda]] |
| *[[Darth Plagueis (novel)|''Darth Plagueis'']]
| |
| *[[Darth Plagueis (audiobook)|''Darth Plagueis'' audiobook]]
| |
| *''[[Star Wars: Republic: Vow of Justice]]'' {{Flash}}
| |
| *{{Tales|13|Stones}} {{Mo}}
| |
| *{{Tales|5|Yaddle's Tale: The One Below}}
| |
| *{{Tales|13|The Secret of Tet-Ami}}
| |
| *{{Tales|13|Puzzle Peace}}
| |
| *''[[Jedi Apprentice: The Rising Force]]''
| |
| *''[[Jedi Apprentice: The Dark Rival]]'' {{Hologram}}
| |
| *''[[Jedi Apprentice: The Defenders of the Dead]]''
| |
| *''[[Jedi Apprentice: The Uncertain Path]]''
| |
| *''[[Jedi Apprentice: The Captive Temple]]''
| |
| *''[[Jedi Apprentice: The Fight for Truth]]''
| |
| *''[[Jedi Apprentice: The Shattered Peace]]'' {{Mo}}
| |
| *''[[Jedi Apprentice: The Deadly Hunter]]''
| |
| *''[[Jedi Apprentice: The Evil Experiment]]''
| |
| *''[[Jedi Apprentice: The Ties That Bind]]''
| |
| *''[[Jedi Apprentice: The Only Witness]]''
| |
| *''[[Jedi Apprentice Special Edition: Deceptions]]''
| |
| *''[[Jedi Apprentice Special Edition: The Followers]]''
| |
| *[[Qui-Gon and Obi-Wan: The Aurorient Express 1|''Qui-Gon and Obi-Wan: The Aurorient Express'' 1]] {{Mo}}
| |
| *[[Qui-Gon and Obi-Wan: Last Stand on Ord Mantell 1|''Qui-Gon and Obi-Wan: Last Stand on Ord Mantell'' 1]]
| |
| *''[[Jedi Council: Acts of War]]''
| |
| *[[Star Wars (1998) 2|''Star Wars'' (1998) 2]] {{Flash}}
| |
| *[[Star Wars (1998) 3|''Star Wars'' (1998) 3]] {{Flash}}
| |
| *[[Star Wars (1998) 6|''Star Wars'' (1998) 6]]
| |
| *{{WizardsCite|url=default.asp?x=starwars/article/sw20030320masquerade|text=Masquerade|int=Masquerade (online adventure)|archivedate=20091016060524}} {{Mo}}
| |
| *''[[Cloak of Deception]]''
| |
| *''[[Episode I Adventures 1: Search for the Lost Jedi]]''
| |
| *''[[Episode I Adventures 3: The Fury of Darth Maul]]'' {{Hologram}}
| |
| *''[[Episode I Adventures 4: Jedi Emergency]]''
| |
| *''[[Darth Maul: Shadow Hunter]]''
| |
| *{{Film|I}}
| |
| *''[[Star Wars: Episode I — The Phantom Menace]]''
| |
| *[[Star Wars: Episode I The Phantom Menace (novelization)|''Star Wars: Episode I The Phantom Menace'' novelization]]
| |
| *[[Star Wars Episode I: The Phantom Menace (junior novelization)|''Star Wars: Episode I The Phantom Menace'' junior novelization]]
| |
| *''[[Episode I: The Phantom Menace Movie Storybook]]''
| |
| *''[[Episode I: Obi-Wan Kenobi]]''
| |
| *''[[Episode I: The Phantom Menace ½]]'' {{Flash}}
| |
| *''[[Kinect Star Wars]]''
| |
| *''[[Star Wars: Yoda's Challenge Activity Center]]''
| |
| *''[[Star Wars: Battlefront]]'' {{Voice}}
| |
| *[[Star Wars (1998) 7|''Star Wars'' (1998) 7]]
| |
| *[[Star Wars (1998) 8|''Star Wars'' (1998) 8]] {{Mo}}
| |
| *[[Star Wars (1998) 10|''Star Wars'' (1998) 10]] {{Mo}}
| |
| *[[Star Wars (1998) 13|''Star Wars'' (1998) 13]]
| |
| *[[Star Wars (1998) 23|''Star Wars'' (1998) 23]] {{Mo}}
| |
| *[[Star Wars (1998) 28|''Star Wars'' (1998) 28]]
| |
| *[[Star Wars (1998) 33|''Star Wars'' (1998) 33]] {{Mo}}
| |
| *[[Star Wars (1998) 36|''Star Wars'' (1998) 36]] {{Flash}}
| |
| *[[Star Wars (1998) 39|''Star Wars'' (1998) 39]] {{Flash}}
| |
| *''[[Star Wars: Republic: The Devaronian Version]]'' {{Flash}}
| |
| *[[Star Wars (1998) 45|''Star Wars'' (1998) 45]]
| |
| *''[[Philology]]'' {{Mo}}
| |
| *{{TCWUKCite|volume=7|9|Temple of Phantoms}}
| |
| *''[[Rogue Planet]]'' {{Mo}}
| |
| *''[[Jedi Quest: Path to Truth]]''
| |
| *[[Jedi Quest 1|''Jedi Quest'' 1]]
| |
| *[[Jedi Quest 3|''Jedi Quest'' 3]]
| |
| *''[[Jedi Quest: The Way of the Apprentice]]''
| |
| *[[Outbound Flight (novel)|''Outbound Flight'']] {{Mo}}
| |
| *''[[Star Wars: Zam Wesell]]''
| |
| *''[[Jedi Quest: The Master of Disguise]]''
| |
| *''[[Jedi Quest: The School of Fear]]''
| |
| *''[[Jedi Quest: The Shadow Trap]]''
| |
| *''[[Jedi Quest: The Changing of the Guard]]'' {{Mo}}
| |
| *''[[Jedi Quest: The False Peace]]'' {{Mo}}
| |
| *''[[Jedi Quest: The Final Showdown]]''
| |
| *''[[Full of Surprises]]''
| |
| *{{Hnn|50|jediwatch/1344_2.html|Jedi TradeChips Spark Controversy|https://web.archive.org/web/20050226023825/http://www.holonetnews.com:80/50/jediwatch/1344_2.html}} {{Mo}}
| |
| *''[[Star Wars: Jedi Starfighter]]''
| |
| *''[[The Approaching Storm]]'' {{Mo}}
| |
| *[[The Approaching Storm (audiobook)|''The Approaching Storm'' audiobook]] {{Mo}}
| |
| *{{Hnn|53|news/13425_1.html|Would-Be Saboteur Captured|https://web.archive.org/web/20130728114749/http://www.holonetnews.com/53/news/13425_1.html}}
| |
| *{{Hnn|54|news/1352_1.html|Dooku Spotted in Gree Enclave|https://web.archive.org/web/20130105210722/http://www.holonetnews.com:80/54/news/1352_1.html}} {{Po}}
| |
| *{{Film|II}}
| |
| *[[Star Wars: Episode II Attack of the Clones (novelization)|''Star Wars'': Episode II ''Attack of the Clones'' novelization]]
| |
| *[[Star Wars: Episode II Attack of the Clones (unabridged audiobook)|''Star Wars: Episode II Attack of the Clones'' unabridged audiobook]]
| |
| *''[[Star Wars: Episode II — Attack of the Clones]]''
| |
| *[[Star Wars Episode II: Attack of the Clones (junior novelization)|''Star Wars'': Episode II ''Attack of the Clones'' junior novelization]]
| |
| *''[[Star Wars: Attack of the Clones Movie Storybook]]''
| |
| *{{WizardsCite|url=default.asp?x=starwars/livingforce/swlf20030206scenario|text=Friendship in the Order|int=Friendship in the Order|archivedate=20090603045501}} {{Mo}}
| |
| *{{Hyperspace|url=hyperspace/member/fiction/f20080423/index.html|text=''Precipice''|int=Precipice|newurl=http://star-wars.suvudu.com/2012/10/star-wars-shorts-precipice.html|newhost=[[Unbound Worlds|Suvudu]]}} {{Mo}}
| |
| *''[[Machines of War]]''
| |
| *''[[Most Precious Weapon]]'' {{Flash}}
| |
| *{{InsiderCite|79|Death in the Catacombs}} {{Mo}}
| |
| *''[[Star Wars: Republic Commando]]'' {{Hologram}}
| |
| *[[Star Wars: The Clone Wars (video game)|''Star Wars: The Clone Wars'' game]]
| |
| *''[[Star Wars: Clone Wars Adventures (video game)]]''
| |
| *''[[Star Wars: Battlefront II]]''
| |
| *[[Republic 49|''Republic'' 49]]
| |
| *[[Republic 50|''Republic'' 50]]
| |
| *''[[Jedi: Mace Windu]]''
| |
| *''[[Duel]]''
| |
| *{{CW|1}}
| |
| *{{CW|5}} {{Hologram}}
| |
| *[[Star Wars: Clone Wars (PhotoComic)|''Star Wars: Clone Wars'' PhotoComic]]
| |
| *{{CW|15}}
| |
| *{{CW|16}}
| |
| *{{CW|19}} {{Vision|Anakin Skywalker}}
| |
| *{{CW|20}}
| |
| *{{CW|21}}
| |
| *''[[Star Wars: Battle for the Republic]]''
| |
| *{{CWACite|9|Life Below}}
| |
| *''[[Only the Force]]''
| |
| *[[Republic 54|''Republic'' 54]]
| |
| *''[[Jedi: Aayla Secura]]'' {{Mo}}
| |
| *{{CWACite|1|Fierce Currents}} {{Hologram}}
| |
| *{{CWACite|2|Run Mace Run}} {{Vision|Mace Windu}}
| |
| *{{CWACite|3|A Stranger in Town}}
| |
| *{{CWACite|10|Thunder Road}}
| |
| *[[Shatterpoint (novel)|''Shatterpoint'']]
| |
| *''[[Legacy of the Jedi]]''
| |
| *''[[Jedi: Count Dooku]]'' {{Mo}}
| |
| *''[[Star Wars: The New Droid Army]]''
| |
| *''[[The Clone Wars: Shadowed]]''
| |
| *{{TCW|The Hidden Enemy}} {{Flash}}
| |
| *[[Star Wars: The Clone Wars (film)|''Star Wars: The Clone Wars'' film]]
| |
| *[[Star Wars: The Clone Wars (novelization)|''Star Wars: The Clone Wars'' novelization]]
| |
| *[[Star Wars: The Clone Wars (audiobook)|''Star Wars: The Clone Wars'' audiobook]]
| |
| *''[[Star Wars: The Clone Wars Official Movie Storybook]]''
| |
| *{{TCW|Supply Lines}}
| |
| *''[[The Clone Wars: Prelude]]''
| |
| *{{TCW|Ambush}}
| |
| *''[[The Clone Wars: Shakedown]]''
| |
| *{{TCW|Rising Malevolence|Rising ''Malevolence''}} {{Hologram}}
| |
| *''[[The Clone Wars: Wild Space]]''
| |
| *[[The Clone Wars: Wild Space (audiobook)|''The Clone Wars: Wild Space'' audiobook]]
| |
| *''[[The Clone Wars: No Prisoners]]''
| |
| *[[The Clone Wars: No Prisoners (audiobook)|''The Clone Wars: No Prisoners'' audiobook]]
| |
| *[[The Clone Wars 1|''The Clone Wars'' 1]] {{Hologram}}
| |
| *[[The Clone Wars 2|''The Clone Wars'' 2]] {{Hologram}}
| |
| *[[The Clone Wars 6|''The Clone Wars'' 6]]
| |
| *''[[The Clone Wars: Shipyards of Doom]]''
| |
| *''[[The Clone Wars: Crash Course]]''
| |
| *''[[The Clone Wars: The Wind Raiders of Taloraan]]''
| |
| *''[[The Clone Wars: Transfer]]'' {{Hologram}}
| |
| *{{TCW|Cloak of Darkness}} {{Hologram}}
| |
| *{{TCW|Lair of Grievous}}
| |
| *{{TCW|Dooku Captured}}
| |
| *{{TCW|The Gungan General}}
| |
| *''[[Clone Wars Gambit: Stealth]]''
| |
| *[[Clone Wars Gambit: Stealth (audiobook)|''Clone Wars Gambit: Stealth'' audiobook]]
| |
| *''[[Clone Wars Gambit: Siege]]''
| |
| *[[Clone Wars Gambit: Siege (audiobook)|''Clone Wars Gambit: Siege'' audiobook]]
| |
| *{{TCW|Blue Shadow Virus (episode)|Blue Shadow Virus}} {{Hologram}}
| |
| *{{TCW|Liberty on Ryloth}} {{Hologram}}
| |
| *''[[Star Wars: The Clone Wars: Republic Heroes]]''
| |
| *{{TCW|Holocron Heist}}
| |
| *{{TCW|Children of the Force}}
| |
| *{{TCW|Senate Spy}}
| |
| *''[[The Clone Wars: Act on Instinct]]'' {{Mo}}
| |
| *[[The Clone Wars 10|''The Clone Wars'' 10]]
| |
| *[[The Clone Wars 11|''The Clone Wars'' 11]] {{Hologram}}
| |
| *{{TCW|Landing at Point Rain}} {{Hologram}}
| |
| *{{TCW|Grievous Intrigue}}
| |
| *{{TCW|Lightsaber Lost}}
| |
| *{{TCW|Senate Murders}}
| |
| *{{TCW|The Zillo Beast Strikes Back}}
| |
| *''[[The Clone Wars: The Valsedian Operation]]''
| |
| *{{TCW|Corruption (episode)|Corruption}} {{Mo}}
| |
| *{{TCW|The Academy}} {{Mo}}
| |
| *{{TCW|Evil Plans}} {{Flash}}
| |
| *{{TCW|Hunt for Ziro}} {{Flash}}
| |
| *{{TCW|Witches of the Mist}}
| |
| *{{TCW|Overlords}} {{Flash}}
| |
| *{{TCW|Counterattack}}
| |
| *{{TCW|Citadel Rescue}}
| |
| *{{TCW|Wookiee Hunt}}
| |
| *{{TCW|Water War}}
| |
| *{{TCW|Gungan Attack}}
| |
| *{{TCW|Mercy Mission (episode)|Mercy Mission}} {{Hologram}}
| |
| *{{TCW|Kidnapped}}
| |
| *{{TCW|Deception}}
| |
| *{{TCW|Friends and Enemies}}
| |
| *{{TCW|The Box}}
| |
| *{{TCW|Crisis on Naboo}}
| |
| *{{TCW|Brothers}}
| |
| *{{TCW|Revenge (episode)|Revenge}}
| |
| *''[[The Clone Wars: The Sith Hunters]]''
| |
| *''[[Darth Maul—Death Sentence 1]]''
| |
| *''[[Darth Maul—Death Sentence 3]]''
| |
| *''[[The Clone Wars: Decide Your Destiny: Dooku's Secret Army]]''
| |
| *{{TCWUKCite|6.3|In Triplicate}} {{Flash}}
| |
| *{{TCWUKCite|6.6|Milk Run to Maarka!}} {{Mo}}
| |
| *{{TCWUKCite|6.13|The Guns of Nar Hekka}}
| |
| *{{TCWUKCite|6.14|In the Air}}
| |
| *{{TCWUKCite|6.16|Hunted (comic)|Hunted}} {{Hologram}}
| |
| *{{TCWUKCite|6.22|Leisure}} {{Mo}}
| |
| *{{TCWUKCite|6.23|Fashion}}
| |
| *{{TCWUKCite|6.29|Blind Jedi's Bluff}} {{Mo}}
| |
| *{{TCWUKCite|6.31|Deadly Droid}}
| |
| *{{TCWUKCite|6.32|The Fear Architects}} {{Vision|[[Obi-Wan Kenobi/Legends|Obi-Wan Kenobi]]}}
| |
| *{{TCWUKCite|6.37|Incident on Kashyyyk}}
| |
| *{{TCWUKCite|6.38|Sabotage (comic)|Sabotage}}
| |
| *{{TCWUKCite|6.42|The Collector}}
| |
| *''[[The Clone Wars: The Colossus of Destiny]]'' {{Hologram}}
| |
| *{{TCW|A War on Two Fronts}}
| |
| *{{TCW|The Gathering (episode)|The Gathering}}
| |
| *{{TCW|Secret Weapons}} {{Flash}}
| |
| *{{TCW|Revival (episode)|Revival}}
| |
| *''[[The Clone Wars: Darth Maul: Shadow Conspiracy]]''
| |
| *{{TCW|The Lawless}}
| |
| *{{TCW|Sabotage (episode)|Sabotage}}
| |
| *{{TCW|The Jedi Who Knew Too Much}}
| |
| *{{TCW|To Catch a Jedi}}
| |
| *{{TCW|The Wrong Jedi}}
| |
| *{{TCW|Conspiracy}}
| |
| *{{TCW|Orders}}
| |
| *{{TCW|The Rise of Clovis}}
| |
| *{{TCW|Crisis at the Heart}}
| |
| *{{TCW|The Disappeared, Part I}}
| |
| *{{TCW|The Lost One}}
| |
| *{{TCW|Voices}}
| |
| *{{TCW|Destiny (episode)|Destiny}}
| |
| *{{TCW|Sacrifice}}
| |
| *{{TCWUKCite|6.47|Lockdown (comic)|Lockdown}}
| |
| *{{TCWUKCite|6.49|Seeds}}
| |
| *{{TCWUKCite|volume=7|2|Labyrinth (comic)|Labyrinth}}
| |
| *{{TCWUKCite|volume=7|8|Yoda Uncovered}}
| |
| *''[[The Hive]]'' {{Mo}}
| |
| *''[[Hero of Cartao]]'' {{Mo}}
| |
| *''[[Republic Commando: True Colors]]'' {{Mo}}
| |
| *[[Republic 61|''Republic'' 61]]
| |
| *[[Republic 63|''Republic'' 63]]
| |
| *''[[Jedi: Yoda]]''
| |
| *[[Republic 64|''Republic'' 64]] {{Mo}}
| |
| *''[[Republic HoloNet News Core Edition 14:10:03]]'' {{Mo}}
| |
| *''[[Star Wars: Republic: Show of Force]]'' {{Mo}}
| |
| *{{Tales|22|Honor Bound}}
| |
| *''[[Deep Forest]]'' {{Hologram}}
| |
| *''[[CIS Shadowfeed Dispatch 15:01:15 Edition]]'' {{Mo}}
| |
| *''[[MedStar II: Jedi Healer]]'' {{Mo}}
| |
| *[[Republic 68|''Republic'' 68]] {{Hologram}}
| |
| *[[General Grievous 1|''General Grievous'' 1]]
| |
| *[[General Grievous 4|''General Grievous'' 4]]
| |
| *[[Secrets of the Jedi (novel)|''Secrets of the Jedi'']]
| |
| *''[[Jedi Trial]]''
| |
| *''[[Yoda: Dark Rendezvous]]''
| |
| *''[[Star Wars: Republic: Dreadnaughts of Rendili]]'' {{Mo}}
| |
| *[[Obsession 1|''Obsession'' 1]]
| |
| *[[Obsession 2|''Obsession'' 2]]
| |
| *''[[Sithisis]]''
| |
| *''[[Reversal of Fortune]]''
| |
| *''[[Labyrinth of Evil]]''
| |
| *{{CW|23}}
| |
| *{{CW|24}} {{Mo}}
| |
| *{{CW|25}}
| |
| *''[[Star Wars: Republic: Siege of Saleucami]]'' {{Vision|[[Tholme/Legends|Tholme]]}}
| |
| *{{CWACite|5|What Goes Up...}} {{Mo}}
| |
| *{{Film|III}}
| |
| *''[[Star Wars: Episode III — Revenge of the Sith]]''
| |
| *[[Star Wars: Episode III Revenge of the Sith (novelization)|''Star Wars'': Episode III ''Revenge of the Sith'' novelization]]
| |
| *[[Star Wars: Episode III Revenge of the Sith (unabridged audiobook)|''Star Wars: Episode III Revenge of the Sith'' unabridged audiobook]]
| |
| *[[Star Wars Episode III: Revenge of the Sith (junior novelization)|''Star Wars'': Episode III ''Revenge of the Sith'' junior novelization]]
| |
| *''[[Evil Eyes]]''
| |
| *''[[Star Wars: Republic: Hidden Enemy]]''
| |
| *[[Kenobi (novel)|''Kenobi'']] {{Mo}}
| |
| *[[Kenobi (audiobook)|''Kenobi'' audiobook]] {{Mo}}
| |
| *''[[Dark Lord: The Rise of Darth Vader]]'' {{Mo}}
| |
| *''[[Star Wars: Purge: Seconds to Die]]'' {{Flash}}
| |
| *''[[Star Wars: Purge]]'' {{Mo}}
| |
| *''[[Star Wars: Dark Times: Parallels]]'' {{Mo}}
| |
| *''[[The Eye]]'' {{Mo}}
| |
| *''[[Evasive Action: Recruitment]]'' {{Mo}}
| |
| *{{WEGCite|book=Heir to the Empire Sourcebook|story=Scouting Report SS-176.01, Imperial Year One …}} | | *{{WEGCite|book=Heir to the Empire Sourcebook|story=Scouting Report SS-176.01, Imperial Year One …}} |
| *''[[Coruscant Nights I: Jedi Twilight]]'' {{Mo}}
| |
| *''[[Coruscant Nights III: Patterns of Force]]'' {{Mo}}
| |
| *''[[The Last One Standing]]'' {{Mo}}
| |
| *''[[The Last of the Jedi: The Desperate Mission]]'' {{Mo}}
| |
| *''[[The Last of the Jedi: Dark Warning]]'' {{Mo}}
| |
| *''[[The Last of the Jedi: Underworld]]'' {{Mo}}
| |
| *''[[The Last of the Jedi: Death on Naboo]]'' {{Mo}}
| |
| *''[[The Last of the Jedi: A Tangled Web]]'' {{Mo}}
| |
| *''[[The Last of the Jedi: Secret Weapon]]'' {{Mo}}
| |
| *''[[The Last of the Jedi: Against the Empire]]'' {{Mo}}
| |
| *''[[Star Tours: The Adventures Continue]]''
| |
| *[[The Force Unleashed (novel)|''The Force Unleashed'' novel]] {{C|puppet}}
| |
| *[[Star Wars: The Force Unleashed (video game)]] (Appears as a junk mannequin)
| |
| *''[[Star Wars: The Force Unleashed II]]''
| |
| *''[[Domain of Evil]]'' {{Mo}} | | *''[[Domain of Evil]]'' {{Mo}} |
| *{{WEGCite|book=Classic Adventures: Volume Two|story=Domain of Evil|stext=''Domain of Evil''}} {{Mo}} | | *{{WEGCite|book=Classic Adventures: Volume Two|story=Domain of Evil|stext=''Domain of Evil''}} {{Mo}} |
| *''[[The Farlander Papers]]'' {{C|voice in a dream}} {{Imo}} | | *''[[The Farlander Papers]]'' {{C|voice in a dream}} {{Imo}} |
| *[[Death Star (novel)|''Death Star'']] {{Mo}}
| |
| *[[Tantive IV (comic)|''Tantive IV'']] {{Mo}}
| |
| *''[[Perfect Evil]]'' {{Flash}}
| |
| *[[Star Wars: Rebellion (video game)|''Star Wars: Rebellion'']] {{Mo}} | | *[[Star Wars: Rebellion (video game)|''Star Wars: Rebellion'']] {{Mo}} |
| *[[Empire 27|''Empire'' 27]] {{Flash}}
| |
| *''[[Galaxy of Fear: The Hunger]]'' | | *''[[Galaxy of Fear: The Hunger]]'' |
| *{{SWG|An Empire Divided}} {{C|[[Hologram/Legends|Holographic]] costume}}
| |
| *{{WEGCite|book=Star Wars: The Roleplaying Game (first edition)|text=''Star Wars: The Roleplaying Game''|story=Jedi Heirlooms}} {{Mo}} | | *{{WEGCite|book=Star Wars: The Roleplaying Game (first edition)|text=''Star Wars: The Roleplaying Game''|story=Jedi Heirlooms}} {{Mo}} |
| *[[Star Wars Episode V: The Empire Strikes Back (novel)|''Star Wars Episode V: The Empire Strikes Back '' novel]] {{1st}} | | *[[Star Wars Episode V: The Empire Strikes Back (novel)|''Star Wars Episode V: The Empire Strikes Back '' novel]] {{1st}} |
| Line 874: |
Line 155: |
| *[[Star Wars (1977) 42|''Star Wars'' (1977) 42]] | | *[[Star Wars (1977) 42|''Star Wars'' (1977) 42]] |
| *''[[Star Wars: Yoda Stories]]'' | | *''[[Star Wars: Yoda Stories]]'' |
| *''[[Star Wars Adventures: Luke Skywalker and the Treasure of the Dragonsnakes]]''
| |
| *{{Tales|15|Slippery Slope}}
| |
| *[[Star Wars (1977) 43|''Star Wars'' (1977) 43]] | | *[[Star Wars (1977) 43|''Star Wars'' (1977) 43]] |
| *[[Star Wars (1977) 44|''Star Wars'' (1977) 44]] {{Mo}} | | *[[Star Wars (1977) 44|''Star Wars'' (1977) 44]] {{Mo}} |
| Line 886: |
Line 165: |
| *[[Shadows of the Empire (junior novelization)|''Shadows of the Empire'' junior novelization]] {{Mo}} | | *[[Shadows of the Empire (junior novelization)|''Shadows of the Empire'' junior novelization]] {{Mo}} |
| *[[Star Wars: Shadows of the Empire (Galoob)|''Star Wars: Shadows of the Empire'' Galoob minicomic]] {{Mo}} | | *[[Star Wars: Shadows of the Empire (Galoob)|''Star Wars: Shadows of the Empire'' Galoob minicomic]] {{Mo}} |
| *''[[Star Wars: Empire at War: Forces of Corruption]]''
| |
| *''[[The Rise and Fall of Darth Vader]]''
| |
| *{{Tales|6|The Hidden}}
| |
| *{{Film|VI}} | | *{{Film|VI}} |
| *[[Star Wars Episode VI: Return of the Jedi (novel)|''Star Wars Episode VI: Return of the Jedi'' novel]] | | *[[Star Wars Episode VI: Return of the Jedi (novel)|''Star Wars Episode VI: Return of the Jedi'' novel]] |
| Line 924: |
Line 200: |
| *''[[Junior Jedi Knights: Anakin's Quest]]'' {{Mo}} | | *''[[Junior Jedi Knights: Anakin's Quest]]'' {{Mo}} |
| *''[[Junior Jedi Knights: Vader's Fortress]]'' {{Mo}} | | *''[[Junior Jedi Knights: Vader's Fortress]]'' {{Mo}} |
| *''[[Survivor's Quest]]'' {{Mo}}
| |
| *''[[Young Jedi Knights: Jedi Under Siege]]'' {{Mo}} | | *''[[Young Jedi Knights: Jedi Under Siege]]'' {{Mo}} |
| *''[[Young Jedi Knights: Return to Ord Mantell]]'' {{Mo}} | | *''[[Young Jedi Knights: Return to Ord Mantell]]'' {{Mo}}}} |
| *''[[The New Jedi Order: Vector Prime]]'' {{Mo}}
| |
| *''[[The New Jedi Order: Dark Tide I: Onslaught]]'' {{Mo}}
| |
| *''[[The New Jedi Order: Dark Tide II: Ruin]]'' {{Mo}}
| |
| *''[[The New Jedi Order: Agents of Chaos I: Hero's Trial]]'' {{Mo}}
| |
| *''[[The New Jedi Order: Agents of Chaos II: Jedi Eclipse]]'' {{Mo}}
| |
| *''[[The New Jedi Order: Balance Point]]'' {{Mo}}
| |
| *''[[The New Jedi Order: Edge of Victory I: Conquest]]'' {{Mo}}
| |
| *''[[The New Jedi Order: Edge of Victory II: Rebirth]]'' {{Mo}}
| |
| *''[[Emissary of the Void]]'' {{Mo}}
| |
| *''[[The New Jedi Order: Enemy Lines I: Rebel Dream]]'' {{Mo}}
| |
| *''[[The New Jedi Order: Destiny's Way]]'' {{Mo}}
| |
| *''[[The New Jedi Order: Force Heretic I: Remnant]]'' {{Mo}}
| |
| *''[[The New Jedi Order: Force Heretic III: Reunion]]'' {{Mo}}
| |
| *''[[The New Jedi Order: The Final Prophecy]]'' {{Mo}}
| |
| *''[[The New Jedi Order: The Unifying Force]]'' {{Mo}}
| |
| *''[[Dark Nest I: The Joiner King]]'' {{Mo}}
| |
| *''[[Dark Nest II: The Unseen Queen]]'' {{Mo}}
| |
| *''[[Dark Nest III: The Swarm War]]'' {{Mo}}
| |
| *''[[Legacy of the Force: Betrayal]]'' {{Po}}
| |
| *''[[Legacy of the Force: Bloodlines]]'' {{C|[[Flow-walking|Flow-walk]]}}
| |
| *''[[Legacy of the Force: Sacrifice]]'' {{Mo}}
| |
| *''[[Legacy of the Force: Fury]]'' {{Mo}}
| |
| *''[[Legacy of the Force: Revelation]]'' {{Mo}}
| |
| *''[[Fate of the Jedi: Outcast]]'' {{Mo}}
| |
| *[[Fate of the Jedi: Outcast (audiobook)|''Fate of the Jedi: Outcast'' audiobook]] {{Mo}}
| |
| *''[[Fate of the Jedi: Omen]]'' {{Mo}}
| |
| *[[Fate of the Jedi: Omen (audiobook)|''Fate of the Jedi: Omen'' audiobook]] {{Mo}}
| |
| *''[[Fate of the Jedi: Abyss]]'' {{Mo}}
| |
| *[[Fate of the Jedi: Abyss (audiobook)|''Fate of the Jedi: Abyss'' audiobook]] {{Mo}}
| |
| *''[[Fate of the Jedi: Allies]]'' {{Mo}}
| |
| *[[Fate of the Jedi: Allies (audiobook)|''Fate of the Jedi: Allies'' audiobook]] {{Mo}}
| |
| *''[[Fate of the Jedi: Vortex]]'' {{Mo}}
| |
| *[[Fate of the Jedi: Vortex (audiobook)|''Fate of the Jedi: Vortex'' audiobook]] {{Mo}}
| |
| *''[[Fate of the Jedi: Conviction]]'' {{Mo}}
| |
| *[[Fate of the Jedi: Conviction (audiobook)|''Fate of the Jedi: Conviction'' audiobook]] {{Mo}}
| |
| *''[[Fate of the Jedi: Apocalypse]]'' {{Mo}}
| |
| *[[Fate of the Jedi: Apocalypse (audiobook)|''Fate of the Jedi: Apocalypse'' audiobook]] {{Mo}}
| |
| *[[Crucible (novel)|''Crucible'']] {{Mo}}
| |
| *[[Crucible (audiobook)|''Crucible'' audiobook]] {{Mo}}
| |
| }}
| |
| | |
| ===Non-canon appearances===
| |
| {{Scroll_box|content=
| |
| [[File:Yoda-SC4.jpg|thumb|right|180px|Yoda from ''[[Soulcalibur IV]]'']]
| |
| *[[Jedi Academy (novel)|''Jedi Academy'']]
| |
| *''[[Jedi Academy: Return of the Padawan]]''
| |
| *''[[Jedi Academy: The Phantom Bully]]''
| |
| *[[Path of the Jedi (video game)|''Path of the Jedi'']]
| |
| *''[[Tag & Bink: Revenge of the Clone Menace]]''
| |
| *''[[LEGO Star Wars: The Phantom Menace]]''
| |
| *''[[LEGO Star Wars: The Video Game]]''
| |
| *''[[LEGO Star Wars II: The Original Trilogy]]''
| |
| *''[[LEGO Star Wars III: The Clone Wars]]''
| |
| *''[[LEGO Star Wars: The Complete Saga]]''
| |
| *''[[LEGO Star Wars: The Padawan Menace]]''
| |
| *''[[LEGO Star Wars: The Empire Strikes Out]]''
| |
| *{{The Yoda Chronicles|The Phantom Clone}}
| |
| *{{The Yoda Chronicles|Menace of the Sith}}
| |
| *{{The Yoda Chronicles|Attack of the Jedi}}
| |
| *{{The Yoda Chronicles|Escape from the Jedi Temple}}
| |
| *{{The Yoda Chronicles|Race for the Holocrons}}
| |
| *{{The Yoda Chronicles|Raid on Coruscant}}
| |
| *{{The Yoda Chronicles|Clash of the Skywalkers}}
| |
| *{{Tales|7|Force Fiction}}
| |
| *{{Tales|11|Tall Tales}} {{Mo}}
| |
| *{{Tales|13|The Sith in the Shadow}}
| |
| *{{Tales|15|Do or Do Not (comic)|Do or Do Not}} {{Ghost}}
| |
| *''[[Star Wars: Super Bombad Racing]]''
| |
| *[[LEGO Star Wars: The Yoda Chronicles (video game)|''LEGO Star Wars: The Yoda Chronicles'' video game]]
| |
| *''[[LEGO Star Wars: Revenge of the Brick]]''
| |
| *[[Star Wars: Republic Commando: Order 66 (video game)|''Star Wars: Republic Commando: Order 66'']]
| |
| *''[[Star Wars Infinities: A New Hope]]''
| |
| *''[[Star Wars Infinities: The Empire Strikes Back]]''
| |
| *''[[The Return of Tag & Bink: Special Edition]]'' {{Ghost}}
| |
| *''[[Return of the Ewok]]''
| |
| *''[[Star Wars Infinities: Return of the Jedi]]''
| |
| *''[[Star Wars Adventures in ABC]]''
| |
| *''[[Star Wars: Epic Duels]]''
| |
| *''[[Soulcalibur IV]]''
| |
| *''[[Star Wars: Visions of the Blade]]''
| |
| *''[[Star Wars -Phantasmagoria-]]'' {{Flash}}}}
| |
|
| |
|
| ==Sources== | | ==Sources== |
| Line 1,050: |
Line 244: |
| *''[[Cracken's Threat Dossier]]'' | | *''[[Cracken's Threat Dossier]]'' |
| *''[[Star Wars Trilogy Sourcebook, Special Edition]]'' | | *''[[Star Wars Trilogy Sourcebook, Special Edition]]'' |
| *[[Star Wars Trivial Pursuit]]
| |
| *''[[Star Wars Episode I: I Am a Jedi]]''
| |
| *[[Star Wars: Episode I (toy line)|''Star Wars: Episode I'' toy line]]
| |
| *''[[Star Wars: Power of the Jedi]]''
| |
| *''[[The Secrets of Star Wars: Shadows of the Empire]]'' | | *''[[The Secrets of Star Wars: Shadows of the Empire]]'' |
| *{{StarWarsKidsCite|3|Star Wars Kids Answer Quest}} | | *{{StarWarsKidsCite|3|Star Wars Kids Answer Quest}} |
| Line 1,061: |
Line 251: |
| *{{CCG|set=Dagobah Limited|link=Dagobah-Light/large/yoda.gif|cardname=Yoda}} | | *{{CCG|set=Dagobah Limited|link=Dagobah-Light/large/yoda.gif|cardname=Yoda}} |
| *''[[Star Wars: Rebellion: Prima's Official Strategy Guide]]'' | | *''[[Star Wars: Rebellion: Prima's Official Strategy Guide]]'' |
| *{{InsiderCite|47|In the Star Wars Universe}}
| |
| *''[[Design An Alien]]''
| |
| *{{InsiderCite|27|Excerpts from the Journal of a Rebel Pilot}}
| |
| *{{KennerCite|set=Star Wars: The Power of the Force (1995 toy line)|text=''Star Wars: The Power of the Force'' (1995)|pack=Yoda|link=POTF2Yoda.asp|archivedate=20190926195604}}
| |
| *{{KennerCite|set=Star Wars: The Power of the Force (1995 toy line)|text=''Star Wars: The Power of the Force'' (1995)|pack=Jedi Spirits|link=POTF2jedispirits.asp|archivedate=20190929064432}}
| |
| *{{KennerCite|set=Star Wars: The Power of the Force (1995 toy line)|text=''Star Wars: The Power of the Force'' (1995)|pack=Yoda with Cane and Boiling Pot|link=POTF2yodafb.asp|archivedate=20190926215737}}
| |
| *{{KennerCite|set=Star Wars: The Power of the Force (1995 toy line)|text=''Star Wars: The Power of the Force'' (1995)|pack=Dagobah with Yoda|link=POTF2cgyoda.asp|archivedate=20190929055547}}
| |
| *''[[Star Wars: The Action Figure Archive]]'' | | *''[[Star Wars: The Action Figure Archive]]'' |
| *[[Star Wars Episode I: The Phantom Menace (reference book)|''Star Wars Episode I: The Phantom Menace'' reference book]]
| |
| *''[[Star Wars: Episode I The Visual Dictionary]]''
| |
| *''[[Star Wars: Episode I The Phantom Menace The Official Souvenir Magazine]]''
| |
| *''[[Star Wars Episode I: The Data File]]''
| |
| *{{CCG|set=Coruscant Limited|link=coruscant/ls/coruscantjedicouncilchamber.gif|cardname=Coruscant: Jedi Council Chamber}} {{Po}}
| |
| *{{CCG|set=Coruscant Limited|link=coruscant/ls/speakwiththejedicouncil.gif|cardname=Speak With The Jedi Council}} {{Po}}
| |
| *{{CCG|set=Coruscant Limited|link=coruscant/ls/yodaseniorcouncilmember.gif|cardname=Yoda, Senior Council Member}}
| |
| *''[[Star Wars: Rogue Squadron II: Rogue Leader: The Official Nintendo Player's Guide]]''
| |
| *{{GamerCite|7|Bartyn's Landing (article)|Bartyn's Landing}}
| |
| *''[[The New Jedi Order Sourcebook]]''
| |
| *''[[Star Wars: Attack of the Clones: The Visual Dictionary]]''
| |
| *''[[Star Wars: Attack of the Clones: The Illustrated Companion]]''
| |
| *{{WizardsCite|url=starwars/article.asp?x=sw20020530cdarkblue&c=rpg|text=Dark Blue|int=Dark Blue|archivedate=20090602013038}}
| |
| *{{WizardsCite|url=default.asp?x=starwars/article/sw20030612arbra2|text=Arbra: Sanctuary In the Storm Part 2|int=Arbra: Sanctuary In the Storm|archivedate=20091016073142}}
| |
| *{{TCG|set=Attack of the Clones (TCG)|link=https://swtcg.com/Content/Images/Cards/AOTC/AT_TE_Walker_23X.webp?v{{=}}2|cardname=AT-TE Walker 23X}} {{Mo}}
| |
| *''[[Star Wars: Rogue Squadron III: Rebel Strike: The Official Nintendo Player's Guide]]''
| |
| *''[[Star Wars: Revenge of the Sith: The Visual Dictionary]]''
| |
| *''[[Episode III: Revenge of the Sith: Prima Official Game Guide]]''
| |
| *''[[Star Wars: The Visual Dictionary]]'' | | *''[[Star Wars: The Visual Dictionary]]'' |
| *''[[Star Wars: The Complete Visual Dictionary]]'' | | *''[[Star Wars: The Complete Visual Dictionary]]'' |
| *{{FFCite|3|JED2, ''Jedi Detection''}}
| |
| *{{FFCite|4|DAG1–3, ''Dagobah''}}
| |
| *{{FFCite|11|YOD1-6, ''Yoda''}}
| |
| *{{FFCite|30|YOD7-10, ''Yoda''}}
| |
| *{{FFCite|51|YOD11-14, ''Yoda''}}
| |
| *{{FFCite|65|YOD15-16, ''Yoda''}}
| |
| *{{FFCite|75|LIG15-16, ''Yoda's Lightsaber''}}
| |
| *{{FFCite|86|YOD17-20, ''Yoda''}}
| |
| *{{FFCite|118|YOD21-24, ''Yoda''}}
| |
| *''[[Star Wars: The Ultimate Visual Guide]]'' | | *''[[Star Wars: The Ultimate Visual Guide]]'' |
| *''[[Star Wars: Chronicles]]'' | | *''[[Star Wars: Chronicles]]'' |
| *''[[Star Wars Chronicles: The Prequels]]''
| | *''[[The Essential Guide to Characters]]''}} |
| *''[[The Essential Guide to Characters]]'' | |
| *''[[The New Essential Guide to Characters]]''
| |
| *''[[The New Essential Chronology]]''
| |
| *[[Star Wars Insider 79|''Star Wars Insider'' 79]] <!--article?-->
| |
| *''[[Star Wars Roleplaying Game]]''
| |
| *''[[The Dark Forces Saga]]''
| |
| *''[[Order 66: Destroy All Jedi]]''
| |
| *[[Clone Strike|''Star Wars Miniatures: Clone Strike'']]
| |
| *''[[Star Wars Roleplaying Game Saga Edition Core Rulebook]]'' <!--p.219-->
| |
| *{{HasbroCite|set=Star Wars: The Saga Collection|pack=Yarael Poof|altlink=https://www.rebelscum.com/TSC069yaraelpoof.asp}} {{Po}}
| |
| *[[Jedi vs. Sith: The Essential Guide to the Force (real-life book)|''Jedi vs. Sith: The Essential Guide to the Force'']]
| |
| *[[Starships of the Galaxy (Saga Edition)|''Starships of the Galaxy'', Saga Edition]]
| |
| *{{InsiderCite|101|Classic Moment}}
| |
| *{{InsiderCite|102|Master & Apprentice (Star Wars Insider)|Master & Apprentice}}
| |
| *{{InsiderCite|102|A Long Time Ago....}}
| |
| *{{WizardsCite|url=default.asp?x=starwars/article/sw20050728a|text=Heroes of ''Revenge of the Sith''|int=Heroes of Revenge of the Sith|archivedate=20091016033515}}
| |
| *{{WizardsCite|url=default.asp?x=starwars/article/sw20040205manaan|text=Manaan: Depths of History|int=Manaan: Depths of History|archivedate=20100430052119}}
| |
| *''[[Star Wars Battlefront II: Prima Official Game Guide]]''
| |
| *''[[Star Wars: Empire at War: Forces of Corruption Expansion: Prima Official Game Guide]]''
| |
| *{{HasbroCite|set=Star Wars: 30th Anniversary Collection|altlink=https://www.rebelscum.com/tacOrder666.asp|pack=Yoda & Kashyyyk Trooper (Order 66)}}
| |
| *{{HasbroCite|set=Star Wars: 30th Anniversary Collection|altlink=https://www.rebelscum.com/TAC0804kashyyyk.asp|pack=Kashyyyk Trooper}}
| |
| *{{SideshowCite|set=Order of the Jedi|pack=Aayla Secura (Jedi Master)|altlink=https://www.rebelscum.com/SSC16Aayla.asp|archivedate=20210302050527}}
| |
| *''[[The Force Unleashed Campaign Guide]]''
| |
| *''[[Star Wars Fandex Deluxe Edition]]''
| |
| *''[[The Complete Star Wars Encyclopedia]]''
| |
| *''[[Star Wars: The Clone Wars: Heroes and Villains Flip Book]]''
| |
| *''[[The Clone Wars Campaign Guide]]''
| |
| *{{InsiderCite|106|Star Wars: The Clone Wars Season One Episode Guide, Part One}}
| |
| *{{InsiderCite|106|Han Solo: The Early Years}}
| |
| *{{InsiderCite|106|Blaster (Star Wars Insider)|Blaster}}
| |
| *''[[Fate of the Jedi: Dramatis Personae]]''
| |
| *''[[Rebellion Era Campaign Guide]]''
| |
| *''[[Star Wars: The Clone Wars Character Encyclopedia]]''
| |
| *''[[Star Wars: The Clone Wars Annual 2010]]''
| |
| *{{Topps|set=2010 Topps Star Wars Galaxy Series 5}}
| |
| *''[[Star Wars ABC]]''
| |
| *[[The Jedi Path: A Manual for Students of the Force (real-life book)|''The Jedi Path: A Manual for Students of the Force'']]
| |
| *''[[Star Wars Art: Visions]]''
| |
| *{{SWArchive|url=movies/episode-v/chronicles_yoda/index.html|text=''Empire'' Chronicles: Yoda|archivedate=20101101215449}}
| |
| *{{InsiderCite|122|Ask Lobot}}
| |
| *{{SWGTCG|set=The Price of Victory|swglink=File:Yoda_soupbowl.png|cardname=Yoda Soup Bowl Replica}}
| |
| *{{SWGTCG|set=The Price of Victory|swglink=File:Yoda_hut_loot_card.png|cardname=Yoda's Dagobah Hut}}
| |
| *{{SWArchive|url=theclonewars/guide/episode314.html|text=''The Clone Wars'' Episode Guide: Witches of the Mist|archivedate=20110629021826}}
| |
| *{{InsiderCite|123|Secrets of the Force}}
| |
| *{{SWArchive|url=theclonewars/guide/episode317.html|text=''The Clone Wars'' Episode Guide: Ghosts of Mortis|archivedate=20110902135110}}
| |
| *{{SWArchive|url=theclonewars/guide/episode320.html|text=''The Clone Wars'' Episode Guide: Citadel Rescue|archivedate=20110629021424}}
| |
| *{{SWArchive|url=theclonewars/guide/episode322.html|text=''The Clone Wars'' Episode Guide: Wookiee Hunt|archivedate=20110630162442}}
| |
| *''[[Star Wars: Head-to-Head Tag Teams]]''
| |
| *{{InsiderCite|125|50 Great Reasons to Rewatch Star Wars: The Clone Wars Season Three|50 Great Reasons to Rewatch ''Star Wars: The Clone Wars'' Season Three}}
| |
| *{{InsiderCite|130|Launchpad|Launch Pad}}
| |
| *{{DB|character|yoda|Yoda|archivedate=20110911123202}}
| |
| *{{DB|starship|yodaescapepod|Yoda's escape pod|archivedate=20100306102647}}
| |
| *{{DB|location|yodashut|Yoda's Hut|archivedate=20100719111532}}
| |
| *{{InsiderCite|131|We Need to Talk About Jar Jar}} {{Po}}
| |
| *''[[Star Wars: The Phantom Menace: The Expanded Visual Dictionary]]''
| |
| *''[[Battle for Naboo]]''
| |
| *''[[Star Wars: Darth Maul, Sith Apprentice]]''
| |
| *''[[Millennium Falcon Owner's Workshop Manual]]''
| |
| *''[[Book of Sith: Secrets from the Dark Side]]''
| |
| *''[[Star Wars: Beware the Sith]]''
| |
| *''[[The Essential Guide to Warfare]]''
| |
| *''[[Star Wars: The Ultimate Visual Guide: Updated and Expanded]]''
| |
| *''[[Star Wars Character Encyclopedia]]''
| |
| *''[[The Essential Reader's Companion]]''
| |
| *''[[Star Wars: Obi-Wan Kenobi, Jedi Knight]]''
| |
| *''[[Star Wars: The Clone Wars: Masters of the Force]]''
| |
| *{{FFGTCG|set=Star Wars: The Card Game Core Set|cardname=Dagobah Training Grounds}} {{Po}}
| |
| *{{FFGTCG|set=Star Wars: The Card Game Core Set|cardname=In You Must Go}} {{Imo}}
| |
| *{{FFGTCG|set=Star Wars: The Card Game Core Set|cardname=Yoda}}
| |
| *{{FFGTCG|set=Star Wars: The Card Game Core Set|cardname=Return of the Jedi}}
| |
| *{{FFGTCG|set=Star Wars: The Card Game Core Set|cardname=Jedi Training}} {{Po}}
| |
| *{{FFGTCG|set=The Desolation of Hoth|cardname=A Message from Beyond}}
| |
| *''[[Star Wars: The Legendary Yoda]]''
| |
| *{{FFCite|y=2013|2|YOD1-4, Yoda}}
| |
| *[[Star Wars: Edge of the Empire Core Rulebook|''Star Wars: Edge of the Empire'' Core Rulebook]]
| |
| *{{FFGTCG|set=Edge of Darkness|cardname=Force Precognition}} {{Po}}
| |
| *{{FFGTCG|set=Assault on Echo Base|cardname=Knowledge and Defense}} {{Po}}
| |
| *{{FFGTCG|set=Assault on Echo Base|cardname=Yoda's Protection}}
| |
| *''[[Ultimate Sticker Collection: Star Wars: Battles of the Clone Wars]]''
| |
| *''[[Star Wars: Force Collection]]'' {{C|Card: Ashla}}
| |
| *''[[Star Wars: Force Collection]]'' {{C|Card: Master Yoda (★★)}}
| |
| *''[[Star Wars: Force Collection]]'' {{C|Card: Master Yoda (★★★)}}
| |
| *''[[Star Wars: Force Collection]]'' {{C|Card: Master Yoda (★★★★★)}}
| |
| *''[[Star Wars: Force Collection]]'' {{C|Card: Master Yoda (Special)}}
| |
| *{{FFGTCG|set=Escape from Hoth|cardname=Aggression}}
| |
| *''[[Star Wars: Sith Wars]]''
| |
| *{{FFGTCG|set=Balance of the Force|cardname=Premonitions of the Future}}
| |
| *{{FFGTCG|set=Heroes and Legends|cardname=Echoes of the Force}} {{Po}}
| |
| *{{SWE|technology|alderaancruiser|Alderaan cruiser}}
| |
| *{{SWE|characters|chewbacca|Chewbacca}}
| |
| *{{SWE|locations|dagobah|Dagobah}}
| |
| *{{SWE|characters|darth-bane|Darth Bane}}
| |
| *{{SWE|groups|jediorder|Jedi Order}} {{Po}}
| |
| *{{SWE|characters|masamedda|Mas Amedda}}
| |
| *{{SWE|locations|rugosa|Rugosa}}
| |
| *{{SWE|groups|wookiees|Wookiees}}
| |
| *{{SWE|characters|yoda|Yoda}}
| |
| *{{FFGTCG|set=Join Us or Die|cardname=May the Force Be With You}} {{Po}}
| |
| *{{FFGTCG|set=Join Us or Die|cardname=Yoda}}
| |
| *{{FFGTCG|set=Join Us or Die|cardname=Dagobah Training Grounds}} {{Po}}
| |
| *{{FFGTCG|set=Join Us or Die|cardname=Yoda, You Seek Yoda}}
| |
| *[[Star Wars: Age of Rebellion Core Rulebook|''Star Wars: Age of Rebellion'' Core Rulebook]]
| |
| *{{FFGTCG|set=It Binds All Things|cardname=Echoes of the Force}} {{Po}}
| |
| *''[[LEGO Star Wars: The Dark Side]]'' {{Ncs}}
| |
| *{{FFGTCG|set=Between the Shadows|cardname=The Master's Domain}}
| |
| *{{FFGTCG|set=Between the Shadows|cardname=Yoda}}
| |
| *{{FFGTCG|set=Between the Shadows|cardname=Yoda's Hut}}
| |
| *{{FFGTCG|set=Between the Shadows|cardname=Journey Through the Swamp}}
| |
| *{{FFGTCG|set=Between the Shadows|cardname=Life Creates It}}
| |
| *{{FFGTCG|set=Between the Shadows|cardname=Size Matters Not}} {{Po}}
| |
| *{{SW|url=news/swca-the-untold-clone-wars-panel-liveblog|text=SWCA: The Untold ''Clone Wars'' Panel Liveblog}}}}
| |
| | |
| {{Start box}}
| |
| {{Succession box
| |
| |title=[[Grand Master/Legends|Grand Master of the Jedi Order]]
| |
| |years=Unknown—[[4 ABY/Legends|4 ABY]]
| |
| |before=Eventually [[Fae Coven]]
| |
| |before-years=
| |
| |after=[[Luke Skywalker/Legends|Luke Skywalker]]
| |
| |after-years=
| |
| }}
| |
| {{Succession box
| |
| |title=[[Master of the Order/Legends|Master of the Order]]<ref name="CSWE">''[[The Complete Star Wars Encyclopedia]]''</ref>
| |
| |years=[[22 BBY/Legends|22 BBY]]–[[4 ABY/Legends|4 ABY]]
| |
| |before=[[Mace Windu/Legends|Mace Windu]]<ref name="CSWE" />
| |
| |before-years=
| |
| |after=
| |
| |after-years=
| |
| }}
| |
| {{End box}}
| |
|
| |
|
| ==Notes and references== | | ==Notes and references== |
| Line 1,242: |
Line 268: |
| *{{SWArchive|url=kids/activity/draw/f20061108.html|text=Drawing Animated Yoda|archivedate=20090616142307}} | | *{{SWArchive|url=kids/activity/draw/f20061108.html|text=Drawing Animated Yoda|archivedate=20090616142307}} |
| *{{SWArchive|url=kids/activity/draw/f20041019.html|text=Drawing Yoda|archivedate=20110913234634}} | | *{{SWArchive|url=kids/activity/draw/f20041019.html|text=Drawing Yoda|archivedate=20110913234634}} |
|
| |
| {{Council46}}
| |
| {{Council33}}
| |
| {{Council32}}
| |
| {{Council22}}
| |
| {{Council19}}
| |
|
| |
| {{Interlang
| |
| |bg=Йода
| |
| |cs=Yoda/Legendy
| |
| |da=Yoda
| |
| |de=Yoda#legends
| |
| |el=Γιόντα
| |
| |es=Yoda/Leyendas
| |
| |fi=Yoda/Legends
| |
| |fr=Yoda/Légendes
| |
| |hr=Yoda
| |
| |hu=Yoda/Legendák
| |
| |it=Yoda
| |
| |ja=ヨーダ/レジェンズ
| |
| |nl=Yoda
| |
| |no=Yoda
| |
| |pl=Yoda/Legendy
| |
| |pt=Legends:Yoda
| |
| |ro=Yoda
| |
| |ru=Йода
| |
| |sl=Yoda
| |
| |sv=Yoda
| |
| |ptGA=1
| |
| }}
| |
|
| |
|
| [[Category:Dagobah residents]] | | [[Category:Dagobah residents]] |


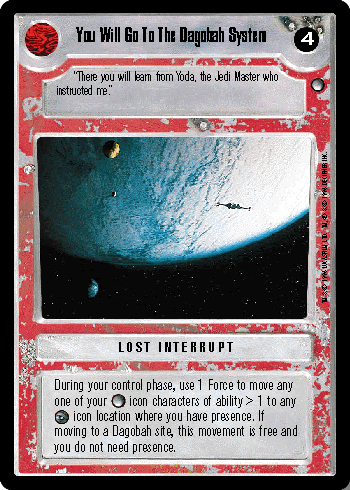
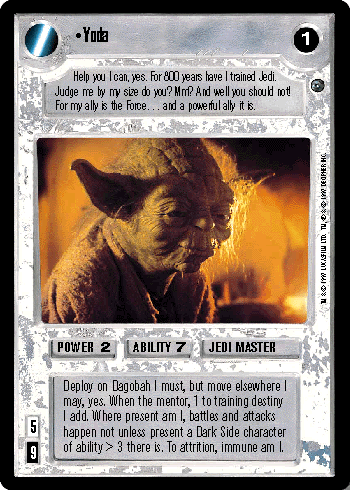
 Yoda on Wikipedia
 Yoda at the Internet Movie Database (backup link)
 Drawing Cartoon Yoda on StarWars.com (content now obsolete; backup link)