Siege of Jabba's Palace
- «There will be no bargain, young Jedi. I shall enjoy watching you die.»
- ―Jabba the Hutt to Luke Skywalker
The siege of Jabba's Palace was conducted in 4 ABY by key members of the Rebel Alliance, including Leia Organa disguised as Boushh, Luke Skywalker, Chewbacca, Lando Calrissian, and Han Solo. The objective was to free Han Solo from carbonite and rescue him from Jabba the Hutt's possession.
Prelude
- "If I told you half the things I've heard about this Jabba the Hutt, you'd probably short circuit!"
- ―C-3PO to R2-D2
After the Galactic Empire arrived on Bespin, the Rebel leader Han Solo was frozen in carbonite and handed over to the bounty hunter Boba Fett to be brought to the crime lord, Jabba the Hutt, as a trophy. Luke Skywalker returned to Tatooine and traveled to Obi-Wan Kenobi's old hut in the Jundland Wastes. There he discovered Jedi training material, from which he learned how to build himself a new green-bladed lightsaber. After this, the Rebels set in motion the plan to rescue Han by first having Lando Calrissian infiltrate Jabba's palace, disguised as the guard Tamtel Skreej, all of them having slipped through the Imperial blockade of Tatooine after starting at Kothlis's asteroid field.
The mission
C-3PO and R2-D2 Arrive

The two droids, C-3PO and R2-D2, arrived at Jabba's Palace to deliver a message to Jabba. They were greeted and interrogated by a TT-8L/Y7 gatekeeper droid before being granted access. R2-D2 went first, followed reluctantly by C-3PO. Once inside, with the doors closed, they were stopped by Jabba's Gamorrean guards and greeted by Bib Fortuna. After refusing to give the message to Fortuna, they were brought before Jabba to present the offer.
Luke Skywalker's holographic message offered a peaceful resolution in which Jabba would release Solo and in turn would be given the two droids as a show of good faith. Jabba refused, but chose to keep the droids anyway. C-3PO and R2-D2 were brought to EV-9D9 and given jobs in Jabba's service. C-3PO became Jabba's translator, and R2-D2 was given the task of serving drinks on the Hutt's sail barge.[4] Around the time EV-9D9 had given C-3PO and R2-D2 their orders, one of the Gamorrean guards, Jubnuk, attempted to ask the droid inspector about a Tusken battle talisman that Jabba had misplaced in the palace, but his requests were ignored. He eventually rummaged through the junk, although he eventually resorted to asking the B'omarr monks about its location due to the noise driving him crazy.[6]
Leia and Chewbacca

Realizing that Jabba likely wouldn't agree, Leia Organa entered the palace disguised as the bounty hunter Boushh, who had by that point been deceased. With her she brought a "captured" Chewbacca for the bounty on his head. In order to ensure that Jabba agreed to the deal, she brought along a thermal detonator with the intention of setting it off in the event that Jabba refused the bounty price of no less than ![]() 50,000. Jabba then laughed it off, impressed with "Boushh's" fearlessness and inventiveness, and they agreed to a reduced price of
50,000. Jabba then laughed it off, impressed with "Boushh's" fearlessness and inventiveness, and they agreed to a reduced price of ![]() 35,000. The same night, Organa sneaked into Jabba's throne room and succeeded at freeing Han Solo from the carbonite.[4] However, Jabba suspected treachery and was waiting to surprise and capture the Rebels. Solo was taken to the dungeons and placed in a cell with Chewbacca, and Organa was brought before Jabba, whom he decided to make into his newest slave girl after he executed Oola by feeding her to his pet Rancor.[4] Jabba ordered his female dancers to strip her down, and dressed her in a revealing slave girl costume, which consisted of a bikini made of brass. He put a collar on her neck and chained her to his throne, forcing her to lay before him. Solo and Chewbacca were kept in the cells for several days, while Organa was kept by her master's side, where she became fearful and obedient towards Jabba.
35,000. The same night, Organa sneaked into Jabba's throne room and succeeded at freeing Han Solo from the carbonite.[4] However, Jabba suspected treachery and was waiting to surprise and capture the Rebels. Solo was taken to the dungeons and placed in a cell with Chewbacca, and Organa was brought before Jabba, whom he decided to make into his newest slave girl after he executed Oola by feeding her to his pet Rancor.[4] Jabba ordered his female dancers to strip her down, and dressed her in a revealing slave girl costume, which consisted of a bikini made of brass. He put a collar on her neck and chained her to his throne, forcing her to lay before him. Solo and Chewbacca were kept in the cells for several days, while Organa was kept by her master's side, where she became fearful and obedient towards Jabba.
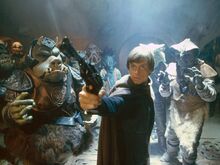
Skywalker then entered the palace and, after gaining access to the throne room, attempted to influence Jabba to release his friends by using a mind trick. When this failed, Skywalker attempted to assassinate the crime lord with an appropriated blaster. Jubnuk, having arrived to inform Jabba of the bad news regarding his search, witnessed this and attempted to defend Jabba.[4]
Battle in the rancor pit
- "You should've bargained, Jabba. That's the last mistake you'll ever make!"
- ―Luke Skywalker to Jabba the Hutt
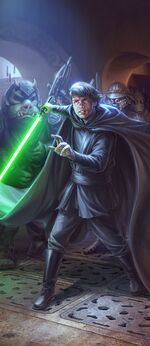
In the scuffle that ensued, Jabba opened a trap door dropping Skywalker and Jubnuk, into the rancor pit. The rancor ate Jubnuk and continued to head for Skywalker. Skywalker found a large oblong bone and inserted it vertically into the rancor's mouth as it lifted him up. He then hid in a nook in the wall before running under the rancor and over to a metal grate door in a smaller area of the pit. He attempted to open the door, but it was closed. The area was separated by an open gate through which the rancor was now approaching. Next to the gate was a switch. Skywalker picked up the skull of a previous prisoner and threw it at the switch. The lever broke and the gate crushed the rancor's head, killing it.[4]
Enraged, Jabba sentenced Solo, Skywalker and Chewbacca to death by means of feeding them to the sarlacc located in the Great Pit of Carkoon in the Dune Sea. While Leia was not sentenced to death, her master had plans of gaining pleasure from his new slave.[4]
After the Rancor's death, its body was cut up, and Jubnuk was learned to have survived his being eaten by the Rancor, in large part due to a lucky talisman that he was tasked with finding for Jabba.[6]
Aftermath
- "Jabba, this is your last chance. Free us or die."
- ―Luke Skywalker to Jabba the Hutt

Jabba and his court then traveled aboard his luxury sail barge Khetanna while the prisoners were transported by cargo skiff. Skywalker assured Solo that he had a plan to destroy the Hutt and escape the sarlacc. They were brought to the Sarlacc's resting place, but Skywalker used his skill with the Force and a lightsaber to free both Solo and Chewbacca. With the assistance of Calrissian on the skiff, plus R2-D2 and Organa on the barge, the Rebels were able to destroy the Hutt crime lord and escape aboard a second skiff. In addition, R2-D2, as part of the Rebel's extraction plan once they rescued Solo, planted misinformation directed towards Jabba's gang that indicated that the Imperial blockade was going to descend to the planet and specifically arrest them. It worked on two fronts: It evaded the possibility of retribution from Jabba's fleet, and in addition, the massive evacuation of Jabba's criminal empire also overwhelmed the Imperial fleet, distracting the Imperials long enough for the Millennium Falcon and Luke's X-wing to escape the Tatooine system. Parting ways when they left Tatooine, Skywalker returned to Dagobah with R2-D2 to fulfill his promise to Yoda and complete his training, while the others returned to the Alliance fleet, which was currently stationed near Sullust.
Behind the scenes
The siege of Jaba's Palace[7] was an event that incorporated the beginning of the film Return of the Jedi, which picked up where The Empire Strikes Back left off. Although it was popularly assumed that George Lucas had thought up the opening, it had actually been the idea of writer and director Richard Marquand and Lawrence Kasdan, which had eventually been revealed via transcripts of meetings included in The Making of Return of the Jedi.[8]
In Star Wars Infinities: Return of the Jedi, Leia is making her offer to Jabba of Chewbacca in an attempt to gain the Hutt's trust. But things go horribly wrong. When C-3PO is knocked down by Jabba following her demand of "fifty thousand, no less," the droid's head comes off, leaving her with no means to communicate with the Hutt. With no translator and forced to reveal herself to the entire assembly, she pulls the thermal detonator and threatens to use it unless Jabba cooperates to release Solo. Lando Calrissian, noticing Boba Fett drawing his weapon, knocks him aside, sending his shot into Leia's elbow, accidentally activating the thermal detonator. As the crowd scatters, Fett takes the carbonite block of Han Solo away, and Leia and Chewbacca chase after him. Leia attempts to stop him, but is unsuccessful, one shot accidentally hitting the block's control panel and two other shots missing him. With no other option, she, Lando, and Chewbacca escape the palace shortly before it blows up when the thermal detonator goes off; C-3PO is destroyed in the explosion, and Jabba and Bib Fortuna are killed. Boba Fett brings Solo aboard the Slave I and flees Tatooine.
Appearances

- "Of the Day's Annoyances: Bib Fortuna's Tale"—Tales from Jabba's Palace
- Star Wars: Episode VI Return of the Jedi
- Star Wars Episode VI: Return of the Jedi novel (First appearance)
- Star Wars Episode VI: Return of the Jedi junior novel
- Return of the Jedi 1
- Tales from Jabba's Palace
- LEGO Star Wars II: The Original Trilogy (Non-canonical appearance)
- LEGO Star Wars: The Complete Saga (Non-canonical appearance)
- Return of the Jedi (radio)
- Heir to the Empire (Mentioned only)
- Specter of the Past (Mentioned only)
- Specter of the Past unabridged audiobook (Mentioned only)
Sources
 "Anthony Daniels: Remembering That Galaxy Far, Far Away" – The Lucasfilm Fan Club Magazine 1 (Picture only)
 "Mark Hamill: 10 Years Later" – The Lucasfilm Fan Club Magazine 3 (Picture only)
- The Secrets of Star Wars: Shadows of the Empire
 1996 Topps Star Wars: Shadows of the Empire (Card: Luke Plans Han's Rescue) (backup link)
 Star Wars: Shadows of the Empire (Pack: Leia (In Boushh Disguise)) (backup link)
 Star Wars Episodes IV-VI (Card: Princess Leia Organa) (backup link) (First identified as siege of Jabba's Palace)
- The Essential Atlas
- The Essential Reader's Companion
- Star Wars: Force Collection (Card: Boushh (★★★★))
Notes and references
- ↑ Star Wars Omnibus: A Long Time Ago.... Volume 4
- ↑ The New Essential Guide to Characters, p. 159
- ↑ The New Essential Chronology, p. 123
- ↑ 4.00 4.01 4.02 4.03 4.04 4.05 4.06 4.07 4.08 4.09 4.10 4.11 4.12 4.13 4.14 4.15 4.16 4.17 4.18 4.19 4.20 4.21 4.22 4.23 4.24 4.25 4.26 4.27 4.28 4.29 4.30 Star Wars: Episode VI Return of the Jedi
- ↑ The Essential Atlas
- ↑ 6.0 6.1 Jabba's Palace Pop-up Book
- ↑
 Star Wars Episodes IV-VI (Card: Princess Leia Organa) (backup link)
- ↑ The Making of Return of the Jedi