Lusankya/Legends
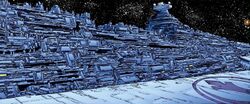
The Lusankya (Pronunciation ), originally known as Executor II, was an Executor-class Star Dreadnought built by Kuat Drive Yards, as the sister ship to the Executor, which was built at Fondor.
Following its construction, the ship was buried beneath the surface of Coruscant as an emergency evacuation craft for the Emperor, where it served as Ysanne Isard's private prison after his death, and later as her command ship during the Bacta War.
When Isard was defeated, the Lusankya was acquired by the New Republic. It served in the New Republic fleet until its destruction in the Yuuzhan Vong War.
Characteristics

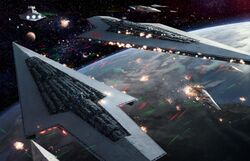
The Lusankya was the second Executor-class Super Star Destroyer to be constructed.[5] It was 19 kilometers long, twelve times the length of an Imperial I-class Star Destroyer. It could carry more than 5,000 weapons,[6] at least 12 TIE Fighter squadrons,[7] at least 200 other combat and support ships, three prefabricated garrison bases,[6] and enough stormtroopers and AT-ATs to impose the Empire's will on any star system.
The Lusankya was designed to be a variant of the Executor-class, focusing more on planetary occupation without a need for supporting vessels. As such, it dispensed with some heavy turbolaser batteries in exchange for more point-defense weaponry.[2]
History
Construction and placement on Coruscant
The Lusankya was built concurrently with her sister-ship, the Executor. During construction, both ships were provisionally named Executor to make it appear as if only one ship were being built. However, while the Executor was commissioned into Imperial service after completion, the Lusankya was taken to Coruscant and buried beneath the planet's surface. The vessel and its repulsorlift cradle were hidden inside a superframe of girders and electronics before the burial, and were claimed to be a large planetary shield generator.[2] The cityscape was subsequently rebuilt over the ship to hide its location.[5]

Not knowing all of the details surrounding the burial, some New Republic observers later speculated that either all the witnesses to this event had been executed, or that Emperor Palpatine had used the Force on a massive scale to command everyone to forget what they saw.[8] As for the purpose of the burial, it was theorized that the Lusankya was meant to provide Palpatine with a secure means of escape, in case Coruscant was invaded by hostile forces. Only a select few were made aware of its existence, location, and purpose.
Ysanne Isard's private prison
A portion of the Lusankya served as a private prison managed by Director of Imperial Intelligence Ysanne Isard. Isard was able to travel back and forth to the Lusankya by a network of private tunnel shuttles that were connected between the city and the ship. One of these shuttles went to the Galactic Museum, another to a 43rd-floor foyer in the Imperial Palace, and another to an old subcommittee room in the former Imperial Senate Building. In interrogating the Lusankya's prisoners, Isard was ruthless, employing any means necessary—including torture, drugs, and psychological conditioning—to learn what she desired. She even turned prisoners, usually captured Rebels, into sleeper agents. These agents would then be returned to their families, friends, and colleagues, where Isard would use them to spy on the Rebellion, perform sabotage, and assassinate enemies.
Corran Horn learned of the prison when the Corellian Diktat's greatest rival was murdered by his aide. The aide had been taken to the Lusankya and turned into a sleeper agent, then returned to perform the assassination. After committing the murder, the aide repeated the word "Lusankya" over and over.
Though no one outside Isard's circle knew of the Lusankya's location, it regardless came to be infamously known as Ysanne Isard's private prison. Rebel Alliance General Jan Dodonna was sent there following his capture shortly following the Battle of Yavin. Tycho Celchu was also sent there following his capture during an espionage mission to Coruscant in 5 ABY. Isard tried to condition Celchu into one of her agents, but the efforts rendered him catatonic. He was eventually transferred to Akrit'tar, but escaped from that facility and returned to the Rebellion. The reputation for Isard's prisoners to be sleeper agents was so strong that Celchu was not trusted by even close compatriots. During the Liberation of Coruscant in the following year, the controls to Horn's fighter were seized by an override code and he appeared to crash into the cityscape and was presumed dead. This and other evidence pointed to Celchu, and he was branded a traitor.
However, Horn was not dead, and the events of his "crash" had been orchestrated by Isard and framed on Celchu. Horn was placed aboard the Lusankya, where he eventually met Jan Dodonna. From him, Horn learned that many people washed out of Isard's indoctrination process, and were rendered catatonic in the process—the other prisoners referred to them as "sleepers." Horn also learned of a suspicious inconsistency within the prison: in the main cavern where the prisoners worked, a rock would "fall up" if thrown high enough. This was because the artificial gravity of the Star Dreadnought was rotated so that prisoners were in effect standing upside down, a tactic employed by Isard so if anyone tried to escape by digging "up," they would actually go deeper into the prison, making them easier to capture.
Eventually Horn was able to escape from the prison complex, during which he found a library complex on the Lusankya and discovered that not only had he washed out of the indoctrination process, but so had Celchu. In addition to this information, he was able to find out who was the real traitor within Rogue Squadron. After further searching, he found a blaster in the library's copy of The Complete History of Corvis Minor, and a private tunnel shuttle that allowed him to leave the Lusankya. The shuttle took him to a closed-off section of the Galactic Museum, where Horn then learned that he had, in fact, never left Coruscant.
Breaking free of Coruscant

After Horn escaped, Isard knew that the New Republic would soon find the Lusankya and capture her if she remained. Isard had the crew break the ship free of the planet. While leaving Coruscant, the Lusankya devastated over 259 square kilometers of the planet's surface, killing untold millions.
The Lusankya blasted its way through the two planetary shield levels, pausing to exchange fire with an orbiting Golan space defense platform before jettisoning the lift cradle and departing the Coruscant system.
The Battle for Thyferra
The Lusankya then traveled to Thyferra after Xucphra conducted a political coup that installed Ysanne Isard as the planetary leader. Because the New Republic was unwilling to interfere with the internal politics of a world, Corran Horn, Wedge Antilles, and the other members of Rogue Squadron resigned their commissions in the New Republic fleet and began gathering resources to continue to fight against Isard without the New Republic's support.
Upon arriving at Thyferra, the Lusankya was joined by the Imperial-II class Star Destroyers Avarice and Virulence and the Victory-class Star Destroyer Corrupter.
Over the next few months, the Rogues slowly worked to build up their forces, while whittling down the Imperial forces to the point where the two forces could engage each other. The Corrupter was destroyed at Alderaan when an automated Alderaanian war cruiser, the Valiant, joined the Rogues. Commander Antilles was able to talk Sair Yonka—the Captain of the Avarice—to take his ship and leave Isard's service. That left the Lusankya and the Virulence.
Once Isard's forces discovered the Rogue's space station base at Yag'Dhul, the Lusankya and the Virulence were sent to destroy it. But when they arrived, the Rogues jumped to hyperspace, and the station appeared to be very heavily armed, with more than three hundred proton torpedo and concussion missile launcher signals. The Lusankya was caught by the station's tractor beam, but was released when the Virulence intercepted and was caught in the beam. The Lusankya retreated from the system and left her fighters behind in her haste to flee. The station ordered the Virulence to surrender or be destroyed, to which the Virulence complied after the station's gravity well projector pulled Pash Cracken's A-wing squadrons out of hyperspace on top of the standoff. After the Virulence crew had surrendered, the pirate in charge of the station, Booster Terrik, took over the ship without firing a single torpedo. He loaded Pash's people and his own people on to the Virulence and departed for Thyferra.
The captain of the Lusankya, Joak Drysso, returned to Thyferra expecting a battle. However, when the ship slowed to sublight, there was nothing but normal traffic. Shortly after the Lusankya arrived, a Star Destroyer arrived in the system. It was the Avarice, now renamed the Freedom. The Freedom had carried the Rogues to Thyferra. The Rogues began to attack the Lusankya, and when they fired a salvo of their proton torpedoes, a large salvo of torpedoes and missiles from the freighter traffic in the system hit the Lusankya. Antilles had convinced a number of freighters to join the effort. They were equipped with heavy torpedoes, but were not given targeting sensors so they would not appear as hostile on Imperial scopes. Instead, the freighter's weapons were slaved to Rogue Squadron's targeting computers.
The Freedom and the Valiant also concentrated their firepower on the Lusankya. The Freedom was severely damaged; however, the Valiant, having been ignored by Captain Drysso, had outmaneuvered its huge opponent. The Valiant had managed to slip and remain behind the Lusankya, where it could target the huge engine array at leisure; the lack of a fighter screen and the low amount of tail guns on the Executor-class design allowed the Valiant to escape serious damage. Soon the Virulence appeared in the Thyferra system, but it was no longer under Imperial control. A squadron of A-Wings led by Pash Cracken had sprung upon the Virulence during its standoff with the Yag'Dhul station and had destroyed the Imperial TIE fighters, and now traveled on the ship after its capture by Booster Terrik. They now launched into the fray as the Virulence turned its weapons on the Lusankya.
Commander Antilles then decided to ask the Lusankya to surrender, seeing as how the starship would not last much longer. Drysso refused to surrender and seemed driven to insanity by the events of the past several days. He was preparing to ram Thyferra with the Lusankya itself, against the wishes of the crew, when he was killed by his aide. His aide, Acting-Captain Waroen, surrendered the ship to Antilles. Isard had appeared to have died when Captain Celchu destroyed a shuttle that was believed to have been carrying her. Celchu credited the kill to Lieutenant Horn's targeting.
After the Bacta War
The Lusankya was severely damaged after the battle for Thyferra. The area where the prison was had been breached. Fortunately for the prisoners, they were not on board during the battle, as Isard had them shipped to other facilities, believing Horn's escape had ruined the previously inescapable prison.
As the ship had been surrendered to him, Wedge Antilles was the acting commander of the Lusankya. In that capacity, he performed the marriage ceremony of Corran Horn and Mirax Terrik, with Tycho and Iella Wessiri as witnesses. Antilles, Horn, and the rest of the squadron then rejoined the New Republic armed forces, when it was discovered an "error" had occurred which resulted in their earlier resignations failing to be formally logged in the squadron member's files. The council then passed a resolution approving what the Rogues had done, making the entire operation fait accompli for the Republic.
The Lusankya then left the Thyferra system and was taken to a secret location, where repairs and upgrades were made. Rumors were spread that the ship was destroyed—that either the damage was such that the ship couldn't be repaired, or that the Lusankya was salvaged for parts. The ship's sharp lines were eventually restored, and two large Rebel crests were painted on its sides. The original prison complex was also removed, with a medical quarantine complex installed in its place. The secrecy over the repairs was such that even some members of the council were unaware of the Lusankya's continued existence until the military made them aware of it.
Ysanne Isard, who had slipped away from the Thyferra system at the end of the Bacta War, had spent several years in seclusion. She finally reappeared in an attempt to retake control of her beloved Lusankya from the New Republic. By plotting the downfall of Delak Krennel and his Ciutric Hegemony, Isard hoped to keep the New Republic distracted long enough for her to steal back her Super Star Destroyer. However, she was outguessed by Booster Terrik, Mirax Terrik, and Iella Wessiri, who were waiting for her when she arrived. Isard attempted to kill Wessiri with her holdout blaster, but failed, as the latter returned fire and instantly ended her life.
New Republic Service
- "I'm not exactly going to miss you."
- ―Wedge Antilles on the Lusankya's destruction

After Isard's death, the Lusankya entered regular New Republic service. The ship spent much of its time until 11 ABY in the Scarl shipyards, acting as a medical research facility[4] in case the Empire attempted further biological warfare after seeing the devastation done by the Krytos virus during the Liberation of Coruscant. The ship was designed with new quarantine facilities which included a containment zone where no living creature was allowed to enter. This area was serviced strictly by droids so that, if necessary, the containment zone could be destroyed with minimal loss of life.
When the surviving original prisoners of the Lusankya were freed, they, along with Rogue Squadron, were held on the Lusankya quarantine facilities so that medical experts could confirm that neither the prisoners nor the Rogues were carrying any biological weapons within them. In addition to refitting it for biomedical operations, the New Republic also succeeded in reducing the crew requirement for the warship. Further, the Lusankya was refitted with better armor than Star Dreadnoughts still in Imperial service. Several other systems were also redesigned to take advantage of having the extra available space.
The ship was placed under the command of Wedge Antilles and used as a base for the reformed, multi-fighter Rogue Squadron he had been assigned to oversee. Besides Rogue Squadron itself, over 100 other ships also assigned to its service were stationed aboard Lusankya. The first mission it undertook for the New Republic was the Battle of Phaeda in 11 ABY.
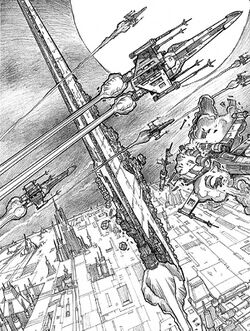
Later in 12 ABY, she again served with the New Republic at the Orinda campaign.[4] The Lusankya served in the New Republic fleet for nearly twenty years. She participated in the Battle of Borleias during the Yuuzhan Vong War, where she helped protect the Republic stronghold on Borleias over the course of a month. After taking heavy damage due to attrition, it was decided that she would be abandoned. The Lusankya's crew was slowly taken off, while her weapons were dismantled and transferred to other warships. In their place, New Republic engineers installed a massive hollow spear, known as the Beltway that ran the length of the ship underneath her hull, which was then filled with high explosives. When the time came to finally evacuate Borleias, the Lusankya was sent to collide into the Domain Hul worldship. With a fleet of Republic warships escorting him, Commander Eldo Davip was able to reach the worldship and impale the Lusankya's hull into it before escaping the doomed ship. Both vessels were obliterated, allowing New Republic forces to withdraw among the chaos.
Commanders and crew
The names of most of the Lusankya's command officers during the Bacta War are known. With the exception of her Captain and the Colonel commanding her two TIE Fighter wings, most were apparently relatively junior in rank, perhaps a reflection of the irregular circumstances in which the ship had been put into service.
- Captain Joak Drysso (commanding officer)
- Colonel Arl (starfighter commander)
- Lieutenant Waroen (captain's aide/sensor officer)
- Lieutenant Gorev (gunnery officer)
- Lieutenant Rosion (Chief Navigator)
- Ensign Yesti (communications officer)[5]
Less is known about her officers and crew in New Republic service; she was commanded by General Wedge Antilles for several years beginning in 11 ABY,[10] and at the time of her destruction in 28 ABY, she had been assigned a crew of politically inconvenient misfits led by Commander Eldo Davip.[11]
Behind the scenes
The Lusankya was named after the Lubyanka, the infamous KGB prison. Author Michael A. Stackpole stated, "I wanted it to sound much like the inescapable prison in Moscow because I wanted the Lusankya to be inescapable."[12]
In his endnotes, Jason Fry, one of the writers for The Essential Guide to Warfare, cited the Lusankya's emergence from the cityscape of Coruscant as the goofiest thing in the entire Expanded Universe, also claiming that the only way it could get any goofier is if "[the Lusankya's] bridge crew were Jaxxon, Reist, and Waru."[13]
Appearances
- Star Wars: Mara Jade – By the Emperor's Hand (Indirect mention only)
- Star Wars: X-Wing Rogue Squadron: Masquerade (Mentioned only)
- Star Wars: X-Wing Rogue Squadron: Mandatory Retirement (Mentioned only)
- X-Wing: Rogue Squadron (First mentioned)
- X-Wing: Rogue Squadron unabridged audiobook (Mentioned only)
- X-Wing: Wedge's Gamble (Mentioned only)
- X-Wing: The Krytos Trap (First appearance)
- X-Wing: The Bacta War
- X-Wing: Wraith Squadron (Mentioned only)
- X-Wing: Isard's Revenge
- Star Wars: Crimson Empire
- Crimson Empire audio drama
- I, Jedi (Vision to Corran Horn)
- X-Wing: Starfighters of Adumar (Mentioned only)
- Star Wars: Union (Mentioned only)
- The New Jedi Order: Dark Tide II: Ruin (Mentioned only)
- The New Jedi Order: Enemy Lines I: Rebel Dream
- The New Jedi Order: Enemy Lines II: Rebel Stand
- The New Jedi Order: Destiny's Way (Mentioned only)
- The New Jedi Order: The Unifying Force (Mentioned only)
Sources
 "ISB Intercepts" – Star Wars Adventure Journal 15
- Star Wars Encyclopedia
- The Essential Guide to Planets and Moons
- Star Wars Handbook 2: Crimson Empire
- The Essential Chronology
- The New Essential Guide to Characters
- The Official Star Wars Fact File 9 (COR6–8, Coruscant – Imperial City)
 "Who's Who in Rogue Squadron" – Star Wars Insider 59
- The Official Star Wars Fact File 24 (DEA6, The Destruction of Alderaan)
- The New Essential Chronology
- Coruscant and the Core Worlds
- Starships of the Galaxy, Saga Edition
 "Super Star" (original article link) on Wizards.com (content now obsolete; backup link)
 2009 Topps Star Wars Galaxy Series 4 (Card: Illustrating the Order)
- Star Wars: The Official Starships & Vehicles Collection 25
- The Complete Star Wars Encyclopedia
- Galaxy of Intrigue
- The Essential Guide to Warfare
 "The Art of Warfare" – Star Wars Insider 133 (Picture only)
 The Imperial Warlords: Despoilers of an Empire, Part 2 on StarWars.com (article) (backup link not verified!)
- File:StarWarsLCG Logo.png Star Wars: The Card Game – Between the Shadows (Card: The Investigation)
Notes and references
- ↑
 "Jedi Counseling 84" (original article link) on Wizards.com (content now obsolete; backup link)
- ↑ 2.0 2.1 2.2 2.3 Starships of the Galaxy (Saga Edition)
- ↑ 3.0 3.1 3.2 3.3 3.4 3.5 3.6 3.7 The New Essential Chronology
- ↑ 4.0 4.1 4.2 The Essential Guide to Warfare
- ↑ 5.0 5.1 5.2 X-Wing: The Bacta War
- ↑ 6.0 6.1 Star Wars: Complete Locations, p. 171
- ↑ Starships of the Galaxy, p. 106
- ↑ X-Wing: The Krytos Trap
- ↑ The New Jedi Order: Enemy Lines II: Rebel Stand
- ↑ Star Wars: Crimson Empire
- ↑ The New Jedi Order: Enemy Lines I: Rebel Dream
- ↑ Michael A. Stackpole Chat Transcript on moseisley.com (archived from the original on February 17, 2001)
- ↑
 Jason Fry's Dorkery — EG to Warfare: Endnotes Pt. 11 on Tumblr (backup link)
- Pages with ignored display titles
- Pages with bad parameters in Template:Top
- Pages needing citation
- Pages with broken file links
- Pages with missing permanent archival links
- Captured starships
- Coruscant government buildings
- Executor-class Star Dreadnoughts of the Galactic Empire
- Flagships
- New Republic starships
- Prison ships
