File:Javin Oversector.jpg: Difference between revisions
Jump to navigation
Jump to search
== Summary == Importing file Tags: Reverted Server-side upload |
Undo revision 67104 by Maintenance script (talk) Tag: Undo |
||
| Line 1: | Line 1: | ||
== Summary == | ==Summary== | ||
{{Information | |||
|attention= | |||
|description=Map depicting the [[Javin Oversector]] | |||
|source=''[[The Essential Guide to Warfare]]'' | |||
|artist=[[Modi]] | |||
|filespecs= | |||
|licensing={{Fairuse}} | |||
|other versions= | |||
|cat artist=[[Category:Images by Modi]] | |||
|cat licensee=[[Category:Images of maps from The Essential Guide to Warfare]] | |||
|cat subject=[[Category:Images of the Ado Spine]] | |||
[[Category:Images of the Anturi Reach]] | |||
[[Category:Images of the Atravis system]] | |||
[[Category:Images of Belsavis]] | |||
[[Category:Images of the Belsavis Run]] | |||
[[Category:Images of Berrol's Donn]] | |||
[[Category:Images of Bespin]] | |||
[[Category:Images of the Bomis Koori system]] | |||
[[Category:Images of Bri'ahl]] | |||
[[Category:Images of Bryndar]] | |||
[[Category:Images of Bunduki]] | |||
[[Category:Images of the Celestial Wake]] | |||
[[Category:Images of Cerea]] | |||
[[Category:Images of the Cerean Reach]] | |||
[[Category:Images of Chalcedon]] | |||
[[Category:Images of the Clone Wars]] | |||
[[Category:Images of the Corellian Trade Spine]] | |||
[[Category:Images of the D'Aelgoth Trade Route]] | |||
[[Category:Images of the Eiattu system]] | |||
[[Category:Images of Endor]] | |||
[[Category:Images of Fanha]] | |||
[[Category:Images of Gerrenthum]] | |||
[[Category:Images of the Great Gran Run]] | |||
[[Category:Images of Halm]] | |||
[[Category:Images of Hoth]] | |||
[[Category:Images of the Hydian Way]] | |||
[[Category:Images of the Ichtor system]] | |||
[[Category:Images of Isde Naha]] | |||
[[Category:Images of Javin]] | |||
[[Category:Images of the Jiroch system]] | |||
[[Category:Images of Kaal]] | |||
[[Category:Images of Karfeddion]] | |||
[[Category:Images of Kinyen]] | |||
[[Category:Images of Koda Space Station]] | |||
[[Category:Images of the Koda Spur]] | |||
[[Category:Images of Kriselist]] | |||
[[Category:Images of the Lipsec Run]] | |||
[[Category:Images of the Lipsec system]] | |||
[[Category:Images of Lorta]] | |||
[[Category:Images of Lutrillia]] | |||
[[Category:Images of Manpha]] | |||
[[Category:Images of maps of the Expansion Region]] | |||
[[Category:Images of maps of the Mid Rim]] | |||
[[Category:Images of maps of the Outer Rim Territories]] | |||
[[Category:Images of Mustafar]] | |||
[[Category:Images of Noe'ha'on]] | |||
[[Category:Images of Nothoiin]] | |||
[[Category:Images of the Nothoiin Corridor]] | |||
[[Category:Images of Ogem]] | |||
[[Category:Images of Ogoth Tiir]] | |||
[[Category:Images of Ord Vaug]] | |||
[[Category:Images of Pendaxa]] | |||
[[Category:Images of Polis Massa]] | |||
[[Category:Images of Rattatak]] | |||
[[Category:Images of Riflor]] | |||
[[Category:Images of the Rimma Trade Route]] | |||
[[Category:Images of Rutan]] | |||
[[Category:Images of Ryoone]] | |||
[[Category:Images of Sarrish]] | |||
[[Category:Images of the Senex-Juvex Loop]] | |||
[[Category:Images of the Senex Trace]] | |||
[[Category:Images of Shumavar]] | |||
[[Category:Images of the Spar Trade Route]] | |||
[[Category:Images of Sump]] | |||
[[Category:Images of Tar Morden]] | |||
[[Category:Images of Tibrin]] | |||
[[Category:Images of Trenwyth]] | |||
[[Category:Images of Vandelhelm]] | |||
[[Category:Images of Virgillia]] | |||
|cat type=[[Category:Reference book illustrations]] | |||
}} | |||
Latest revision as of 05:14, 25 August 2022
Summary
File history
Click on a date/time to view the file as it appeared at that time.
| Date/Time | Thumbnail | Dimensions | User | Comment | |
|---|---|---|---|---|---|
| current | 09:59, 23 August 2022 | 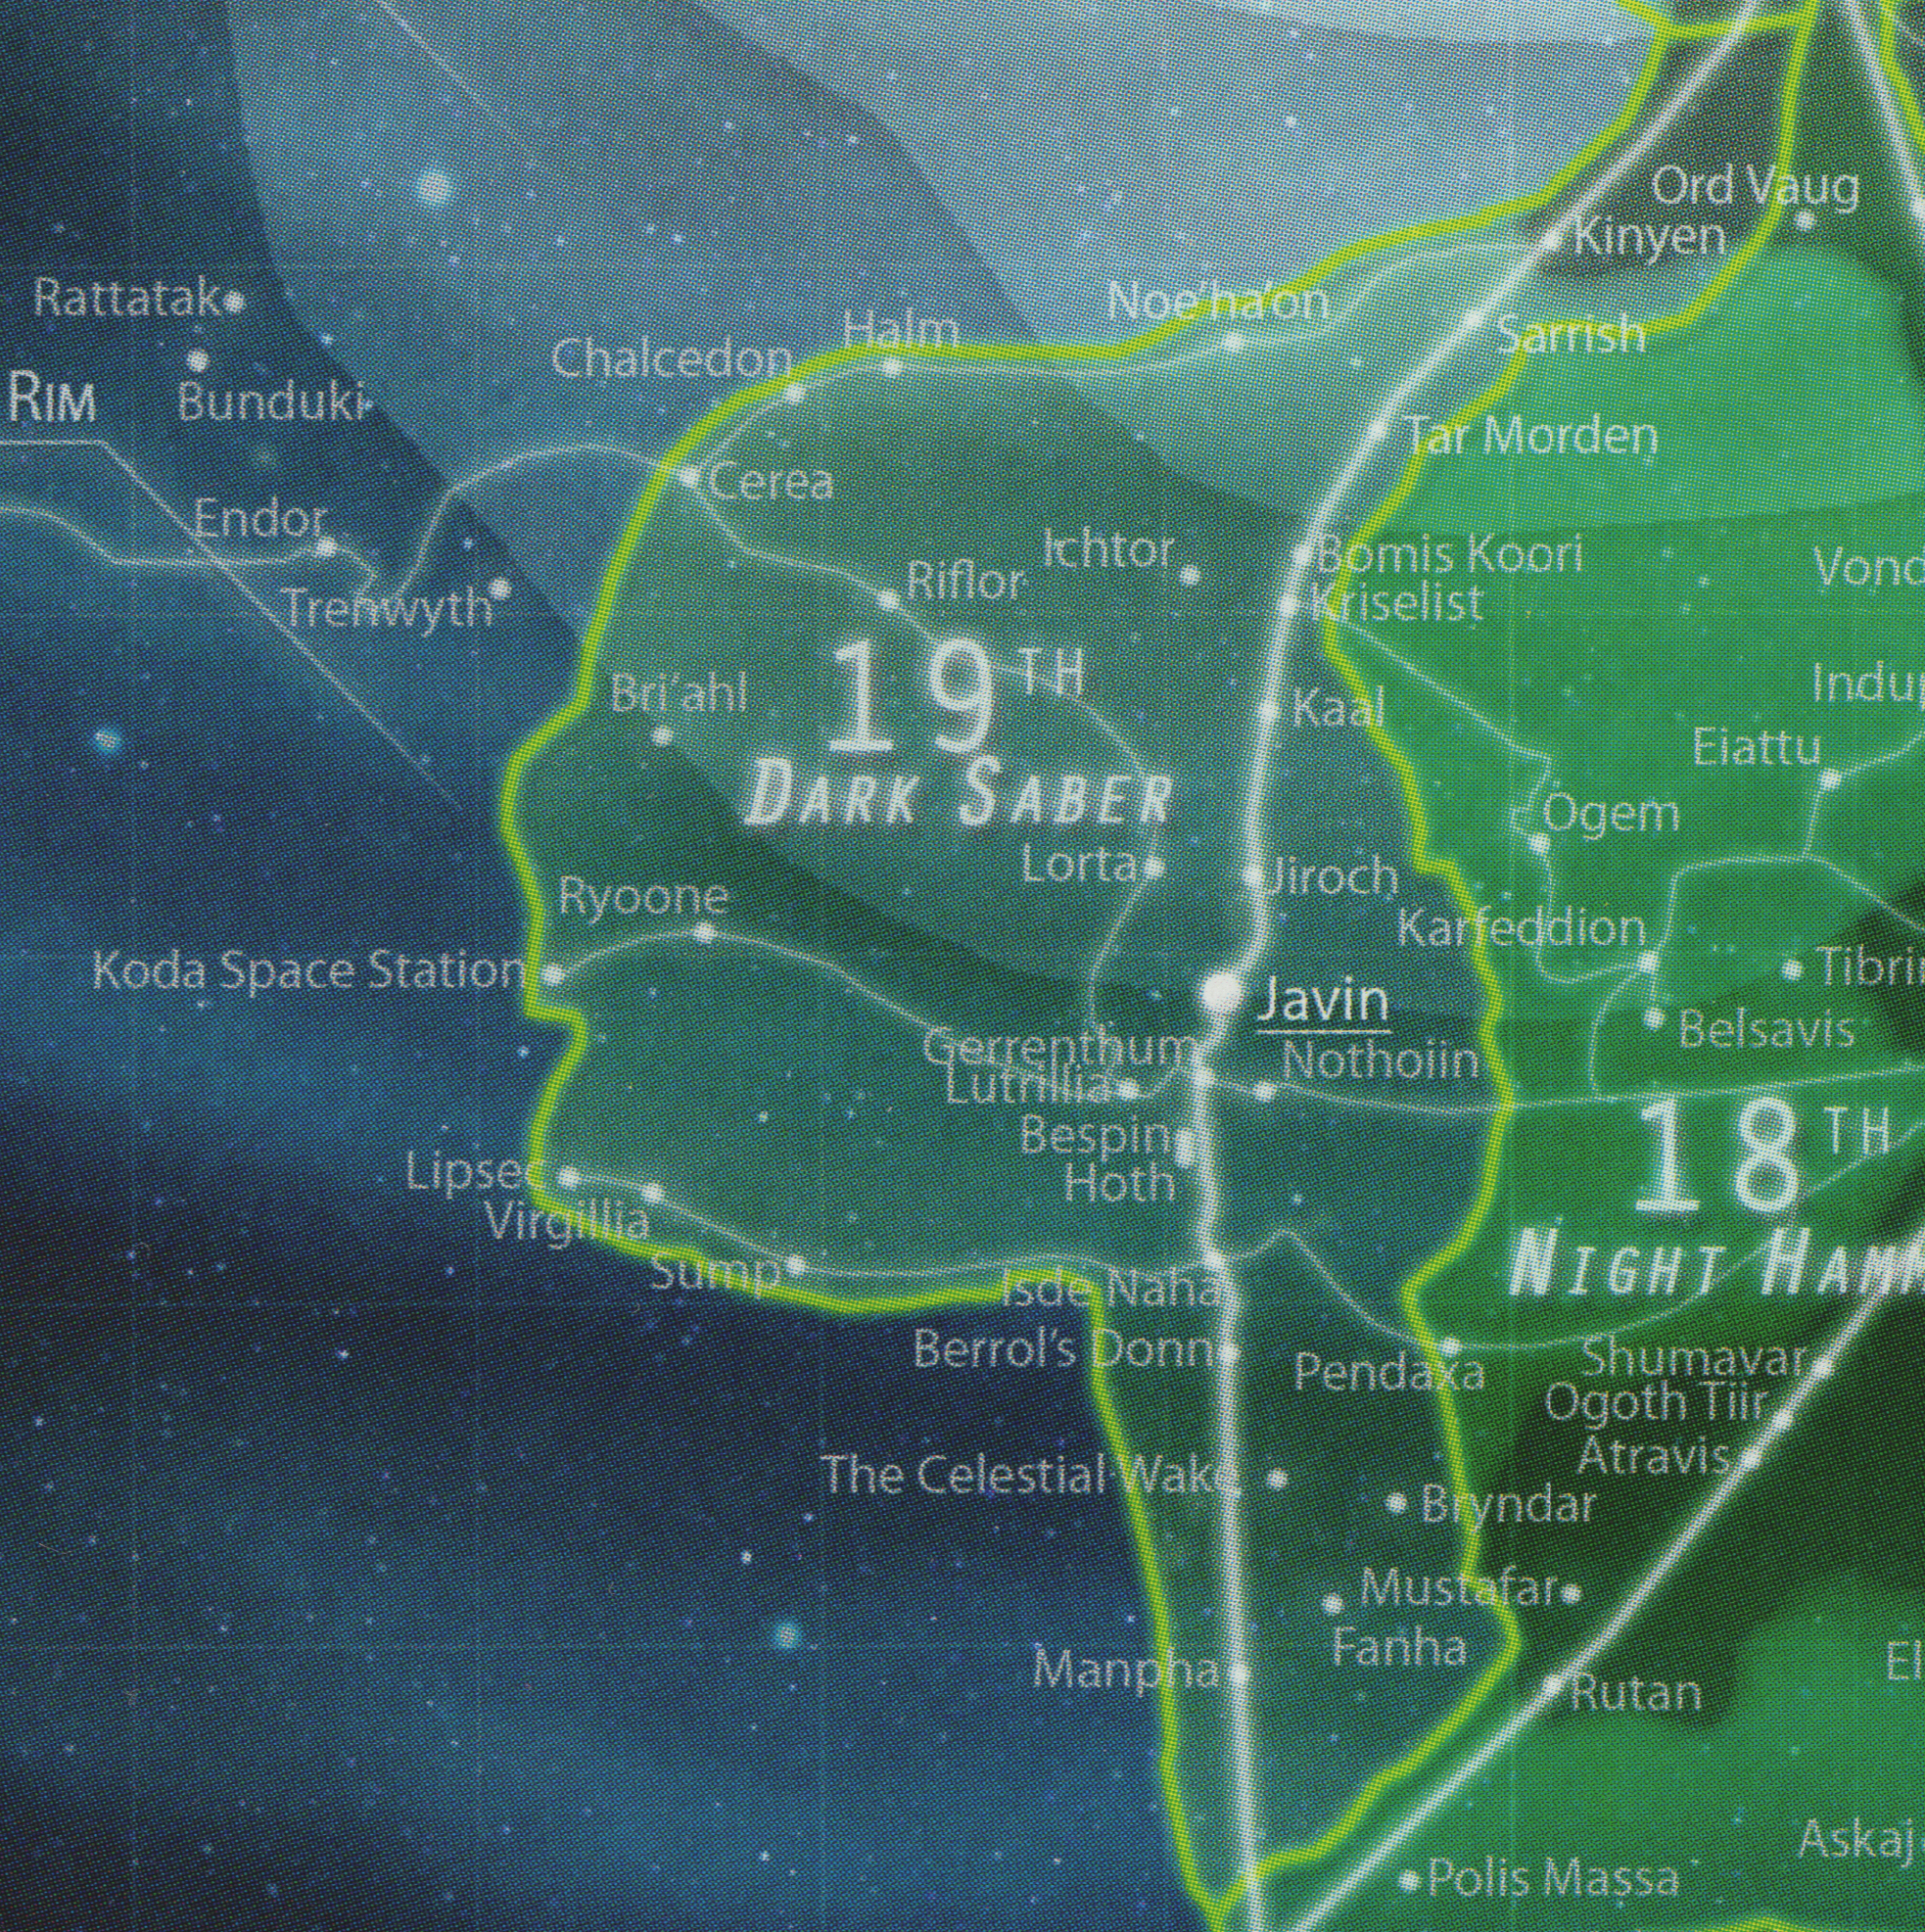 | 1,966 × 1,973 (6.85 MB) | Maintenance script (talk | contribs) | == Summary == Importing file |
You cannot overwrite this file.
File usage
The following page uses this file:
Categories:
- Fair use images
- Images by Modi
- Images of maps from The Essential Guide to Warfare
- Images of the Ado Spine
- Images of the Anturi Reach
- Images of the Atravis system
- Images of Belsavis
- Images of the Belsavis Run
- Images of Berrol's Donn
- Images of Bespin
- Images of the Bomis Koori system
- Images of Bri'ahl
- Images of Bryndar
- Images of Bunduki
- Images of the Celestial Wake
- Images of Cerea
- Images of the Cerean Reach
- Images of Chalcedon
- Images of the Clone Wars
- Images of the Corellian Trade Spine
- Images of the D'Aelgoth Trade Route
- Images of the Eiattu system
- Images of Endor
- Images of Fanha
- Images of Gerrenthum
- Images of the Great Gran Run
- Images of Halm
- Images of Hoth
- Images of the Hydian Way
- Images of the Ichtor system
- Images of Isde Naha
- Images of Javin
- Images of the Jiroch system
- Images of Kaal
- Images of Karfeddion
- Images of Kinyen
- Images of Koda Space Station
- Images of the Koda Spur
- Images of Kriselist
- Images of the Lipsec Run
- Images of the Lipsec system
- Images of Lorta
- Images of Lutrillia
- Images of Manpha
- Images of maps of the Expansion Region
- Images of maps of the Mid Rim
- Images of maps of the Outer Rim Territories
- Images of Mustafar
- Images of Noe'ha'on
- Images of Nothoiin
- Images of the Nothoiin Corridor
- Images of Ogem
- Images of Ogoth Tiir
- Images of Ord Vaug
- Images of Pendaxa
- Images of Polis Massa
- Images of Rattatak
- Images of Riflor
- Images of the Rimma Trade Route
- Images of Rutan
- Images of Ryoone
- Images of Sarrish
- Images of the Senex-Juvex Loop
- Images of the Senex Trace
- Images of Shumavar
- Images of the Spar Trade Route
- Images of Sump
- Images of Tar Morden
- Images of Tibrin
- Images of Trenwyth
- Images of Vandelhelm
- Images of Virgillia
- Reference book illustrations